Interesting crafts from autumn maple leaves.
With the advent of autumn in schools, children are often given crafts from leaves. Let's look at interesting craft ideas in this article.
How to process maple leaves for crafts?
The autumn palette of trees gives us bright colors. The carved maple leaves are especially beautiful. Moreover, their color scheme is diverse: green, yellow, burgundy. From this natural material are obtained beautiful crafts which are interesting for both children and adults.
But in order for the results of your creativity to please long time, the leaves need to be properly prepared. Experienced craftsmen use several options for processing maple leaves.
Drying under pressure- this is the simplest and most familiar way for us, which is suitable for applications and collages:
- lay maple leaves between the pages of albums or books.
- place some flat weight on top.
- leave for a week or two.

Drying iron- an accelerated version of the preparation of maple leaves:
- lay out the leaves on thick cardboard.
- cover with a thin sheet of paper.
- iron with a not very hot iron.
- Peel off the paper and let dry for about an hour.

soaking in paraffin, with this treatment, the leaves retain their bright color and become glossy:
- break the paraffin candle into pieces.
- melt it in a water bath or in the microwave.
- briefly dip a leaf in hot paraffin so that it is evenly coated (it is convenient to do this with a fork).
- lay out on a paper towel to dry.

Preservation in glue helps to eliminate the fragility of dried leaves:
- dilute PVA glue in water in the ratio: 1 part glue to 4 parts water.
- dip the leaves into the solution.
- Lay out on a flat surface and let dry.
Glycerin treatment. This option is suitable for the manufacture of volumetric compositions:
- mix glycerin and water (1:2).
- Pour the solution into a tight ziplock bag.
- put the leaves in it and smooth them out.
- zip up the package.
- put in a dark place for 10 - 14 days.
- remove the leaves from the bag and dry on paper.
Skeleton - very unusual way preparing leaves for original flat compositions:
- take fresh maple leaves
- make a solution of 1 liter of water and 12 tsp of soda
- bring the solution to a boil
- drop the leaves there and cook for 15-20 minutes
- rinse them with cold water
- use an old toothbrush to scrape the softened greens from the leaf
- rinse again
- dry under pressure for 2 days

What to make from maple leaves for school and kindergarten on the theme of autumn: photo
Maple leaves are often used to make crafts for school or kindergarten. Helping your child in this process, you will not only get closer to him, but also enjoy creativity yourself.
- draw a tree trunk on paper.
- glue the leaves in the form of a crown.
- Below you can draw little animals.
- let the child decorate the picture as they wish.

- cut a tree from thin plywood with a jigsaw.
- Use sandpaper to smooth out uneven edges.
- paint with stain and let dry.
- stick prepared leaves on the tree branches.

Autumn candle:
- prepare two candles.
- melt one.
- take small maple leaves.
- Use a brush to apply melted paraffin to one side of the leaf.
- glue the sheet to the second candle.
- Gently dip it completely into the melted paraffin.
- let it freeze.

Photo frame:
- take an old photo frame and clean it of decor.
- abrade with sandpaper if necessary.
- Starting from the bottom, glue the leaves overlap on the frame.
- try to maintain the color scheme of the leaves (dark below, and light shades on top).

- cut out the base of the mask from cardboard.
- attach to the ends of the rope ties.
- cover the mask with maple leaves.

Bunch of grapes:
- take a few acorns and make longitudinal through holes in them with an awl.
- thread the wire through them and bend the tip so that the acorns do not slip off.
- twist the wire-tails together, forming a bunch of grapes.
- attach a maple leaf on top.
- paint the acorns blue or green.

Bunch of grapes
Maple Seed Parachute Crafts for Kids
Many in childhood loved to launch "helicopters" from maple seeds. Not everyone knows that this natural material can be used for various crafts. We offer some interesting ideas.
Applications or panels. With natural "parachutes" you can paste over the outline of your drawing, depicting:
- head of hair framing a woman's face
- lion's mane
- bird feathers
Since maple seeds are light, it is better to perform your composition on a dark background.
- prepare plasticine, a thin twig, and two pairs of seeds of different sizes.
- use plasticine to secure the larger seeds to the edge of the twig.
- strengthen the small "parachutes" immediately below the large ones.
- form a head with antennae from a piece of plasticine and put it on the end of the twig.
- make eyes out of apple seeds.
- If desired, paint the "wings" with paint.

- from the newspaper, twist two round blanks for the head and torso.
- fasten them by wrapping them with thread.
- connect the head and torso with a stick and glue.
- stretch the wire across the body to hold the wings.
- cut out two semicircles from dense fabric - blanks for wings.
- fasten them with a stapler to the wire.
- Seed the wings on both sides.
- cut three pieces of wire for the tail.
- fasten the fabric on them with a cone.
- paste over these blanks with "parachutes".
- make paws out of wire.
- attach the tail and legs to the body.
- cover the entire bird with seeds.
- make eyes from beans, and a beak from a nut shell.
- you can put your bird on a branch.

Helicopter:
- using plasticine, connect a large walnut and an oblong small cone (cabin and tail of the helicopter).
- on top of walnut with plasticine, install two maple lionfish - “helical blades”.
- At the end of the cone, attach a couple of small seeds - the “propeller”.
- install the helicopter on a wooden block.

How to make a bouquet from maple leaves?
The carved shape of the maple leaf is beautiful in itself. Therefore, a laconic bouquet of dried leaves, placed in a vase, will look bright and festive. You can also cut whole branches with leaves from the maple and put in a transparent container.
And with a little effort, you can decorate the interior with more unusual maple compositions.
- smear the leaves with clear varnish or melted paraffin.
- tie a few pieces with wire.
- decorate with a string of beads or lurex ribbon.
- make a loop out of the tape and hang it over the doorway.

Rose bouquet:
- fold the maple leaf across with the right side facing out.
- twist a tube out of it and secure with a thread.
- fold the second sheet across and wrap it around the already twisted bud, aligning their cuttings.
- wind the next leaves in the same way, moving down a little and tying the cuttings with threads.
- fasten the rose to the branch.
- wrap the "stalk" with decorative paper.
- make some flowers and make a bouquet out of them.

How to make a wreath from maple leaves?
It is customary to decorate the house with maple leaf wreaths for Halloween. And it’s just nice to revive the interior on gloomy autumn days. Making them is easy. Children will especially enjoy this activity. Prepare:
- Maple leaves
- wire
- threads
- flexible branches (willows or birches)
- acorns, rose hips, fesalis fruits
- beads or ribbons
Get to work:
- twist a ring from several rods, securing it with wire.
- attach maple leaves to the branches with thread or glue.
- glue acorns, bright fruits, etc. between the leaves.
- wrap the wreath with bright beads.

Use your imagination and decorate your wreath with various natural materials:
- small pumpkins
- mountain ash
- cones
- spikelets
- dried flowers
- bird feathers
- coniferous twigs
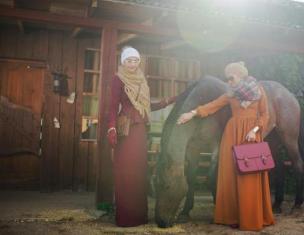
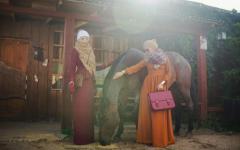
Or you can simply weave a wreath of maple leaves in the same way as from ordinary summer flowers. With such a wreath, you can decorate not only the room, but also yourself for a holiday or an autumn photo shoot.
How to make a crown out of maple leaves?
An unusual decoration for a child for a matinee will be a crown of maple leaves. Its production will not take much time:
- take beautiful leaves about the same size.
- cut off the thick tips of the petioles.
- bend the first sheet inward about a third parallel to the handle.
- bend the second sheet in the same way and “sew” the previous leaflet with its stem.
- Repeat the process using the rest of the leaves until you get a ribbon of the desired length.
- fold the ring, securing the first cutting on the canvas of the last sheet.
- decorate the crown by gluing rowan berries.

DIY maple leaf hedgehog
Using maple leaves, you can make a funny hedgehog. The leaves will act as a prickly fur coat. There are two ways to make a hedgehog.
- on colored cardboard, draw the outline of a hedgehog.
- using PVA glue, glue the leaves on the body of the animal, starting from the contour and moving towards the middle (the leaves should overlap a little).
- make a sun, flowers from colored paper and decorate your work with them.

- form an oval from salt dough or plasticine.
- on one side, flatten it a little, making the muzzle of a hedgehog.
- take small maple leaves and cut the petioles, leaving about 3 cm.
- stick the leaves into the back, pressing well.
- blind the hedgehog's paws.
- make eyes and nose out of peppercorns.

DIY maple leaf plate
From autumn leaves you can make a decorative plate for fruits or sweets. Wide maple leaves are perfect for this craft. To make a plate, prepare:
- leaves
- inflatable ball
- PVA glue
How to do:
- inflate the balloon.
- set it for convenience in a bowl.
- grease the surface with glue.
- cut the petioles off the leaves.
- grease the leaves with PVA and attach them to the ball.
- overlap each next row.
- glue the ball in this way to half.
- at the base of the plate, glue several layers of leaves for the stability of the future product.
- let dry.
- gently deflate the balloon.

The original piece of furniture is ready!
Crafts from cones and maple leaves
Cones are an excellent natural material for all kinds of compositions. And in combination with bright maple leaves, they can become the basis of interesting crafts.
- prepare a large cone, plasticine and maple leaves.
- from plasticine, mold the neck and head of the swan and attach it to the cone - the body.
- using plasticine, attach leaves on the sides of the cone - wings.
- make a ponytail from a small leaf.

- take OBLONG FIR CONE.
- form a head from salt dough or plasticine and attach to the wide part of the cone.
- fasten two large maple leaves on a cone in the form of wings.
- place smaller wings below.
- make a mustache on the head of the wire.
- do not forget to glue the pea eyes.

New Year's wreath:
- from foam or branches, form a base ring.
- using glue and wire, attach the cones to the base, alternating them with maple leaves.
- cover the wreath with gold paint.

- tie cones and leaves on ribbons, alternating them with each other.
- from several such tapes different lengths form garlands by attaching them to one branch.
- sun from maple leaves with their own hands.

In gloomy inclement weather, the sun made from leaves, made by hand, will warm you.
- cut out a circle from thick cardboard.
- prepare yellow maple leaves and cut off their tails.
- cover the edge of the cardboard circle with leaves
thus. - make three rows.
- Glue a large maple leaf in a contrasting color to the center of the cardboard circle.
- make eyes from beans or small leaves.

Do-it-yourself maple leaf sun
- roll up the maple leaves.
- piercing the tubes in the middle, string them on two wires.
- connect the ends of the wires, forming a ring.
- tie a ribbon to the "sun" and hang it up.

DIY maple leaf vase
Autumn bouquet can be put in a vase of maple leaves. The color range of this natural material is wide, and you can easily pick up desired shade for composition. Let's get to work:
- take a smooth glass vase or plastic bottle.
- from flour and water, cook a liquid paste.
- Apply a thin layer of cooled paste to the surface of the vessel.
- wrap the vase with thin paper, press well.
- Grease the paper with paste as well.
- paste over the vase with leaves (it is better to cut the tails).
- top with PVA glue.
- garnish with rose hips or rowan berries.
- let dry for at least a day.
- carefully remove the paper with the leaves from the vase.
- For strength and shine, spray the product with hairspray.

Leaf crafts

If you plan to create compositions from living plants, then do not remove the base from the vase. Then you can pour water into it and change the bouquets according to your mood.
Craft from maple and oak leaves
The combination of maple and oak leaves in various autumn compositions looks spectacular:
- wreaths
- garlands
- bouquets
- candlesticks
- topiary

You can especially give free rein to your imagination in applications and panels.
The stained-glass window made of leaves on the door looks very unusual and beautiful:
- just tape the leaves to the glass in random order.
- rub wax crayons on paper, put leaves on top, cover with paper on top and iron. The wax will melt and stick to the leaves.
- Such multi-colored leaves are best glued to the glass separately.
Crafts from chestnuts and maple leaves
Walking through the park, do not forget to pick up chestnuts. Together with your child, you can make funny figurines out of them. For this you will need:
- chestnuts
- maple leaves
- plasticine
- take two chestnuts: a small one for the head and a larger one for the body.
- from plasticine, blind the neck and connect the chestnuts.
- Use an awl to make a hole in the large chestnut.
- cut off the stem from the leaf, leaving 1-2 cm.
- insert a leaf into the hole - you get the tail of a bird.
- in a small chestnut - head, make three holes on top.
- insert pieces of matches into them.
- paint the match heads with colored paint.
- from plasticine make eyes, beak and paws of a bird.

Caterpillar:
- take six chestnuts (preferably of different sizes).
- arrange them in a row by size in descending order.
- connect the chestnuts together with pieces of plasticine.
- on the largest chestnut, mold the face of the caterpillar with plasticine.
- make horns from short matches.
- put the caterpillar on a bright maple leaf.

- pick up two chestnuts of different sizes (large - torso, small - head).
- connect them with plasticine.
- from thin willow twigs make eight long paws.
- form large eyes from plasticine and stick to a small chestnut - head.
- cover the spider with a leaf.

Snail family:
- mold the body and head of the snail from plasticine.
- lay a chestnut on the body - a shell.
- make several snails of different sizes.
- arrange the whole "family" on bright maple leaves.

DIY maple leaf tree
A tree made from maple leaves will be an excellent decoration for your room. It can be crafted in different ways.
"Herringbone":
- prepare maple leaves of different sizes.
- fold each inward twice.
- Using wire, attach the leaves to the stick, starting from the bottom of the Christmas tree.
- at the bottom should be the largest leaves, and at the top - small.

- dry the leaves in any way.
- find a beautiful branch and varnish it.
- attach dry leaves to the branch with a thin wire.
- put the "maple" in a vase or nail it to a plank.
- make two balls out of styrofoam or a wad of newspapers - a large one and a small one (to fit in a pot).
- put a small ball in a pot and make a hole in the foam (newspapers) for the barrel.
- grease the hole with glue and insert a thick branch there - the trunk.
- also make a hole in a large ball and, using glue, attach it to the trunk.
- paint the balls and the barrel in the color you want.
- in a large sphere, make a small hole with an awl, drop glue there and insert a twisted maple leaf (pre-treated in any way).
- fasten the leaves in the same way over the entire surface of the ball.
- you can additionally decorate the crown of the tree with cones, rowan or pine needles.
- close the base of the trunk with moss or small leaves.
- the crown of the tree can be decorated with roses from the leaves.

Such a topiary will look elegant in any interior.
Crafts from rowan and maple leaves
Bright rowan berries and carved maple leaves are a great idea for beautiful interior! Add red rowan to any autumn composition - and it will look festive and elegant.
- choose a large beautiful maple leaf.
- grease it with PVA glue.
- lay rowan berries on it like a mosaic.
- let dry.

"The music of wind":
- fasten two branches crosswise.
- string alternately on a thin strong rope.
- rowan berries and maple leaves.
- make 7-8 such ribbons, each of which should end with a berry.
- attach garlands to twigs and hang.

Topiary:
- make the base for the topiary, as described above.
- decorate the upper sphere with maple leaves with rowan berries (put a couple of leaves and a small rowan branch into a bundle and secure with a thread).
- form the crown of a tree from 8-10 such beams.

Video: Autumn Leaves Decor
The composition in the circle is original craft from a disposable paper plate. Such work can serve as a decorative stand or wall decoration.
White disposable paper plate, chestnut fruit (4 pieces), prickly chestnut shell, three larch cones, two pine cones, four acorns, one hazelnut, melon and watermelon seeds, PVA glue, scissors.
Cut out a 10 cm circle inside the plate, set it aside. The rest of the plate is the basis for crafts. Lay out, alternating, chestnuts, cones, acorns, chestnut shell, walnut. Fix the parts with glue. Decorate the rest of the plate with melon and watermelon seeds, secure with glue.
sunny flower

You bought a bag of pistachios and quickly ate delicious nuts with pleasure. Put the shell in a separate bag. What if these are the petals of a sunflower?
Necessary materials:
White sheet of A4 paper, pistachio shell, two physalis lanterns, bay leaves, scissors, PVA glue.
For the background in this application, it is best to use white paper, which will emphasize the peculiarity of the natural material: a flower pattern with neat contours of each petal will appear with graphic accuracy.
Cut the physalis lanterns into individual petals (Fig. 6).
The core of the physalis with a bright berry is the base of the flower. Secure it with glue at the top of the sheet. Arrange the pistachio shells, making the flower petals around the middle. Fix the parts with glue. Put physalis petals along the edges of the shells, fix them with glue. Also lay out the stalk from the pistachio shells. Leaves for a flower - laurel.
Basket of flowers

How much labor and time it takes to weave a basket of twigs! It is much faster and more interesting to “weave” a basket of pistachio shells. But you can fill it bright colors and herbs.
Necessary materials:
A white sheet of paper and light yellow A4 sisoflor, pistachio shells, physalis lanterns, two rowan berries, field grass, scissors, PVA glue.
Fix light yellow sisoflor with glue on a white background. From the shell of pistachios, make the silhouette of a basket. So that the work does not cause difficulties, you need to lubricate the surface of the background with glue and then carefully lay out each shell. While the glue dries, prepare the center and flower petals from the physalis lanterns. Make flowers from the received details, fix with glue. The middle for large flowers can serve as rowan berries. Complete the composition with field grass.
Branch with flowers

Elm seeds fall in spring. These oval-shaped seeds with a round beige center are very fragile. In the application, they can turn into different images. We will consider the most interesting transformations. The simplest is the flower petals, which resemble a flowering branch of a sakura or an apple tree.
Necessary materials:
A light pink sheet of A4 paper, a twig of some shrub, ash, elm seeds, rowan berries, scissors, PVA glue.
Cut a branch of a bush into several parts, fix them with glue on the main background. Try to keep the branch not clearly in the center, but slightly tilted. Make flowers from elm seeds, rowan berries will be their center. The leaves of the flowers are oblong ash seeds.
Secure all parts with glue.
Lion cub in thick grass

Who is hiding in the thick grass? Here appeared a shaggy mane, strong paws and a tail with a tassel.
This little lion cub decided to play with you. You should not be afraid of him, because the lion cub is fabulous. And if you look closely, you will see that the fluffy mane is the bones from melon and watermelon, and the shaggy fur is simple sawdust!
Necessary materials:
A sheet of white paper, light orange A4 syzoflor, sawdust, watermelon seeds, melons, fern leaves, two “flakes” from a pine cone, one chestnut, plastic eyes, black and red velvet paper, scissors, PVA glue.
Fix light orange sisoflor with glue on white paper. From the green and dark brown leaves of the fern, cut off a few small leaves, spread them at the bottom of the background, fix with glue.
To complete the figure of a lion cub, use the stencils of the torso with paws, muzzle, mane and tail.
Cut out the pieces from cardboard and arrange them in sequence.
Gently grease the silhouette of the body with paws with glue, fill with sawdust. Also decorate the muzzle (circle).
For the details of the muzzle, use two "scales" of a pine cone - these will be the ears; plastic beads - eyes; chestnut - spout; "Pads", antennae and mouth cut out of velvet paper.
Gently fill the wavy contour of the mane with glue, fix the bones of the watermelon and melon on it.
Tail - sawdust; brush - bones of melon and watermelon.
Lay out the prepared parts on the main background, fix with glue.
Still life with pineapple

A napkin on the table, a beautiful pineapple, a burgundy apple, grapes ... And now we have a real still life in front of us. Only not paints and brushes we will choose for work. Our unusual materials will create a three-dimensional picture.
Necessary materials:
Light orange sheet of A4 paper, elm seeds, pistachio shells, burgundy maple leaf, yellow elm leaf, green birch leaves, green maple leaf and spouts, field grass stalks, straws, White paper, hole punch, scissors, PVA glue.
Place a light orange sheet of paper vertically. Start the applique from the plane of the table on which the still life will be drawn. At the bottom of the sheet, diagonally, glue the straw - the table. Spread the stalks of field grass vertically - a wall. Fix the parts with glue.
From white paper, cut out a semicircle, around the edges of which, using a hole punch, make circles. Shape the circles with scissors, like the edges of a napkin. Fix the prepared "lace" napkin with glue on the plane of the table. Wait for the glue to dry.
Start compiling a still life with a picture of a pineapple. In order for the elm seeds to most accurately convey the texture of the pineapple, do not rush to lay them out on the main background. Cut out an oval from white paper - the base of the pineapple. Gently lubricating each elm seed with glue, lay it in succession on a white oval. Gradually, the entire oval will be filled with seeds. Fix the prepared pineapple base with glue on the main background. Make up the top of the pineapple from maple "spouts", which in their shape resemble green leaves.
For bunch of grapes pistachio shells are suitable, which will successfully convey the color and texture of the grapes. But a branch with leaves can be made from a green maple leaf, if you cut it into several parts. Fix all the details with glue on the main background.
Now it remains to prepare the images of apples. To do this, cut out circles from maple and elm leaves. A large apple is a burgundy maple leaf, a small one is a yellow elm leaf. Fix the parts with glue. Green birch leaves will harmoniously complement the composition.
Castles on the water

Mysterious castles on the water are like islands of something unknown, mysterious. Steep banks, lonely trees and a gentle breeze that invites you to travel.
Necessary materials:
Blue sheet of A4 paper, pistachio shells, pine cones - large and small, field grass, oak leaf, pine needles, ash seeds, green maple "spouts", scissors, PVA glue.
Start the application with locks. On the left side of the sheet, place a large castle. For its image, use pistachio shells. To make the castle look like a stone structure, try to arrange the shells row by row. The number of shells in a row is 4 pieces. Gently grease each shell with glue and fix it on the main background. It will take time for the glue to dry. In the same way, lay out a smaller castle on the right side of the sheet.
Cut an oak leaf into two halves. Make of them the banks on which the castles will stand. Fix the parts with glue. Trees - field grasses - also fix with glue.
Make up the surface of the water from pine needles, ash seeds and maple spouts. Start fixing the parts with pine needles, placing them over the entire surface. Fill free areas with ash seeds and maple spouts.
smart owl

A smart owl sits high on a tree. Her beautiful, fluffy feathers shimmer in the moonlight.
Our owl is fabulous, and, of course, her feathers are unusual. Each feather is an elm seed. And the wings are scales from pine cones.
Necessary materials:
White sheet of A4 paper, elm seeds, pine cone and twig, apricot pits, physalis lanterns, scissors, PVA glue.
Start the applique by drawing up the head and body of the owl. Light feathers - elm seeds - fix with glue. To do this, gently apply glue to the surface of a white sheet and glue one seed to it. Gradually, you will get a silhouette of the head with ears and torso.
The seeds do not need to be glued tightly - then they slightly move away from the background and even more resemble fluffy owl feathers.
To make owl wings, you will need a pinecone.
A large cone with large “scales” that are easy to cut with scissors is suitable for work.
Lay out the "scales" on both sides of the owl's body and secure with glue.
For the eyes, the centers from physalis with bright berries are suitable, which are also fixed with glue. The beak is the petal of an exotic plant. The paws are apricot pits.
You can decorate the application with a pine branch on which an owl sits and carefully watches us.

How touchingly small yellow lumps look in spring - mimosa flowers against the background of green leaves! Such a branch pleases the eye, warms with warmth.
As a reminder of spring, there may be another, fabulous, branch of mimosa. Only on this branch did the flowers turn into corn kernels, and the leaves into ferns.
Necessary materials:
A4 thick cardboard, blue thin napkin 20 x 30 cm, dried fern leaf, corn kernels, PVA glue, scissors, wooden frame 20 x 30 cm.
Glue the blue napkin onto the cardboard. Cut off small leaves from a fern leaf. Arrange the leaves on a blue background, secure with glue. Wait for the glue to dry. Fix the corn kernels on the background of the leaves. Everything!
summer portrait

The warm colors of summer are reflected in the sun's rays. The young princess generously gives placers of daisies and cornflowers, greenery of field grasses and unusual plants. And what if you imagine a portrait of such a summer beauty? Flowers and herbs will help draw it.
Necessary materials:
Yellow sheet of paper, light green A4 sisoflor, pink paper, dried chamomile and cornflower flowers, green field grass, green exotic plants from the Sachet set, corn leaves, sparkles, felt-tip pens, scissors, PVA glue.
Fix light green sisoflor with glue on a yellow sheet of paper. From pink paper, cut out the details of the face and neck, fix with glue on the background. Make up the hair of the princess from corn leaves, fix it with glue. Decorate your neck and hair with daisies, cornflowers, exotic plants, green blades of grass. Complete the appliqué with glitter. Draw the details of the face with felt-tip pens.

A nimble squirrel jumps on the branches of trees. She needs to hurry - autumn is coming soon. Cones, acorns, nuts - a thrifty squirrel will have time to collect everything. It will be so warm and cozy in a hollow in a cold winter!
Necessary materials:
Green sheet of paper, light orange A4 sisoflor, dried oak leaves, larch branches with cones, acorns, birch bark, plastic eye, black button, scissors, PVA glue.
Fix the light orange sisoflor with glue on a green sheet of paper. Place a sprig of larch at the bottom of the leaf. Arrange the oak leaves along the edges of the background so that the right side remains free. Complete the application with acorns.
Prepare details for the image of a squirrel from birch bark. Please note that for work you will need not the front, but wrong side birch bark. She has a light brown color. Small oval - head; large oval - torso; two triangles - ears; two paws. A feature of the image of a squirrel is its volume. Try to choose the most twisted part of the birch bark for the tail. Lay out all the details on the background and secure in sequence. Lubricate only the protruding edges of the birch bark with glue. It will take enough time for the glue to dry. Complete the image with a plastic eye and a nose with a black button.
When the work is completed, decorate it with a voluminous paper frame. One side of the frame can be decorated with small sprigs of larch; they will become a continuation of the branches from the picture.
Monkey on a palm tree

A mischievous monkey jumps from palm tree to palm tree. Her tenacious paws cling tightly to the trunk of a palm tree. And after all still it is necessary to feast on ripe bananas!
Necessary materials:
A sheet of thick A4 cardboard, yellow paper measuring 20 x 30 cm, dried fern leaves, persimmon seeds, watermelon, apricot seeds, birch bark, two chestnut fruits, one prickly chestnut shell, two orange flowers from the "Sachet" set, two "scales" from a pine cone, two beads, a red thread 1 cm long, a brown thread 6 cm long, PVA glue, a wooden frame measuring 20 x 30 cm.
Glue the yellow paper onto the cardboard. Make a palm tree trunk from persimmon seeds and apricot seeds, fix with glue.
Decorate the background with green fern leaves, secure with glue. Orange flowers are bananas.
From two chestnuts, make a muzzle of a monkey, fix with glue. Wait for the glue to dry.
The monkey's ears are the "scales" of a pine cone. Eyes - beads, mouth - thread. The body is a prickly chestnut shell. Paws - watermelon seeds. The tail is a brown thread. Fix the parts with glue. Insert the finished work into a wooden frame.
boletus

Mushrooms in the forest have their favorite places. So, chanterelles hide together in the grass along the paths. Mossiness mushrooms love to grow among pines, in moss. A boletus with a red hat peeks out of the grass under an aspen. And here is the company of boletus. The name of the mushrooms tells you where to find them the fastest.
Necessary materials:
Wooden frame, A4 thick cardboard sheet, birch bark, yellow elm leaves, green oak leaves, corn leaves, chestnut fruits, gray moss, lingonberry sprigs, small red pebbles, scissors, knife, PVA glue.
For this application, select birch bark with a fairly large, characteristic pattern. Cut out a rectangle measuring 12 x 20 cm - this will be the birch trunk. Lubricate the back side of the bark with glue. Wait for the glue to dry a little and apply another layer. Secure the prepared bark in the upper part of the composition. Cover the top of the bark with a sheet of paper and put a load (these can be thick books). Leave the bark for a day. You will continue to work the next day.
Glue corn leaves at the bottom of the sheet - this is green grass. Place yellow elm leaves to the left of the birch trunk - this is the background. Secure each leaf in sequence with glue. Cut a small strip of birch bark - this is a branch. Fix it with glue on a birch trunk and leave it under load for a day. The preparatory part for the application is completed.
Now you can start working on the mushrooms. Cut three strips from birch bark - legs for mushrooms. Cut the chestnut fruits with a knife into two halves - these are hats. Compose images of mushrooms and secure with glue. Complete the application with gray moss, lingonberry sprigs, the berries of which will be red pebbles. Insert the finished applique into a wooden frame.
Firebird

The bright tail of multi-colored feathers of the firebird dazzles with its beauty. It is a pity that you will meet such an unusual bird only in a fairy tale. But, perhaps, in a real forest, among the tree trunks, the motley tail of this magical bird will flash?
Necessary materials:
Tree fungus, melon seeds, dry blades of grass, apricot pits, petals from the "Sachet" set, corn kernels, corn cob, two beads, PVA glue, a piece of plasticine, a toothpick, scissors.
Clear the tree fungus of dust - this will be the tail of the bird. Glue the petals from the Sachet set along the edge of the mushroom. Free places fill with melon seeds, corn kernels. Spread apricot seeds inside the mushroom, fix with glue.
Cut dry blades of grass into two centimeters. Then lay out the resulting pieces of blades of grass in the direction from each bone to the petals, secure with glue.
Cut off the cob of corn upper part- this will be the body of the bird. The head and beak are a dried petal, fix it with glue on the body. Two beads - eyes.
Attach a small piece of plasticine to the back of the head. Cut the toothpick into three pieces. Attach a corn kernel to the end of each.
Prepared parts - a tuft of a bird - put on the back of the head to a piece of plasticine.
Attach the body with plasticine to the tail of the bird.
Flower meadow

Remembering the warm summer, you imagine white daisies in the green grass, golden sunbeams, the aroma of flowers and berries. As a reminder of a flower meadow can be decorative composition in a circle. Especially it will please you in winter, cold evenings.
Necessary materials:
White disposable paper plate, green gouache, brush, dried chamomile flowers, fruits and flowers of exotic plants from the Sachet set, gold sparkles, yellow pebbles, green flower-shaped ribbon, PVA glue.
Type green gouache on the brush and carefully apply paint to the inside of the plate. Wait for the paint to dry. Lubricate the edges of the plate with glue and fasten the braid. The plate will immediately change. Stepping back a little from the edge of the plate, in a circle, fix the chamomile flowers with glue. Decorate free places with sparkles and pebbles, which are also fixed with glue. In the center of the plate lay out a pattern of fruits and flowers. Fix the parts with glue.
autumn bird

Autumn leaves are circling... But it's not the trees that drop them from their branches. Flying across the sky, the autumn bird drops its magical feathers, which turn into multi-colored leaves. I would like to see such a bird!
Necessary materials:
White sheet of A4 paper, elm leaves, laurel, physalis lanterns, ash seeds, scissors, PVA glue.
In the center of the composition, make an autumn bird out of leaves. A large elm leaf is the body. Laurel leaves - neck and wings. The head is a small bay leaf. Cut the physalis lantern into petals, from which make the bird's tail. Physalis petals can also decorate the wings of a bird. For the eye, use the cut out middle of the physalis.
Beak - ash seeds. Fix the parts with glue. For the crown of the bird, use the fruit of an exotic plant.
gold fish

The sheet of paper turned into white sea foam, from which a goldfish peeked out, and then quickly disappeared into the waves, sparkling with scales.
Necessary materials:
White sheet of A4 paper, elm leaf, ash and elm seeds, lemon immortelle flower, rowan berry, two pistachio shells, small seeds of field plants, pine needles, PVA glue.
In the center of the white sheet, glue the yellow elm leaf - the body of the fish - with glue. Make up the fins and tail from transparent elm seeds. The fish's mouth is pistachio shells. The immortelle flower is the eye, and for the pupil, use a rowan berry, which you fix with glue. To render a wavy bottom surface, use thin needles pine and oblong ash seeds. Bubbles of water can be made from small seeds of field plants. Secure all parts with glue.
Autumn forest

How nice it is to walk through the autumn forest when the leaves rustle under your feet! Unexpectedly find a mushroom that seems to be waiting for you. Listen to the silence, which is broken only by the voices of flying birds.
Necessary materials:
White sheet of A4 paper, oak, maple, elm leaves, ash seeds, green maple "noses", apricot pit, scissors, PVA glue.
Cut the elm and maple leaves in half. At the bottom of the composition of the halves of the leaves, make up the ground. You can alternate: elm, maple, then again elm. Fix the parts with glue. In the left corner of the "spouts" of maple, make a Christmas tree. The shape of the "spouts" resembles spruce branches, start laying them out from top to bottom. Place small “noses” at the top, and gradually increase their length towards the bottom. Tree trunk - ash seeds. Fix the parts with glue. Oak leaf - a large deciduous tree - also secure with glue. A small fungus can be made from an oak leaf and an apricot pit. Grass - ash seeds.

Not only did you manage to find the fungus in autumn forest. A small hedgehog, running among the trees, noticed a boletus and hurried to take it to a mink.
Necessary materials:
White sheet of paper, light green A4 sisoflor, green maple spouts, leaf twigs, orange petal of an exotic plant (from the Sachet set), elm leaf, ash seeds, oak leaf, five pine cone “flakes”, scissors , PVA glue.
Fix light green sisoflor with glue on a white sheet of paper. At the bottom of the sheet, make a picture of a hedgehog. Cut the elm leaf into two halves. Half of the sheet is the body of a hedgehog. Secure the part with glue. Thorns - ash seeds, which are carefully glued to half an elm leaf with glue. Cut two protruding parts from the oak leaf. Use one part for the muzzle of the hedgehog, the other for the leg of the mushroom. Fix the parts with glue.
The paws and nose of the hedgehog are “scales” of a pine cone. A mushroom cap is an orange petal of an exotic plant.
At the top of the sheet, make images of Christmas trees from maple spouts. Branches from leaves will serve as trunks for trees. Fix the parts with glue.
turtle and palm tree

Hot Africa... Under the scorching rays of the sun, a turtle is slowly moving. She wants to hide from the sun under the big leaves of the palm tree.
Necessary materials:
White sheet of paper, light yellow A4 size syzoflor, large yellow aspen leaf, oak leaf, ash seeds, pistachio shells, pine cone "flakes", maple "spouts", leaf cuttings, apricot pit, corn seed, scissors, PVA glue.
Fix the light yellow sisoflor with glue on a white sheet of paper. At the bottom of the composition, make an image of a turtle. An aspen leaf is suitable for the shell. Its wavy edge resembles the curve of a shell. Cut three protruding parts from an oak leaf. One of them is the stretched neck of a turtle. From the other two, cut off small arcs - the legs of a turtle.
An apricot seed is suitable for the head, and a corn seed is suitable for the eye.
Make high mounds from leaf cuttings, bend them slightly. In our picture, they will look like wavy lines.
Complement the image with tall grasses, for which ash seeds are suitable.
From the "flakes" of a pine cone, make a palm tree trunk. Maple spouts are suitable for palm leaves. And large coconuts are pistachio shells.
For the image of clouds, use oak leaves.
Secure all parts with glue.
Tulips and daffodils

The spring mood is especially felt when yellow daffodils and red tulips bloom. Can you imagine such flowers that are painted with colorful feathers and corn leaves?
Necessary materials:
Green sheet of paper, light green A4 sisoflor, corn leaves, red, yellow, orange feathers, red and yellow paper, green blades of grass, scissors, PVA glue.
Fix light green sisoflor with glue on a green sheet of paper. Lay the corn leaves on the background and glue. To make it easier to fix the feathers on the background, cut out thin outlines of flowers from red (for tulips) and yellow (for daffodils) paper. Gently fix the feathers with glue on the contours of the flowers, as if they were delicate petals. For the centers of the daffodils, use orange feathers. Make flower stems from green blades of grass.

Fluffy lamb, like a small cloud on the green grass. As if heavenly fluffs came up with his drawing. And you almost guessed it - such a picture turned out thanks to poplar fluff.
Poplar fluff is harvested in early summer. A light breeze is enough to cover all the streets like snowflakes. But do not rush to collect such poplar fluff, because it can be stained with dust. It is better to remove earrings covered with down from a tree. Carefully remove dried seeds and scales so that only fluff remains in your hands. It is best to store poplar fluff in paper boxes. For the background, use multi-colored velvet paper. But you don’t need glue to fix the fluff, because velvet paper firmly holds light fluffs.
Necessary materials:
Sheet of green velvet paper measuring 20 x 20 cm, poplar fluff, black velvet paper, yellow ribbon in the shape of flowers.
In the center of the sheet, start drawing a lamb. To do this, select small poplar fluffs, from which lay out an oval - the body of a lamb. The fluffs are so soft that they are easily fixed on the velvet surface of the paper.
For the muzzle, gather the fluff more tightly together to get a white silhouette. For the image of horns, poplar fluffs are slightly rolled up, then fasten the horns on both sides of the muzzle. Hooves, eyes, nose cut out of black velvet paper.
Decorate the appliqué with yellow flower lace. Fix the parts with glue.
Moonlight night

Night winter forest. The moon shines brightly high in the sky. Beautiful picture painted with white snow. Here's to keeping it as a keepsake! But the snow melts quickly, they can not draw. You have poplar fluff left in your box from summer. Maybe it will remind you of snow flakes?
Necessary materials:
A sheet of blue velvet paper measuring 20 x 20 cm, poplar fluff.
Start the application by making snowdrifts. To do this, gradually fill the lower part of the sheet with poplar fluff. The thinner the layer of poplar fluff, the more transparent the pattern will be. If you want to depict a denser layer of snow, place poplar fluffs closer friend to friend.
Continue spreading poplar fluff on the right side of the sheet, giving it the shape of a Christmas tree. The tree pattern can be done with slightly twisted poplar fluff.
It remains to supplement the application with a pattern of the moon and clouds.
Give a small ball of poplar fluff the shape of a circle - this will be the moon. Clouds are light fluff.
Master class "Butterfly made of natural material"
The master class is designed for school-age children, teachers and parents.
Purpose: Decoration in the corner of nature, interior decoration, gift.
Target: Develop imagination, creativity, imagination.
Tasks:
To introduce a new way of using natural material;
· Develop fine motor skills hands, attention, intellectual and creative activity;
Cultivate a sense of love for nature.
Butterflies! Who does not know these lovely insects that adorn our land. Graceful, bright, they cheerfully flutter over plants, sitting on flowers to refresh themselves with nectar.
You look at a butterfly, you will be amazed at the perfection of its form, splendor, and you will involuntarily think about the mystery of beauty generated by wise nature.
Puzzles.
It will take off, then it will fold its wings,
That will straighten them ... Looks like
On a fluttering flower
On a sunny summer day.
The flower was sleeping and suddenly woke up -
I didn't want to sleep anymore.
Moved, stirred
It flew up and flew away.
I wanted to touch with my hands
To the most beautiful flower
And he, waving his petals,
He fluttered and flew under the clouds!
T. Nesterova
Butterfly is associated with love, with hot summer, and in some nations it is a symbol of immortality. To give decorations and toys in the form of butterflies means to wish health and longevity.
The Romans used to say that butterflies are like flowers blown by the wind and soaring through the sky. I wanted to combine a butterfly and a flower, capturing this union in a natural composition.
This craft can be a wonderful gift teacher, mother, educator, be a decoration for a class or an exhibition of autumn crafts made from natural material.
You will need: l rose petals of different colors, a cardboard butterfly template, cardboard, a simple pencil, PVA glue, a glue brush, scissors, double-sided tape.
Rose petals must be prepared in advance by ironing them on medium mode through thin paper.
On the cardboard according to the template, we trace the silhouette of a butterfly, cut it out.

Glue the petals of the same (yellow) color on the top of the cardboard blank.

Glue the petals of a different (burgundy) color on the bottom of the cardboard blank.

Turn the workpiece over and cut off the protruding part of the petals along the contour of the cardboard.


To decorate the butterfly from the petals of the third (red) color, we cut out details of various shapes and glue them onto the workpiece.


We fix the finished butterfly on the birch bark with the help of double-sided tape.


The craft is ready.
To decorate a butterfly, you can also use colorful autumn leaves, fruits (snowflake, hawthorn, mountain ash), seeds of American maple (“airplanes”), ash, physalis, etc.

Such a butterfly can decorate a branch, a fancy piece of wood, put in a frame.
Happiness is like a butterfly...
Light, tender, fragile too,
So weightless, but so tangible
Very desirable and necessary!
With the onset of autumn, kindergartens and schools hold holidays dedicated to this time of year. We have collected maple leaf craft ideas and are happy to share them with you.
Important: Autumn nature is rich in materials from which you can make real masterpieces.
It would seem that maple leaves ... Is it possible to do interesting craft from this uncomplicated raw material? It turns out you can.
Here's what you can do with maple leaves:
Herbarium. Beautiful multi-colored maple leaves will look good in tandem with other leaves. bizarre shapes form a beautiful picture.
Herbarium of autumn leaves
Bouquet of flowers. Leaves folded using a special technology can turn into original bouquet colors. Clusters of viburnum or mountain ash, dried flowers will add color to your bouquet.

 Bouquet of autumn leaves
 Applications. Stick a maple leaf on a white or colored sheet of paper and make a muzzle from improvised materials. You can also make an application in the form of a still life or landscape.

 Maple leaf appliqués
 Crafts from maple parachutes for children: photo
Important: Creative fantasy is limitless. In the process of creating crafts, not only maple leaves are used, but also parachutes, or earrings, they call them differently.
Craft "Dragonfly"
A very simple craft that even the smallest can handle (with the help of mom, of course).
 Dragonfly from maple parachutes
 For manufacturing you will need:
- Maple parachutes
- Paints
- Brush
- small twig
Paint the parachutes with paints, then let the paint dry. Then glue the parachutes onto the twig. The craft is ready!
You can make a whole collection of colorful butterflies, dragonflies and other insects in this way.

 Maple lionfish insects
  Crafts from maple parachutes
 Maple seed applications
It's easy to make a hedgehog from maple seeds. Draw a hedgehog on a piece of paper, you can also print the finished picture. Instead of needles there will be maple parachutes.
 maple seed hedgehog
 In addition to the hedgehog, you can make any other application. For example, owl.

 Maple Seed Owl
 How to save maple leaves for crafts, how to process?
Important: Autumn foliage is a short-lived material, the leaves quickly darken, curl. Therefore, many are wondering - how to save the leaves? It turns out there are several ways.
Method 1. Dry the leaves in a book under pressure.
Method 2. Iron the leaves with an iron between two sheets of paper. Down you need to lay a solid foundation.
 How to Save Maple Leaves for Crafts
 Method 3. Dip the leaves in melted paraffin. The temperature of the melted paraffin should be medium so that the sheet does not turn black. This is done as follows:
- Melt the paraffin in a wide bowl
- Dip a leaf in warm paraffin
- Place the maple leaf on a piece of paper to dry.
Method 4. Soak the leaves for several days in a solution of glycerin with water. The solution should be in this proportion: 1 part glycerin, 2 parts water.
Video: How to save leaves for crafts?
Cones are a common material for children's crafts. If you combine cones with maple leaves, you can get an interesting little thing.
For example, such a cute owlet can be made from a cone, its wings will be dried maple leaves.

 Crafts from cones and maple leaves
 Craft: a bouquet of maple leaves
Important: Maple leaves can turn into a luxurious bouquet if you work hard.
First you need to learn how to twist a rose.
 Step by step manufacturing maple leaf roses
 And here are the bouquets that can turn out in the end.

 Bouquet of maple leaves
 maple leaf craft
 Maple leaf roses
 Video: Maple leaf roses
Craft: Maple Leaf Wreath
A wreath made of autumn leaves can become a spectacular element of decor.
You can combine a maple leaf wreath with many other natural materials:
- Clusters of rowan
- cones
- spruce branches

 autumn wreath

 Wreath of autumn materials
  Maple leaf wreath
 To create such a wreath, you will need time and perseverance, as well as improvised materials:
- Willow rods, wire or any other improvised base for the frame
- Tape or thread
How to make a maple leaf wreath:
- First make a round base with willow twigs or hard wire
- After that, twist each maple leaf with a tail onto the base.
- To keep the leaves, secure them with thin wire or thread
- Add decorations while weaving a wreath

 Step by step creation maple leaf wreath
 Another option bases for a wreath - cardboard:
- Cut a ring out of cardboard
- Gently wrap the circle with knitting thread
- After that, you can start decorating the wreath with leaves, fixing them with PVA glue


Video: Decorative leaf wreath
Maple Leaf Crafts: Vase
In order to make a vase from maple leaves, you have to tinker.

 Maple leaf vase
 You will need:
- PVA glue
- Brush
- Balloon
- maple leaves
Preparation method:
- Blow up the balloon. Please note that the vase will take the shape of your ball in the end.
- Dilute PVA glue with water in a ratio of 1: 1. Coat the ball with glue.
- Glue the leaves in any pattern.
- Leave the ball to dry. When the glue dries, you can pierce the ball with a needle and remove it from the vase.
Craft: maple leaf plate
As mentioned above, the leaves take the form hot air balloon if stick them on it. In this way, you can make narrow vases or flat plates, as you wish.

 How to make a maple leaf plate
 The plate is made in the same way as a vase. First, inflate the balloon, then spread it with glue, glue the leaves and voila - the plate is ready.
 maple leaf plate
 DIY maple leaf crown
Important: If your daughter will perform at the autumn festival in kindergarten or school, and you don’t know how to decorate her themed outfit, make a crown from maple leaves.

 leaf crown
 - Collect smooth beautiful maple leaves
- Trim the tails of each sheet with scissors.
- Pull the tail of one leaf through the other, as if making a stitch


Fold the leaves in this way until the chain reaches the desired length. At the end, fasten the sheet in front.

 How to make a leaf crown step by step
 The crown on the matinee can be replaced with a wreath of leaves. Decorate it with bright clusters of rowan to make the wreath shine with colors.

 Maple leaf wreath
 Craft: Maple Leaf Hedgehog
We have already talked about how to make a hedgehog from maple leaves above. Here are a few more options for the Maple Leaf Hedgehog craft.
A maple leaf hedgehog is a simple craft that will take you very little time. Such an activity will captivate the baby for a long time.

 Leaf applique: hedgehog
 maple leaf hedgehog
  Children's crafts: hedgehog
 Craft from maple and oak leaves
Important: Oak leaves can also be used for crafts. If you combine oak and maple leaves, you get interesting combination colors and shapes.
Oak leaves are suitable for applications.
 oak leaf craft
 As an example, you can take the following interesting idea. Leaves can be glued to any, including oak and maple.

 Craft from oak and maple leaves
 More options for applications from various leaves:

 Crafts for kindergarten and school: leaf applications
  Leaf applique: squirrel
  Leaf applique: cat
 Craft: maple leaf tree
The original tree can be made if you show imagination. For the Maple Leaf Tree craft, you will need the smallest leaves so that they can fit on a small piece of paper.
 craft tree
  craft maple tree
 Crafts from chestnuts and maple leaves
Important: Chestnuts grow in many cities, towns, villages. Finding a chestnut for crafts and finding a use for it is not a problem, there are a lot of ideas.
By the way, you can use not only chestnuts, but also the prickly peel from them. See what cute hedgehogs in the clearing turned out from the dried chestnut peel.

 Craft from maple leaves and chestnuts
 You can make a whole autumn composition using chestnuts, maple leaves and other materials.
 Composition of autumn natural materials
 Maple leaf sun: crafts
Making a sun out of maple leaves is an easy task.
You will need:
- A4 sheet of paper
- Paints
- felt-tip pens
- yellow maple leaves
Draw a circle on a piece of paper. Color it with yellow paint, when the paint dries, draw eyes, a mouth and a nose with a felt-tip pen. Or stick on colored paper. Maple leaves will be rays, so it is better to choose bright yellow leaves.
 Maple leaf sunshine
  Craft the sun
 crafts with children
Important: Red rowan goes well with leaves. The color scheme is bright, juicy.
Rowan can be added to bouquets.

 Combination of rowan and maple leaves
 And again a hedgehog. Only on his back is a bright bunch of mountain ash.
 Crafts from rowan and maple leaves
 Rowan looks gorgeous in bouquets.

 Autumn wreath with rowan and leaves
 Autumn is not the time to be sad and mope because of rainy weather. Do not forget that autumn also gives us the time when you can fully admire the beauties of the many-sided nature.
Video: Children's autumn leaf crafts
The variety of natural material used for handicrafts and the ease of its processing make it possible to widely use this material in work with children. It is only necessary to collect natural material in a timely manner, using for this the students' stay in the camp and country walks.
When collecting natural material with children, one should not forget about the protection of nature. We must tell the children about the colossal work of our people in creating green areas and shelterbelts, about the participation of pioneers and schoolchildren in this.
Students should know and remember what a great responsibility falls on us to protect forests. A broken branch, damaged bark on a tree - all this harms the forest, damages the national economy. Collecting natural material, students should not forget about it. So, for example, children should not rip off the birch bark necessary for work from a growing, healthy tree - it should be taken from firewood and from birches cut down for something.
Birch bark is stripped as follows: a suitable part of the bark is selected (on a log or a cut down tree), cuts are made along and across it with a knife, indicating in this way the size of the birch bark sheet that is supposed to be stripped. Then, using the blunt side, the knives peel off the incised bark across the trunk (from left to right). The stripped birch bark is stacked, pressed on top with a board and something else heavy so that it does not warp when it dries. Birch bark should be dried in a cool place for one and a half to two weeks.
Before use, dry sheets of birch bark should be soaked in warm or hot water until it becomes flexible and elastic.
In addition to birch bark, moss, lichens, and some fern plants should be prepared. Moss moss, a spore plant, which must be sought in mossy coniferous forests, will be especially popular material in mock-up work.
Kukushkin flax, sphagnum and other types of mosses resembling appearance small trees will also be required in layout and decorative work.
Gray lichen, the so-called bearded man, grows in abundance on old spruce trees - it should also be stocked.
Dry crushed moss and lichen should be doused with hot water before use and allowed to dry slightly. From this, the moss will take on a fresh look, straighten out.
Cones - spruce, pine, larch, as well as acorns and seeds of various herbal and woody plants will have a variety of applications in the works. Their various forms, coloring allow them to be used in finishing works and as the main material. It is necessary to prepare more sand (white quartz, yellow, colored with iron salts, and other shades). Sand should be dried and stored in bags.
Shells of various freshwater and marine mollusks. Collected shells should be washed, removed from them traces of silt, dried and stored in a box or boxes, as this material is fragile and breaks easily if stored carelessly.
The straw in the works is mainly rye and wheat. You can store it in a suspended form, connected with sheaves.
For weaving baskets, kugu and cattail should be prepared. These plants should be sought in swampy and coastal areas. Dry them flat on the floor or shelves.
Before use, straw, kugu and cattail should be moistened with hot water until they acquire their original flexibility. For some carvings, easily processed pine bark should be prepared. It should be taken with stumps and butt of cut trees. On the lower part of the tree, the bark is always thicker, and therefore more suitable for carving various objects from it.
As additional materials, the work will require: glue (carpentry, office, etc.), cardboard (of various thicknesses and grades), paper (writing, drawing, color, glossy, landscape, etc.) and wire.
The necessary tools will be: a knife, scissors, a ruler with divisions, a thin awl. Some jobs will require wire cutters and pliers.
Works from seeds and moss
The simplest works from natural material are works from seeds and moss.
It will be a simple job to compile collections of seeds, mosses, lichens, etc. It is convenient to place each type of exhibit in small boxes (for example, matchboxes), then combine everything into one glazed box, making the appropriate labels.
Various patterns and ornaments are also laid out from the seeds.
The technique of these works is very simple: cardboard, plywood or a thing intended for decoration is completely smeared with office or other glue, densely covered with seeds and placed under a press until dry, after which the thing is lightly shaken to remove excess non-stick seeds.
In the works, not only seeds of wild plants are used, but also cultivated ones (beans, millet, cereal seeds, watermelon and melon seeds, etc.).
By combining seeds in shape, size and color, you can lay out various drawings - folk patterns, ornaments, etc .; the gaps are covered with small seeds or sand.
Rice. 79. Products decorated with acorns
 Rice. 80. Acorn tea service
Patterns from some large seeds, such as acorns, can be sewn onto cardboard and thick fabric, decorate some small things with them: a cardboard ink stand, a frame, a small bag, a baby's handbag, etc. (Fig. 79).
For sewing, medium-sized acorns of the same size are selected, pierced through with a thin awl, so that later a needle and thread can be threaded through the holes.
 Rice. 81. Nutshell toys
 A good gift for kids can be " tea-set” with a samovar made from whole acorns and individual acorn “cups” (plus). To connect the parts, pins, thin wire, pointed pieces of matches are used. The samovar faucet, the toe of the teapot and the handles are made from sticks (Fig. 80).
For various small toys can also be used nutshell using plasticine (Fig. 81).
Products from seeds can be coated with a colorless varnish, which makes them more durable and makes it possible to remove dust from them.
When performing some work, sawdust is used; they are easily dyed with aniline dyes sold for coloring cotton fabric. The paint is diluted with hot water in a container, sawdust is immersed in it, then the water is filtered, the sawdust is dried and used for work, gluing them in the same way as seeds.
Undersized moss, growing on stumps and resembling green ivy, is used in layout work for pasting lawns. Frames, boxes and other things pasted over with such moss look good.
Pasting with moss is done as follows: first, pieces of suitable moss are selected, bumps are cut off, then the thing intended for pasting is smeared with glue, and the prepared moss is placed on the glue. So that the moss lies more tightly and does not move, it is covered with a piece of cardboard until it dries and pressed with something heavy.
Works from cones
 Rice. 82. Cone toys
 Pig, bird, fish and butterfly
It is easy to make from spruce, pine and other cones various toys, for example, birds, animals, foresters. You just need to pick up cones of various shapes.
When dried, the cones open, and if this happens in the products, then the shape of the finished toy will be broken; this will be especially noticeable in products from fir cones.
To avoid this, spruce cones should be immersed in warm liquid wood glue. In the glue "bath" the opened cones will close. Then they should be taken out and dried. The scales of cones, fastened with glue, do not open, and the shape of products from them does not change.
Cone toys (fig. 82) can be an additional play material for younger children, and they can also be used for decoration. Christmas trees. Cones and products from them can be painted and varnished.
Piggy
For the body of the pig, choose a cone that is suitable in shape. The narrow end of it will be the head. For the ears, scales taken from another cone are used. For the legs in the bump, four holes are made with an awl, into which sticks lubricated with glue are inserted. The curl of the tail is made of wire.
Birds
The body and head of a crane are made from large and small cones. Suitable sticks are taken for the neck and legs, and a bunch of pine needles for the tail. To connect the parts in the cones, holes are made with an awl, in which the prepared parts are strengthened with glue. Eyes can be made from any suitable seeds by gluing them with wood glue. The bird shown in Figure 82 has a tail and wings cut with a knife from a pine bark plate. Wings can be glued from maple seeds (fly). The legs of the bird are glued into the holes of the stand made of pine bark.
Fish and butterfly
From spruce cones processed in a glue bath, fish and butterflies are made. When making a fish, a cut is made in the cone for the dorsal fin and tail, as shown in the figure, and in the cone intended for the body of the butterfly, two cuts are made for pasting wings into them.
The fins are cut out of birch bark (see figure) and glued into the slots. For butterfly wings, a piece of birch bark must be folded in half and two wings cut out at the same time. They are inserted in the same way as the fins of a fish, on glue. Butterfly wings can be decorated with pieces of thin birch bark of a different color.
Butterfly antennae are made from pine needles; for this purpose, a hole is made in the cone first, and the needles are lubricated with glue.
Teddy bear and woodsman
For the torso and paws of the bear cub, fir cones that are suitable in shape (one large and four smaller) are selected and treated with glue. In order for the limbs to fit more closely to the body, the scales on the cones at the junctions are cut off with scissors, then through holes are drilled. The parts prepared in this way are connected with a soft wire threaded through the holes; The ends of this wire are twisted with pliers.
The woodsman does the same, only they add another small cone or part of the cone to make the head.
Lesovichka can be glued with gray lichen hair, a hat made of leaves or birch bark, legs must be attached with wire to a plank or glued to a piece of pine bark.
 Rice. 83. Lesovichok and teddy bear
 Rice. 84. Works from scales of spruce cones
Works from scales of spruce cones
Scales from spruce cones can decorate a frame, box and other items made of cardboard and plywood. But the use of scales in mock-up work for "tiled" roofs is especially successful (Fig. 84).
The process of strengthening the scales is very simple: you first need to cut them from the opened spruce cones, then grease them with glue and put them in place in a checkerboard pattern. The scales should be laid so that they go a little on top of each other, otherwise gaps will form, and the work will take on a sloppy look. The finished thing must be put under a press to dry.
Instead of scales, cones can be used small shells. The process of gluing them is the same as the scales.
birch bark works
Freshly peeled or steamed in hot water, birch bark is easily stratified: from it (with a knife) you can remove separate, paper-thin layers and use them for pasting bookbinding and cardboard products (walls of a calendar, notebook, frame, notebook, etc.) .
Pasting with such birch bark is done in the same way as with ordinary paper (see instructions). The glued thing should be wrapped in a newspaper and put under a press until it dries completely.
 Rice. 85. Works from birch bark
 Birch bark scoop, birch bark, birch bark basket. Below - methods for attaching the edges of birch bark strips
On hikes and excursions, you can use birch bark to make some crafts (Fig. 85).
You can easily make a scoop for drinking water from birch bark. A rectangular piece of birch bark must be cleaned, one of its sides bent in half and fastened with a split stick. The implementation of the second version of the scoop is clearly visible in the figure.
To collect berries, mushrooms, samples of stones and other materials, it is not difficult to make birch bark. For its manufacture, a rectangular piece of birch bark is taken and bent in the shape of a box. Then, in the corners, at the junctions, holes are pierced, twigs are threaded through them for fastening.
More complex birch bark products will be various baskets. The simplest kind birch bark basket consists of a sidewall, bottom and handle. For the sidewall, they take a strip of birch bark, level it, cut its edges along the ruler and fold it in the form of a cylinder.
If a small basket is made, then it is sewn with thick threads (using a needle). For sewing baskets big size use narrow birch bark strips, threading them through the cuts previously made for this.
The bottom of the basket is sawn out of plywood or plank and the sidewall is nailed to it with wooden or small iron nails. The bottom of the basket can also be glued to the side with wood glue.
A handle glued from two strips of birch bark is sewn to the basket, or it is made from a twig, inserting its ends into holes specially made from the sides.
The side of the basket can be glued with wood glue. This is done as follows: the bottom of the basket (round, oval or other shape) is cut out of the plank, a strip of birch bark is prepared, the length of which should correspond to the circumference of the bottom (with an addition to the connection). The joints of the birch bark must be cleaned off with a knife, made thinner, fading away so that the gluing point is not noticeable. Then they bend around the bottom with a prepared birch bark strip and nail it with small nails. The ends of the birch bark are lubricated with carpentry glue and connected.
When gluing birch bark with birch bark, it is necessary for strength to lay paper in the glued places, and in some cases thin cardboard smeared with glue.
If you need to make a basket with a lid, then it is cut out of a plank of the same shape and size as the bottom. A hole is drilled in the center of the lid, into which a loop is glued - a birch bark handle.
Figure 85 shows a method of fastening birch bark by means of incisions in the form of teeth. Such a bond is stronger than stitching and gluing.
In the north, in forest areas, birch bark utensils are very common in household use. It is lightweight, durable and does not leak liquid. They make it from two birch bark cylinders, putting one into the other.
wicker basket
Birch bark is cut with a sharp knife along a ruler, like cardboard, and baskets are woven from the strips. For weaving, all strips must be of the same width and thickness and not have cracks.
To begin with, you can weave a small basket, the implementation of which will require 8 birch bark strips in 1 cm width and 30 cm length.
Weaving starts from the bottom. Four strips are laid on a table or board and intertwined with the remaining four strips. The strips at the corners must be fixed with clamps so that the weave does not diverge and has the shape of a square.
As shown by the dotted line in Figure 86, BUT, it is necessary to draw the bottom of the future basket on the braid and bend the birch bark strips upwards along these lines. Now you can start weaving corners. The corners of the bottom of the basket are formed at points a B C And G. Further weaving of the strips is carried out in the same alternation as the bottom and corners of the basket were intertwined (Fig. 86, B).
The strips should be pulled closer to each other so that there are no gaps, and for this, clamps must be used during work.
The top of the basket from the outer and inner sides can be sheathed with strips of birch bark (Fig. 86, IN And G).
You can close the ends of the birch bark strips in another way: bend the ends obliquely and close them in the gaps of weaving (Fig. 86, D). Excess ends should be cut off.
Baskets can be woven and large sizes, increasing the number of stripes, their length and width.
For weaving baskets, you can use not only birch bark strips, but also other natural materials: cattail, kugu and straw.
 Rice. 86. Basket weaving from birch bark:
BUT- bottom weaving; B And IN- weaving corners and walls; G And D- ways to seal the ends of birch bark
 Rice. 87. Straw patterns
 Weaving braids from straw and a method for sewing them together
Straw work
In mock-up work, straw can be pasted over cardboard houses when it is required to depict a log house. It is pasted over various cardboard products. This work is performed as follows: the straw is soaked, cut along the length and smoothed out with a not particularly hot iron to form even straw ribbons.
Straw is usually used to decorate things with a flat surface, frames, folders, pencil cases, etc. Drawings are made up of straight and broken lines ( folk embroidery cross, ornaments from geometric shapes, stars, etc.) (Fig. 87 a B C D E).
Having chosen a drawing, transfer it with the help of transfer paper to a thing intended for finishing with straw.
According to the drawing, the straw is cut into pieces with scissors, then the thing is smeared with glue and the prepared pieces of straw are laid according to the drawing. Ready product pressed with a piece of board and dried.
Hats, handbags and other things are sewn from straw woven into pigtails. They do it this way: they soak the straw and weave braids into 4 and 5 straws from raw straw (Fig. 87, BUT). The pigtail should be long, therefore, in the process of work, it is necessary to instruct the straws by folding the end with the end in half. The finished pigtail, still in its raw state, is straightened and ironed.
From the ribbons of such a pigtail, you can make a basket in the same way as they make from birch bark ribbons. You can also make a hat.
 Rice. 88. Crafts from pine bark
 It is sewn with threads, starting from the center of the bottom (Fig. 87, IN). The finished hat is moistened and smoothed - the fields are on the table, and the head is on a round log wrapped in some clean rag.
Works from pine bark
Various applications in manual work has pine bark. It is easy to process, and with the help of a knife they make models, toys and games from it. Figure 88 shows a boat and a chess piece - a horse. To make a boat, a piece of bark is taken, its outer part is processed, then an oval is outlined on top, along which a recess is cut out with the tip of a penknife. The bench can be made from a separate piece of bark and glued inside the boat.
Chess pieces are drawn on a prepared bark plate. Then, according to the drawing, the bark is cut, first giving it a general, rough shape, and only after that the details of the figure are cut out.
The listed crafts are far from exhausting the possible works from natural material, there can be an unlimited number of them. A variety of material gives impetus to the creative thought of students.