Rarely when creative people are limited to one type of needlework: as a rule, we want to try more and more new types of handicraft. And every beader should know how to make paper: imagine what a sensation you will make if you use handmade paper as a substrate for your jewelry! Such paper can also be used as a postcard: its texture is unique, and there is no way in the world that will allow you to make 2 identical sheets.
So, for work you will need:
- Blender
- Water container: bowl, pot or tray. I bought myself a tray at the pet store, usually used as a cat litter box.
- Frame and mesh (details below) - should be smaller than the water tank by about 10 cm on each side: you should be able to easily submerge them into the water tank by holding the side edges with your hands.
- Several foam sponges for washing dishes
- A few pieces of fabric that absorbs water very well. I used sheets of felt, and then I found in the kitchen the household napkins that are usually used for wiping surfaces (sold in the household departments under the Cinderella and Cleaner brands). They are perfect for making paper!
- Paper: carton boxes from once donated perfumes, carton for eggs, paper for printers, napkins, wrapping paper .. Almost any will do! It is not recommended to use glossy magazines and newspapers as there is too much printing ink.
- All kinds of inclusions: leaves, grass, threads, wool, glitter, confetti - to decorate paper and give it a unique color.
Pour some water into the blender and put the paper in it, after tearing it into small pieces. I put in a few pieces of white card stock and a few pieces of thick orange paper for color. Paper can be dyed in several ways: mixing white sheets with colored ones, as well as by steeping it in onion skins, tea and other natural dyes.
Now cover your ears and turn on the blender... We need to bring the source material to the state of slurry: as a rule, this takes about a minute. Here you can go two ways: grind the paper until smooth or stop halfway, as I did. Look at the mass in the blender and the photo finished paper: there are visible bright orange blotches. It's unshredded orange paper.
Pour the resulting mass into a container with warm water. At the same stage, add to the inclusion bowl: confetti, threads... whatever you see fit!
The turn of the main tools has come, without which the process of making paper is practically impossible: the grid and the frame. I had two frames, one of which was stretched with a fine mesh. The mesh is needed in order to trap paper particles and let water through. A frame without a grid is needed to give sheets of paper rectangular shape. You need to use them as shown in the photo: the frame with the grid is located below, the grid is up. A frame without a grid is placed on top.
Align the sides of the two frames, take them with both hands (the mesh is facing you, the frame is on top), and dip into the basin as shown in the photo below. First vertically.

Then carefully move the frame and grid to a horizontal position, lowering it under water. In photography, I hold the frame and grid with one hand only because I take the photo with the other. I usually hold them with both hands.

Remove the frame and mesh from the basin strictly vertically. Wet paper pulp will remain on top of the grid. Let the water drain (about a minute), then take a sponge and start blotting from the underside: where the wet paper pulp is separated from the sponge by a grid. Wring out the sponge (or change it) 2-3 times.

Now carefully remove the frame from the grid. We have a rectangle of wet paper pulp on the grid. Set it aside and prepare a place for your paper to dry.

I did it on the windowsill - it's good that its width allows. So, on a flat surface that is not afraid of moisture, put plastic bag, on top of it - a few newspaper sheets. Wet and lightly wring out a piece of absorbent cloth and place on top of the newspapers. It is very important that the fabric is damp and has a non-woven structure. Now take the grid on which the wet paper rests, lean with a wide edge against the wet non-woven material (household napkin) so that the grid is on the bottom and the paper is on top. Flip the mesh over in one quick and gentle motion.
Now the paper pulp lies on wet tissue, on top of it closes the grid. Take a sponge and start blotting the mesh, removing excess moisture from the paper pulp:

Wring out (or change) the sponge properly several times. At this stage, we must remove as much moisture as possible from the side of the mesh. When there is little water left on the sponge after blotting, slightly lift the narrow edge of the mesh and look under it: if the paper does not stick to the fabric and rises with the mesh, continue to remove excess water with a sponge. If the paper separates from the mesh and stays stuck to the fabric, great, that's what we need. Carefully remove the mesh, leaving the paper on the fabric. At this stage, not everything can go smoothly - practice and experience are needed here. A couple of times my sheet of paper was torn, until I realized that it is very important that the "receiving" fabric is damp: then the paper pulp will more easily stick to it and come off the mesh.
If you want to make one sheet of paper, you can leave it to dry directly on the grid or on the fabric. If you want to make several sheets in one session, cover the still wet sheet of paper with the next layer of wet non-woven fabric, and repeat the procedure from the beginning. Lay the next sheet on top of the previous one, lay wet household wipes between them.

When you run out of felt sheets and household napkins (or when you run out of strength and desire to continue), place the last piece of felt material on top of the resulting layered construction (this time you can take dry), you can put a towel on top, then a few newspapers, a plastic bag , and press it down with a plank or a thick art book - if anything, the package will save her! Put the heaviest dumbbells on top, and leave your sheets for a day or three under this press. Once a day, it is advisable to disassemble and ventilate the structure - so that nothing in the moisture is rotten and moldy. IN summer days paper will dry faster than in rainy autumn. Proximity to heating appliances is also important: my drying structure lay on the windowsill directly above the central heating battery, which accelerated its drying. When the paper dries, dry it a little in the open air, and put it under the press again for a few days.
As an option: if the mesh and frame used above seemed too complicated or hard to reach for you, you can use the materials at hand that every housewife has: an embroidery hoop and a mosquito net, or in general, just a mosquito net.

In this case, the sheets are round and more textured, due to big size cells in a mosquito net. If you use mesh alone, the pulp will float away and the sheets will be shapeless and thinner at the edges. I used this design before I got the grid and frame, and, most likely, I will never use it again - compared to a rectangular grid and frame, this is very inconvenient!
Discussion
One note - a way to make two identical sheets has already been invented;) Eh, technology!
02/28/2015 07:38:13, Elissaa very laborious process is written here - but everything is very simple and easy and you get a lot of fun !!! I took an iron sieve and grabbed paper from a basin of water with it - then squeezed out the water - turned it over as it was written on a wet cloth and put it all on a towel - wring everything out again and then iron everything with an iron !!! try it and you will succeed!!!
bbbbbbbbbbllllllllllllllllllllllllllllllllllllllllllllllllllllllllllllllllllllllllllllllllllllllllllllllllllllllllllllllllllllllllllllllllllllllllllllllllllllllllllllllllllllllllllllllllllllllllllllllllllllllllllllllllllllllllllllllllllllllllllllllllllllllllllllllllllllllllllllllllllllllllllllllllllllllllllllllllllllllllllllllllllllllllllllllllllllllllllllllllllllllllllllllllllllllllllllllllllllllllllllllllllllllllllllllllm
27.12.2008 15:38:34, =-interesting. But really, it’s a bit complicated :) Paper is made from napkins using a slightly similar technology, only there, like PVA, is still used in the process. whole there is a community in Learn on this topic. I haven't done it yet, but I want to try :)
this is a very tricky way. It might be interesting... When you know why you are making such a thing. When you may have felt the resulting paper somewhere.
But there is usually little time for packaging or creativity, and something faster is suitable for business.
Comment on the article "Make paper with your own hands"
Let's make a cute rosehip branch today. The main advantage of Dokmai paper is that when wet, it becomes very soft and pliable, which allows you to create very realistic flowers with soft beautiful folds.
We make paper with our own hands. And every beader should know how to make paper: imagine what a sensation you will make if you make Paper: cardboard boxes from perfumes once donated, cardboard packaging for eggs, paper for printers ...
Sticks to baking paper:(. Teach me how to cook!. Cooking. Some time ago I began to lay baking paper on a baking sheet so that it would remain clean later.
If the fabric / felt is not translucent, I act depending on: 1. If the pattern is large, I slowly “cut off” the paper with the pattern along the lines, thus tracing them gradually along the contours on the felt-fabric. Drawing on paper can be stitched on a typewriter without thread.
How to make an artificial homemade vagina with your own hands at home? What can an artificial vagina be made of? You can make a vagina with your own hands from a banana peel. A banana peel is just as satisfying as a watermelon.
The girls said to make a leaf for the garden like this on a stick, they dance with it, that's actually the question of my hands growing from one place to draw it myself, not in the same way to make another maple leaf. Cut. Colorize. (you can initially take colored paper).
"baking paper" is actually ready for use ... And you need to "oil" the usual white paper, if you want to use it as baking paper... Section: Teach you how to cook! (how to make oiled paper for the oven).
I know, they made the soil from polyurethane foam. this is for adults only, do not give children hands. This is called "transparency" in jargon, it is printed on it instead of paper on the usual one made of foam, as the EC advised. maybe something else interesting 11/21/2008 04:01:19 PM...
We make paper with our own hands. The thread was created to discuss this article. It is rare when creative people limit themselves to one type of needlework: as a rule, we want to try more and more new types of handicraft.
They asked me to make a model of the Kremlin (or a tower, etc.) according to Moscow studies. Help, from what? as? maybe there are cutouts somewhere? Gosha and I made the Cathedral of Christ the Savior in the garden. from a cardboard box and plastic bottles. Well, they adapted bells with matches.
Section: Games (how to make paper out of paper recipe yourself). Once in my childhood I was convinced that if you chew a piece of paper, like the current chewing gums, and then with this mass you can carefully close up a small hole in a paper sheet, resulting from some ...
Chainmail. Hi all! Tell me, please, how can I make chain mail for a boy of 9 years old? Needed to speak in literature class. We have on New Year children made such chains from colored paper - easily without glue.
how to make papier mache as? as a child, I did it - I sculpted small pieces of paper on a form on a starch paste, now we do this - something turns out, but either it sticks out of the mold, or it sticks tightly. a couple of plates are obtained, and sometimes we glue glue ...
How is paper made? Learning something. Early development. Techniques early development: Montessori, Doman, Zaitsev's cubes, learning to read I was once very fond of her. It's like surviving in the forest. Well, there is also how to make primitive paper out of algae, and what to do from ...
You can make paper. Many children love this. To do this, you need a fine mesh, with which the windows are tightened; flat frame; and soak large paper in water, glossy paper works worse, soak it for a long time. Somewhere on a newspaper spread - a glass of water, but the proportions are not very important.
How to fasten 30 sheets of paper at home if there is no large stapler? There is no time to deal with long bookbinding works and it is not necessary to beautifully, you need to be careful to use it. Thank you for the idea to pierce with a nail! That's what I'll do if nothing else...
The paper is BREAKABLE. Paper dough can still be made from newspapers - the looser the original product, the easier it is to make Topic: Paper Is it possible to make paper at home somehow? most plain paper, more precisely, even something that can be used as ...
there is such an option: make paper bags (you know how they used to wrap sweets in the store? You wind a rectangular paper sheet around your hand) it turns out a cone, as it were. clearly explained? Make 20 pieces! fasten along the edge so that it does not unfold. Then...
We make paper with our own hands. Paper: cardboard boxes from once donated perfumes, cardboard packaging for eggs, paper for printers, napkins, packaging Section: Games (how to make paper out of paper recipe yourself). this recipe was given on the TV channel "home".
Erofeev Dmitry
research project "how to make paper at home by hand"
Download:
Preview:
MUNICIPAL BUDGET EDUCATIONAL INSTITUTION
SECONDARY EDUCATIONAL SCHOOL c. WHITE LAKE
MUNICIPAL DISTRICT GAFURII DISTRICT RB"
How to make paper at home by hand?
research project
Executor:
Erofeev Dmitry
9 years
Supervisor:
Akbasheva
Olga Anatolievna
year 2013
- Theoretical part. page
1.1. Introduction……………………………………………………………3
1.2. The history of paper…………………………………..3
1.3. Paper making methods …………………….……5
- Practical part.
Making paper at home……………………………………………………………………………………………………………………….
Conclusion…………………………………………………………….. 9
Sources used………………………………………………….10
Introduction
Hello! My name is Dima.
I study at school in the 3rd grade and I am surrounded by objects made of paper everywhere: books, textbooks, notebooks, notebooks, albums, colored paper, cardboard and other items. And recently I watched a TV show that talked about paper and how it is made. I wanted to know more about this.
Hypothesis: if you study the history and methods of creating paper, then paper can be made and used at home in domestic conditions.
Problem : is it possible to make paper at home for its further use.
Target: learn how to create and use paper in modern conditions.
Object of study: paper.
Subject of study:ways to create and use paper.
Tasks:
Study the literature on paper, the history of paper making, paper making methods, make paper at home
The history of paper.
Paper has not always existed. Once, a very long time ago, people did not know writing, did not know how to write. primitive people they made their drawings on the walls of caves, carved them on the rocks.
Then people began to write on wet clay tablets with pointed sticks, and then on birch bark, later on papyrus, parchment, only then (almost 2000 years ago) paper appeared.
The raw materials for making paper were mulberry and bamboo. The word "paper" comes from the word "bambigo" - the so-called paper made from bamboo.
For centuries, paper has been made by hand. After the invention of the first paper machine by the Frenchman Robert (1761-1828), the production of paper and cardboard made a sharp leap forward.
Paper began to be used not only for writing and printing books, for packaging goods, but also in construction, industry, agriculture, and electrical engineering.
Modern ways of making paper
Modern methods of making paper differ little from those that were used 2000 years ago.
Making paper at home
Did you know that you can make your own paper?
1. Tear the paper into small pieces and soak in water for 24 hours
2. Squeeze out excess water, transfer to a basin. Add a little water, a teaspoon of PVA glue (for bonding paper) and a tablespoon of starch (so that the sheet is elastic and can bend), beat with a mixer. The result should be a mixture like porridge.
3. Put the resulting mixture on the grid and allow excess water to drain
- Now it's time for the final drying.Put everything on a towel, put gauze or newspaper on top and leave it under pressure for 24 hours. And ifwe want to get a thin sheet of paper, we need to lay out the mass in a thin and even layer.
- As a result exciting activity it turns out very beautiful paper handmade.
6. For decoration, dry herbs, seasonings, multi-colored threads, leaves, flower petals, shells and beads can be added to the paper pulp.
7. Handmade sheets can be used for design work: books, postcards, panels, for painting.
8. You can dry the paper mass not on the screen, but on a cup or on a glass, and then you get a decorative vase or bowl, a pencil holder, a hat for a doll.
Output:
1. Paper can be made at home.
2. It is beneficial to use homemade paper, because. it is made from waste paper and does not require cash costs.
3. It is best to use such paper for registration.
4. In addition, homemade paper is more environmentally friendly.
Sources used:
1. “New Newspaper” No. 49 (492), 2005
2. Khoreva G. A. “Your alternative to nuclear power plants” Book 2 / Family Energy Passport / Ed. 2nd, revised. and supplemented. - Murmansk, 2002. - 32 p.
3. Do-it-yourself paper _ Country of Masters.mht
Preview:
To use the preview, create yourself a Google account (account) and log in: https://accounts.google.com
Preview:
To use the preview of presentations, create a Google account (account) and sign in: https://accounts.google.com
Slides captions:
Research project Making paper at home by hand
Head: Akbasheva Olga Anatolyevna Executor: Erofeev Dmitry, 9 years old, student of the 3rd grade of the MOBU secondary school with. White Lake
Paper in my life I study at school in the 3rd grade and I am surrounded by objects made of paper everywhere: books, textbooks, notebooks, notepads, albums, colored paper, cardboard and other objects. And recently I watched a TV show that talked about paper and how it is made. I wanted to know more about this.
Research hypothesis: if you study the history and methods of creating paper, then paper can be made and used at home in domestic conditions.
Is it possible to make paper at home for its further use? Research problem:
and learn how to create and use paper in modern conditions. Purpose of the study:
paper Object of study:
ways to create and use paper. Subject of study:
Analyze the available literature on paper, find and study the history of paper creation Collect necessary material to conduct a practical technique Learn methods of making paper at home Make paper at home Objectives:
Equipment needed: Basin or bucket Sheets of used paper Blender Water Piece of mesh with fine holes Damp-proof paper or newspaper Tray with fine holes Pieces of cloth Dried mint Glycerin Gouache Dried flowers Starch Making paper at home.
Tear paper into small pieces and soak in water for 24 hours Making paper at home
Squeeze out excess water, transfer to a basin, add a little water, PVA glue, starch or other fillers, beat. Making paper at home
Put the resulting mixture on a grid and let excess water drain. Making paper at home
Put everything on a towel, put a towel or newspaper on top and leave under pressure for 24 hours Making paper at home
Pulp turned out Making paper at home
To decorate the paper mass, you can add dry herbs, seasonings, you can add multi-colored threads, "skeletons" of leaves, flower petals, shells and beads. Making paper at home
You can dry the paper mass not on the screen, but on a cup or on a glass, and then you get a decorative vase or bowl, a pencil holder, a hat for a doll.
1. Paper can be made at home. Making handmade paper is very interesting and creative process. And quite uncomplicated. And what an amazing result: exclusive paper your own design! 2. It is beneficial to use homemade paper, because. it is made from waste paper and does not require cash costs. 3. It is best to use such paper for registration. 4. In addition, homemade paper is more environmentally friendly. Output:
one . “Novaya Gazeta” No. 49 (492), 2005 2. Khoreva G. A. “Your Alternative to Nuclear Power Plants” Book 2 / Family Energy Passport / Ed. 2nd, revised. and supplemented. - Murmansk, 2002. - 32 p. 3. Do-it-yourself paper _ Country of Masters.mht Sources used
This article is quite unusual in it, we will try to tell you in detail, how to make your own paper with their own hands from the most diverse raw materials. Of course, such paper is hardly suitable for letters and business documents, but for decorative purposes, for example, in technology, it can be used.
How to make your own paper
Interesting master classes
Master class number 1. homemade paper from grass.
It turns out that the original paper can be made from many types of the most common grass. It should be noted that the manufacturing process of such paper includes work with hazardous materials. chemical preparation- alkali, which evaporates very intensively, so the entire manufacturing process should be carried out in the open air so that toxic fumes do not accumulate. Also, it will not be superfluous to wear a respirator, goggles and, of course, rubber gloves - medical or household, hands must be fully protected. How exactly grass paper is created, our first master class will tell you in detail.
To create paper from grass, we need:
Dry reed that grows along the banks of water bodies;
Alkali - fifty-one hundred grams;
Starch;
Ice cubes;
Two wooden frames;
Fine plastic mesh;
Natural cotton fabric;
Rubber;
Foam sponge.
How to make your own paper: a step-by-step master class
First step. As we noted above, we will make our paper from grass growing on the banks of water bodies, outwardly it resembles a small reed. We cut it with ordinary scissors into small pieces, about seven to ten centimeters long.
Third step. Then we take fifty to one hundred grams of alkali and combine it in a plastic bowl with one glass of cold water, which we previously turned into pieces of ice.
Fourth step. Let the chemical dissolve and carefully pour the mixture into a saucepan with herbal decoction in a thin stream.

Sixth step. So alkaline-herbal decoction can remotely stand until it cools completely. After that, it should be drained through a sieve, and we wash the remaining grass for a long time in running cold water until all the alkali is washed out of it and it ceases to be slippery to the touch. spend all this procedure should only be worn with rubber gloves.
Seventh step. After the grass is thoroughly washed, we sort it out and remove all large stems and twigs, leaving only a small mass.

Ninth step. Separately, we brew a little starch and combine it with herbal puree. Mix and let it brew a little.
Tenth step. While our herbal mass is infused with starch, we will make special frames for handmade paper molding. Of course, such frames can be bought ready-made in special art stores, but we prefer not to spend money and decided to make them ourselves. To do this, we take two identical ordinary wooden frames for photographs or paintings, tightly pull a fine plastic mesh onto one frame and fasten it around the edges with pushpins. Here you can use a regular household mosquito net. Please note that the size of the frames you have chosen will fully correspond to the size of the sheet of paper that you are going to make by hand.
Eleventh step. Now we take a large bowl, it can be either round or square shape, the main thing is that our manufactured frame fits freely into it. We fill the basin with cold water, put several handfuls of pulp made from herbal puree and starch into the water and mix everything well with our hands.
Twelfth step. Next, we take two frames, on one of which we previously stretched a plastic mesh. We put the empty one on top of the mesh and tightly fasten them together along the edges with an ordinary elastic band so that they do not move apart during work.

Thirteenth step. We carefully immerse the construction of two frames into a basin with diluted pulp, so that the frame with the mesh is at the bottom, and scoop up the liquid with them. Next, we hold our frames over the basin, waiting for all the excess water to drain.

Fourteenth step. Then we carefully remove the rubber bands, and with them the upper wooden frame, and carefully turn the lower frame with the mesh, on which the herbal raw materials for making paper remain as a solid ball, onto the cotton fabric previously spread on a flat hard surface.
Fifteenth step. Using a regular foam sponge, carefully collect the remaining moisture from the surface of the mesh. We blot several times, and only after making sure that the mesh is almost dry, carefully remove the frame, while leaving the first layer of grass on the fabric.

Sixteenth step. We cover this grass layer from above with a second piece of natural cotton fabric.

Eighteenth step. On top of all layers of grass paper covered with cotton cloth, we install a load, it is important that its weight is evenly distributed over the entire surface of the sheets, for this you can first put an ordinary cutting board or a flat tray on the top sheet, and then put something heavy on them, such as a jar or bottle of water.
Nineteenth step. After a few hours, carefully change the heavily soaked pieces of cotton fabric and set the load again.
Twenty step. When all sheets of grass paper are almost dry, lay them out separately and leave to dry completely in the open air.

Twenty-first step. At the end, each piece of paper is carefully smoothed with a warm iron, after which it is fashionable to assume that the detailed master class on how to make paper yourself grass finished.
This grass paper turns out to have a very unusual texture, it can be used for a variety of purposes, for example, to make various papers from it, draw small pictures on it, etc.
Master class number 2. Fragrant paper with their own hands.
This master class will tell you how to make paper fast with a pleasant mild fragrance. To make it, we need:
Special mesh screen designed for casting handmade paper;
Plastic basin of the appropriate size;
Old waste paper;
Terry towel;
Natural waffle kitchen towel;
Hydroperite tablets;
Dye;
Essential oil (any);
dried flower;
sequins;
PVA glue;
Blender.
How to make paper yourself step by step with fragrance.
First step. Let's start by taking the most unnecessary paper - it can be napkins, newspapers, sheets office paper, school notebooks, etc. and cut it all into small pieces or cut with scissors.
Second step. Shredded paper is placed in an enamel pan, filled with water and put on fire. Cook the paper until it acquires a thick porridge-like consistency.
Third step. When the paper broth is ready, remove it and cool.
Fifth step. To whiten paper, we need to use hydroperite tablets, which are used to lighten hair. To do this, grind several packs of tablets into powder and combine them with water.
Sixth step. Pour the wrung out boiled paper with the resulting mixture, mix for several minutes, then remove the paper and wring it out well. We do all this with rubber gloves to protect our hands from the chemical preparation.
Seventh step. Now our future paper needs to be slightly tinted. To do this, dilute a little dye in hot water, carefully mix everything and lower the boiled, wrung out and already bleached paper into it. Beat the resulting mixture well with a mixer or blender until a homogeneous thick consistency.
Eighth step. In order for our paper to turn out, it needs a binding element, which in our case is PVA glue. Of course, starch can also be used for these purposes, but it needs to be brewed and this process takes additional time, so we decided to work with glue, it will adequately cope with its duty. It should also be noted that you can do without any binder, in this case the paper will still turn out, only it will be more fragile and delicate.
Ninth step. Pour the finished mixture into a basin, into which our special frame for handmade paper molding can freely enter. You can make it yourself, as described in detail in the first master class, or buy it ready-made in art stores.
Tenth step. Next, we take the above-mentioned frame and scoop up a mixture of water and paper from the basin and carefully distribute the wet paper over the entire surface of the grid so that it lies in an even single layer. Let excess water drain into a bowl.

Eleventh step. According to our idea, we will have fancy paper, with a natural pattern, for this we take a dried flower and lay it randomly over the entire surface of the frame.
Twelfth step. Then add some sparkles to the dried flower and drip a few drops of any essential oil.

Thirteenth step. To ensure that all selected decorations are inside the paper and do not fall off when using it. On top we impose another thin layer of wet paper mixture.
Fourteenth step. We put the finished frame with the future sheet of unusual fragrant paper on a hard flat surface, previously covered with a terry towel. The towel should quickly absorb any excess moisture from the paper.
Sixteenth step. Carefully turn the frame with paper on the table, remove it and continue to evaporate excess moisture from the paper from the back.
Seventeenth step. After that, we take the made fragrant piece of homemade paper and place it under the press, it is important that the weight is evenly distributed over the entire surface of the paper, for this we should place a cutting board on top of the piece of paper right size, a book or something similar and put something heavy on top.
Eighteenth step. At the end, we remove a sheet of paper from under the press and dry it in the open air.

Our unusual homemade scented paper is ready!
Such leaves can be used not only in the scrapbooking technique or for writing various romantic messages, they can also be supplemented and decorated, for example, using them as wallpaper for walls.
Using the methods of creating paper with your own hands described above using the example of two master classes, you can later give it a special look using hand-painted paints. Such paper can acquire the most incredible shades, patterns and ornaments. You can paint such paper with paints, wax crayons or pencils, it will turn out very unusual, beautiful and unique.
«Masterclasses» © 2011-2017 .
All articles on the site are copyright, copying is strictly prohibited. With partial citation, a direct indexed link to the Masterclasses website is required.
According to the textbook decorative trim"and the book" Decorating rooms with your own hands.
Today, you can make homemade paper at home with a minimum of costs and materials. It can be further used for decorating panels, albums, making various postcards, books. Such paper will not be superfluous in floristic works. For its manufacture, almost all paper is suitable, which has already worked out its own and is no longer needed on the farm. You can, of course, buy cotton fluff and linters, which are sold in specialized stores for artists, or order these fibers in online stores, but for the first experiments, it is quite possible to get by with old postcards, drawing paper, and packaging store bags. The only thing that is not suitable for work is the glossy paper of fashion magazines and paper from waste paper. Can be combined different types paper, achieving an interesting texture, and dye it with any dyes that are not afraid of hot water.
 Making homemade paper at home is easiest using the deckle and mold method. To do this, you will need a simple frame of the desired size, some fiberglass window mesh (gauze is undesirable - it stretches very much), an iron mesh with cells of 1 - 1.5 cm about the size of a frame, construction adhesive tape, a furniture stapler, polyurethane varnish for the frame optional and wire cutters.
All work can be conditionally divided into two parts: preparatory and paper making itself.
 Preparatory work
- this is the manufacture of a mold from a wooden frame with grids, for which first an iron grid is attached with a stapler with stainless brackets in the center of each side of the frame, exactly the same size as the frame. Excess mesh is trimmed with wire shears. A piece of window mesh, slightly larger than the frame, is placed on top metal mesh and begin to attach it with tension, moving from the center of each side to the corner and placing brackets every 2 -2.5 cm.
Preparatory work
- this is the manufacture of a mold from a wooden frame with grids, for which first an iron grid is attached with a stapler with stainless brackets in the center of each side of the frame, exactly the same size as the frame. Excess mesh is trimmed with wire shears. A piece of window mesh, slightly larger than the frame, is placed on top metal mesh and begin to attach it with tension, moving from the center of each side to the corner and placing brackets every 2 -2.5 cm.
 At the edges of the frame, the excess mesh is cut off and the brackets are closed with a wide construction adhesive tape, bending it around the sides of the frame. The form for making homemade paper is ready. Often, another frame is prepared separately for work, exactly the same size as the main one, but without grids. It is simply applied on top when scooping out the next portion of the paper pulp, so the sheets of homemade paper are thicker and stronger.
Making homemade paper
Pieces torn paper with sides about 2 cm in size, pour hot water and leave overnight.
 It is desirable to grind the pressed paper mass further. This can be done as in the manufacture or use the help of a blender, in which small portions of the squeezed paper are placed.
Important: it is imperative to add at least a liter of water to the blender mixer and it must work in short bursts.
The crushed paper mass is transferred to a large container with warm water and mixed well.
 A wooden frame with attached nets (it is called a deckle) is immersed with the nets down into the container and drawn along the bottom from edge to edge, then the shape is taken out, trying to keep it as even as possible.
Gently shake the form from side to side, trying to remove excess moisture.
 The form is placed with paper pulp on the fabric and wetted on top of the frame with a sponge from excess moisture, then the form is removed. To make large sheets of paper, it is not necessary to make a huge shape, you can make a sheet of several leaves, laying them in layers on top of each other and compressing the seams with a sponge.
 In order for the sheets of paper to be even and smooth, they are allowed to dry in the air for several hours, and then the resulting paper sheets are placed between pieces of cotton fabric. This whole "sandwich" is placed between two heavy boards.
Important: if a bath is used as a container, then you need to remember that the paper pulp should not fall into the sewer. Its remains must be caught out of the water with a sieve, squeezed out and allowed to dry. Dry paper pulp can be used to make the next batch of homemade paper.
It remains only to wait for drying and homemade paper is ready.
Making homemade paper is a very exciting process that allows you to create something unique in texture and color from a pile of unnecessary pieces of paper.
For those who are no longer interested in ordinary manual craftsmanship, I suggest making homemade paper. It is not very difficult to do. By making paper with your own hands, you open new doors of mastery in your work. In this article you will find the necessary list of all the required materials and tools, the process of creating homemade paper will be described below, more will be offered helpful tips with recommendations for creating homemade paper and a video.
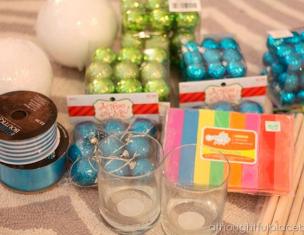
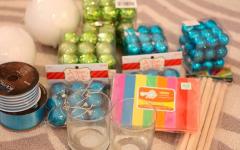
Necessary materials and tools for making homemade paper:
- Mixer;
- Christmas needles;
- Gauze;
- Sponge for washing dishes;
- absorbent wipes;
- Feathers;
- PVA glue - 0.5 teaspoon;
- Wooden cutting boards - 2 pieces;
- Tray with plastic mesh;
- A bowl;
- Towels - 3 pieces;
- Napkins - 30 pieces.
The process of making homemade paper:
We start preparing homemade paper by tearing the napkins into small pieces, then pour them with slightly warm water so that the napkins are covered with water.
Our next assistant will be a mixer that will help bring wet wipes to a homogeneous mass. Then, in this mass of paper, add 0.5 teaspoons of PVA glue along with Christmas tree needles - mix everything thoroughly.
Now we take gauze. We put one of its edges on the grid of the tray, pour ½ of the paper mass there, evenly align everything. We put feathers on the surface of the paper pulp, pour out the second part of the paper pulp, close the mass with the second edge of the gauze.
Then we raise the grid of the tray so that the water can drain. It is constantly necessary to wet the surface of the mass with a sponge, squeezing out water from there.
The mesh with gauze should be transferred to a towel, the paper should be blotted with napkins that absorb moisture.
The top of the gauze should be slowly removed. After we prepare the cutting board, on which you must first lay a towel. We spread the mass of paper on a towel, then remove the second piece of gauze. At the same time, we cover the paper with another towel, and put a second cutting board on top. On the boards should put oppression.
Periodically for several days, it is worth changing towels, thus helping to dry the homemade paper.
1. You can dry the paper much faster if you do not put a second cutting board on top, but then your paper will lose its proper smoothness.
2. To make the paper multi-colored, gouache can be added to the paper mass or multi-colored napkins can be used.
3. Flowers can be applied large sizes, leaves, newspaper pieces and more on one side of the paper to create decor.
4. If you do not have napkins, then you can use cardboard packaging or toilet paper instead.
5. For filling, you can use dry flowers and grass, multi-colored threads of short size, small shells or pebbles.
I bring to your attention a video in which a master class on creating homemade paper will be presented. So let's see!
I hope this article has brought you a lot of fun and creative inspiration. I wish you good luck and the birth of new ideas!