The local area must bear the positive and give a charge of cheerfulness. In addition to welcome vegetation, it's great when it is located unusual fabulous characters. Looking at their smiling faces, you always want to believe that everyone around us wish you happiness.
Such figures in the assortment offer professional manufacturers. Their goods are impeccable, beautiful, practical and born. But many prefer to equip their yard crafts for their own manufacture. Let them not have such professional, but made with a soul, according to their own views and tastes.
Fabulous hero with whom early age All children get acquainted, is a kolobok - this cute character who is entertaining and instructive. Due to the simplicity of the forms, each wishes to work in this direction is available in the manufacture of such a country resident.
Most. simple option It is painting any round item and applying an eye, nose, smiles on it. Figures 1-3 show exactly such models. At the same time, the figure can be supplemented with designer elements: golk, cap, legs, legs, curly hair, a basket (Fig. 4, 5).
Paints for such work should be used by those designed for external work, since the hero installed on the street is subject to precipitation, wind, other negative environmental factors.
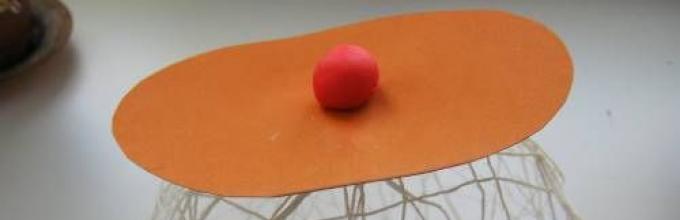
You can arrange such figures in different ways, for example, to strengthen the bunches on the hemp - rice. 7. It is convenient for the game, and protect the product from the stretch with rain puddles.
From the ball and the twine
How to make a bun from the twine? Such a craft is obtained original and creative. She is not very similar to a bun from a fairy tale, but emphasizes the style and fits well into the country ensemble consisting of original wire parts. It is possible to add it to internal illuminations and make it an element of decorative lighting.
The next master class will help this:
- Inflated the usual round balloon. You should not put the goal to inflate the most, otherwise further work will be difficult (Fig. 8). The thread connecting the inflatable hole is left for the closer - it does not have any further meaning.
- The end of the selected twine is attached to the smooth surface of the ball (Fig. 9).
- The whole surface is lubricated with glue, the twine is quickly wounds, also treated with glue (Fig. 10). Winding must be performed evenly in all directions, trying to maximize the smeared surface. The more the twine will be attached, the more dense it turns out the bun. For a more dense bonding on the already applied layer, you can additionally apply glue and, without expecting the final drying, work further.
- After drying the design, the rubber ball is bursting by piercing (Fig. 11) and is pulled out through a specially done hole (Fig. 12).
Kolobka's layout is ready. Getting to decorating it. From colored paper, fabric, cardboard or foam plastic make a hat, beretik, bows or hat (Fig. 13). Confirm glue, preferably in several places.

We draw up his face, especially fixing attention to good features and expressive eyes (Fig. 14). And the bunny of girlfriend is ready to decorate any plot. The twine can be of any color, but the yellow shade will be more realistic, because the creation of the dough is exactly this.

Of Mounting foam
Another interesting way - Production of a split from the mounting foam, you can use the ball:
- Covered by its foam in several layers, giving them alternately dry (Fig. 15). On the protruding places we apply foam more (nose, mouth, etc.).
- For the handles and legs, we harvest the tubes, which are also processed by foam (Fig. 16).
- Stain all work in yellow and allocate face features (Fig. 17).
Similarly, the manufacture of a kolobka for giving with their own hands from the gypsum (Fig. 18-22). Working on him for the garden with their own hands, we give the figure to a part of your soul, try to make it good and fun, as well as recognizable. Often surround the vegetation, the heroes of the same or other fairy tales.
From Papier Masha
An interesting and extraordinary version of the manufacturer of a kolobka from Papier-Masha (Fig. 6). Here, a method for amazing a round item with a mixture of moistened crushed trays for eggs with PVA glue is used. Applying such a layer will give the sculpture of volume, inhomogeneity, visual naturalness. After drying the form, the water-level paint is applied to it, better white color. As it dry out, it is embarrassed by staining the mock-up of a ribbon yellow paint (final version).

To make the facial features volume, in the locations of their location, the paper mixture is glued with a thicker layer. After complete drying, a knife can be more expressively cutting dents and protrusions, fix the relief of the eyes, mouth (of course, in a smile), the nose, ears.
From the same material you can make a golk or takes. Painting will not be much difficulty.
In order for the figure from such a material to be practical and stood safe until the end of the country's season, it can be covered with glue once again before staining, or another makeup to strengthen the design with street work.
Kolobok from papier-mache with their own hands on the country looks original and interesting. Especially since it is possible to decorate it in your own taste. Additional details Made from:
- fabrics;
- wire;
- foam rubber;
- tree and other materials.
Conclusion
Amateur masters often resort to the manufacture of figures from plastic bottles. For a kolobka, this is not the most appropriate etcher material, but it can be used to design the external design of the lawn, on which it is worth or attributes it is decorated.
For people who want to give their own sections of originality, there will always be an option how to make a born for a garden. This cheerful and smart fabulous character will make the games of children interesting, and the local area is more well-groomed.
In contact with
Crafts from Papier Masha are widely popular. This is successful of different ages and adult people. There is nothing surprising.
You can make a simple to the holiday or, but you can create and real masterpieces that are not ashamed.
Features of the material
Paper Masha is a mixture of paper mass with adhesive substance. As the basis (filler), any crushed. One of the most technological materials is considered because It is well soluble in water, forming a homogeneous mass.
 Papier-Masha is a mixture of paper mass with adhesive substance
 The binder is the adhesive composition. The most common options are:
- Ordinary stationery glue or. It is most suitable for simple crafts performed by children of junior preschool age.
- Wall-made glue. Easy to prepare that and provides widespread use.
- Paste. It can be prepared independently, dissolving starch in boiling water when stirring.
To give certain properties of the mixture, other components are additionally introduced. The plasticity of the mass gives vegetable oil and. To give strength to crafts after rejection, plaster, alabaster or putty are added to the raw material.
Attention! Each master has its secrets of preparation of papier-mache and correctly adjusts the recipe by an experimental way.
Production technology of crafts from Papier Masha includes several stages:
- Preparation of the source material.
- Formation of the foundation. Several options can be used. - The mass is folded on a flat surface in the form. The thin-walled - thick mixture is covered with a complex form, while the mass repeats all the depressions and bulges. Characteristic example - masks. Volumetric figures - they are formed on the frame or by analogy with the plasticine. So you can make dolls and.
- Rejection of crafts in natural conditions. The process may occur for several days during which the product should be alone.
- Staining. After complete hardening of the figure, its final painting is produced with the drawing of all parts. The optimal option is. The volumetric staining is ensured by adding the desired dye to the desired raw materials (pigments, gouache). Often the figures are covered with varnish (colorless or with a toning effect).
Papier-Masha is quite a fatty material. Depending on the consistency, it can fill and repeat the most.
Idea! It is possible to make decorative dishes, vases, caskets, figurines, a variety of masks and decorative elements in it with your own hands. different style. Fantasy Master is not limited.
 Papier-Masha is quite a fatty material. Depending on the consistency, it can fill and repeat the most complex forms.
 Where can you start
Inflated ball Pucked by paper pieces, and after the blank is folded, pumped and neatly removed outside. After coloring, a funny bun is obtained.
 Another simple handicraft - "Kolobok"
 Crafts for the new year
New Year's crafts from Papier Masha can replace Christmas toys and decorate the room. Beautiful balls can be made in engine technique.
For such toys, you can take any basis - rubber, plastic balls. The paper pieces are glued on top, which are painted and vague. Papier-Masha surface can be decorated with sequins or small colorful pictures.
 New Year's crafts from Papier Masha can replace Christmas toys and decorate the room
 The mixture is prepared for the manufacture of volumetric figures decorations. It is best to use toilet paper. A sufficiently plastic mass can be obtained by dissolving 1 paper roll in 700-750 ml of water.
After receiving a homogeneous mass, the water should be squeezed, add a binder (PVA glue, wallpaper glue or hubble). The mixture should be reminded by consistency thick sour cream. Making figures can be used by children's sand molds. The mass is poured into them, and after the hardening is neatly removed and painted.
 Beautiful toys can be made in engine technique
 Features of the manufacture of cubs
There are many options how to make a doll from Paper-Masha - from very simple children's crafts to original artistic creations.
The mass is prepared on the basis of loose paper - toilet, napkins, egg packaging, etc. PVA glue, wallpaper glue or hubbean is used as adhesive composition. The consistency of the mass must match the soft plasticine.
 There are many options, how to make a doll from Papier-Masha - from very simple children's crafts to original artistic creations
 Simple doll It is manufactured in this order:
- From plasticine, a form for the head. It is then covered with a thin layer of paper mass. After his hardening, it is necessary to make an incision through which remove plasticine. The final formation of the thickness of the workpiece is performed by adding the desired amount of mass. Thickness should be 5-6 mm. Eye deepening, nose, mouth, ears are formed.
- For the body is collected wire frame. It is superimposed by a cooked mass with the simultaneous formation of neck, arms and legs.
- Connection of the body with head with the help of PVA glue.
- Shoots outfit dolls from the fabric of the desired color.
- The whole doll is painted white acrylic paint. You can add a small peach shade. Draw feathers face.
- Hair is performed from Moulin or woolen thread. They are glued to the head, a hairstyle is formed.
- Clothes wear and fixed.
From Papier Masha you can make a complex doll with movable elements (hinge doll). Such an exercise forces to experience the master.
She is going to prepared in advance drawings. The composition includes such ingredients: toilet paper, PVA glue, putty on a plaster basis, detergent liquid.
 From Papier Masha you can make a complex doll with movable elements (swivel doll)
 Prepared by weight as follows. The dissolution of the paper is produced in hot water (55-65 degrees) for 5-6 hours, it is better to use a mixer for mixing. After receiving a homogeneous mass, the water is pressed through the gauze, adhesive and detergent (1 tbsp. L. Per 1 l of the mixture). The latter in the mixture is introduced with a putty (120-140 g / l).
All elements of the dolls are enclosed from papier-mache separately. For a moving connection, there is a durable tight gum or a screw connection. In the latter case, the screw is inserted into one of the parts, and in the adjacent element - the nut. The articulation surfaces must be well processed to provide a dense adjacent.
Technique Steampunk
Recently, the steampunk style figures have entered the fashion. In fact, it is a fantastic allegory with the transfer of vintage and wonderful elements.
In such figures, originality and irony are especially valued. The journey of the constituent elements may be the most unexpected, but they should create a single impression.
 Recently, Steampunk Style figures have entered the fashion
 As an example, crafts in the style of Steampunk can consider the manufacture of fantastic fish.
As materials used papier-mache, foam panel, cardboard, organic leaf, leatherette, carnations for furniture upholstery, various small gears, seashells and all sorts of spare parts of household appliances.
 As an example, crafts in the style of steampunk can consider the manufacture of fantastic fish
 The base of the fish is performed from a foam panel with a thickness of 1-1.5 cm. It contains one longitudinal and several cross-ribs of corrugated cardboard. The whole base is covered by papier-mache in the consistency of soft plasticine.
Finniks are filled with a logging of an organity in a carton and fasten on the papier-mache. Cups can be formalized from rings for curtains and leatherette. Various parts of mechanisms are installed on top. Here you have to show fantasy, because A certain order is not provided.
 It is important that the fish looked like a mechanized monster
 It is important that the fish looked like a mechanized monster. Shells are hung for decor. You can pour out a shape with a sandbox. The billet is then ground with the creation of a brown background, and some details are highlighted by acrylic paint golden color. Finally, the fish is covered with a varnish of 3-4 layers. The size of such a handicraft is 85-100 cm.
Making masks
Some of the most impressive crafts from Paper Masha are African masks. Such manual creations are able to decorate the interior of any apartment. Their size is in a height of 35-37 cm, in width - 21-24 cm.
Mass prepares based on toilet paper. For one mask, 2 rolls will be required. Paper dissolves in hot water, and then mixed with PVA glue (420-440 g), and it is necessary to take thick glue for construction work. Linseed oil is added to impart plasticity (3 tbsp.). When mixing, the mixture is desirable to use a mixer.
 Some of the most impressive crafts from Papier Masha are masks
 For the form, a spherical PVC tray for products is well suited. His configuration resembles a mask. A layer of Pape Masha is superimposed on that form. Separately laid out the main details - nose, eyebrows, lips. Eyes are formed.
Smoothing is provided with fingers, as well as stack and knife. For complete casting, the crafts will take 12-14 days. Then the mask is putty thin layer and grinds after drying the putty. The surface must be perfect smooth.
 Such manual creations are able to decorate the interior of any apartment.
 Mask staining is carried out in special mode. Initially, the primer is applied, and then the entire facial surface is painted with white acrylic paint. The next step is to apply from the top of the black paint.
After drying, the pearl enamel is superimposed with the help of a sponge in the right places. The final operation is an acrylic varnish coating. You can use a glossy or matte lacquer. The photo shows examples of films.
 The photo shows examples of films
 In addition to the specified colors, African masks can be painted in other colors. Frequently used elements of red, yellow and blue shade. Decorate the craft and special details - piercing.
Papier Masha is fairly considered excellent material for different crafts. Simple products Even small children can make. Teenagers and adults have such creativity to grow into a hobby. Their creations are able to decorate the interior of any apartment.
Ekaterina Kalugina

To work B. technique Papier"We use cardboard cassettes for eggs, water, PVA glue.

Cardboard cassettes from the eggs are finely rotten and fill with water, we leave for several hours, let me wake. Then grind a blender. Excess water pressed, add a little glue PVA (or wallpaper glue). We are ready for a great mass for any crafts.

We form a ball. If the mass of the liquid, then press excess water, if, on the contrary, dry, then add water and glue.

In a bowl, we make a hole for your finger. Leave the ball to dry up, from time to time turning the ball and correcting the form if it is deformed. Someone dries in the oven, it hits well in the sun, we did not hurry, so our kolobok Dried a couple of days in a natural way on the windowsill.

Exceeded kolobok Purchase toilet paper or napkins (pre-rummage into small pieces, dipping PVA glue into the water diluted with water. Valve kolobok again dry, It will take much less time. we kolobok They painted with yellow gouache, put the dryer again.

Gouache painted our face kolobku and covered with varnish(we have it ordinary furniture). Dried lacquer a couple of days and our Kolobok - Ready.

To Kolobok did not pour out, we made a penny for him to: The plastic cup from yogurt was placed with napkins in several layers, from the folded newspaper tubes Made roots, covered with gouache and varnish.

Here is like Kolobok on hemp Now lives in our group in the theater corner, participates not only in theatricalization, but also often the guest in the development of speech, plays with us to various games. Guys Kolobok really likesAs soon as you put it on my finger, he comes to life.
Publications on the topic:
Master class: Fruits do it yourself. Manufacture in the technique of Papier-Masha. Purpose: Formation of skills and skills in the design of products in.
Hello respected guests of my page! I bring to your attention the master - a class of making fungi in the technique of Papier - Masha.
Papier Masha "Mushrooms for the site" Free activities of children in senior group "Bee". To fulfill this work, we will need: newspaper, white.
As the wonderful approach new Year's celebration, I decided to make a New Year's plate in the papier-mache technique. Purpose: Formation.
Before the New Year, we took part in the district view - the competition "The Best christmas tree toy For Christmas trees in Vorontsovsky Park. "(Yes.
Master Class. The creation of the teacher with children. "Monkey in Papier-Masha technique." We are participating in the city competition every year.
The material is designed for music leaders and teachers dough. Purpose: Production of an attribute, for a surprise moment.
Papier-Masha is the form of a mixture from which you can independently create an original craft at home. This French name is literally translated as "chewing paper."
Papier Masha is a mixture of cardboard (paper) with adhesive materials (gypsum, starch). From such a mass can be made independently at home ornamental decorations, children's toys or furniture.


Workplace
To create a papier-mache, a large spacious table will be required. It must be closed with a glue or paper (newspaper), which will not be sorry to throw out after work. Next to the workplace must be kept dry fabric to wipe the hands from the glue.

Before considering the options for crafts from Dad-Masha and the necessary tools for this, it is worth reading the instructions to make a papier-mache, production techniques and some nuances.

Papier Masha
To date, there are many techniques for the manufacture of various crafts from papier-mache.

In order to make a large craft, you will need to work with paper and hub. What kind of papier-mache can be done? Beginner handicrafts are advised to make small crafts and only after trying to create toys and interior items.

The most popular technique for the manufacture of similar crafts - Mask. The main principle - sticking ripped paper layers on the subject. After waiting for paper drying, remove it from crafts, color and cover with varnish.

This manufacturing technique is very easy to perform and can be mastered by children. Simple crafts Papier Masha is suitable novice needlewomen. This method is used in the manufacture of plates or cups.

First you need to grind paper, pour it with water and mix thoroughly. The prepared mixture is left for a day, then pressed and add glue.

For maximum plasticity, experienced needlewomen advise add 2-3 tablespoons of any of the oils. If you carefully pack the prepared mixture into the food film, you can save it in the working form in the refrigerator.

What crafts can be made from papier-mache
Similar equipment manufacturers make it possible to create interesting interiors, children's toys, caskets, dishes, etc. The greatest interest in this hobby is shown by children from five to ten years.


Such classes raise the mood to children, develop motility and perception of beautiful. Such a hobby does not include any particularly complex action. The main thing is perfection.

How to make a papier-mache yourself
Beginner needlewomen advise to begin to engage in this hobby from the manufacture of plates. Try to attach children to this session. This will make the process of making crafts from Paper-Masha any complexity more fascinating and cheerful.

First you need to cut paper (white) or a newspaper on small strips. Next, we prepare the foundation for crafts - a plate. In a separate dish, mix the water and glue PVA.

Lubricate a plate with oil or cream. This will provide easier paper from the base. Next, do the sliced \u200b\u200bpieces in the water and stick them. At the beginning lay out one layer. It must be thoroughly wrapped with glue and lay out the next one. Repeat the process is worth it until the layer thickness reaches three to five millimeters.

As soon as the billet reaches the necessary thickness, it is left dry at room temperature. After complete drying, carefully remove the workpiece from the base.


For the beauty and smoothness of the surface, treat it with sandpaper, and apply a layer of putty on top.


Similar plates will perfectly decorate the interior of the apartment, at home, zone in the photo studio. Show your fantasy, inspire the photo of Detail Paper Masha on the Internet. Create a product from papier-mache is inexpensive, but it will be interesting to look like a fake.


How to make a tiger-piggy bank from papier-mache
In the Internet sources you can find a lot of master classes on papier-mache. Here is one of them: the creation of a tiger-piggy bank. This will require: white paper - 2 liters, sheets of newspaper, plasticine, bank, glue, holter, gouache, acrylic varnish.

First of all, prepare the kleuister (boiled and cooled mixture of cold water and starch). Bank turn over and put on the floor or table. It is fascinated by plasticine, forming an animal muzzle.


In order for the piggy bank to turn out to be stronger, leave it overnight for drying. After it should be booing with white paper using PVA glue.

Give the workpiece a little dry, and then cut it into two parts. They must be removed from banks and connect again with the help of plow and white paper glue.

Top we make an incision suitable for coins. The workpiece is processed from above the white gouache, and after drying, you can begin to color it. Piggy-piggy bank ready!
Stock Foto Papier Masha Crafts


I asked me somehow daughter to make a bunker - cradle. Began to ask about what exactly she wants. As a result, we decided that the bun should be waterproof, because Planned with him to have breakfast. The choice fell on the papier-mache technique with further coating acrylic paints.
I read the master classes, and I realized that sticking 8 layers of the newspaper and then wait three more days "while dry" - not our option.
Therefore, I offer my variation on the topic of Papier-Masha. I'm not sure that only I thought about it, so I do not pretend to authorship.
What we need for a simple craft of papier-mache
- Slippet.
- Newspaper or paper
- PVA glue
- Warm water
- For painting our craft.
First you need to roll desired size Tight lump of the newspaper and plane it with painting scotch. I had 2 reversal of the newspaper (8 sheets of A4 format).

Now the child (3 years) poured a warm driver into a plastic trailer, we cut together and narrow the newspaper to pieces. The first layer on top of the painting scotch I walked the napkin and walked a damp brush, and then the daughter began to scat pieces of the newspaper in the driver and put on the ball in random order.

Especially she liked smoothing the wet newspaper over the crafts. Well, the handles beat in the tray with the water is the most cute business!

The child pasted about three layers of the newspaper, until he was tired. Then, from above, I once again wrapped the newspaper with a napkin and put it dry. By the morning, we had already ready for a painting ball.
Painted kolobok acrylic paints. The child drew the hair. A bun, of course, turned out with appearance "on an amateur" and far from spontaneous, but they themselves did. And, most importantly, what kind of child likes.


So I still wonder how many children (and in my opinion) like some terrible toys. That will stand main painting dollAnd the child will choose a shabby plugged mouse with a torn ear. In general, the bun for a long time lay in the kitchen for a long time, and the child with him constantly played.
As for the technique itself, the papier-mache itself, then in my version there is a much smaller number of layers and it is not necessary to wait for a drying of the crafts for a long time, and you also do not need to cut the finished work, remove the basis and then glue. Yes, because of the weight of the newspaper, the craft is not so easy as original crafts From Papier Masha, but the troubles are less, which is important for a small child participating in the process.