Olga Strebnyak
How beautiful autumn time! It was sung by poets, composers in their works, artists wrote many paintings - after all, autumn is truly a magical time. I try to use every day of this enchanting season in my work with children to show the bright colors of autumn, listen to beautiful music, read the poems of great poets, And, of course, I do not miss the opportunity to make all kinds of handicrafts from natural materials.
After all, the rose is the queen of flowers.
There is nothing in the world more tender and more beautiful,
Than this bundle of scarlet petals,
Opened with a fragrant bowl.
S. Ya. Marshak
The ancient Greeks considered roses a gift from the gods, and the Romans - a symbol of courage and embossed her image on their battle shields.
I really love roses and try to master all kinds of ways to make it from fabric, ribbons, paper, orange peel, and of course from autumn leaves.
By right, maple leaves are considered the most beautiful leaves in autumn. The guys and I have already made many compositions of roses made from maple leaves... But I believe that other leaves can be great for making them, for example, birch leaves.
I would like to offer for your judgment one of the ways to make a rose from birch leaves.
We select leaves of different sizes, about 7 - 8 pieces of small, medium and large
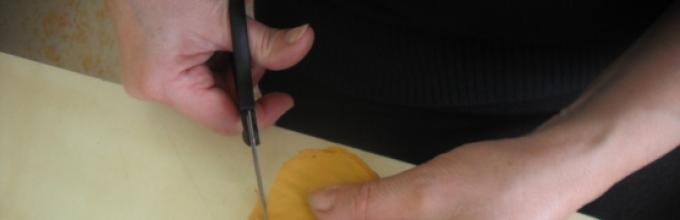
Cut off the sharp top of the leaf to give it a rounded shape.

We fold a few of the smallest petals so that one slightly covers the other.

We turn them into a roll. This will be the core of the flower.

Around it, alternately lay the following petals, small, then medium, and large.

So that the rose does not disintegrate, do not forget to often fix it with a thread at the base of the flower.


So our rose is ready. The outer petals can be bent slightly for a more natural look. For the "greenery" framing the flower, any beautiful leaves... I borrowed them from the roses themselves.

(If you need a bud, then use fewer petals).
This is the composition I got.

To keep our flowers longer, you can sprinkle them with hairspray or open them with sunflower oil with the addition of a few drops of any essential oil.
Enjoy your creativity. I would be glad if this material is useful to someone.
What is Autumn? These are the leaves! Leaves under the feet of the guys! With the arrival of autumn, the cold comes and we especially want warmth and comfort. The interior of your home can be made cozier and warmer by decorating it with natural elements - autumn leaves, dried mushrooms, acorns, nuts in a glass vase, etc.
Pumpkin decorations are also appropriate in autumn, it can be a vase or a candlestick, since pumpkins come in all sizes and shapes. They can simply be painted in bright shades with a golden sheen.
You can also complement the interior with a warm-colored tablecloth and a soft carpet.
Bouquets of autumn roses look incredibly beautiful - these are roses made from autumn leaves.
How to make roses from autumn leaves
Let's take a look at how to make them. The colors associated with autumn are yellow, burgundy, red, brown and warm orange.

For an autumn rose, maple, ash, and wild grape leaves are best suited. If you want to make a lush rose, it is best to choose ash leaves. The leaves must be collected from the tree, they are not brittle and they still have moisture.
The splendor and size of an autumn rose depends on the number of petal leaves.
The order of execution of an autumn rose:
1. Collect multi-colored, large, not dry leaves directly from the trees.

2. Roll the leaf in half, while front side should be outside.

3. Then roll it up. This is the heart of our autumn rose.

4. Place rose petals around the roll. In this case, the front side should be inside.

5. Bend half of the petal away from you. The fold line should be one to one and a half centimeters higher than the core.

6. Once again we bend the leaf outward, the inflection line is not smoothed out.

7. We wrap our roll on both sides.

8. Thus, we collect the following petals of the autumn rose.

9. Assemble the lower part with a piece of paper and attach it with threads.


10. For greenery we take the most variegated leaves. First, iron them between the paper. Then we carefully decorate the bouquet with them using a teip tape.

11. Our rose from autumn leaves is ready!


Master class: roses from autumn leaves video
Hey! It's October. The aspen is about to turn red. And this means - the time has come for roses and autumn leaves! For the brightest and fabulous rose is obtained, in my opinion, from aspen leaves.
However, we will tell you step by step instructions on the example of our rose, which we made in September. At that time there was still no smell of aspen leaves, and indeed it was difficult to find red leaves.
As a result, we collected: three randomly reddened aspen leaves, many maple leaves - very bright, but very susceptible to all leaf lesions and darkening, and many burgundy loach leaves. This is all that we found, and we got this rosette:
Here we will tell her today.
Despite the fact that I have last year's arsenal in my arsenal (by the way, that's where the aspen leaves flaunt, here they are - how bright!), This time we used a couple of chips to improve the craft and, as you can see, this rosette of ours, cultivated with her own hands turned out to be a more perfect person.
So. Let's get started!
How to make roses from leaves - Step by step

pictures can be enlarged by clicking
We need
- The leaves are beautiful and vibrant. Red, orange, yellow are the colors of your rose. Better - large. Just in case - a lot. Let's say twenty. You never know what.
- Maple green leaves. Several. Five pieces. A couple are smaller, the rest are large.
- Juice straw. This is approximately the same as in the photo. Not very narrow and not very wide.
- A twig for a stem. Important! On a branch-stalk in the upper part of it (you can cut it to length in the right place), the juice tube should be very well put on and not very dangling. So - go looking, take a straw for juice.
- Elastic bands for weaving.
- Double sided tape.
- PVA glue, I think, will not hurt.
- Hair fixation spray. Moreover - it is for the hair. Why so - I will write in the paragraph on how to save a rose.
- A pot or vase in which our rose will flaunt. How we made this pot, I will write in brief later. Here we did ... Or you can think of something simpler. By the way! You can quickly and easily make a vase from a bottle and rubber bands. ... Only the bottle here should be narrow and long and, perhaps, not cut at all.
- If you have chosen a pot then, attention! The rose must hold very tightly in it! We naturally have papier-mâché inside. How to do it,. It can also be plasticine or modeling mass, but note! This will take a lot. About two-thirds of the pot.
- Again, if you have a pot, you will need to make earth. You can do it simply - take ... the Earth!))). We imitated the ground with ground cones. We set up a special thresher for such purposes.
Making a rose
Petals

The first step is to take the tube. We put it on upper part the stem and cut it so that our rose and receptacle fits on the tube (such a green cup with leaves from which rose petals stick out).
Now we are removing the straw. And we start forming a flower on a tube.
To do this, we take a leaf and cut a petal out of it. Like this.

And now we tightly wrap the petal around the tube.

We do not wrap the first petal outward. Better yet, tuck the edges of the leaf into a tube with a thin stick so that the hole for the juice is not visible.

Yes! We put the petals with the beautiful side inward. So that the turned sides are bright.
We also cut them out. Only now we turn off the edge, and then attach it to the rose. From different sides. And fix it with an elastic band. You can - every petal. You can - several pieces.

here we have already bent the very first petal inside the tubes
Actually, this is exactly what we use the straw for. You can form a rose and immediately on the leg, as we did last time, but it will be much more difficult to fix the petal with an elastic band.
It turned out like this.

Stalk
We plant a rose on the stem.
If the tube does not sit tightly, we first pour PVA into it.
Yes! For those who do not know - PVA will dry up and become transparent! Don't worry about white smudges.
Receptacle
We form a receptacle.
To do this, cut out such a blank from a green maple leaf. 
We wrap our bud at the bottom so that at the top (under the flower) we get green protruding leaves-crown. We fix it with an elastic band.

Now we form a green wrapper around this crown in order to hide the elastic and protruding edges (for some reason they did not photograph the process. At the end of the last photo you can see what the receptacle looks like after “wrapping”. If it’s not clear, look there).
To do this, we cut off a long tapering strip from a large green maple leaf (let's say from 2 cm to 0), glue it on one side to double-sided tape, cut out the strip and, removing the protective layer from the second sticky side, we wrap our bud nicely and tightly below. We start with a wide edge.

I doubt, of course, that everyone will now rush to do the same (a long matter), but for those who are interested, I will tell you.
For the pot we used
- Pot base - a penny pot for seedlings or transplanting flowers
- Papier mache
- PVA glue
- Orange and green lentils
We covered the potted base for seedlings with a layer of papier-mâché, forming a beautiful pot.
Then they covered it with a layer of PVA and, sprinkling the mixed lentils in a tray, thoroughly rolled the pot on all sides.
And they left the pot alone. He needs to dry for several days.
Installing a rose in a pot
If you have a rose in a vase, then you don't need it at all.
We fill the pot tightly into two-thirds with a mass of papier-mâché and stick it into the mass of a rose. In papier-mâché, the rose holds up perfectly.
We used black taffeta. Again, it is specified more specifically.
Why exactly hairspray? Checked.
But when we tried to pour the rose with professional acrylic varnish for various surfaces - the rubber bands that held the rose together, everything corroded! Therefore, I propose to take something that probably will not hurt the rose.
We covered the rose with varnish, the stalk, by the way - and the peas too.
All is ready!

Our rose is already decorating the class of the eldest daughter and will look like a real living rose in a pot for a long time to come. Last year's rose, in my opinion, stood until spring.
That's all. All successful creativity!
Autumn gives us not only cool weather, rains and slush. Her arrival is usually accompanied by rich, bright colors, in which nature dresses. Heaps of bright leaves underfoot just ask: "Take us, put us in bouquets, take a piece of autumn with you to your house."
Let's not resist their call. But instead of banal bouquets of leaves, let's try to decorate the interior of the apartment in an autumn style in a new way. And for this we use flowers that will delight the eye for three long months, and if desired, even longer. Let's make roses out of
What is needed for such an unusual bouquet?
Naturally, first of all, you should go to the park and collect more bright ones. You can collect everything, but if you want to make the bouquet more interesting, try to find purple or crimson ones that will become the buds of future roses. Well, besides that, you need to prepare a spool of strong thread and a vase. So we don't need any unusual adaptations.

Before making roses from maple leaves, they need to be sorted out and washed - often dust, soil particles and other street dirt settle on them. Rinse them under running water and place them on a terrycloth towel to dry.
How to make roses from maple leaves?
We select 5-6 pieces of medium-sized leaves for one flower. One of them will become the base of our rose, and the rest will be its petals. As you know, each leaf has a front and back side. The first is brighter and smoother, and the veins are better visible on the reverse. We fold our leaf horizontally in half. We twist the resulting workpiece tightly with a roll. The core of the bud is ready.
Next, we move on to winding the petals. We take the next sheet, we also fold it in half, but this time so that when applied to the core, the bend is slightly higher than it. The front side of the sheet should be on the outside. We slightly bend the part protruding above the core outward, and then wrap the edges around our bud. Then we take the next sheet and do the same operation, but this time on the other side of the core. The first two petals are ready. So we continue to wind the next leaves until the moment when the bud becomes the right size and splendor.
Now we proceed to the final stage. We wrap the finished bud at the base with a thread and fix it firmly. We make roses from leaves by the same method further. After that, we collect them together, wrap them around the perimeter with large maple leaves - this time they will be the border of the bouquet, and also mask the protruding cuttings at the base of the roses. Tie the resulting flower with threads and put it in a vase without water.

These roses will be a beautiful addition to the interior decor. In addition to the ease of manufacture, they are also attractive for the brightness of the colors. You can make monochromatic - lemon yellow, orange, red - buds and combine them with the same thematic bouquets. And you can combine different leaves in one flower - you get very funny variegated roses. In addition, ready-made flowers can be sprinkled on top of the most ordinary varnish for hair. And if it is also with sparkles, the buds will acquire a pleasant shimmer. Well, if you have a spray can of silver or gold paint in your house, you can make futuristic roses in these shades. Such flowers can be used as Christmas decorations, if you carefully cut the cuttings of the sheets and attach a thread loop to the rose.
Conclusion
Now you know how to make Such crafts can become great gift for friends and family. If you are asked about how to make roses from maple leaves, be sure to share your skills.
, natural leather and other materials at hand for making crafts, from which we learned to make beautiful artificial flowers.Autumn has long come into its own and painted the world around us with bright, multi-colored colors. Autumn gave us wonderful natural materials for making unique DIY crafts - fallen from trees
autumn leaves different sizes and with bizarre shapes, as well as numerous flowers and inflorescences that we will use to make beautiful flowers, cute lamps , graceful bouquets with artificial roses, original compositions of vegetables and fruits for interior decoration.And the kids will be happy to help their parents create amazing crafts from the handyman, absolutely waste natural material ... Such joint leisure is very useful for the development of imagination, fine motor skills of hands, sensory abilities of young children and primary schoolchildren.
From autumn natural materials you can make not only simple crafts, children's educational toys, applications and herbarium. Interior designers have long adopted the unique beauty and indescribable sophistication of autumn gifts. The walls of the rooms can decorate with exquisite panels and paintings with compositions in the form of flowers from autumn fallen leaves (maple, oak, chestnut), folded with their own hands in a special way. In order to use fallen leaves of trees and dry flowers for making crafts , bouquets and compositions with your own hands, it is important to properly prepare these natural materials before work. You probably already know that autumn leaves can be laid between the sheets of albums (books, magazines, newspapers) and the load can be placed on top. This method of preparation is suitable for the formation of a herbarium, children's applique or collage.from dried leaves.
But for making bulk crafts and bouquets with flowers from autumn leaves fallen from trees, this method is not suitable. Before you start rolling such flowers from leaves fallen from trees (for example, roses from red maple leaves), it is important to properly process them in order to the crafts kept their original appearance long time. We will tell you about this in detail in this article later. In addition to advice and useful ideas for creating bouquets and compositions from natural materials, you will find here video lessons , as well as master classes, with the help of which you can quickly make with your own hands both simple compositions (children's crafts from leaves, applications, figures, collages), and complex bouquets and objects for interior decoration in the form of bouquets with flowers from autumn leaves ( topiary ) or a composition of dried flowers (see photo).
You will learn how to properly process and preserve maple leaves and autumn flowers so that made from them beautiful crafts did not turn into brittle, shapeless and twisted objects. And you can make any of these natural gifts of autumn in a wide variety of colors and with surprisingly different bizarre shapes. artificial flowers - big roses , little cornflowers, graceful chrysanthemums, cute daisies, gorgeous water lilies ... The color of these homemade flowers can be very different (not only yellow or red) - after all, dried autumn leaves can be painted with an acrylic primer with the addition of the desired color scheme (and then covered with colorless varnish). With the help of helium pens, you can apply different patterns and geometric figures on a surface artificial flowers autumn theme.
Ideas for creativity:
- Application.
A great idea for spending leisure time with your child! Have you already collected many beautiful fallen leaves and autumn flowers in the yard, dried it, made a colorful herbarium? Let's not stop there! Spread a large sheet on the table thick paper or cardboard, lay out our "harvest" on it and put together an original composition, combining colors and different forms of natural materials ... You can glue the details of the autumn composition to the base with PVA glue (but it is better to use photo glue or gum arabic);
- Collage.
You can put a multi-layered bright collage with your child under the frame. The lower layer is large dark and brown leaves, then greenish, the upper layers are small bright contrasting leaves of red and yellow flowers... Add dry autumn flowers to the collage, adding different shapes from them and get a beautiful volumetric composition.
Or you can add letters or words (as well as shapes) to the collage - tightly press a sheet of cardboard with cut letters to the glued composition and carefully cut out the letter pattern with a clerical knife (of course, by the hands of parents, not a child);
- An educational game for a child.
A great idea that your little one will love preschool age! Glue a half of a fallen leaf on a paper sheet (first cut the sheet vertically). The child's task is to draw the missing half of the sheet with a pencil (felt-tip pen). Advise the kid to choose suitable color pencil and carefully look at the shape of the halves in order to accurately reproduce the mirror part of the composition. The most difficult option is a maple leaf, leave it for later and help the kid draw a little;
- Painted autumn leaves.
You can decorate both flat and voluminous leaf crafts with painting. For this work, use helium pens and felt-tip pens (with silver, gold, white and other colors). Bouquets with decorated artificial flowers will be fine and other interior objects;
- Bouquet of autumn leaves and dried flowers.
You will find information below how to fold flowers from maple leaves with your own hands and collect a bouquet from them. If you decorate such a bouquet with dried flowers and put it in a small wide vase, you will get an excellent compositional center for your room; 
- A tree or topiary made of autumn materials.
Another great option for interior decoration. From the fallen branches, you can fold a small tree and decorate it with homemade flowers made from leaves. Or fold the topiary with your own hands (see photo) by attaching many of these flowers to a floral ball (option: to a foam ball); 
Tree (photo):

- A three-dimensional picture of the gifts of autumn.
You can use a large photo frame or a wooden picture frame as a base. The background can be done made of cardboard, painted in a suitable color ... We make interesting compositions of maple leaves, dried flowers, fallen pine needles and other natural materials with our own hands, attaching them to the base with a wire.
Helpful hints:
How to prepare autumn leaves for making crafts and appliques at home.
- for voluminous crafts in the form of flowers and bouquets.
We will not be able to fold voluminous crafts from dried leaves, since they are too brittle. Therefore, we will specially process the collected leaves. We make a solution - 200 ml. glycerin per 400 ml. pure water... In a dense plastic bag, carefully put the leaves fallen from the trees and level them, then fill them with the prepared solution. The package with the contents must be sealed tightly (with a heated knife) or sealed with adhesive tape. Leave this bag in a dark closet for 3-4 days, and then spread the leaves on a paper towel to dry. From these flexible leaves that retain their original appearance for a long time, you can add a variety of flowers (below - MK: how to make beautiful roses from maple leaves with your own hands);
- for flat autumn compositions (applications, collages).
Leaves and flowers harvested in the fall are best dried in massive magazines and reference books. The collected natural materials must be properly pressed with a weighty load placed on top of the reference book.
How to dry autumn flowers for crafts and compositions:
- drying with an iron.
Autumn leaves and many small flowers can be ironed dry. To do this, lay out natural materials on thick cardboard. , cover the top with a thin paper sheet and iron with a not very heated iron until all the moisture evaporates;
- natural drying.
great option for drying autumn flowers. Tighten the rope in a dry place with good air circulation. We put the collected flowers in bunches and hang them on a rope with inflorescences down;
- drying in the oven.
a great way to dry large single flowers (roses, tulips, peonies) for making compositions. The temperature in the oven should not be very high - about 50-60 ° C. Follow the process carefully so that the flowers do not turn brown and do not lose their shape during drying;
- volumetric drying of flowers.
According to many experienced florists, this method of drying autumn flowers preserves their natural shape and color. The cut flower is placed in calcined dry sand for 4 weeks. As a container, you can use a drawer with a fine mesh at the bottom and a pull-out bottom. Flowers with double and voluminous inflorescences (lilies, dahlias, roses) are placed in the sand with stems down, and with flat inflorescences-baskets (buttercups, chamomile, asters, forget-me-nots) - with stems up.
What tools and materials can be useful for making autumn crafts:
- Scissors.
Small scissors with blunt ends for a child and sharp long ones for an adult;
Stationery knife and stacks.
With the help of a clerical knife, it is convenient to cut the multi-layered parts of the craft. Plastic stacks are great tools for child, with the help which he can cut individual leaves for application;
- Shiloh.
For convenience, choose a tool with a wide wooden handle (length - 5-6 cm) and a not very thick piercing part;
- Long tweezers and tweezers.
It is convenient to move small parts of crafts with tweezers. Tweezers with a flattened, twisted front can be borrowed from the manicure set. It is very convenient to twist individual parts of the product and wire with such tweezers;
- Thin wire.
It is often used to form the frame of crafts and toys from natural materials. For bonding separate parts it is desirable to use flexible and durable copper wire with a diameter of 0.35 mm;
- Foil and foil paper.
For decorating autumn crafts, for appliques and collages;
- Sewing needle and thread.
For connecting individual parts of crafts, for forming bouquets of leaves and dried flowers;
- Paper.
The more different types paper (differing in color, density, thickness), the better. For the manufacture of crafts, applications, bouquets, panels and wall compositions from natural materials, you can use corrugated, wallpaper, velvet, parchment, landscape, wrapping, copying and other types of paper;
- Plasticine and plastic (polymer clay).
For fastening, as well as for sculpting individual parts that complement products from leaves, dried flowers. Working with plasticine and polymer clay your child can do it;
- Glue.
A variety of brands of glue can be useful in the work. PVA, BF, Mars are often used. The safest options for a child to use are PVA and glue stick.
For gluing individual parts of the craft, hard-bristled brushes are useful;
- Paints and brushes.
To create appliques and collages - watercolors and gouache paints. For coloring voluminous crafts from autumn leaves and dried flowers - acrylic paints... It is most convenient to paint with soft squirrel brushes.
2. HOW TO MAKE YOUR OWN HANDS A BEAUTIFUL ROSE FROM DANGEROUS AUTUMN LEAVES
Such artificial flower DIY is very easy! For work, prepare autumn maple leaves, strong threads, golden colors and sunflower oil. You can treat the leaves with a glycerin solution (see recipe above) for the longevity of the harvested craft.
For making a single flower, it is best to choose solid maple leaves. Roses from the leaves will turn out to be quite large. 5-7 such crafts are enough to fold beautiful bouquet... You can use the same maple leaves as the leaves for this bouquet with artificial homemade flowers. Make the roses red and yellow.
So let's get to work:
- take a maple leaf and bend it in half (front side outward);
We bend the very tip and twist the leaf into a roll;
Take the second maple leaf of the same color, put the already twisted bud in its base (see photo);
Form a maple rose petal by bending the leaf and wrapping it tightly around the bud;
We wrap the third maple leaf in the same way. The more such rose petals there are, the more voluminous and larger the rose will turn out. Move each subsequent row down a little so that the flower looks blooming;
Slightly above the leaf stalks, we fix the craft with a thread;
Similarly, we will make 5-7 more of the same roses (yellow, red, greenish);
Lubricate maple roses with sunflower oil so that the bouquet retains its original appearance for a long time. Now you can cover the crafts with golden paint;
It remains to dip a few maple leaves into a small vase, and then form a beautiful bunch of artificial roses.
3. MASTER CLASSES. LEARN TO MAKE CRAFTS IN THE FORM OF FLOWERS FROM AUTUMN LEAVES AND COMPOSITIONS FROM DRY FLOWERS
Master class number 1:
STAGES OF STEP-BY-STEP MANUFACTURE OF GORGEOUS BULK ROSES FROM RED MAPLE LEAVES FALLED FROM TREES (PHOTOS).
Master class number 2:
HOW TO MAKE A FLOWER FROM AUTUMN LEAVES. ANOTHER OPTION OF FOLDING FROM BIG ROSE MAPLE LEAVES BY OWN HANDS. STEP-BY-STEP PHOTO MK.
Master class number 3:
WE MAKE CRAFTS FROM LEAVES