Patterns of toys from Pretty Toys and the Internet
Cats are primitives
On the net you can find interesting toys made by craftswomen from all over the world. But as a rule, this is their business and they are not very willing to share patterns. Of course, you can design a pattern yourself, even from a good image, but you still have to adjust it. Mostly simple patterns here, but they are tested. I really like toys-primitives, and especially from linen or fabrics in the Scandinavian style. Sometimes I gasp from working in patchwork technique and also richly decorated. Interior toys decorate the house, make it cozy and lively. Toys can serve as a separate gift if the intended recipient loves and appreciates handicraft, but they are usually a good addition to any gift. The gift immediately becomes personal and will certainly delight the one to whom it will be presented. After all, attention is pleasant to everyone. It may happen that your toy will be thrown away soon, but even a few pleasant moments that you will give dear person are worth making and donating. After all, our life is made up of moments ... There will be cats. It seems to me that one or two patterns can be chosen by everyone.
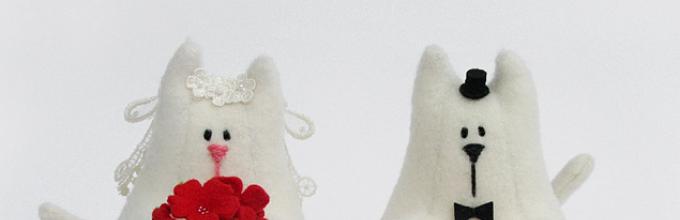
First we got a hand-drawn pattern, and then we found this pair in a magazine. " Handmade". Very light toys, but they have so much charm.
This is a pattern for seals by masters A. Udalova and O. Khlebnikova. They have made whole series of cats from fabrics of different colors and textures.


For work, you will need to increase or decrease the pattern, depending on the purpose of the toy. Now you need to pick up a bright fabric and you can sew. If you will be sewing a pillow, use a special pillow padding available from bedding stores.

Choose a bright fabric for work. If you are making a pillow, then just embroider the muzzle. Choose funny eyes for the toy. Don't forget to make a mustache.

Sewing such a toy will not be difficult even for a beginner who first took a needle in his hands.
For sewing, you need fleece in white, black, orange and variegated colors.
On the cut out parts of the body wash "strips" of triangles of variegated fabric, then sew the parts, turn out, stuff. Eyes and nose - parts pulled together on a thread, forming balls.
Note: if you increase the pattern to the right size, you can sew a roller under your head or legs.

It takes a little skill, time and good materials... Fleece, velor, short-piled fur are best suited. Eoe need to take eyes, preferably feline, special. Wire can be inserted into the tail so that it is in the desired shape. Whiskers can be made from fishing line, thread or real cat whiskers, which cats periodically lose ...
From the Internet "Kitty with a crown:


This cat can be an independent and peaceful toy, standing at the expense of its tail somewhere on the shelf. But it can be a fat and lazy cat lying under ... your head strong half... Yeah, nice pillow It will be easy to get this pattern, and if you take a special pillow padding for stuffing, you will get an irreplaceable thing.

Everything is pretty, simple and very laconic. There are only two main details - the tail and the torso. The muzzle can be embroidered in advance on the front part of the body. For this toy, it is best to use fleece, velor, or other soft, fleecy fabric. You can make a toy out of terry cloth, but in this case, do not forget to process the edges of the blanks so that they do not crumble.

And another interesting cat with a bow:
Thanks:
A couple of similar textile painted cats from the artist Elena Borodina:


Look at the original picture (at the bottom of the pattern). Liked? And now you can sew the same toy from Tatyana Brazhenkova.
To make a toy, you will need your favorite fleece. Make an applique for the eyes and nose: stitch the fabric details onto one of the parts of the body. Stitch your nose and mouth. Don't forget your navel. Now it remains to sew on the legs and tail. Note that one piece of each piece is cut with a straight edge and the other with a concave edge. This is necessary so that the legs and tail are directed in the right direction.
Funny koteiko - thanks to the author. Many people thought that the toy could be sewn according to the drawing they liked, but only a few do. Tatiana also belongs to such authors.

Simple yet eye-catching toys that can be made from any fabric. The mice are made of fleece.
Here are some more similar cats from the Internet:


Another example of primitive cats:


Funny simple toys that you can use to decorate your home, give to your loved one, use as gift wrapping.
For making, take any fabric, eyes, noses and tails, you can embroider, you can make an applique, or you can draw acrylic paints.
A simple toy is a fun gift!
Note: It seems to me that such simple patterns give free rein to imagination. You can make a kitty in the style of patchwork or who are friends with "drawing" and paint to paint. You can even make something shabby chic or vintage if used as packaging. In general, you have to dare ...
Examples from the Internet:


A very simple pattern was sent to us by five users at once, we could not resist and present it to you. Cute, simple toys that will decorate any interior.

Stuffing the bottom with something heavy, these cats are often used as a door lock.
Examples from the Internet:


You can't look at this toy without a smile, and making it as easy as shelling pears. Try to take colorful pieces of fabric and make Vesnyanka for yourself or for a gift.
Slightly different, but similar cats from the Internet:


Just a cute and funny thing. The muzzle is painted with acrylics. Padding - synthetic winterizer.

This cat is only seemingly unprepossessing, simple and not very expressive ... Firstly, this is a toy for the little ones, therefore only embroidery and only eco-friendly materials; secondly, it is in your power to make a work of art out of it; and, thirdly, try to cut the fur details ...
You will be surprised how this cat becomes a beautiful, interesting creation. Just don't forget to make a tail.
Another pattern of the Sly cat
The toy is not very difficult to make. Various materials can be used.

Wrong, funny cat? His name is Kotinka.
You can sew this toy from any fabric, the main thing is that the edge does not crumble when sewing. But what color or suit your Kotinka will be depends on your desire and, possibly, the desire of the little customer - your baby.
You can even sew such a miracle from fur, but will it be convenient for a child to play with such a toy?

You can sew this kitty from any fabric or fur and even try different texture in combinations with each other. The toy is very simple, but very cute.

A very simple, very elegant toy. Fleece, plush, velvet, terry cloth of the same color will do. There are only two details and you don't even need to decorate the toy, although you can embroider the nose and make the eyes.
But this kitty is gorgeous just in this form, and even sitting on the windowsill with her muzzle on the street.
Something very similar from the Internet:


Note: There is also a pattern of details of another item superimposed on the pattern of "our" kitty.

Funny cats will be a wonderful addition to the house. Their hook tails allow you to stay almost anywhere
An example from the internet:


Today I suggest you sew just such a kitty. The toy is quite simple and requires more applique and embroidery skills than the actual sewing. This toy can be an excellent talisman and keychain for mobile phone, keys or just decorate your handbag. Even in simple toys have their own charm, which is why they are called positive toys here.

Toys magnificent in execution simple cats... which will be a great gift or home decoration.
The eyes of these cats can be painted with acrylic or embroidered, but it is better to make them with applique.
Try to make this pair for yourself or for loved ones and, believe me, you will enjoy the result, and the process too.
An example from the Internet (offered as a gift for lovers):
More photos here:

For one pattern, you can sew all three participants, you just need to increase the pattern for one of the three.

The brightest fabric in five colors is needed for this toy. Everything is very simple, the catch is only in the correct fit of the details. But we are sure you will succeed just as well. Do not forget to sew colored laces or elastic bands into your paws and head.
Note: I don't quite agree with the comment here. It seems to me that such a precise execution is needed here that contrasting fabrics will emphasize all the flaws. Better some one fabric, for example, with a small flower and decorate with multi-colored laces or threads or cut stripes.

A funny kitten that can be sewn from any suitable fabric. Head and back strips can be made from felt, drape, or other non-flowing fabric.
The eyes can be used ready-made from the online store, or you can take two matching buttons. In short, everything is very simple.
Note: we can assume that this is a pattern for a kind of "moon" kitty.
MK (in English) from the Internet:


An example from the internet:

Lying, sitting, hanging, in a word, all sorts of different cats for your kitchen. All toys are very simple to design and can be transformed into potholders, stands and even an apron. Any fabric can be used. The muzzles can be sewn on separately and embroidered with eyes, nose and mustache, or can be painted with acrylics.


Any thing made with your own hands is considered not only exclusive, but also “alive” since a piece of soul, warmth, energy was sewn into every detail. Interesting toys tilde cats, bunnies, bears, chickens will decorate any home, will serve as a wonderful gift.
Creating a tilde with your own hands will not take much time, but the result will delight you for a long time. In many magazines, on the Internet, there is a large selection of life-size cat tilde patterns, with the help of it you can easily sew a toy.
Pattern of a fat hare tilde
To create a hare toy, many needlewomen use a life-size tilde cat pattern, correct ears - increase to the desired size or take ready-made pattern bunny.

The pattern is tightly pressed against the fabric, outlined with chalk, allowances are taken into account when cutting. They are stitched along the drawn line, the places on the pattern of the cat, indicated by the dotted line, are left unstitched, through them the parts are turned into front side... The next step is to gently iron all the seams. All parts are filled with filler, so that each element is soft, it is not necessary to stuff it tightly, the toy can break. Further, the non-stitched places are carefully stitched by hand. All parts are assembled into one product.
Sometimes to the basic patterns of toys, patterns of clothing patterns for the tilde of a cat, a hare and others are added.
 It is not necessary to sew outfits according to the proposed schemes, you can come up with an original costume yourself.


Tilde bunny with long legs: video mk
Before you take a pattern of a tilde cat, cut the fabric and sit down at a sewing machine, you should read the recommendations of people who have experience in sewing a tilde, perhaps many tips will help you avoid problems when creating a toy, while others will push you to create, for example, clothes for cats, interesting clearance.
All seams are made only from the seamy side, otherwise the toy will look sloppy.
It is necessary to leave allowances for all seams, if the thing is being sewn for the first time, it is recommended to leave from 0.5 cm, for more experienced ones - 0.3 cm.If the allowance is large, at the end of the work the excess fabric is cut off, leaving 0.3 cm to the seam.
Of the whole variety of types and forms of tilde, choose the one that you like best, they have almost the same complexity. The tilde cat pattern can be downloaded from the Internet, and this opens up the opportunity to adjust the size of the future toy. With the help of graphic editors, on a computer, you can enlarge, compress, stretch the pattern to the required size.
Material for cats, their clothes are washed and ironed before cutting.
When sewing a cat with your own hands in places of parts with a fold, in rounded places, you should make notches at the allowance, this allows you to exclude the formation of folds and irregularities.
The finished part is turned inside out, with a long object with a blunt rounded end (pencil, pen), if you take a pointed long object, you can tear the fabric.
For the filler, one material is chosen for all parts, for these purposes it has proven itself well - synthetic winterizer, synthetic winterizer, alpolux, holofiber.
When decorating the muzzle, black small beads are chosen for the eyes, dark threads for embroidery are selected for the nose and mouth. Basically, the face can be drawn with a thin black marker or paint on the fabric.
Tilda the cat: video master class
Two-legged tilde cat
It is an excellent option for those who are afraid to start sewing. The cat's pattern is simple, even a child can handle it.

All details are paired, except for the nose. They cut out, sew, in all tilde-style patterns they leave an unwired place for turning and filling.
To obtain a neat nose, the parts are pulled together at the edges, forming a "bag", filled with padding, tightened the threads, and closed the part. Sewn to the head. Unlike a standing cat, a two-toed tilde is not worth it; it is usually hung on a hook or door handle.
Beads are sewn with black thread, a mustache is embroidered. At the stage of designing the muzzle, you need to show imagination - eyes, nose, mustache can be made whatever you want, for every taste.


Cat-angel (tilde): video mk
Pattern of a fat cat tilde
Quite simple product, well suited for beginner needlewomen. The pattern of the cat is adjusted to the desired dimensions of the future toy. Patterns are cut from thick paper.

A pattern is transferred to the seamy side of the fabric, allowances for seams are taken into account, and cut out. When sewing a cat, they begin with paired parts, iron them, fill them with filler, and carefully sew the uncovered places by hand. Collect the toy. You can supplement the cat's tilde with various items, handmade decorations.

Fleece cat: MK step-by-step video
Master class for making a tilde cat
When cooking, the toy looks very cute, pleasant to the touch, will serve as a great addition to the interior.
A small master class will help you create crafts.
The tilde cat pattern consists of a small amount of details.

To sew a toy you will need: basic plain fabric, colored fabric for clothes, lace, ribbons, black beads for eyes, black fishing line for a mustache, dark threads, 4 buttons to match the main material, filler.
Cut out paper pattern made of thick paper or cardboard. The cat's pattern is transferred to a fabric folded in half, secured with needles and outlined with chalk. Taking into account the seam allowances, cut out. They begin work on collecting the toy from the head, sew it up, leaving a small hole for turning out not sewn up and fill it with filler, after which the hole is manually sewn up. The same operation is performed with the ears.

A distinctive feature of this tilde cat doll toy is that all its legs move as if on hinges. This effect is achieved by using buttons to sew the paws to the body, poking it through and through, and the upper or lower paws are sewn at the same time.

The tail is made in the same way as other details, sewn to the back of the body.

The eyes are decorated with beads or simply painted, the nose is embroidered with threads, the cheeks are painted with special paints on the fabric, the antennae are the fishing line, pulled through the muzzle, their length is limited only by imagination.

The pattern of a dress for a cat is done like this - they measure the required length and width of the dress on the doll. A rectangle is drawn on paper from the data obtained. At this stage, you should subtract upper part dresses - it turns out a trapeze. They transfer the pattern to colored fabric, cut out two parts and fold them face to face, sew them with their own hands or on a typewriter, leaving holes for the arms and head. A hole is made for the tail with scissors. Decorate the dress with lace, ribbons, bows. Tilda is ready.


Fashionable cat tilda: video master class
Textile tilda-cat with polka dots: video mk
Selection of schemes


Sewing cats from patterns is a very rewarding and exciting home activity. Even if there are already several beautiful cats running around your apartment, there are still a couple of delicious beauties made from various materials, does not hurt at all. A cat is a wonderful symbol of home comfort, beauty and elegance.
The unconditional benefits of making cats according to do-it-yourself patterns
Having decided to do needlework, you will spend time creatively, and as a result you will get a cute toy:
- If you need to organize leisure activities for children, making cat toys is a great idea. You will give toddlers their first cutting and sewing skills, a lesson in patience, a sense of pride and creative joy when the job is complete.
- Making a cat according to a pattern is an excellent stress therapy, it calms, harmonizes, in the process of sewing, new useful thoughts will surely come to you, and important issues will be solved.
- You will clear the space of patches by filling it with cats.
- You will receive a cat that you can play with, decorate the interior, and present as a gift.
- Attach a red gift mitten to the legs - plant it under the Christmas tree.
- Decorate the cat with a heart, you will get a valentine cat.
- Sew a small cat according to a pattern and attach a key ring - with such a key ring you will definitely not lose them.
Create a holiday for your child!
For children, joint sewing of soft toys will replace educational games. When removing the patterns of cats with your own hands, give the baby a piece of tracing paper so that he learns to copy the image, then try to cut it out with safe scissors. Show how the thread is threaded into the needle. And stuffing a stitched toy with padding polyester is a safe, interesting activity, which trains dexterity and motor skills of the hands.

Of course, you should not count on the exclusive attention of a restless child to the whole process, but he will definitely become the first enthusiastic connoisseur of your labors. For toddlers, turning the rags into a cat toy is a real magic. He will benefit simply by watching what you do.
What materials to choose?
Any material is suitable for making a cat, imagination and possibilities are not limited by anything. This can be: pieces of linen, felt, suede, fur patches, unnecessary flannel pajamas.
It's great if you can buy new fabric, especially if you're making a pattern for a gift or living room decoration. If the cat takes pride of place on the shelf, choose a color that suits your interior.
What needs to be prepared for a useful cause?
Before you start sewing, print out the patterns. By choosing the desired scale, you will get them larger or smaller. If there is no printer, using tracing paper or transparent polyethylene, you need to transfer the image directly from the screen, and then cut it out. You can immediately make patterns from thick paper for use in the future.

Prepare fabric, threads for seams and embroidery of the nose, a needle, scissors, synthetic winterizer or cotton wool, sequins and small pieces of white dense fabric for the eyes, cardboard for the base.
Are you ready? Go!
- Transfer the patterns to the fabric using chalk or a sharp bar of soap. Make a seam allowance if you will connect the parts on a typewriter, cut along the contour if you will sew by hand. A loop stitch is used to make soft toys. It is very simple and durable.
- You need to carve out the eyes, two parts of the body and three parts of the bottom.
- Making eyes is a very crucial stage, the expression of the cat's muzzle depends on them. The most in a simple way will cut out white circles and sew green, blue, amber sequins to them. It's good if you have a pair of black beads to make the pupils. Eyes need to be glued or carefully sewn with fishing line to one of the halves of the body.
- Connect the large parts on the seamy side, do not touch the bottom yet. If you will be sewing them on a typewriter, then make notches perpendicular to the seam, leaving 1-2 mm in the corners and places of rounding.
- Turn the resulting workpiece inside out, iron the seams if the fabric allows.
- During the exciting process of stuffing with padding polyester, try to distribute it evenly. Shape your figurine by making it rounder or slimmer.
- Now let's move on to making the bottom. Cut two pieces of fabric, fold the wrong side to each other and insert one piece of cardboard between them, sew with oblique stitches along the edge. You do not need to turn anything inside out, these edges with stitches will go inward during the assembly of the cat.
- Sew the bottom with a blind stitch to the stock.
Now you know how to sew a cat, and you can make a more complex model.
Phoebe the cat
The patterns for this cat were developed in Japan.

It will take a little more patience and time to make the snow-white baby, which you see in the first photo. The process follows the same steps, only there are more details here.
Please note that the ears are sewn in. Remember to insert them when you assemble your head.
You will have a charming toy that will delight children, your friends and relatives.
Cute textile cats can be both a toy for a child and a cozy decorative element of your home.

What is the main difference between a toy designed for play and a decorative toy? In the first case, the most important is the strength of the toy, in the second - appearance... Of course, a toy can be both beautiful and durable, but most often you have to sacrifice something :) For example, making eyes for a decorative toy, you can paint them beautifully with acrylic paints. But for play doll or toys, this is no longer entirely acceptable, since a child can either pick out the paint or simply gnaw or lick it off. Those. when making a toy for a child, it is better to sew or embroider the eyes.
I sewed cats for my children. So what do we need?
- Textile. If you want to soft toy, then it can be fleece, felt, fur, velor, flannel, velsoft, etc. If you want a decorative toy or just a harder, more shape-retaining toy, then, in my opinion, linen or cotton are the best, interesting toys are also obtained from burlap.
I used fleece. It is convenient to work with this material, it is soft and children like it, well, and the most important thing is that my children chose it themselves, everyone preferred the fleece of their own color), so in my case it was a choice without a choice
- Stuffing. It can be anything: synthetic winterizer, synthetic fluff, wool or sliver, someone even stuffs with cotton wool. I stuffed with padding polyester and finished off with padding polyester, but one padding polyester would have been enough.

Print this pattern in regular A4 format, cut and trace on the material of your choice. By the way, I must say, I really liked to trace the disappearing markers. It's convenient and doesn't leave any residue from your markup.
When tracing your patterns, do not forget that the cat should not only have a body with a head, but also 2 arms, 2 legs and a tail.


When cut and turned out, this is what happened :)

Almost a cat:

So that the ears are not too thin, I made a pattern for the ears (2pcs) and rolled the resulting piece inside, to the ears. You don't have to do this, if you wish:

Then we sew the ears, you can also mark for yourself so that the seam is more even:

Now we stuff. It is more convenient for me to form the desired shape and volume from the sitepon at once, and then fill with the already obtained lump:

So we stuffed our heads:

Then we fill the body in the same way:

Here's what happens. Please note that I do not hem the bottom yet:

Now we outline where we will have the eyes and nose. I decided to make the eyes buttons, as I wrote earlier.

Now I sew it on as planned. Since the bottom is not hemmed - all the knots will remain inside

We embroider a mouth, antennae, hairs:

To make the cat a little pot-bellied, I finished it off with a padding polyester. This is optional, I just love chubby cats.

Now the legs. They are already stitched with us, do not forget to fill them with padding polyester or padding polyester. Then we pin with pins the way we want to sew on the legs:

And then we sew:

Now we sew the bottom of the calf with a blind seam, with the legs already sewn on. I walk back and forth several times to make the seams tighter.

Here's how to make a blind seam (picture from the Internet). In fact, this is just a scary name), the seam is very simple and convenient:

Voila, the legs are sewn:

Now we sew on the handles. I sewn a blind seam just in a circle

Now we also sew the tail. To make it softer, I did not stuff it:

That's all! The kitty is ready:

These cute fluffy animals are considered to be some of the most popular household favorites. Probably, there is no person who would not love a kitten. Both an adult and a child would be delighted with a gift in the form of an animal. Beautiful needle beds, neat pillows, stands with cats can be made by yourself. You can make a thing in the form of a pet of different parameters and from textile materials.
It will not only be a beautiful product, but also an interesting piece of interior decor or a practical thing in terms of use.
As for the patterns, you can find them on the Internet or draw a blank yourself, taking into account the fantasies and sizes of the future product.
Pillow models and options
A novice craftswoman can easily cope with the task and sew an interesting decorative cat with her own hands.
For this you will need:

 Sew by hand if the toy is small. You can use sewing machine, if there is no experience in such work. Then the seams will be even, and the product will turn out neat.
When there are no certain skills in creating toys, you can use simple patterns consisting of two parts. This will be enough for a novice craftswoman to gain the necessary experience in sewing and correct, uniform filling of the product.
This toy has two parts. First, the pattern must be cut out of paper and transferred to the fabric using a crayon or felt-tip pen. Then cut out two pieces. On one of them, attach eyes (you can draw them later or sew on blanks in the form of beads or buttons) and a nose, mustache can be distinguished with white threads.
 Sew the parts together, but not entirely, leaving space so that you can turn the workpiece out and fill the toy with holofiber. In order for the future pillow to be soft, you need to give a little filler, but evenly distribute it over the entire part. Then sew up the place of filling with a secret seam. The toy is ready.
This option is considered simple, you can also make pillows from several parts. H The more elements, the more interesting the product will be.
In this version, felt of different colors is also used - for details of the eyes, nose and belly. You can sew a cat's tail, then the pillow will also be a decoration of the sofa.
To make the sewn pillow more comfortable to use, it is recommended to cut it in an oval shape.
Patterns of cats and cats from fabric
An interesting option for decorating a sofa can be a sewn sweet couple: a cat and a kitty. If you make toys of a large size, then this will be a full-fledged pillow. If the parameters are small, then you will get a beautiful souvenir or gift for Valentine's Day.
Of course, you can search for patterns on the Internet, but it's not difficult to draw a blank yourself..

 Animals can be made beautiful eyes and noses, sew on antennae or paint them using acrylic flowers. Craftswomen do this part before stitching the parts, so it turns out neater and more beautiful. But you can just use a glue gun and attach all the details of the face with silicone. This option is considered fast.
Ready-made patterns of soft toys-cats can be found on the Internet and simply printed for further work.
Sleeping cat
An easy toy in terms of implementation. It is easy to cut and sew using the material of your choice. If you choose felt or fleece, then the cat will turn out to be tight and will keep its shape well. If the fabric is softer, then the pillow will be comfortable to use.
First you need to print the pattern.

The resulting toy can be used as a decorative element or as beautiful pillow... Some needlewomen decorate the primitive style with fabric elements or additional accessories.
Cat in the "Tilda" technique
This technique was loved by everyone for its ease of execution, airiness of details and beauty. A needlewoman without special skills can sew an original toy. It all depends on the pattern chosen. The elements must be transferred to the fabric carefully and accurately so that the details are even and neat. The result is an airy and stylish piece.
For manufacturing you need:

First, parts are cut out, then stitched along seamy side taking into account the seam allowance. Then, using a stick, you need to turn the fabric out and fill the insides of the toy with filler - tight enough for the product to keep its beautiful shape.
Attach a tail to the filling place and sew with a secret seam. Decorate the face and add a light dress.