Paper handbag as crafts with your own hands for children or gift package
We offer to make your own hands along with the child elegant handbags made of cardboard, foil, velvet paper with volumetric colors from colored paper, color velvet, foil. Such elegant handbags can be made no more than thirty minutes.
Paper handbags for a girl can be done as a children's craft in kindergarten, and as a bag or gift package for a gift, and as an independent gift. At the same time, the child will learn the designs of the design.


How to make a paper bag
To make such elegant handbags will need: cardboard of different colors or colored paper, velvet paper, foil, scissors, stapler.


For a handbag with a yellow flower, 1 sheet of green cardboard will be required, 1 sheet of yellow velvet paper. Green cardboard cut along half. From one half twist the cylinder, fasten the stapler.


Cylinder make flat and make internal folds on both sides with a total width of about 2 cm on each side.


In our harvesting from the green cardboard, we cut a rectangle from yellow velvet paper so long to close the front and rear parts and the bottom.


On the back of yellow velvet paper draw a flower. We fold the paper twice and cut out the flower only in the upper part, the lower part of the flower remains untouched and the fusion along with the bottom.


Deploy paper. Cut the circle for the middle of the flower - from foil, white paper or paper of another color (optional). We try out the detail of yellow velvet paper on our flattened green cardboard cylinder.


Breeping the middle of the flower and at the same time on the inside of the handbag made of green cardboard (our flattened cylinder) on one side of the handbag and on the other side. Handbook ready. Cut from a green cardboard a handbag strap - a strip length with a sheet of cardboard and the width of an equal width of the inner side fold of the handbag - 2 cm.


Fresh strap on the sides of the handbag with a stapler.


Handbook ready. You can put a gift for the holiday or birthday in such an elegant handbag.
Handbag with butterfly
For her, we used the red foil, dark blue, pink, red and brown velvet paper. Instead of the listed paper, color cardboard is suitable, and colored paper.
The inner part of the handbag is made of red foils, similar to a handbag with a yellow flower. From blue velvet paper, a detail is cut into the shape of a butterfly, inside of which a red folded cylinder is located. At the butterfly, krepim with a stapler pink and red ovals as shown in the photo.


From brown velvet paper carved butterfly tank with mustache. Fresh this detail downstairs below. Then we put the red item from the foil inside the butterfly and attach the butterfly to the stapler above the inside.


From the red velvet, cut out the handle for the handbag and secure it to the handbag using a stapler. Handbook ready.


Bag with bulk flower
For her, we used a metal tint cardboard (and gray cardboard is suitable), a sheet of pink velvet paper, a silver and pink paper sheet, a little white paper usual. For the manufacture of the inside of the handbag, the cardboard sheet is cut along the middle and twist the cylinder first, fix the stapler. Then it is flattened. We look at the side of the side folds. Width -1 cm. The total width of one side fold is 2 cm.


Bend folds inside.


From pink velvet paper cut the rectangle in size equal to two cylinder height plus the width of the bottom is about 2 cm.


From the back of the velvet paper, we draw on one of the parts of the flower. We fold twice the bottom of the bottom and cut out the flower at the top.


For decorating the handbags, we cut two circles with a diameter of 12 cm from pink foil, from silver foil - two circles with a diameter - 10 cm, from white paper - 4 circles with a diameter of 2 cm. Circles of white paper is a middle of the flower. For the middle, you can cut 2 circles from pink velvet paper (as shown in the photo).


Cut circles cut into narrow strips without reaching the middle by 1-1.5 cm. Then on the circle of pink color put the circle of silver color, on the circle of silver color we put two circles from white paper (or one pink optional). Confirm our folded flower to the pink part and the inside of the handbag made of gray cardboard simultaneously using a stapler.


We take scissors or flat wand and curly the petals of our flower. A white middle can simply "deximize" to the middle. The same is done on the other side of the handbag.
From the gray cardboard, cut out the strap to our handbag. Fresh strap with a stapler to the side parts of the handbag.


Handbag with metallized paper finish
From the orange cardboard we make an internal part similar to other handbags. Metallized paper yellow color Either foil cut out the item as in the photo. The narrow part is equal to the width of the bottom of the handbag.


The upper part on each side we collect in folds and fix with a stapler. Fresh finishing of metallized paper on the inside of the handbag using a stapler.


From a thin strip of metallized paper of red, either foil we fold a bow and fix with a stapler. Fresh a bow to a handbag.


Brown handbag with terry flower
Cut from pink velvet paper six strips 2 cm wide and 10-12 cm long. We cut every strip on thin strips with a width of 0.2 mm, not reaching the edge by 1-1.5 cm. Curious strips with scissors or hands. We put them in the flower and fasten the stapler.


Cut from orange velvet six strips shorter pink by 1.5-2 cm and we do with them too, as with pink stripes.


Orange flower connect with pink. We make the inside of a handbag made of orange cardboard, similar to a handbag with a yellow flower. Cut from metallized paper brown color top Handbags.


Wrap the internal part and fasteners with a stapler with a metallated paper. Fucking flower to a handbag. Cut the circle with a diameter of 1 cm made of pink velvet paper and glit to the flower.


The handle for the handbag can be made of velvet orange paper and attach with a stapler. You can make an elegant handle for a handbag - weave a pigtail braid woolen thread Or threads folded in several rows of different colors. In our case, the pigtail is woven from woolen thread of brown, orange and pink colors. In such an elegant handbag, you can put a gift.
 Handbag
Blue paper handbag with white flower
The inner part of the handbag is made of blue cardboard. The upper part of the handbag is made of blue foil or metallized paper of blue color. For side edges of the upper part, cuts are made about 1 cm long. Breppy top to the inner, edge "deximal". For a flower, it is necessary to cut the strips with a width of 0.6 mm long with a sheet with a4 format. Each strip bend in half. Then the edges of the strip are attracted to the middle and we set out for the middle of 1 cm to secure. We assign so strip over the strip (in the photo of the flower of 9 strips) and fasten in the middle of the stapler.


From blue paper, we cut three mug with a diameter of 2 cm for the middle of the flower and make cuts around the edges without reaching the middle. Fresh a middle to the flower in the stapler and collect the edge of the middle to the center.


To the top of the handbag is both flower. From the blue paper, we cut the strap for the handbag - three layers of 3 cm wide. We fold three layers one on the other and make cuts along the entire length not reaching the center.


Fresh strap on the sides of the handbag. The side sides of the strap slightly "deximize" among themselves.

Handbag with lace of metallized paper
The inner part of the handbag is made of red cardboard. Top of a bag of silver cardboard. From red metallized paper or foil, cut two strips with a width of 5 cm and the length of the upper front and back of the handbag plus the bottom. We fold two strips in several layers and cut out similarly to Christmas paper snowflakes. We lay down strips and secure on the top of the bags on the sides.
No, perhaps, in the light of another of the same universal material as ordinary paper. It is from paper that you can make many useful, interesting and easy beautiful crafts and items -, animal figures, carnival masks... In our master class, we will teach you how to make a bag from paper from paper.
Crafts "Bag-origami paper"
- To create a craft, we need a sheet of conventional A4 office paper. Sogle leaf diagonally, aligning one of its corners with an opposite side.
- We will cut the lower part of the sheet, separating it in this way into two parts: square and rectangular.
- We plan on the square diagonal lines.
- We turn the square converter by connecting all its corners in the center.
- We fold the resulting square twice in diagonal in such a way that all previous bends are inside. We get a double triangle.
- One of the corners of the upper triangle we combine with the opposite side, we plan a fold line and return to its original state.
- The top angle of the triangle is folded down to combination with a previously intended folding line.
- I turn over the workpiece and combine the remaining triangle angle with the opposite side.
- The main part of our handbag is ready, it remains only to bend its top parts out.
- Now make a handle with our handbag. To do this, take the rectangular segment of the sheet and cut off the strip of 1.5 cm wide from it.
- We turn the cut off strip along, we plan the fold line and turn again.
- Weigrate the edges of the part inside by about 1.5 cm.
- We fold the edge of the strips diagonally, combining its edge with a previously intended fold line.
- We repeat this manipulation to the other side.
- According to the intended lines, we turn the triangle.
- We fold the edges of the strip inside, combining them with the central line.
- We get here such a handle with two arrows at the ends.
- Fresh a handle to the bag.


We get here such a bag-origami from paper!
- dense paper;
- napkins for decoration;
- scissors and glue.
- compacted paper;
- pVA glue;
- line;
- pencil;
- ropes for pens.
The original paper handbag can be made according to modern origami technology. Here is the origami scheme for a paper handbag:
Follow all stages alternately, do not rush, and at the end, make a tape. It turns out a very pretty handbag!
Very busy doing paper handbag. At the same time, it can be useful in everyday life, and can be presented as a gift package.
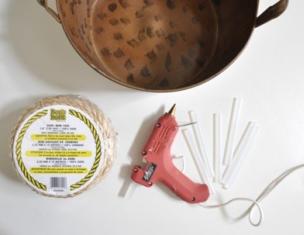
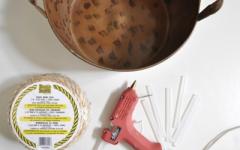
For making paper bags, we will need:

This scheme can be printed on the printer using tight paper.

Cut out the workpiece, make bends in the points of dotted lines.

Cut out flowers from the napkins, we have napkins in this topic. We glue them to the workpiece of the future bag.

We glue our handbag.

Berm paints and apart the background. Our bag is ready.

You will be surprised, but your bag can be done in just 15-20 minutes. If you take it, then and faster. All you need is:
I can not explain the whole process in words, because I ask you to get acquainted with the video below (it has more than 1 million views - Really useful instructions):
How to make a handbag of paper with your own hands? Very easy for this we need: Color paper, scissors and glue Moment crystal and sewing machine.

We cut our beautiful paper on the strip:
We make the bottom of our paper handbag, retreat 2 cm from the edge and cut out this detail

Draw oval edges with a lid


Our paper handbag, which we made with your own hands and at home is ready :)
I will add to the listed methods another option as you can make a paper handbag. Suitable as original gift packaging for a girl or woman. It takes a dense paper, the best scrap paper with embossed or pattern. It is necessary to cut out the pattern on the template, bend in places designated by the dotted line and hook the slots among themselves. The small valve in the bottom of the template is done in the roset of the upper part. In addition to the purse, you can twist a wire handle with beads and make fastener; From buttons. Another way to additionally decor such a handbag is decorative paper pockets.

Paper handbags can be the most different, from a regular square package, to an elegant puzzle of the lady's handbag. They fit perfectly like gift wrap And as a subject of storage of all sorts of little things. And they are made easily due to the whole scheme, and not many pieces of parts. I offer you some options for handbags. It is possible to decorate such bags by anything: ribbons, rhinestones, stickers, or decorating in focus technique. You can also have a handbag of weighing the tubes of paper, and you can weave in the Origami technique, but for this, more dense sheets are suitable, both from glossy magazines.


Here, I give you a video showing how from paper (journal) you can make a very fashionable and attractive clutch bag. Make such a handbag, perhaps, not everyone under the power, but if you want to yourself exactly the same, then there is no impossible. So, see:
Make a paper handbag fairly easy. First of all, Berm is a sheet of paper A4, after which we conceal the core of the A4 sheet. One of the cores of the cores bend up to the middle and smooth. The second edge is also done as well, and that is, bend to the middle, the main thing left in the middle a little more places for glue. Glue the inner edge and connect the sides. From below, we make a lapse of 3-5 cm. And bend. Open the bend and regit its corners right inside, align up to the middle for the lines coincided with each other. We begin the first edge just below the middle. The second edge bend on the first edge. On cables should be smooth and equal diamonds. In the first edge we glue only a corner, they are in the form of a triangle. We glue the triangular edge and triangular corners, after which it is connecting it. After that, we must make the sides. We begin the side strip so that the first corner of the Rhombic coincides with the second angle of Rhombick. The second we do the same. Align the bottom and sides. Internal sidelines smoke out and form the correct package form. The top of the handbags can be beaten and tied any thread or handle, you can also ribbons.
Hello. Soon holidays - the day of lovers, and then on March 8. Have you already invented what to give a gift or a small bouquet? I think you like the idea to put a gift in the handbag. Day theme: paper handbag do it yourself templates.
Attention! This handbag is not easy a good thing For gift packaging, and an excellent toy in 5 minutes for a little girl. If it became boring at home and you do not know what to do with the child, then make a handbag and my daughter will come up with her hundred games with her and will be happy and grateful to my mother's idea! And the girls so often love to change the bags that if this breaks suddenly, you can immediately make another: another color, with a pattern, with appliqué.
I'll start with the classes master for which the templates do not need, and then show you several templates for printing on the printer.
Master class heart handbag.
Love and heart are inseparable concepts. Love lives in the heart, and it is the storage of the soul. Therefore, about lovers, it is customary to say that they found their relative soul. For the day of all lovers, it is customary to give Valentine - small postcards with wishes in the shape of hearts. You can move a little from the rule and make your valentine in the form of a handbag. The process of manufacturing such a handbag does not take much time if you focus on our master class. 
To create a heart-handbag, prepare:
- pink and red paper;
- scissors;
- compass;
- glue;
- cinema wire pink;
- 2 tubes for a red cocktail.
- Prepare materials

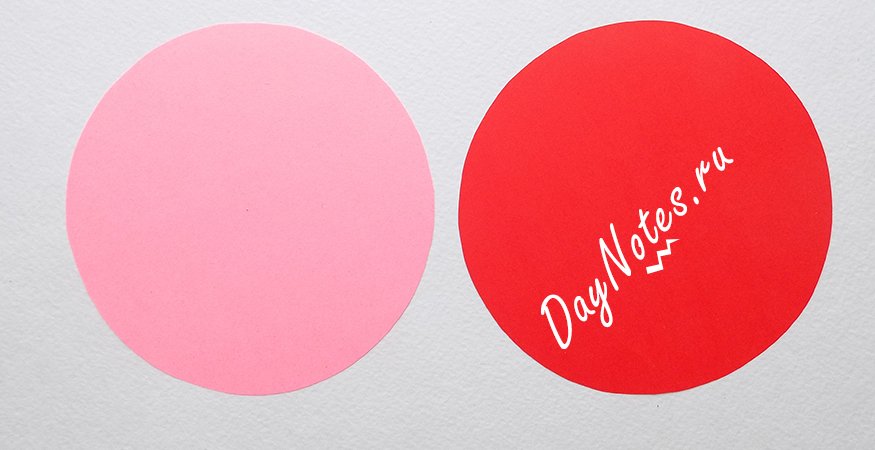
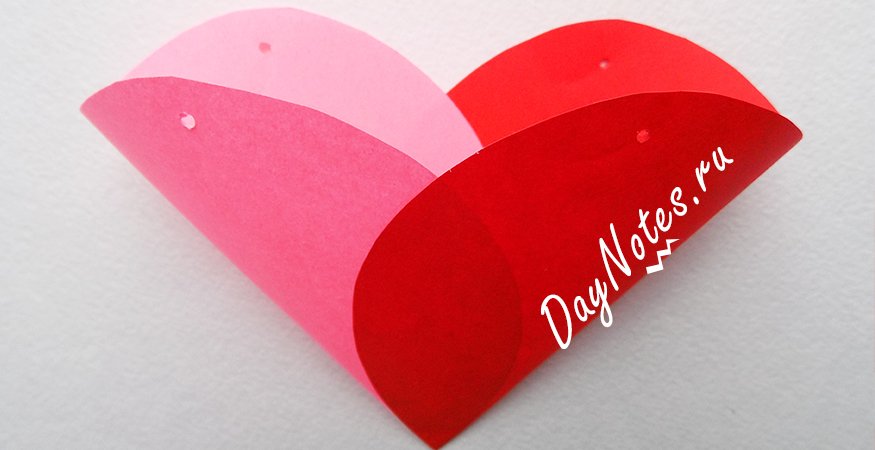
- There will be 2 circles at the heart of our craft. Therefore, to start using a circulation, we draw on the red and pink paper 2 of the same size of the same size. After that, we carefully cut them out with scissors.
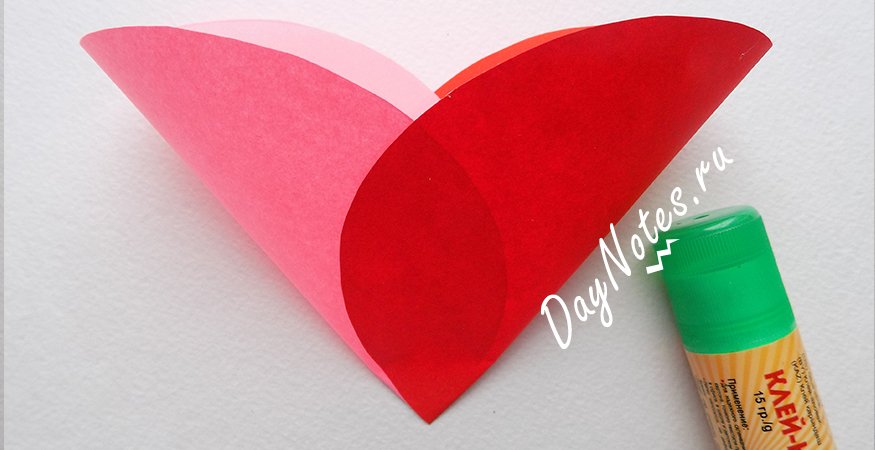
- Now you need to schedule the middle of each circle, but it is necessary to do it only with the edge.

- Two circles (pink and red) need to be combined with each other at an angle, then shove.
- With the help of scissors, rounded the sides of the future handbag, so that it is more like a heart.
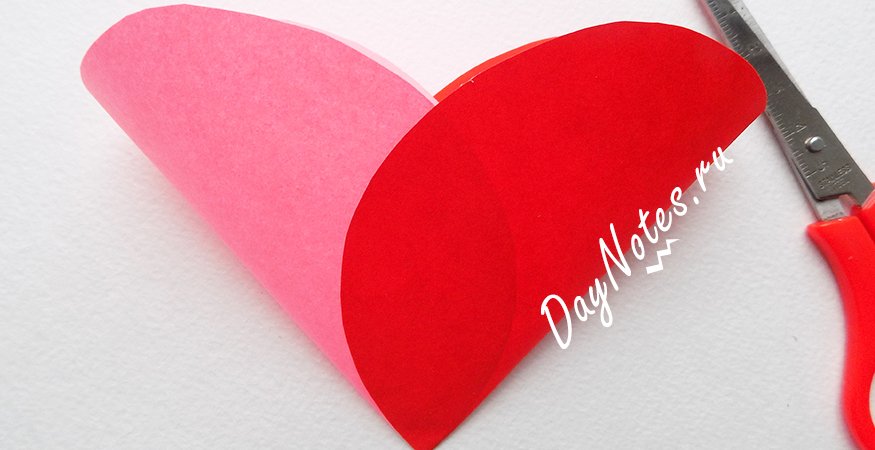
- Now we have done the holes for the handles of our handbag.
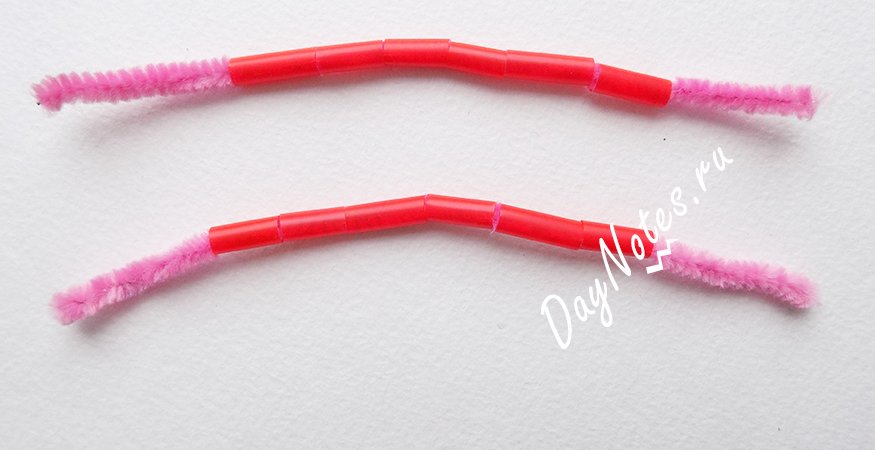
- Handles we will do from a cinema pink wire. First we cut it in half.

- Cocktail tubes apply to small pieces (about 1.5 cm long).
- We put on these pieces of the tube on a cinema wire.
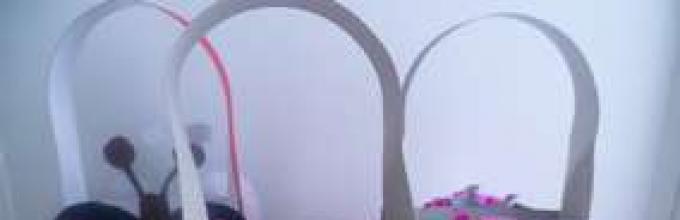
- It remains to fasten the finished handles on the handbag. For this, the ends of the tubes do in advance made holes, and the wire tips carefully bend from the reverse side. Similarly, fix the second handle. Our heart handbag is ready.
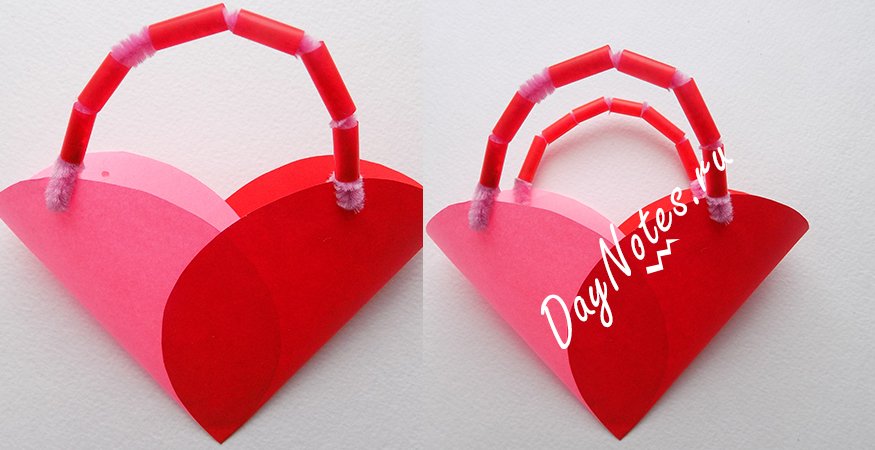
You can put your wishes and sweet surprise.
Bags in the form of basket: step-by-step photos
Such a snap is easy to manufacture, but for this it will be necessary to stock measurement instruments. During the work, you will need to clearly follow the dimensions given in this master class. You can perform a paper basket in any color, and our step-by-step photos will help.

It will be necessary to cook:
- pink paper;
- small pieces of green and yellow;
- adhesive pencil;
- scissors;
- line;
- pencil.
- For the basket itself, we will need to draw a rectangle with dimensions of 18x15 cm. We do it on pink paper.

- Now, along the long side of the rectangle, we divide the figure to 3 equal parts of 6 cm.

- In the width of the rectangle, it is required to divide the figure to 3 equal parts of 5 cm.

- In angular rectangles, we will perform marking, we split them on the bandwidth 2 cm wide.

- In the upper and lower part, draw triangles, their vertices should be located at the edges. Shaded places in the subsequent will need to be cut.

- We take scissors and make slots on the outlined lines.

- The resulting corners bend up.

- Now proceed to the collection of baskets. For this, the side lower strip on the one hand is glued to the triangle.

- Symmetrically fix another strip.

- Then we take stripes located above, and also glue them to the side triangle.

- By the same principle, fix the upper strips of baskets.

- We repeat the same actions on the other hand.

- For the handle of the baskets, cut the strip of 1.5 cm wide and 20 cm long.

- We glue it on the basket.

- I cut small circles. For their drawing, you can use the cap from the adhesive pencil. We glue green circles.

- From yellow paper cut out a couple of small flowers.

- We glue them into green circles.

- Our paper basket is ready.

Paper bag templates for printout
As promised, I made a selection of interesting and at the same time simple templates Paper bags. They can be simply printed on paper, you can immediately print on beautiful designer paper. And you can simply open a picture on the entire monitor screen, zooming, apply paper and circle directly on the monitor screen. It is very convenient, quickly and do not need a printer.
Master - Class for the manufacture of souvenirs
The work is made in the technique of decoupage
Handbag as a gift mom. Master Class
The master class is designed for holding a senior preschool age (5-7 years).
purpose: Development creative abilities children; Manufacturing a gift for mom.
Tasks:
1. Fasten the skills of working with paper, scissors, glue;
2. To form in children practical skills and decoupage execution skills: cutting out the parts you like, placing the napkin on the surface, abundant glue flaw, Dorisovka.
3. Rail an artistic taste.
Decoupage - This is a decoration technique, appliqués, decoration with the help of carved paper motifs. Today, the most popular material for this technique is napkins. Decoupage is good because children who do not know how to draw professionally, can use drawings on napkins, thereby creating the impression of painting. Therefore, this type of creativity positively affects the development of the child - it allows you to show your fantasy and feel like a real artist. You can decorate any surfaces.
With children, I used the decoration of the product from thick paper.
So, let's begin.
Here is my surprise - my idea -
As a gift - a new bag!
Although there seems to be noise
But your shoes fit!
Prepare for work:
paper napkins with a suitable pattern, scissors, glue, dense paper
.jpg)
1. The scheme can be printed on a printer on tight paper.

2. Cut the workpiece of the handbag.
.jpg)
3. Spend on the folds of the folding of the scissors (it is necessary in order to better bend dense paper or cardboard).
.jpg)
4. Received a blank handbag.
.jpg)
5. Cut from the napkin suitable fragments of the picture you want to use.
.jpg)
6. Unlock fragments on the workpiece of the handbag to see how the best way Place cut images on the surface.
.jpg)
.jpg)
7. Use glue to glue images. Carefully smooth them to eliminate any air bubbles.
.jpg)
.jpg)
8. Spread the finished workpiece.
.jpg)
.jpg)
.jpg)
Handbook ready!
.jpg)
And you can still make such a vase as a gift.
.jpg)
These handbags made children to their mothers on March 8. The purse was attached to the birch with congratulations.
.jpg)
I wish all creative success!