From fabric? Read the tips, step by step instructions... Choose the options you like. You can easily make a fashion accessory yourself from scrap materials.
The simplest bag
Even a beginner can cope with such a task. To sew this accessory, you will need fabric for the bag itself and for the handles. They are made from both the same and contrasting material. Special reinforced cords or tapes that are used for seat belts are also suitable. made of fabric are both complex and simple. Manufacturing technology is as follows:
- Cut two identical rectangles out of the fabric. If the material big size, and not in the leftovers, then first bend it in half and make one large workpiece. The fold will be the bottom of the bag.
- If you don't have handles ready-made, sew them yourself using the same fabric. To make such a strap, cut a double-wide strip or a couple of separate the right size... Don't forget about seam allowances. Sew the strips inside out and turn inside out. You will have a belt. Iron the edges. Make the second similar part in the same way.
- Sew one edge of the handle to the desired location, first from the front side of the bag parts. Do the same with the second end. You should now have a loop handle.
- Bend the edge of the bag part by 3-5 cm, sew it on. Pens will be attached to it. If you are going to carry a lot of heavy things in the bag, you need to sew them tightly, therefore, it is better to make the fold wider. Attach a handle to the fold around the rectangle and its diagonals. Now everything will hold on tight and will not come off. Do the same with the second strap. By the way, you can attach it with a regular seam or a zigzag. The second will be more reliable and at the same time fix the edges.
- Sew the main parts of the bag on the sides with the fold line at the bottom or on three sides if the bag is made of two parts.
The simplest version is ready.

You can additionally make the bottom and connections of the sidewalls in the form of rectangles, that is, your bag will resemble a fabric suitcase. Accordingly, more seams will have to be made.

from fabric do it yourself
Another one simple idea- to sew a product from a T-shirt that you do not wear or did not wear at all.

The manufacturing technology will be as follows: 

Using old books as a basis
Ideas for a handbag made with your own hands are very diverse.
As a basis, you can use not only old T-shirts, but even a book cover.

The cover bag is made according to the following scheme:
- Take unnecessary book hardcover. Carefully cut out the block of pages with a knife. You don't need it in this case.
- From the fabric, make two rectangles for the sidewalls or one common for the entire structure of the bag. Do not forget about seam allowances.
- You will also need two triangular (trapezoidal) rags for the "ends" of the bag, straps for the handle and fasteners.
- When everything you need is ready, put a cardboard cover on the fabric. Bend the protruding edges inward and glue to the base.
- Sew on or fasten in any other way handles and fasteners.
- Glue the inside of the bag, that is, the lining. It can be from the same material or different.
- Sew on the side triangles.
The bag is ready.

We use boxes
The original version can be made from ordinary tea boxes or any others. It will take two of them. One for the base and lining, one for the outside.

If the front is not covered with a cloth, the surface of the box should be beautiful. Both blanks must be taken of the same dimensions. If you do not have such, the inner one can be easily made according to the dimensions of the outer one made of cardboard or thick paper... So get to work. Your actions should be as follows:
- Open the first box to a flat pattern. Remove unnecessary parts. You only need a bottom, four sides and a lid. The cardboard needs to be reduced a little by cutting off the edges so that it can then fit inside the second box.
- Cut a piece of fabric according to the shape and size of the workpiece, taking into account the allowances for the folds.
- Place the fabric on a cardboard base, wrap the edges inward and glue. Fold the box so that the fabric is inside.
- Insert the lining into the second box.
- Attach handles or a long chain, as well as an eyelet and bead for fastening.
- Glue the space between the two layers of the bag.

If you don't have beautiful box, which can be used as the front side of the product, you will have to cover the second box with fabric, having previously unrolled it.
How to sew a do-it-yourself shopping bag
Here's an easy way to make a stylish tote bag to go to the market or grocery store. It is made from an old T-shirt or T-shirt.

The material must be stretchable. Do the following: 
All is ready.
Bag decor and renovation of old models
Now you know how to sew a bag with your own hands from fabric, and you can do it. However, you should think about the decor.

Even the simplest thing, originally decorated, will look impressive and stylish. Elements made using the kanzashi technique, as well as flowers made of felt, look very beautiful. You can glue the surface with rhinestones, sew on sequins, embroider with beads or ribbons. If you like to do needlework, then you must have done something similar.

Despite the fact that you have learned how to sew a bag with your own hands from fabric, you may simply not want to do this. Remember, you can always use the options to update old finished products... The easiest way to do this is with decor, but radically change appearance things will help staining. For leather product acrylic will do. To make a drawing on a bag, you need to use stencils cut from film, or ordinary tape. They can glue sections of the bag vertically or horizontally. Uncovered paint in a color contrasting to the old tone. After drying, remove the tape and cover the product with leather varnish. The effect will surprise you.
So, you have learned how to sew a bag with your own hands from fabric. Choose any model, the decor option you like and create your own fashion accessory. And if there is absolutely no time for needlework, just update your old bag the proposed methods.
Every fashionista knows that accessories make the image complete and interesting. But spending heaps of money on jewelry and leather goods is not an option, and sometimes it is very difficult to find the right model of a handbag. However, this does not stop the needlewomen: they can make any model of the bag with their own hands in a short time. The result is a beautiful, high-quality, and most importantly, a unique accessory that can arouse the envy of girlfriends. In our article you will find colorful and original bags made of various fabrics, as well as patterns of patterns and descriptions of how to sew a bag with your own hands.
Patterns for sewing a bag with your own hands quickly and easily
This model is very practical and can be made from a wide variety of fabrics. One condition: the fabric must be dense and durable, otherwise the thing may turn out to be short-lived. Patterns can be easily made from Whatman paper or old newspaper.

This instance is as easy to implement as the previous one. To complete them, a minimum set for a seamstress is required - a sewing machine, threads, scissors, tape measure, sheets of white paper for patterns. After you make paper patterns, you need to cut the canvas and sew on a typewriter.
We make ourselves a stylish clutch in the shape of a rose step by step

An excellent model for romantic evening or a formal reception. To complete it, you will need a thick fabric and a minimal set of seamstress tools. First, you need to carve out the details below. The main fabric for the details is highlighted in pink, and the reinforcing fabric is highlighted in gray.

Also below is a diagram of the assembly of the rosette.

In addition, it is very important that each petal future bag is sewn in 2 parts, and also depends on the central part of the assembly (the parts should be more curved) for the rose to open. Each pair must be sewn along the outer edges, all allowances must be notched, turned out and ironed. The result should be a boat-shaped blank. When all parts of the flower are done, you can start assembling according to the scheme.

The edges of a relatively complex part are indicated in green. It must be twisted into a spiral so that one edge (untreated) closes into a circle. To do this, you must try to roll this edge into a weak tube and place it on the table. This is how the core of the flower is formed. All protruding seams are sewn in any artistic way. The second piece is lightly overlaid on one side and immediately attached to the middle. Sew the next petals with some offset so that they do not overlap. It is recommended to stretch off all the edges with a finishing stitch after each piece of sewing. You need to sew them so much so that the handbag gets required dimensions... The next stage involves the manufacture of a gasket. It can be made of three layers of dense fabric glued with dublerin. This is done so that the finished bag keeps its shape well. The lining is sewn by hand, starting from the middle. There we bend the gasket and grab it along the marked edges. This is necessary so that, as a result, the finished flower does not disintegrate into several parts. As a result, you should get a circle with a rose with raw edges. Next, we collect the remaining parts: a zipper is sewn between the two strips, and a gasket is sewn to the bottom of the bag, stitched strictly in the middle. Then we connect all the received elements into a ring. As for the lining, it is quite easy to perform it. We take any design of 2 identical circles, set along one sewing line. They should also be sewn by hand, and strictly along the zipper line. Handles are sewn at the discretion of the hostess: it can be a thin, graceful lace or chain.
Master class on creating a model from cotton fabric

This cute and easy-to-wear model is perfect for complementing your everyday look, going for walks in the park or around the city.
To complete it you will need cotton fabric and a minimum set of sewing tools. First you need to make the patterns of the handbag, which are presented in the photo.

The letter A denotes the two upper parts of the bag. It is required to cut two such blanks from the fabric.
The main part of this bag are two large blanks, marked in the layout plan of the patterns with the letters "B".
Cut out 2 basic paper patterns and tape them together along the dotted line. This is necessary so that you can already carry the whole half of the bag onto the fabric.
The interior of the bag also consists of 2 large parts, each of which is presented in two separate patterns, separated by a dotted line. You need to cut 2 pieces of each pattern.


Cut a handle and an inner pocket separately from a piece of cotton fabric.
Thus, in our article, we showed how to make a bag with your own hands. Stylish accessory do it yourself will go well with your clothes and will serve you for many years.
Video selection on the topic of the article
A universal selection of gift ideas for any occasion and occasion. Surprise your friends and loved ones! ;)
Greetings to everyone gathered now on the blog! Today I will tell you how to decorate your life and the lives of those around you with the help of such a simple object as a bag with your own hands.
Many shops sell bags, handbags, clutches, etc., etc. But it's so great to do something like that yourself, to feel the process of creating a product, isn't it? Many will agree with me, I think. Therefore, today we will make a bunch of handbags with you, cute and funny)
How to sew a bag with your own hands
First of all, I suggest you sew a cute fluffy handbag that you can give a little girl or girl.
List of materials:
- artificial fur (for the outer part of the bag);
- fleece (for lining and for tightening buttons);
- threads in the color of the fabric;
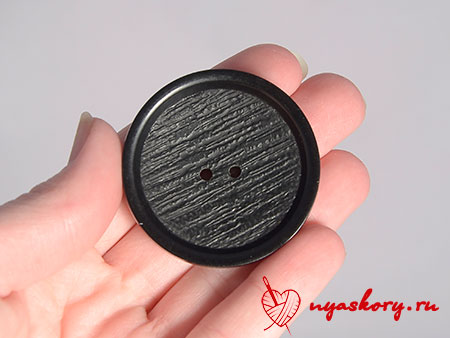
- two round buttons;
- two small white rhinestones or half beads;
- synthetic winterizer;
- paper for patterns;
- needle;
- second glue;
- pencil;
- pins (for pinning patterns);
- scissors.
You can download the patterns of the future bag here: eyelet and the foundation... Let's deal with them.
What kind of patterns are there:
- the pattern of the bag is one-piece (lid + back) - the entire area of the pattern;
- the front of the bag - everything below the side panel;
- width of the side insert - we will sew the side part into the bag, this is its width. Length is the length of the contour of the front (excluding straight top).
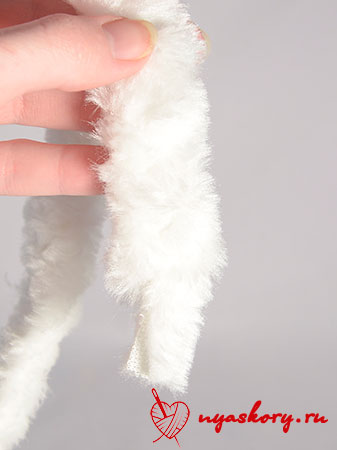
As for the side insert: it should consist of two equal parts, the direction of the pile of which will be directed against each other. But this is only for fur! From the fleece, just cut one strip of the required width, the direction of the pile can be ignored.
How to sew a bag: a detailed master class
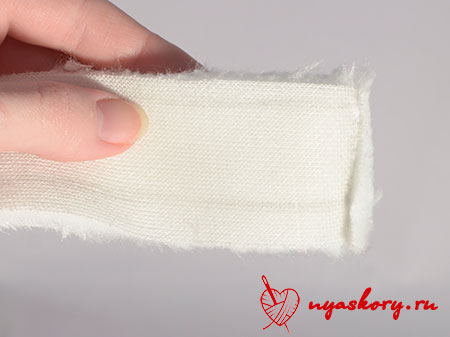
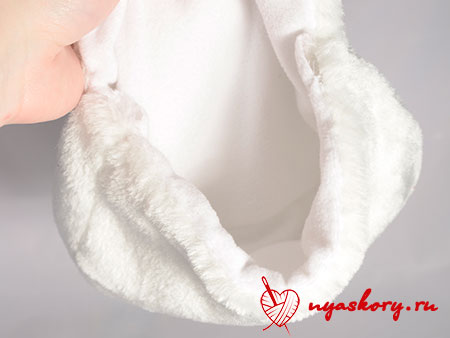
First of all, we will work with the side of our product.
Take two fur side pieces and sew along the edge. Sew them so that the pile of the pieces is directed towards each other.
Why do I suggest doing this? The answer is: the fur has a long pile, which should go in one direction. And this can be achieved just by stitching two pieces
Cut off any unnecessary items. And sew the side to the front of our future bag.
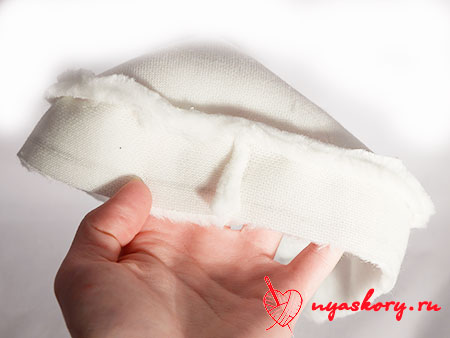

Now we sew on the back of the bag! The cover is already planned
Trim the edges of the seam allowances. See why:
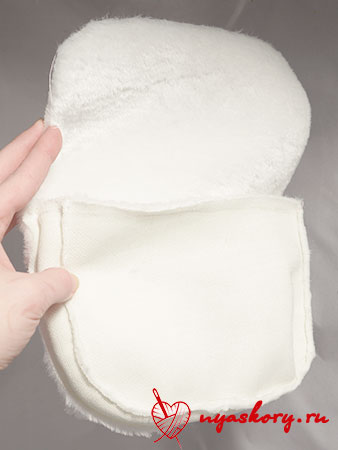
By the way, here is the back view of the handbag:
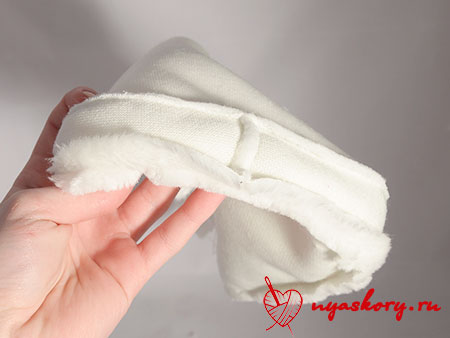
Sew the fleece "handbag" in the same way. This will be the lining - the inside of the bag.

How to sew a lining to a bag? First, place the fleece and fur pieces right side inward.

This photo seems to be clearer.

And just sew the covers of both pieces together.

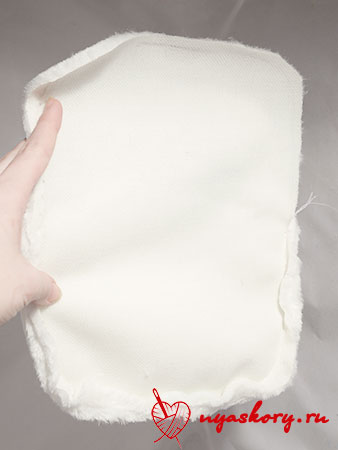
Screw the inside into the bag.


Sew the remaining edges with a blind stitch.
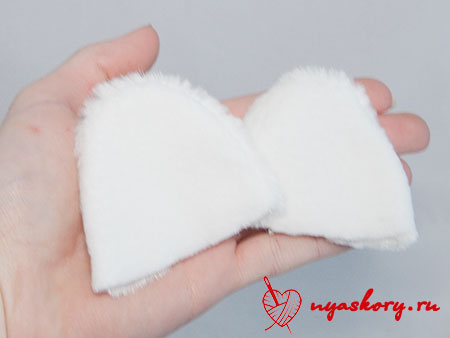
To decorate our bag, I suggest you cut out these ears:

This is how you should get them:
Now let's make a strap for the bag. To do this, cut three strips of fur so long that it is convenient for you to later put on a strap of them on your shoulder. Weave a pigtail out of them (fasten at the end and at the beginning so that it does not come apart).

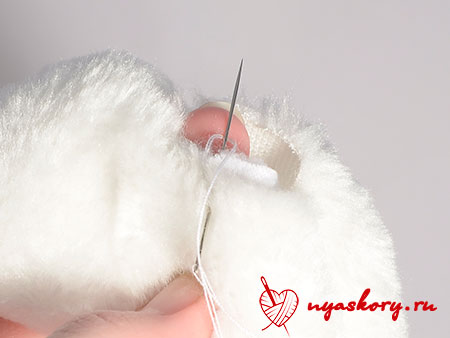
Remember we left holes for the mountings? Now you need to insert into them and carefully sew up the resulting pigtail with a secret seam.

But our bag has no fasteners yet! There are several options: you can sew in a zipper (which is better to do earlier), you can use Velcro and buttons.
I decided to stick with the last option.
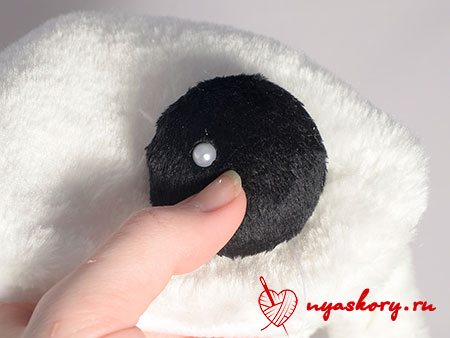
Cut two black circles out of the black fleece that are larger than the button and take the button.
Put a little padding polyester on the button.
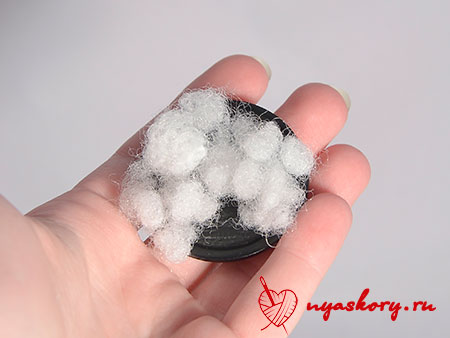
And in a fleece circle, along the edge of which, walk with a basting stitch without securing:

Put them together.

And pull off the thread.
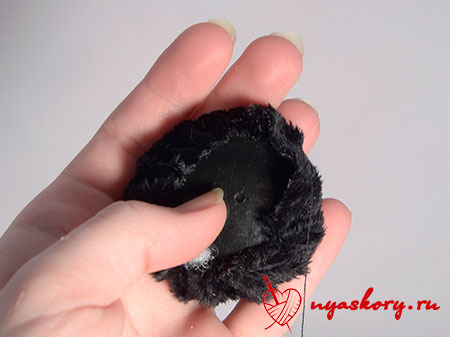
The button for attaching the bag to the back should look something like this:

Glue a small rhinestone-flare in front.

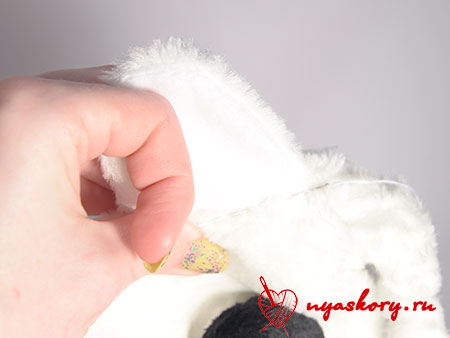
Now attach the clasp to the lid of the bag to see where you will need to cut for the tab.
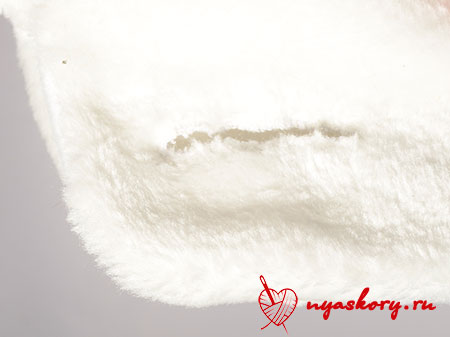
Draw a line down the center of where you want the button to go. Make a cut along the line you have drawn.

To keep the cut nice and neat, sew a buttonhole over it so that each stitch fits as closely as possible to the previous one.
This is what the bag will look like after trimming:
Sew the button eyes to the bag:
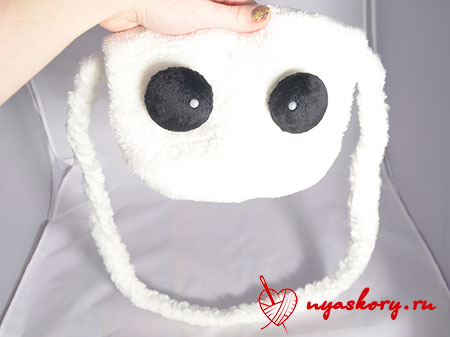
Well, now back to the ears! Fold and hem the edges.

And sew them where you would like to see them.
Ta-dam! The bag is ready It turned out to be a cute kitty)

DIY leather bags
Leather is one of the most interesting and durable materials for sewing bags. Therefore, I present to your attention several master classes from this material.
Bag - cat
For this simple but very cute model (somewhat reminiscent of the previous one), you will need leatherette, scissors, an awl, thread and a thick needle.
This can be worn by both a young girl and a small child.

The simplest leather bag
No, you definitely need to get one. You will need leather, scissors, a strap, tape, a marker and (optionally) a special tool for cutting several holes in a row (you can do with an awl). Essentially all you have to do is cut out a circle, punch holes, pull tape through them, and attach a strap. Everything)

Envelope
Reminiscent of the way of processing a cat bag.

Chanterelle
Adorable model)) Prepare for her leather or dense leatherette, braid and rivets. You don't have to sew the chanterelle, just glue it around the edges and hide these places under the braid.

DIY jeans bags
However, the following models can be made from both jeans and old jeans.
Network
For her, cut the jeans into strips and weave the canvas, as in the photo. Sew it with a bag (by folding a piece of canvas in half) and sew on the handles.

Simple denim bag
There is a denim leg - let's go to the production of a bag! You will also need a buckle, a leather strap, scissors and thread with a needle.

Graceful bag made of jeans
Here you will need two trousers, scissors, thread with a needle and a zipper.

DIY fabric bags
Rectangular
For her, take a few pieces of cotton fabric, a zipper and accessories.

Clutch
An interesting idea is to use dense pieces of processed cardboard for the backing. I would recommend taking plastic boards from Fix Price or juice packaging as a dense base.
Bring such a handbag to your mother - she will definitely be delighted))

Semicircle clutch
Cut out two round pieces of cotton and a circle of padding polyester from the fabric. Fold them in a sandwich and sew several times at right angles. Stitch around the edge with bias tape. Fold the blank in half and sew a zipper into your purse. Decorate.

Handbag
This is where the cotton fabric, lining, clasps and floral decorations come in handy. A young lady, say, about 17 years old, will definitely appreciate such a gift.

Sports bag
For her, prepare thick fabric, braid, scissors, pins, fasteners, zippers and threads. In addition to sports uniforms, this bag can also be used to put outdoor things.

Mini handbag
According to the scheme described below, you can make both a very miniature accessory and a larger object.

Alteration of old things
For the first of two photo workshops, you will need a long rag bag of soft tissue, and for the second - an old jersey.


Photo of handmade bags
I want to show you how you can get many bright and unusual products using the same patterns.
Sandwich bag
Nice purse made of fleece. It is quite simple! And such a design could well be implemented in a cat bag.

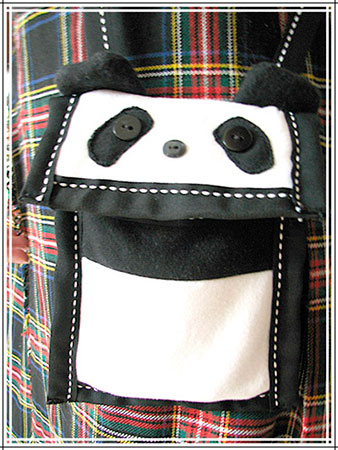
Panda bag
Cute panda design
Simple and elegant bag
The handbag is quite simple and is made according to patterns similar to the very first ones.

Knitted bag
Although this bag is knitted, its design can be implemented and sewn from fabric.

Leather bag
Octopus bag
The bag, again, is knitted. But it is very similar to the first one (at the beginning of the article). Only to it you need to add tentacles and remove the ears.

By the way, I bought fleece for the eyes of the "kitty" bag here... In the store, you can hardly find such
This concludes the article. I hope you enjoyed looking at all the handbags and taking note of something interesting for yourself. See you soon!
P.S. Subscribe to updates!
Best regards, Anastasia Skoreeva
Such necessary thing as a bag made of fabric, suitable for daily shopping, in summer you can take to the beach under towels and blankets. It is not so voluminous, but nevertheless quite roomy. If you still do not have a canvas bag at home, make sure to sew it yourself, it will always be used on the farm. In addition, it is sewn easily and quickly, even a beginner seamstress can handle it, if there is a desire to create and a sewing machine, let's sew together.
In order to sew a fabric bag with my own hands, I needed:
- raincoat fabric 1 m. You can take any dense fabric - pillowcase teak, gabardine, cotton, calico.
- threads in color
- adhesive spider web 10 cm.
- split zipper lock 45 cm.
- haberdashery cardboard 36 * 12 cm.
- one-pointed zipper foot
- tailor's tool: scissors, pins, tape measure, chalk, ruler, sewing needle
MK to sew a bag from fabric with your own hands without a pattern step by step
1. I draw the details of the bag on the fabric. I cut out two rectangles with sides 49 * 42 cm. In the corners I cut out squares with dimensions as shown in the photo. Don't pay attention to the seams on my patterns, I just didn't have enough fabric, I had to add)

2. I overcast the upper edges of the details on the overlock, you can use a zigzag stitch.

3. I unbutton it to the end, fix it with pins with the front sides inward, as in the photo.

4. I attach a single-edged foot for sewing on a zipper lock on the sewing machine. I'm laying a line.

5. On the front side, I make a finishing line along the zipper lock.

6. I fasten the lock to the end.

7. Cut off the excess, make notches in the corners.

8. I fold the edges of the fabric inward, fix it with pins

9. I put a line on sewing machine... Then I do point 6, 7, 8 from the other end of the zipper lock.

10. I cut out two latches for the lock from a piece of fabric - rectangles with sides of 8 * 5 cm. They are needed in order to prevent the zipper from opening.

11. I bend the edges of the rectangles inward by 1 cm on both sides.

12. Sewing by hand on the zipper from both ends.

13. Sew the clips on the lock on both sides. The zipper is now securely fastened and won't part!

14. I fasten two layers of fabric together at the top of the bag, at a distance of 3.5 cm from the edge. I fix it with pins. I am laying a line on the sewing machine.

15. I apply it to the front part of the bag in the middle, fix it with pins.

16. Proceeding to processing the bottom of the bag. I fix the bottom cut with pins. I lay a line on the sewing machine, stepping back from the edge by the width of the foot. I overlock with a zigzag stitch.

17. I turn the bag on front side... I put a finishing stitch along the top of the bottom seam, sewing on the fabric allowance. I smooth it with a steam iron.


18. The next stage, processing the side sections of the bag. I fasten the parts together with pins, lay a line on the typewriter, retreating from the edge by the width of the foot. I overlock the edges with a zigzag stitch.

19. Now I sew the bottom of the bag.

20. In order for the bag to be stable from the bottom, to have a shape and not to fall through, I will sew a solid bottom. I cut out a rectangle with sides 36 * 12 from haberdashery cardboard, which I then put in a fabric cover.
Instead of haberdashery cardboard, you can use isolon or energoflex, which is sold in hardware stores.

21. I sew the cover along the perimeter, leaving one edge unsewn. I cut the corners, as in the photo.

22. I put the cardboard in the case, sew up the free end by hand.

23. Lay the hard bottom on the bottom of the bag, attach it to the bottom seam in the middle with a few stitches to secure.

24. I start sewing the straps. I cut out a rectangle 82 * 4 cm. I fold the edges inward and sweep by hand.

25. On a sewing machine I lay a line along the edge of the straps. I remove hand basting stitches, iron with steam. Cut in half to get two straps.

Women cannot do without such an accessory as a bag. There are never too many bags, you can sew another bag from fabric with your own hands. Our ancestors have long understood one simple truth: one cannot do with pockets. It all started with the fact that ancient people sewed bags of animal skin, which they carried, thrown over their shoulder or in their hands. Today, a person simply cannot imagine himself without the accessory he needs.


As for the 2015 fashion: the good old classic rectangle is back. Fashionable in 2015 will be a "messenger bag", large or small, with a long strap over the shoulder.
Bags are striking in their variety. They are assigned not only a decorative role, but also a practical one. Bags are not only sewn, but also crocheted and knitted. Bags are large: (suitcase, household, beach, travel). These are bags that should hold large volume of things). Youth: (backpack, sports bag, pouch bag, briefcase, laptop bag). For celebrations: (bentleys, clutches, ladies' and theatrical) handbags. The reticule also belongs to theatrical - this is a bag that imitates the old bags in which coins were carried.
I would like to dwell on a laptop bag. Such a bag should protect your laptop from damage and scratches, and, of course, have an attractive and not too gloomy look. Below we will sew such a bag. Summing up, I would like to dwell on the fact that a woman or a girl needs a comfortable, fashion bag... When choosing a bag, we pay attention not only to practicality, but we also need it to please the eye and cheer up and it does not necessarily have to match the color of our clothes, this is not the main thing this season. Let her help you create your own, unique style. We will try to help you choose.
We sew a comfortable laptop bag. Please note that the bag is more suitable for carrying and traveling with a laptop. If you need to turn on your laptop and work on it, it's best to take it out of your bag.

To work on the bag you will need:
- denim or any other thick fabric
- sintepon
- lightning
- threads
- scissors
- sewing machine
- lining fabric
Bag making
Fold the main fabric in half seamy side up. Fold the synthetic winterizer in half. We also fold the lining fabric. Draw a contour with a pen, making a seam allowance of 1.5 cm.

We cut out the blanks. We fold it with a sandwich (fabric + synthetic winterizer) and sew on a typewriter. We sew with diagonal stripes at an angle of 45 *. Can be quilted with rhombuses. It will be good if you sew a patch pocket on top for various little things.

Fold and sweep the zipper to the workpiece.

We unfasten the zipper and sew on a typewriter.

We sew handles. Wrap such a braid with a cloth, sew and sew to the bag.

Sew the lining into the bag by hand. In the right place inside, we sew a black elastic band in several places. This is done to secure the laptop.

Sew on handles.

The bag is ready.


"Messenger bag" convertible
We sew a fashionable bag, very relevant this year. Bag with a long handle, worn over the shoulder or diagonally.

You can cut it out of any dense material, old jeans or any thick fabric will come in handy. If you want a more elegant version, you can decorate it with an applique made of leather, suede, or fabric. There is room for imagination here.
Pattern

Making a pocket on the bag's flap.


Old jeans bag
A bag made from old jeans is small in size, as it is based on such a detail of jeans as a pocket. A bag pattern is built around the pocket. The larger the pocket, the larger the bag.

If you want to make a bag bigger size, fight a pocket and stitch it to the part you cut.
Pattern

Additionally, 2 strips are cut out for the bag handles. The width of the strips is 4 cm and the length is 50 cm. And 2 parts for processing the top, each 20 cm long and 4 cm wide. When cutting, take into account seam allowances of 1-1.5 cm.
Bag making
1 Take the main fabric and the lining fabric. We put them together, put on a pattern, circle them with a pen and cut them out. Then we cut out 2 strips for the handles and 2 parts for processing the top. We should get:
- bag detail - 2 detail
- bottom of the bag - 1 piece
- pen strip - 2 pieces
- top processing strip - 2 pieces
- Cut out the bottom from thermal fabric or oilcloth (for strengthening).
- Sew the bottom of the bag to the side pieces.
- Sweep and grind the sides.
- Sew the lining in the same way.
- Place the lining inside the bag from inside to outside.
- Sweep the upper cuts.
- Take 2 parts for processing the top, attach a zipper to them.
- Sweep and grind the handles of the bag. You can trim the upper parts of the handles with leather.
- Process the top of the bag, pre-sketching.
The bag is ready.
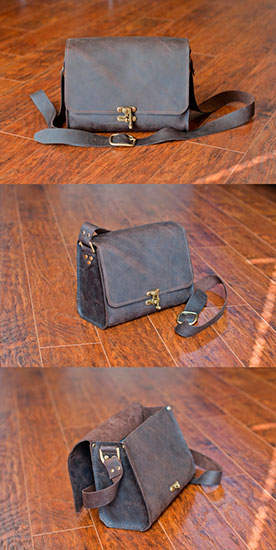
"Messenger bag" made of fabric
Such a fashionable "bag - postman" made of printed fabric will be very useful for any needlewoman. Of course, it will take a lot of time to make, but the result is worth it.

To work you will need:
- fabric size 34 / 27cm, 34 / 35cm, for flap 2 pieces 27/13 cm
- fabric for lining and pocket
- lace trim 34 cm long
- hard doublerin
- a small piece of leather (fabric can be used)
- half rings 2 pieces
- carbines 2 pieces
- magnetic button
- leather strap for a bag (length at your discretion)
- ruler
- scissors
- threads
- pins


Since the bag is textile, you need to strengthen the fabric. We glue the fabric going to the front side of the bag with doublerin. Then the bag will keep its shape. Glue from the inside out, through cheesecloth, with high temperature through cheesecloth.
Getting started
Fold 2 pieces of fabric face to face with 34 cm sides. It is not scary that one end is larger than the other. It's just that we will further form the bottom and floral motif will only be on the front wall of the bag.

Sew, leaving a seam allowance of 1.5 cm. Iron the seam, pin lace on the front side and stitch on 2 sides, iron.

We have got a rectangle 60 / 34cm. Fold the fabric over to the front. Stitch side seams, leaving 1.5 cm for the allowance.

We form the bottom. Fold corners, pin. Draw a 6 cm line with a ruler and sew on a typewriter. Cut off excess fabric, leaving 1 cm.

Unscrew and iron the side seams. Here's what you get:

We sew the valve. Fold the prepared pieces of fabric (glued) front to front. Draw the seam line with chalk and round off the corners of the flap. Sew on three sides, leave one (27cm) completely open.

Cut off the excess, find the middle, mark with chalk: this is where we put a magnetic button.

To the right and left of the mark at a distance of about, 5 cm, cut the fabric. The incisions should not be more than 0.5 cm. Insert and secure the part of the button without the magnet. Turn out.


Sew on and iron. Further installation of the second part of the valve. Bend the valve onto the front of the sukmi. Mark the location for the second part of the button. Install half rings. Cut out 2 strips of leather 2 cm wide and 8 cm long. Pass a ring into each strip, sew to the side seams strictly in the center.

Set aside the bag. Cut out the lining: 2 rectangles 30 / 34cm. Cut out the pockets, there will be 2. For the pockets, cut out 4 rectangles 22/17 cm from the remnants of the fabric.

Stitch them around the perimeter, leaving the seam open. Before turning out, cut off the corners. Unscrew, sew open seam. Where the top of the pocket will be, lay a line, stepping back 0.5 cm from the edge. Pin the pockets to the lining details, sew on. We make a compartment for a mobile phone: we sew it, stepping back 8 cm from the edge.

Next, fold the front lining parts. Stitch side seams. Stitch the bottom. Sewing the bottom, leave an unsewn area of 10 cm in the middle for turning out. Sewing the corners of the lining. Place the outside of the bag in the lining, join the seams, pin, and sew.

Turn out, sew the bottom on the hands.
 We attach the belt. All is ready.

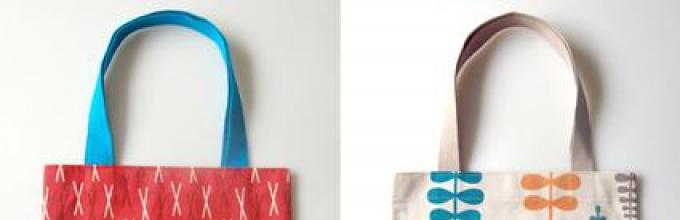
Shopping bag pattern
Highly interesting pattern shopping, everyday bags. It is very convenient to go to the store with such a bag. It is lightweight and roomy. Striped material is shown in blue. Hope you find the pattern useful.