When a child appears in the house, the first thing parents think about is his upbringing and development. And it’s important not only to educate and raise, but to do it right. But here's the problem: oh the fruits of their pedagogical labors parents find out only when the baby grows up. What to do now?
First, calm down. Excessive fuss has not helped in any matter, much less in such a complex and time-consuming matter as education. The psychological and emotional health of the child depends entirely on you, or more precisely, on the atmosphere that reigns in your home. But that's not all. An important role in education and development of children occupied by children's toys. And modern manufacturers have been quite successful in this. Walking into a children's store, even adults' eyes widen.
But you don't need to buy everything. Especially if you can do something with your own hands.
 The theme of the carpet can be varied. This could be a vegetable garden, a forest edge, or a roadway crowded with foam cars. Absolutely any picture will come to life if you put in a little effort and use your imagination. Of course, the rug has more than just visual significance. This is not a simple three-dimensional picture, this didactic manual for development. With its help, we can learn colors and shapes, master counting, and work on coherent speech. Anything is possible if you really want it.
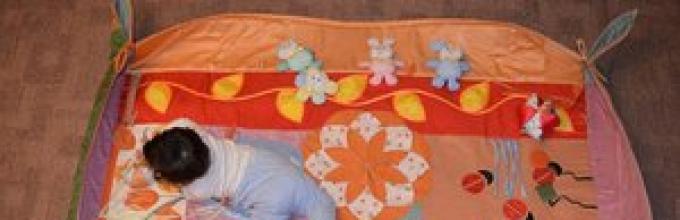
Age limits are taken into account primarily when creating such a children's rug. For a very small baby, we can sew on rodents and rattles, a variety of fabrics different textures. Highlight for small child It is not the close attention to detail, but the attractiveness of the toy. It should be bright, loud and, most importantly, completely safe for the baby.
We often want our child to be better than others in many ways. But it’s all work, nothing happens for nothing. So, over attention and motor skills you need to start working from a very young age. If the classes are regular, the result will not take long to arrive.
Pros

Manufacturing Basics
First you need to decide on the basis. Foam rubber or a baby blanket will help us with this. The second option is much more practical, because the costs for it will pay for themselves entirely. The point is that if we let's take a ready-made base in the form of a rug for a child, then it does not have to be covered with another layer of fabric on top. And saving in the family comes first!
But if you don’t have a suitable blanket, you should choose a natural fabric for covering the foam rubber. The fabric should not be hard, especially if the mat is made for a baby who cannot yet hold his head up on his own.
You will need:

Creation sequence
At the very beginning of this difficult but creative path, you need to decide what the size of the rug will be. If we are talking about a one-year-old child, it would be completely unnecessary to sew a carpet the size of a room one for him. Yes, the child should fit freely on the mat, crawl and move, but not get lost.
Secondly, the lower part of the rug should be made of oilcloth. This will simplify the cleaning process products. Speaking about materials, it is worth mentioning that fabrics should not fade when washed and they must be natural.
For best results you need the source. That is an example of the rug you want. This cheat sheet will give you the opportunity to embody in this product exactly what you want and what your child needs.
For children two years old, you can create a plot drawing on the rug by adding characters. Then we distribute everything we want to attach into development zones. There is a tactile zone - here we will sew fabrics of different textures, beads, zippers. The next zone is the sound zone. Here we can attach rattles, abacus, xylophone, drums for children.
One of the most interesting and useful elements The children's rug is a mirror. It deserves its own separate zone. With its help, the child learns to know himself, to see emotions on his face.
But the elements on the educational mat can be not only static. There are also so-called game elements. These are the parts of the rug that move, jump, fly, that is, do everything that our kids love so much.
 It is not difficult to come up with such elements. An example of one of the simplest games is Musical Berry. To create it we will need:
- kinder egg;
- buttons or beads;
- pink and green fabric.
To begin with, we fill our box with beads or small buttons. Then you need to decorate this yellow plastic egg and create a berry from it. In this case, we should have a raspberry. The berry itself will be pink - to do this, just create a bag of fabric, put an egg in it and sew the edges. But green fabrics serve us leaves for our berries. We sew the finished composition onto the rug and observe the child’s actions. Judging by the numerous advice given by young mothers on forums, we can say with confidence that such a toy will bring joy to your child!
Another example of game elements is the Animal Steam Locomotive. Initially, we need to decide which animals - wild or domestic - we want to introduce our baby to. Then we pockets need to be prepared for our animals. The number of pockets must correspond to the number of animals. Thus, the game will captivate the child for more long time and it will be more interesting. The process of decorating a steam locomotive depends only on your imagination. For example, instead of the wheels of the train, we can sew buttons, and a ribbon of fabric with fringe will serve as smoke coming out of the huge chimney of the locomotive.
An equally popular game is Apple with a Worm. The size of the apple should be such that the worm can hide in it as soon as the baby pulls the worm's tail. Also an interesting game for children Ladybug. At first glance, it looks like an ordinary insect, but you just need to unfasten the zipper installed between the wings like this another one appears immediately, no less interesting toy.
Parents who have already tried the mat on themselves share tips. Firstly, all the elements that make up the mat must be safe for the life and health of your child. It only takes a second for a child to swallow a bead or button, so tip #2: sew everything tightly. Thirdly, it is best to attach most of the parts of the mat with special Velcro. Thus, you can easily replace one or another component of the game at any time convenient for you.
And besides, the child will not play with one such rug throughout his childhood. As he grows up, his interests will change, he will acquire new skills and acquire new knowledge. Need for elementary games will disappear, your favorite characters will change, and what seemed far away will become a little closer. But you can always update the rug according to the age and preferences of the baby. Do you like dinosaurs? Please, here are synthetic T-rexes and foam mountains for you. Do you love trains? Let's create an entire train depot together!
Spending time with your child is much more valuable than purchased toys. You may lose time spent together, and this is the main thing in the parenting process. Ideas for creation can be completely different - in the form of puzzles, a rug with adventures and labyrinths, or an orchestra rug. But the result will always be the same: a satisfied child and happy parents.
Parents set a goal to comprehensively develop their baby, starting from birth. A crawling mat can help with this. You can purchase the device at children's store. But it’s much more interesting to make it yourself.
Loving parents, trying to develop their child from birth, use modern techniques and all kinds of expensive toys.
A rug is a canvas made of yarn or thick fabric. May have different forms. The main idea when creating an educational rug with your own hands is to make it bright and colorful to interest the baby. It should consist of different textures with colorful applications, complemented by buttons, rattles, and musical details.

Thanks to the moving elements, the child will develop fine motor skills.
Mats functions:
- Development of fantasy and imagination.
- Training concentration, memory and fine motor skills.
- Development of logical thinking.
- Basic study of the alphabet, numbers, objects, geometric shapes.
- Recognition of colors and shades.

You can buy such a rug in a store, but many women prefer to make it with their own hands, because it is not at all difficult to do.
Basic requirements for educational mats
When making a children's rug with your own hands, it is important to adhere to certain requirements.

An educational mat is a textile or knitted cloth designed bright applications, with movable elements for play placed on it.
- The quality of materials and components used during assembly must be of the highest quality. They should not cause allergies in the child.
- All seams and connecting elements must be tightly stitched and fastened together. This is especially true for small accessories that a child can place in his mouth or nose.
- The touch mat must contain only serviceable components.

Do not allow chips, cracks, or unraveling seams.
- When making canvas, it is necessary to take into account versatility. After a few months, the child's interests will change. It will be necessary to replace some parts or supplement existing ones. You can make your own children's crawling mat, equipping it with folding sides, allowing you to expand the playing area over time.
- The toy must be mobile and compact so that, if desired, it can be easily transported and folded.

This rug gives children the opportunity to develop from the first days of life, and is designed for use up to 3 years of age.
- When choosing or creating a sensory mat for children, it is important to consider age characteristics. It is not recommended to equip a carpet for a baby with many toys and musical elements, since at this age the baby does not yet perceive complex structures and mechanisms.
- All plastic parts should be easy to unfasten for easy washing.
- When making an educational rug for children with your own hands, it is advisable to use different colors and textures, and many interactive, noisy elements.

They will help attract the child's attention and interest him.
Materials for manufacturing
To make a rug for the nursery with your own hands, you will need the following materials.

Materials and tools for the rug.
- It is best to use foam rubber or padding polyester as a base.
- Considering that the child will spend a lot of time on the rug, finishing materials should be natural. They do not cause allergic reactions or irritation. Pay attention! The fabric should not accumulate static electricity.
- The color palette of the toy should be varied. However, it should be borne in mind that too bright, contrasting combinations will have an impact negative impact on the child’s psyche, tiring and boring him.
- For decoration, you can use large buttons of different colors, elastic bands, thick threads and ribbons, ropes and Velcro.
- To make a play mat with your own hands, you will need to purchase high-quality plastic and mechanical parts.

For a child, a developmental mat will become the largest and most useful toy that will never get boring.
Design ideas
Before you start work, you need to decide on the shape and decorative elements. For convenience, it is advisable to draw a sketch of the canvas on paper. Having looked in advance at ideas for designing educational rugs for children from 0 to 3 years old with your own hands, it will be much easier to come up with an interesting and entertaining design. For very young children, sensory, didactic canvases, or those made from soft pom-poms are suitable.

For older children, an excellent option would be those where you can develop not only fine motor skills, but also logic - puzzle mats, puzzles, mosaics.
Separately, it is worth highlighting rugs for girls - most often they are round or oval, with several zones that reflect the interests of the daughter. It can be supplemented with flaps and pockets. Shades of pink predominate. For boys, the car theme is most often used. How older child, the more detailed the drawing should be. Popular colors are blue, cyan, green. It is recommended for active fidgety children to build a rug with soft sides. You can use not only filler as a barrier, but also an additional layer of pompoms.

When the child grows up and begins to sit independently, he will be able to play with it and develop without outside help.
To make educational rugs for children with your own hands, you will need fabric patterns. With their help, various figures are sewn for decoration and applique. These can be animals, trees, plants, windows, cars, clouds, fairy-tale and cartoon characters.

Bright applications and large number all kinds of elements will occupy the child’s attention for a long time.
We create an educational mat for children with our own hands
The process of creating a children's educational rug with your own hands is not difficult. And most importantly, the product will be individual, taking into account all the needs of the baby.

When playing with such a toy, the child will feel your warmth, love and care.
You should start work by developing a sketch. You can draw a diagram on whatman paper. Next, you need to follow the instructions, which describe in detail how to make educational rugs for a child with your own hands.
Preparation of accessories
The first step is to purchase all the necessary accessories - buttons, ribbons, fasteners, beads, Velcro, threads, fasteners. The tools you will need are scissors, a needle, a stationery knife, and bobby pins. At the same stage, it is advisable to draw diagrams of future applications and cut them out.

Below we will describe everything in detail on the topic of how to sew a developmental mat with your own hands.
Preparing the base
This stage involves creating a diagram of the finished canvas. You also need to select materials. It is recommended to give preference to natural, non-slip compounds with antistatic properties. These include calico, flannel, felt, cotton. If you intend to create knitted elements, you must choose cotton yarn.

Soft materials cause pleasant tactile sensations and do not provoke allergic reactions.
Important! It is necessary to take care of high-quality internal filler. A baby rug is designed for crawling and is most often placed on the floor. It must be well insulated. It is recommended to use padding polyester or foam rubber.
Before you sew the parts of a baby's educational rug with your own hands, you need to decide on the front and back sides. After this, you can start cutting out the upper and lower parts and the filler. Be sure to leave seam margins on all sides. Then you need to overcast the edges, not missing any protruding threads.
Creation of a playing field, production of game elements
At this stage, you will need to sew on all pre-prepared appliqués and drawings. Then you should firmly attach the fittings, mechanical and musical elements, and rattles. Special attention It is necessary to pay attention to the quality of fastening of small parts, such as buttons, beads. The child should not be able to tear them off. It is recommended not to use glue, replacing it with thick threads.

Adhesive bases are acceptable for fastening fabric elements and appliqués.
Securing elements to the mat
Large fittings can be made either firmly attached to the base or movable. Safe soft parts can be attached using buttons and Velcro.

This will make them easier to remove before cleaning and washing.
After completion preparatory work You can move on to combining all the parts. To do this, you will need to tightly sew all the components together. wrong side and turn it right side out.
The advantage of making a rug for children with your own hands is its uniqueness. When creating it, it is possible to take into account all the characteristics and interests of the baby. Below are several ideas that will help parents decide on the plot of the playing field for children from 0 to 3 years old.

You choose the materials for its manufacture yourself and you will know exactly what it is made of.
- A bee hiding in a bright flower.
- Christmas tree with buttons for fastening toys.
- A castle for cartoon characters, equipped with opening doors and windows.
- Ships, boats, cars, attached using tape in a movable way. This way, the baby will be able to move objects independently.
- Multi-colored trees, clouds, plants.
- For older children, you can choose more complex applications - traffic, stories from fairy tales.
- It is recommended to equip rugs with pockets in which the child can put his favorite toys.
Rug with arcs yourself
A good idea for creating a rug for children with your own hands is to equip it with special arcs. You can attach toys, musical mechanisms, and rattles to them.

Thanks to such elements, you can concentrate the child’s attention.
The process of creating a canvas for a children's room consists of the steps listed below. To sew elements of a developmental rug for children from 0 to 3 years old, you need to adhere to the following sequence.
Mat base
To make a sensory mat for children with your own hands, equipped with arcs, you will need several meters natural fabric and the material that serves as a seal - synthetic winterizer or foam rubber. If you don’t want to create patterns for appliqués from fabric, you can purchase one that is already decorated with children’s patterns.

For the wrong side, a plain calico is suitable.
To create a rug for children with your own hands, size 1 square. m. you will need:
- Main fabric with printed pattern – 2 m;
- Plastic hoop with a diameter of 90 cm;
- Background fabric without patterns - 4 colors, 30 sq. cm.;
- Foam rubber – 1.5 sq. m.;
- Ribbons, Velcro, colored ropes, pompoms;
- Adhesive tape, preferably in different colors;
After choosing fabrics for the base, you need to start cutting:
- The bottom part is cut first. A pre-prepared paper diagram, carefully traced with soap or pencil. Be sure to leave gaps for seams. After marking, you can cut the fabric.
- Next, you should cut out even squares from the background fabric, which are sewn together one by one. You should get a contrasting pattern. It is important to make all seams tightly and efficiently, leaving them from the inside of the product.
- Educational toys are sewn to the top.
- After this, front side can be sewn to a sealant - foam rubber or padding polyester.

Use to create a product better fabric different tones - cold and warm shades.
Arcs

The selected hoop is divided into two equal parts using a stationery knife.
- The hoop is divided into parts - 125 cm and 132 cm.
- To give softness to the resulting arches, it is recommended to wrap them tightly with padding polyester, securing it with threads.
- After this, the arcs must be decorated with colored fabric.

Pieces of padding polyester must be attached to each half of the hoop, pressing tightly and wrapping them with threads at intervals of 2–3 cm.
Connecting the arches and the base of the mat
The best option is to thread the arcs through the holes and secure them with wide Velcro on the inside.

To prevent the arcs from jumping out, you need to tightly wrap the pockets with the arcs with material.
- Through slots should be made close to the junctions of the background and the center.
- Then it is recommended to sweep them.
- Velcro is sewn on the bottom part (closer to the outer corners).
- The second halves of the Velcro are attached to the arcs on the front surface.
- The arches are folded crosswise, and a thick braid is attached to the bottom to secure the structure.
- The touch mat is ready.
Developmental activities with a mat
The functions of a homemade sensory mat are very diverse.

All that's left is with help satin ribbons or cotton braid to hang on the arcs of the toy.
- Infants can be placed on their stomach. In this position, they will be able to look at colorful pictures, trying to reach them with their hands. This develops concentration and tactile sensations.
- After the child learns to sit, you can place the canvas on the floor and join him, showing in a playful way what can be done with different toys.
- Older children can fasten buttons and zippers and move elements on their own. These actions develop fine motor skills of the hands.
- As they grow older, a hand-made educational mat for newborns can be equipped with letters and numbers.
- It is important to pronounce all actions and names of objects during the game. This way the child will train attention and memory.
A hand-sewn carpet for a nursery will delight a child for several years. And it will help parents free up some time by keeping their baby occupied. Made with love, it will bring joy and fun to the baby, leaving only warm memories.
Educational mats appeared quite recently, but immediately gained wide popularity, and for good reason: this useful thing can replace early age a whole set of toys, without taking up useful space in the room. The stores have a huge selection of models for the most different ages and taste, but sometimes their prices are just off the charts. But making a developmental mat with your own hands is not so difficult. It does not require large financial costs - you just need to invest your time, a little skill, a flight of imagination, a drop of magic and wisdom, as well as every little thing that is in every home - pieces of old materials, buttons lying around idle, beads, etc. lightning, etc. Now we will teach you how to easily create such a toy for your beloved child.
Why do you need a development mat?
Before we talk about how to make a developmental mat for a child with your own hands, let's find out whether it is needed. Maybe you shouldn’t waste your time on it, but rather do something more useful?
So, what is a developmental mat for?
- Such a soft playground develops the baby's coordination of movements. Small children are laid out on a mat and their favorite toys are hung over them. Your baby will learn to feel space and grab toys with his hands.
- If you make such a product as diverse as possible, you can design a lot on it. interesting applications using colorful fabrics, this will improve your baby’s perception of the world.
- A large number of convex elements, accompanied, moreover, by sound effects, will contribute to the development of the baby’s sensory perception, and therefore his memory, hearing and logical thinking.
- For older children, this will be a favorite place to play; it will help them learn numbers, counting, the alphabet, colors and other tricks.
Games on an educational mat
Psychiatrists and pediatricians unanimously advise all mothers not to leave their beloved child just to lie down, but to play educational games with him. What can you play with your child on such a rug? Of course, games are usually limited by the capabilities of the product itself, but you can always add something to your miracle rug, and it will grow and develop with your baby:
- While the child is very small, simply stroke the rug first with your hand, then with the baby’s hand. This will allow him to feel the softness of the fabric and develop tactile sensations.
- When he gets a little older, show him the stripes - he'll probably be interested in them. Show him the noisy and sounding elements, let him touch them with his pen.
- Make secret places on the rug and hide surprises there for your little one to find. This game develops imagination and the ability to analyze.
- Sew patches on the product different sizes. Find small and large applications with your child, analyze which are larger and which are smaller.
- Sew on the sun, clouds, flowers, find out what color they are.
Important! You can make a farm and study animals, or make a pond and put colored fish there. Repeat during classes the name of each animal and what it says. This way the child will start speaking faster.
- It’s good if the mat has a lot of zippers and detachable elements, which perfectly develop hand motor skills. Encourage your child to independently fasten and unfasten zippers, Velcro, lacing, and move removable figures.
- As your child gets older, you can learn numbers and letters. You will be surprised how quickly your baby will master the alphabet and counting with the help of such a wonderful assistant.
What materials are best to use for a rug?
Most do-it-yourself educational children's rugs are quilted blankets covered with a variety of appliqués, pockets, flaps, zippers and other elements interesting to the child.
Here's what you need to consider here:
- It is best to make the base from natural hypoallergenic materials such as satin, felt, calico, flannel or jeans.
Important! It is better to avoid wool - it can cause allergic reactions. Silk is also undesirable for such purposes, since it is easily electrified and highly shiny, which is very harmful to the eyes. It is better not to use synthetics.
- Synthetic winterizer is perfect for filling. This material does not cause allergies and does not accumulate static electricity.
- It is best to take propylene threads, as they are durable and strong.
- Buttons different forms and colors.
- Colored zippers, just make sure that the zipper dog is not sharp and the child will not get hurt when playing with it.
- Various ropes, elastic bands, Velcro.
- Musical elements and other objects that produce sound - rustling paper, bells and bells.
Common mistakes when sewing a children's rug
Often, inexperienced craftswomen make mistakes when sewing a rug for children with their own hands. Let's look at the most common of them:
- There is no need to sew a mirror onto such a product. Not because the baby might see his reflection and get scared. The reason is that light is reflected from the mirror, which is very harmful to the fragile eyes of your babies.
- One more common mistake- monotonous objects to feel on the product. The tactile sense must develop comprehensively, so such elements must be made varied.
- A uniform shiny background is also not good idea. This is also harmful to the baby's eyes.
Stages of creating a developmental mat with your own hands
So, how to make a developmental mat for a child with your own hands, let’s look at the whole process step by step:
- First you need to create a sketch. This needs to be done on paper. Draw your end result as you imagine it.
- Now we need to make the base. It is usually made from large pieces of material onto which they are sewn additional elements. Sew the fabric on all sides. For softness, the base is filled with foam rubber or padding polyester. From below it is better to use a material that does not slip.
Important! Colored leftover materials are used to create the background. For the sky - blue, for the sun - yellow, for the grass - green. The more colored elements, the more interesting it will be for your baby.
- On the background you need to attach, sew or glue game elements - rattles, toys, pockets, zippers, fasteners, etc. This is the most difficult part of the work: selecting, sewing, and assembling the necessary elements into a single picture. Here you will have to use your imagination or use ideas from the Internet. Some toys can be secured movably - with laces or ribbons, Velcro or buttons.
Important! When making such a rug without help sewing machine You won’t be able to do it, but you’ll also have to work with your hands—the game elements will have to be sewn on by hand. Check that small parts are securely sewn and fastened so that a child does not accidentally tear them off.
Let's look at, as an example, several master classes on making a children's rug with your own hands.
Children's rug for boys
Any young car enthusiast will like this children's rug:
- Choose a thick fabric and draw a road map with a pencil. Cover the remaining fields with masking tape to prevent stains.
- Divorce acrylic paint. We will paint the roads gray. If you don't have gray, just mix it up with black and white.
- Paint the roads using a brush or roller.
- When everything is dry, mark the roads.
- Paint your home different colors. You can cut them out of multi-colored felt.
- When the paint is dry, remove the tape.
Important! You can decorate your rug with cars, animals, lakes and other interesting elements to suit your taste.
Educational mat for children: “In the forest”
The main material for this product is felt. All toys are made from it. It can be made in any size - it all depends on your taste:
- We take fabric for the base, onto which we sew the background, and then all the animals.
- For the sky you will need blue felt. For grass - green. For the chanterelle you will need red, white and gray material. For the tree you need white and brown felt.
- To make a design on a birch trunk, fold a white piece of felt in half and cut out a thin piece, then bend it a little more, then a little less, and cut out 1-2 pieces each time. Put white stripe felt on top of the brown one and sew one to the other.
- We sew an owl to the top of the tree.
- We make animals from felt. Patterns can be found on the Internet. Each animal has several details - nose, eyes, ears, tail. We cut out all the details separately, overcast them and sew them to the body.
- It is best to start work from the top of the mat. We sew on the sky and grass, then the fox and trees. On top of all layers we sew a birch and an owl.
- We'll use bias tape around the perimeter.
Important! It is best to sew some kind of rubberized fabric to the back side so that the product does not slip.
An educational mat for children is a complex educational toy consisting of various play elements.
Its main purpose is the development of fine motor skills, sensory skills, coordination and tactile sensations.
You can purchase a mat in a store or make an educational mat for children with your own hands.
In our article we will tell you how such a mat is useful for a child and how you can make a developmental mat yourself.
One of the main tasks good parents is to create a creative developmental environment for the baby. And while the baby is still very small, the developmental mat will be such an environment for him, since it includes everything necessary elements for the initial development of the baby.
An educational mat allows children to develop fine motor skills, which are directly related to speech development.
The rug will allow your baby to grab everything, finger it, crush it, tear it.
The rug will also help your child form an idea of the shape, size, color, taste, and smell of objects that his sensory abilities allow.
And touching objects already makes it possible to determine their properties by touch - that is, to develop tactile sensations.
An educational mat, especially if you make it yourself, can also be used as a massage mat - you can place enough parts on it that will massage your child’s heels.
Thus, the mat will also contribute to physical development and healing.
For children, what age is the developmental mat intended for?
The main advantage of using a developmental mat is that it can be used almost from birth. Until what age your child will play with it depends only on you.
If you are planning to sew a developmental mat with your own hands for a baby under one year old, you need to use as many sensory and tactile elements and small details as possible for the development of motor skills.
If the rug is intended for an older child, it turns into a teaching and development aid.
The more complex the rug, the more opportunities for development it will have. It can become your child’s assistant not only in learning shapes, colors and sizes, but also animals, letters, numbers, continents and even planets. Children at 5 and 7 years old do not want to part with some rugs.
Remember that if your child is very young, you need to limit the time he plays with the mat. It evokes a lot of impressions and emotions in the baby, and can quickly tire him. The older your child is, the more time you can spend developing on the mat, and the more different options for games.
Games with an educational mat
 The number and quality of games with a developmental mat depends on the flight of your imagination, and a little later - on the ingenuity of your baby.
After all, by your example you will show him how many discoveries can be made by manipulating the simplest objects, and you will systematically develop his imagination!
We will list only some of the options for playing with a rug, but this list can be expanded ad infinitum.
Examination and observation. At first, even this is enough to gain new information and knowledge.
Introducing the rug. We show the baby what rustles, what rings, what opens, unfastens, unlaces. At the same time, you can tell funny poems, nursery rhymes on the topic, and sing songs. Gradually, the baby will master all the manipulations on his own.
Secrets and surprises. To motivate your child to quickly learn how to cope with various fasteners, you can hide someone or something under them.
Harvest. Velcro elements can be assembled and folded. For example, flowers in a bouquet, vegetables or mushrooms in a basket.
Studying colors, shapes and sizes, the concept of “more and less.” If an elephant cannot enter a house, then it is bigger than the door.
We study vegetables, fruits, animals, birds, letters, numbers, seasons, time, etc.
We play role-playing games.
We make up fairy tales, and play them together with the baby. Over time, he will amaze you with his writings.
We sew children's educational rugs with our own hands
Preparation
First you need to decide what kind of rug you want to sew. All ideas need to be considered. DIY educational rugs can be of different sizes; different forms; whole or composed of parts; bilateral and unilateral; with sides and arches; musical, etc.
We collect and analyze all available information on educational mats. We highlight for ourselves the most interesting options and study them in detail.
Creating a project for your rug
This most important stage includes the following points:

- We concentrate, awaken our imagination and create in our head a certain image of the future work, i.e. developmental rug. This cannot be a meaningless, ridiculous selection of applications and accessories. There must be a conscious and clearly formulated idea!
- Let's transfer our idea to paper. Determine the shape and size of the rug. You can make a detailed description - from the general picture to detailed description individual elements. You also need a clear rationale and goals that will help you develop your baby with the help of just such a rug. We make patterns for the rug and its elements.
- We study the types of fabrics and accessories and determine what we would like to use and what would be appropriate in our project.
Choosing materials for a children's educational rug
Most commonly used materials:
Fabrics:
- Plain thick fabric for the base (for example, suit) and non-slip fabric for the back side.
- Sintepon as a filler
- Adhesive gasket materials
- Thin fabrics - chintz, calico
- Raincoat
- Drape, felt
- Atlas
- Jeans, corduroy
- Velvet
- Crinkled fabrics
- Terry fabric
- Leather, suede, fur, etc.
Fabrics should be chosen bright, colorful, with an interesting pattern. Before you go to the store, check the contents of your closets - there will probably be several long-unclaimed items or scraps there.
By the way, the atelier also often has scraps of fabric left over, which good seamstresses will be happy to give you free of charge (that is, for nothing), and those who are more cunning will ask for a pretty penny for them.
You go to the store knowing exactly the list of necessary fabrics and the sizes of the flaps.
Accessories:
- Buttons
- Velcro
- Velcro
- Lightning
- Buttons
- Ribbons
- Rubber bands
- Laces, braid
- Beads
- Sequins
- Multi-colored pebbles, etc.
Other elements:
- appliqués
- polyethylene
- squeaker toys
- wool threads
- various fillings: beans, peas, millet, buckwheat, etc.
- mirror film
- music modules, etc.
These are not all types of fittings and other materials that can be used. Go to the store first for informational purposes, study the assortment. Then, at home, think about which of this variety is suitable for your rug, and then, with a ready-made list, feel free to go again. The more options for fastenings and finishing are used, the more developing your rug will be.
We bring the idea to life - we sew a developmental mat with our own hands!
 So that's it necessary materials purchased and prepared: the fabrics are clean and ironed, sorted by color, the threads are matched to them by color, the accessories are neatly laid out in boxes. Let's get started!
The work can be roughly divided into two parts: working with large parts (we use sewing machine) and working with small items (we sew by hand).
Stage 1. Sew the base
The base consists of two pieces of fabric. For the upper part, as a rule, a plain, dense, light-colored fabric, for example, a suit, is chosen. All elements are sewn onto it quite easily. For the bottom of the base, it is better to choose a non-slip, thick fabric, such as denim. When the child begins to crawl, the rug should not crawl with him. Between two cut sections layers of synthetic padding polyester, foam rubber or other filler are placed. If your apartment is cool, it is better to make several layers of filler so that the baby can lie on the floor without fear of catching a cold.
Stage 2. Create the background
For the background we use large pieces of fabric, so you can cut them directly from the base. The background can be a forest, sea, sky, field, etc. You can pin pieces of fabric with pins, or you can baste them - whichever is more convenient for you. Then stitch on the machine. If you place the fabric on an adhesive base, it will last longer and will not fray or unravel.
Now we pin large flat parts of the rug onto the background - houses, trees, roads, rivers, etc. And we sew them on by machine.
Stage 3. We make elements
This process is very labor-intensive, because Every detail must be executed with the utmost care.
The elements can be stationary - they need to be sewn firmly. They can partially move - for example, a butterfly that flaps its wings. Or be completely movable - these are usually Velcro elements that can be moved around the entire rug.
Stage 4. Overlay elements on the background
It's best to spread everything out ready-made elements on the background, and then determine the sequence in which they are added. Larger elements can be stitched on by machine, some of them will be voluminous. Even the colors of the threads can be selected in advance. If you take into account all the factors, you will greatly simplify and speed up the work process.
Stage 5. Manual work
This stage requires perseverance and patience, but if you remember that it is the last, you can be a little patient, right? And the development of fine motor skills will not hurt us, mothers, at all - we can develop it throughout our lives.
We take out our boxes with accessories, lay them out on the rug, and evaluate the aesthetics. If everything is good, we start sewing.
At every stage of creating a rug, you should remember the safety of the child. Any bead or button can be either a developing element or a dangerous object. All small parts must be securely sewn. The threads must be strong. Buttons can be reinforced with duplicate buttons on the wrong side.
The rug requires regular care. Of course, you should wash it by hand, removing the moving parts. If the fabric begins to unravel in some places, it must be hemmed or replaced immediately. The same applies to fittings; their reliability must be monitored with special care. An educational mat is remarkable because it is like a living organism - it can change and grow with your baby. What to remove and what to add is up to you and your baby to decide.
Multifunctional simulator - do-it-yourself development mat. It is non-toxic, game elements are selected taking into account the age and interests of the little one.
The first teaching aid that promotes the development of the baby is a play mat. And, although children are the last thing parents save on, it is not cheap. And the quality of factory products does not always meet the high requirements of mothers. What a difference it would be to make a developmental mat with your own hands! It is non-toxic, the game elements are selected taking into account the age and interests of the little man, and the original plots and compositions are limited only by your crafting abilities and imagination!
Felt is the most suitable material
How the rug “works”
Starting from 2 months, the baby should be placed on a mat in a lying position on its stomach. This multifunctional simulator will allow him to develop faster in different directions.
Related articles:
Gross motor skills
At first, the child will simply look with interest at the pictures and details on it. By raising the head, the baby trains the neck and back muscles.
Trying to reach the modules that interest him, the baby learns to coordinate movements, which will subsequently affect the ability to crawl.
Fine motor skills
Having grabbed the desired part, the baby will continue to study it tactilely. A variety of textures and surfaces of elements (rough and smooth, soft and hard, fleecy) contributes to the development of sensory perception. Babies from 1.5 years old will be interested in fasteners, buttons and zippers.
Phonetic hearing
Add as many rustling and ringing elements as possible to the filling of the rug. This way the baby will not only have fun, but also get acquainted with new sounds.
Logics
Soon the baby will understand that if you click on a certain place, music will play. Or, by pulling the string, a picture will open.
For a child 1–2 years old, you can make a craft with educational content (colors, shapes, names of objects).

If your child has already grown up to role-playing games, you can “fantasize” more complex compositions with moving characters, magic ships and castles on his carpet.
We develop a project and select materials
At the first stage, you need to think about the general idea of the craft - color palette, mood, plot composition, high goals that the rug will serve - developing, educational and educational. You may like a carpet that is united by a common story, or contains several thematic sections. Transfer the project to paper.
The materials can be found in your or your grandmother’s wardrobe. Fabric scraps, ribbons and strings, buttons, zippers and other sewing accessories are suitable. You can use ready-made applications or make your own (images of animals, fruits, vegetables, flowers and trees). If the rug will have vertical elements (arc), choose a suitable base.
When choosing zippers, be guided by the safety of the child. Its teeth should be rounded and large. Check the strength of the “dog”; it will be the first in the baby’s mouth.
Do not use bright neon colors; they should be rich, but not pale.
Make sure that the selected fabrics are natural, because the baby’s skin will come into contact with them.

Elements must be attached so that they can be easily removed before frequent washing mother, but not a child.
An unnecessary blanket or synthetic padding covered with fabric is suitable for the base. Your baby will be warm and comfortable on such a soft rug.
Inspirational ideas
You will definitely create your own unique masterpiece, and as an example, you can get acquainted with our thematic rugs.
Interesting material:
"Seasons"
The rug consists of four equal parts, each of which is dedicated to its own season. In the center we place an object on which seasonal changes will be depicted. For example, a tree - in winter with snow, in spring with buds, in summer with flowers and leaves, in autumn with fruits. Or, the lake is covered with ice, the ice floes are melting, children are swimming, swimming autumn leaves or it's raining.
By planning the details, you can introduce into each sector exactly those signs of the season that will be easier for the child to understand. It should not only be natural changes, but also seasonal holidays. For example, sew a mitten into the winter zone, the baby will be happy to try it on, or a Christmas tree.
An excellent addition would be removable elements that characterize the time of year, which the baby will independently attach with Velcro in accordance with their season. For example, you can make nests with birds, an umbrella, a snowman, flippers, and yellow leaves.

“Forward to adventure!”
It would be interesting to design a craft with the movement of characters (a child’s favorite cartoon character, a flying carpet, a car, a teddy bear, a train, a ship).
They will move along a cord or ribbon that is stretched along the route. To do this, make two holes in the character figurine, into which the rope will then be inserted.
When planning your “adventure”, try to make as many voluminous and retractable parts as possible. For example, if this is a fairy forest:
- strange flowers with petals that can be moved grow in the clearing;
- opening windows and doors of the hut on chicken legs, behind which the baby is waiting magic bags with rustling candy wrappers;
- a voluminous bridge across a swamp in which water lilies grow or frogs jump out on an elastic band.
Use your imagination and try to “revive” the depicted animals, birds and insects as much as possible. For example, wings that you can wave, tug on a fluffy tail or a tongue on an elastic band.
"Weather Phenomena"
On such a rug you can conditionally divide the zones of day and night. Each of them will have different weather. For example, in one direction there is a rain of ribbons, in the other there is a snowball made of sewn beads.
Useful material:
They shine at night volumetric stars, and you can invest a month in a musical mechanism from a toy. Main character lies in the crib, and the baby covers him with a Velcro blanket.
During the day, the sun shines with rays from the braid, mobile birds or insects on an elastic band fly.
"Getting ready for school"
For children 4–5 years old, you can make a mat that will help them learn reading and counting. When depicting letters and numbers, remember that signs for children are an abstract concept, so “reinforce” them with a picture (a house for the letter “D”, four mushrooms for the number “4”).
Find a place for a blackboard - attach a removable notepad or a small magnetic drawing board.
A great idea would be a ribbon of letters and numbers. To do this, you need to make transparent pockets into which cards with letters are inserted.
Master class
Regardless of what kind of masterpiece you have in mind, the general algorithm of work looks something like this.
Choosing a base
For the bottom side of the rug, choose a non-slip fabric, and for the front side, a dense, plain material is suitable. Between them, lay a soft filler (sintepon, foam rubber). The shape and size depend on your preferences, but most often these are rectangular, square or round products with an area of 1–1.5^2 meters.

Working with the background
On dense material, we first pin those objects that will serve as the background - a forest, a farm, a playground, the sea, and on top there are large images - a road, a river, a clearing, a house. We sew everything on the machine.
Preparing the elements
The most painstaking work! We cut out and sew pockets, appliques, figures of birds and animals, think about how to “revive” them and where they will move. You can make the process a little easier and buy some parts in the store (buttons in the shape of animals, ready-made appliqués, squeaky toys).
“Trying on” elements
Distribute the elements on the surface. Think about which ones are best to sew on, which ones to glue, and the sequence of actions.

Final stage
We connect the parts to the base. Now you will have to sew by hand; if you use glue, make sure that its dried remains do not get into the baby’s mouth.
As you can see, making a developmental mat yourself is not at all difficult. The main thing is to start and not put this idea off for a long time, because children grow up so quickly!


