DIY Christmas wreath. Step by step instructions with photo
Production of the volumetric work "Symbol of Christmas"
Suetova Alena Alexandrovna, teacher additional educationPlace of work: MBDOU kindergarten No. 114 of the city of Nizhny Novgorod
Description: the master class is intended for older preschoolers under the guidance of a teacher, for children school age, teachers of additional education, teachers and creative parents.
Purpose: for interior decoration, gift, work for an exhibition, competition.
Target: production of a panel with a Christmas wreath
Tasks:
- to form practical skills in working with paper, scissors, glue;
- to practice unconventional technique splash painting
- develop aesthetic taste, Creative skills children,
- develop fantasy, imagination, fine motor skills of hands;
- coordinate and synchronize the movements of both hands;
- to form the desire and desire to make gifts with their own hands;
- educate independence, patience, perseverance.
Necessary materials:
- A3 sheet
- Glue
- Scissors
- Pencil
- Burgundy (red) velvet paper
- Colored paper in red, green and silver
- Color foil
- Compass
- Dry glitter
- Two spruce branches (can be artificial)
- Two gold beads
- Cotton wool
- Thick cardboard for the base of the wreath
- Old toothbrush or glue brush with hard bristles
- White gouache
- Thin brush
- Watercolor blue, lilac, purple
- Palette


When working with scissors, follow the safety rules:
- Put the scissors with rings towards you.
- Pass the scissors with the rings forward, holding them by the closed blades.
- Do not leave scissors open.
- Watch the movement of the blades while working.
- Do not play with scissors, do not bring scissors to your face.
I bring to your attention a master class on making panels "Symbol of Christmas" with your own hands.
In our work, the wreath is made of paper, in the middle of the wreath we will place a candle, stylized spruce branches and a holly. (The leaves of the holly are specially made red in order to avoid merging with green branches)

The Christmas wreath appeared in the history of the holiday almost 200 years ago in Europe. For a long time he served as a table decoration. Initially, four candles were necessarily installed on it, which were sequentially lit before Christmas. Later, the candles disappeared, and the wreath began to decorate, including entrance doors to the house. Wreaths are most often made from live or artificial fir branches, decorated with fresh, dried, artificial inserts, decorated with ribbons, Christmas decorations.

The holly is another Christmas symbol. He has a wonderful ability to remain green and beautiful even in winter, when nature is deprived of most of its colors.
Step by step job description:
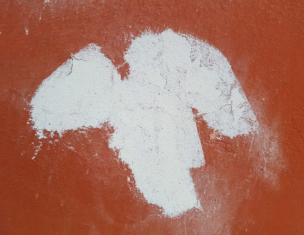
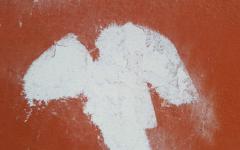
1. Take a watercolor and stir it with water in the palette to the state of "colored water". Dip your toothbrush into the paint and start splattering on the sheet. It will come out like a blizzard.

2. With a pencil, draw a circle in the middle of the sheet, as large as it fits on the sheet. And outside the circle we will draw winter patterns. To do this, take a thin brush, white gouache and blue and purple watercolors.

3. Now you need to make a wreath. It is made of colored paper and thick cardboard. Take the green colored paper and cut out strips measuring 30 cm by 2.5 cm. Then, to the middle of the strip, make “grass” with scissors.

4. Cut out the outline of the wreath (circle) from thick cardboard. (I have divided it into parts for convenience).

5. Glue the strip and wrap it around the outline of the circle. You will get an imitation of a branch.


6. Let's make one more stylized coniferous branches, we will place them on the sides of the candle. To do this, cut out 2.5 cm squares from colored green paper and twist them into tubes. Do as many as you need. In this work, there are approximately 33 of them.

7. Glue the tubes on the sheet on the sides of the circle in the middle.

8. Let's make one more decoration for work. Red bow. Cut out two strips measuring 30 by 3.5 cm. Cut the strip into smaller strips, not reaching the edge. And glue each tip as shown in the photo.


9. Cut out another strip (for the middle of the bow) measuring 21 by 4 cm. Cut the strip into smaller strips, not reaching the edge by 8 cm (as seen in the picture). From this edge of 8 cm, make a tube, gluing the tip with glue, and twist the small strips with scissors.


10. Connect the parts and the bow is ready.

11. Cut out two holly leaves from a sheet of velvet paper.

12. Glue artificial spruce branches to them. Can be decorated with beads.

13. In order to make a candle, take silver paper 9 by 15 cm. Roll the paper into a tube and seal it.


14. Colored foil is used for the candle flame. Wrap and crumple colorful sheets of foil to simulate flames. Insert the flame into the silver tube. Glue.

15. All the details are ready, glue them one by one to the sheet. Start with a wreath.

16. Then glue the candle.

17. Next, on the sides of the candle, glue holly leaves with coniferous branches decorated with beads.

18. Cover the candle and twigs with "snow". Use cotton wool for this.

19. Use white gouache to create frost on the wreath. Lightly run paint over the tips of the needles.

20. Glue a red bow under the candle and snow.
New Year inspires creativity. Even if you haven't picked up pencils and brushes since school, dedicate a few evenings to creating! Assign small tasks to the children and husband, who will also be carried away by work. Creativity will give the family a festive mood, and the result of joint work will decorate the walls of the house. We offer to make a New Year's panel - it will become a worthy part New Year's decor or a special gift.
By the way, almost any materials are suitable for work: paper, fabric, cones, fir branches, beads, buttons and even pasta. No cash outlay is required. The term "panel" comes from the Latin "pannus" ("a piece of cloth"). Today, this word refers to an interior item that adorns walls or ceilings. How is it different from the painting? First of all, manufacturing technique. The picture is painted with paints, and the panels are created from fabric, wood, stone, clay, plastic, salt dough and even natural materials.
Panel of paper and felt
A spectacular 3D-panel will allow you to keep your children entertained for several evenings!The winter landscape will fill the house with comfort. Entrust part of the work to the child, and he will be happy to help. In order not to be distracted from creativity, prepare materials in advance:
- A4 thick paper: white, blue and colored with sparkles;
- white felt fabric;
- a wooden photo frame or a box with wide sides;
- glue stick;
- white spray paint with sparkles;
- Double-sided tape;
- mock knife;
- rug for scrapbooking or board (plywood);
- eyelet installer or hole puncher;
- stencils of trees and animals;
- pencil, ruler and eraser.
Instruction
- Apply spray paint to the frame and wait for it to dry.
- Cut the blue sheet according to the internal dimensions of the frame and glue it as the basis for the appliqué. Draw or print as cartoon characters, trees, snowdrifts and animals. Transfer them to fabric or colored paper, carefully cut and fold in the desired order.
- Using an eyelet installer or a hole punch, knock out the snowflakes from the leftover felt. Prepare Christmas balls and a star made of colored paper.
- Fix the blue sheet inside the frame and with double-sided tape. Glue the details. Start with large ones (snowdrifts, trees) and end with small ones (snowflakes, balls).
Jewelry panel
 Show your imagination - you can fold not only a Christmas tree from jewelry!
 Surely you have a box with beads, brooches and earrings that you wore at school or received as a “legacy” from your grandmother. There is nothing to put them on, but the hand does not rise to throw away. Let's find a new use for jewelry and make a chic panel out of it. In addition to jewelry, fancy buttons and beads, you will need the following materials:
- a sheet of cardboard;
- dark cardboard or felt;
- frame according to the size of the sheet;
- decor: feathers, beads, ribbons;
- scissors;
- glue gun;
- pencil;
- tweezers.
Instruction
- Glue paper to cardboard or stretch felt over it. We advise you to take material in black, dark blue or burgundy, on which the decorations are more clearly visible.
- Using tweezers or scissors, disassemble the jewelry into details. Arrange them on the "tree" to choose the best way pattern. You can place the decorations in any order or follow the laws of symmetry. Large details look better in the center and on the top of the Christmas tree, small ones on the sides. A string of beads will serve as a frame for a figure or an imitation of a garland.
- Stick on jewelry, starting with massive pieces and ending with miniature ones.
Panel on the hoop
 The hoop will be an excellent impromptu frame for a small panel
 Turn an old embroidery fixture into a panel base! The craft will decorate the wall of the kitchen or hallway in the style of "country", a Christmas tree or a window. Prepare for work:
- hoop of small diameter (11-13 cm);
- pieces of plain and patterned fabrics according to the size of the hoop;
- Christmas figurines (snowflakes, Christmas trees, snowmen), crocheted, cut out of felt or felt;
- thin tape;
- threads and needles.
Instruction
- Pull the fabric tightly over the hoop so that there are no wrinkles. Stepping back a little from the center, fasten the hanging tape.
- Sew on the figurines. Cut off excess fabric, glue or fasten so that they are not visible from the front side.
- Make several hoops in the same way. Do not decorate everything with figurines, just cover some with fabric. Hang them with a colorless thread or ribbon.
Ideas for a New Year's panel
 Fancy New Year's panel made using the scrapbooking technique
 We offer a few more ideas for crafts:
- If you know the scrapbooking technique (creating postcards and decor using paper and other materials), the design of the panel will not be a problem. Find paper with a Christmas pattern, stamps, ribbons, snowflakes, flowers and get creative. In order not to get lost in the variety of ideas, select the topic of work in advance, for example, "Snow Maiden" or "Winter Evening".
- Cotton wool is an excellent material for New Year's landscapes. From it you can lay out snowdrifts, fluffy clouds and snowflakes. Cotton pads will become the basis for creating round figures: snowmen, animals, and so on. For the application, choose a dark background, on which white drawings look more impressive.
- Make a panel with retro pictures using the technique. To work, you need special napkins and glue. Separate the top layer of the material with the image you like, attach it to the base and grease with glue. You can combine clippings from several napkins on a panel. The main thing is to work carefully and bring the panel to the same thickness before varnishing.
- A three-dimensional figure made of plasticine, salt dough or natural materials will become the compositional center of the panel. With minimal modeling skills, you can easily depict Santa Claus, the Snow Maiden or the red Cockerel -. We recommend beginner "sculptures" to start with an elegant spruce or snowman.
- A patchwork panel of colored patchworks will bring the cosiness of a village hut to your home. In this technique, you can perform abstract compositions that do not require fine work. Choose threads, fabrics and buttons in the same color scheme, cut out the details according to the patterns given and sew them as shown in the picture:
 Scheme for creating a panel with patchwork Santa Claus
 Examples of New Year's panels
 New Year's panel with the Red Rooster and clock imitation
  Cute Christmas panel with embroidery
  Exquisite winter panel with wooden figurines of Santa and his deer
  Unusual panels of wooden planks
  Scrapbooking is ideal for creating panels and
  Volumetric panel based on a hoop and a lace napkin
  Unusual wall panels that will replace your simple
 Christmas throughout the Christian world is childish, fabulous and Holy holiday. And indeed, when children get acquainted with this Gospel passage, parents do not have difficulties: a Child is born painlessly, bitterness does not yet come to His earthly life, women in Bethlehem do not yet cry, and the prophecies that the Mother of God hears do not yet touch on the topic of suffering. The only inconvenience that the holy family experiences is the very modest birthplace of the Divine Infant - a cattle pen ... But even this fact is very significant and gives us special hope for pardon, because not everyone is allowed into the royal chambers, and anyone who comes to the cave of the poor can enter with the world.
And although now, far from everywhere, in connection with the mention of the feast of the Nativity of Christ, they talk about the One who was born and brought salvation from loneliness and death into a person’s life, the very word “Christmas” will always symbolize joyful tenderness that strengthens family ties and spills over to the lonely , sad, disappointed.
The feast of the Nativity of Christ is special and the expectation of this holiday is also special. The multi-day fast is not strict, but quiet - the daylight hours are getting shorter, the nights are getting colder, and people are increasingly in need of communication.
But the Nativity Fast has one significant difficulty: its asceticism is destroyed by the tradition of preparing for the meeting of the civil New Year and its celebration "from the first to the thirteenth." How to convince a child to limit sweets and entertainment, when garlands are hung in all institutions a month and a half before the holidays, and even New Year's decor is being sold in grocery stores. A child is a particularly social being, how can you not let him go to the Christmas tree, which takes place in kindergarten or at the school he had been looking forward to for so long?
So, instead of taking candy from the child, let's fill the expectation of the holiday with pleasant and useful joint work. After all, no work is possible without asceticism, without the rejection of excesses, everything idle and empty. What's the point of learning to refuse cutlets and cakes, but not to love work? Fortunately, not everything is done for us by machines, we must be able to hold some tools in our hands.
The task that I want to offer you can bring the whole family together joint creativity during several long winter evenings. Let's make a decorative panel using the technique of application on the Gospel theme, depict the moment when the Angel with the gospel appears to the shepherds carrying the night watch:
In that country there were shepherds in the field, keeping watch over their flock by night.
Suddenly an angel of the Lord appeared to them, and the glory of the Lord shone around them; and feared with great fear.
And the angel said to them: Do not be afraid; I proclaim to you a great joy that will be for all people:
For today a Savior has been born to you in the city of David, who is Christ the Lord...
(Luke 2:8-11)
So, it takes place at night, which means that the basis for our work will be a sheet of tinted paper. We used 50x55 brown pastel paper, which you can find in the art supply department. If necessary, you can colorfully paint over the Whatman sheet with wax crayons. We also need:
- color and White paper A4 format (color you need to buy two or three different sets to find different shades green and brown)
- scissors, cereals (hercules or semolina),
- PVA glue and glue stick
— colour pencils,
- as many family members as possible for work.
Children, attract moms, dads, grandparents, uncles and aunts!
The first stage - the distant plan
To depict the horizon line, you need to take a dark blue sheet of ordinary colored paper and tear it in half lengthwise. Now, by gluing these halves to the top edge of the sheet, we will get an image of the sky. Next, cut out deciduous and coniferous trees from green paper. The technique is simple: we cut each sheet in half across to reduce the format to A5 - after all, the plan is distant! -fold again in half and, having outlined the drawing of half of the tree, cut out and place the resulting vegetation on the horizon line. 
The second stage - the shepherds and the angel
Each shepherd consists of three parts: the body, the head and the hand holding the staff. The body is cut out from a dark A4 sheet. We took three brown shades. The shape of the shepherd's body resembles a nested doll, and the head is also depicted according to the principle of a nested doll: we draw a face on white paper, cut and paste a portrait in the upper body. With pencils we draw a sleeve and a staff, to the staff we glue a hand cut out of white paper, looking out of the sleeve. We also cut out the angel from an A4 sheet of white paper folded lengthwise. Drawing it is simple: the head is half a circle, the robe is a trapezoid, and the wing. If desired, you can enrich the image with details.
The third stage - lambs
This part of the task is very popular with children. Remember, we are lamb! Only this time the figure will need to be cut out along the contour. Let everyone make a lamb, because they should fill the rest of the space of our picture!
Now you can cut Star of Bethlehem from a silver wrapper and complete the composition. You see, you can't do it in one evening! I wish you to spend time with benefit and pleasure from communication in the family circle. God bless you! 
When republishing materials from the Matrony.ru website, a direct active link to original text material is required.
Since you are here...
… we have a small request. The Matrona portal is actively developing, our audience is growing, but we do not have enough funds for the editorial work. Many topics that we would like to raise and that are of interest to you, our readers, remain uncovered due to financial constraints. Unlike many media, we deliberately do not make a paid subscription, because we want our materials to be available to everyone.
But. Matrons are daily articles, columns and interviews, translations of the best English-language articles about family and upbringing, these are editors, hosting and servers. So you can understand why we are asking for your help.
For example, is 50 rubles a month a lot or a little? A cup of coffee? Not much for a family budget. For Matron - a lot.
If everyone who reads Matrons supports us with 50 rubles a month, they will make a huge contribution to the possibility of developing the publication and the emergence of new relevant and interesting materials about the life of a woman in modern world, family, raising children, creative self-realization and spiritual meanings.
Attention everyone photo New Year's panel clickable, enlarge on click.
Nothing lifts your spirits like that. as a constant reminder of the holiday.
And what holiday can be compared with the New Year, except perhaps a birthday.
And what is always before our eyes, New Year's panel photo You can view.
Photo
New Year's panel do it yourself
I will say right away that such New Year's panels are very difficult to execute, so you should not take on such difficult work.
It will be doubly offensive when, after hours of hard work. As a result, you may not be what you expected.

New Year's panel photo
I beg your pardon full photo New Year's pano did not work out, so something like that, in parts.

Photo of a New Year's panel with a clock
Therefore, to begin with, try to make a simple snowman.
In no way do I want to offend anyone. But as a rule, pile, a masterpiece of New Year's panels, disappears at this stage.
So we go from simple to complex.
We make panels together with the children, believe me, it is much more interesting for the children and for you.
Here are some interesting articles:
So let's go, first we need:
Felt: white, dark brown, grey, green, yellow and blue colors
- 1 sheet of cardboard, or a cover from a case, folder, album, whatever is at hand
- glue, scissors
-sample
We will find a cellophane bag in the process, the whole process of work is in the photo, we look from left to right.

A simple panel for children and training
The template of our snowman is a snowman, we print it out, the larger the format, the better.
But we need to learn, therefore, an A4 sheet.
Cut out the details along the contour.
We put the cut out details on the felt, and now we cut it out of felt, look at the colors, be careful.
We glue some details like eyes.
Glue felt onto a rectangular sheet of cardboard, cardboard will be the base.
For rigidity.
And on this cardboard pasted over with felt, it serves as a background, we paste a snowman, not forgetting about the details.
The final stage, so that our New Year's panel made with our own hands would look advantageous.
Cardboard with a glued snowman, put in a plastic bag and iron through the fabric with an iron.
That's all, in my opinion a very cheerful New Year's panel made by hand turned out.
Is not it?
And in my opinion, complete nonsense, NOT VERY.

New Year's panel decorated with Christmas toys
A good New Year's panel made by professionals or real amateurs looks much better.
And it's pretty much the same, with a few differences. The base is different, the frame is a little better, the tinsel is a little better, some colors and...
Here is a real hand-made New Year's panel that makes our eyes riveted.

Christmas panel decoration elements close-up
In my opinion THESE New Year's panel beautiful.
If needed step by step instructions on creating a New Year's panel, write in the comments, I will describe in detail, but unfortunately there are no step-by-step photos.
Unless you take it apart again. 🙂
Attention, all photos of the New Year's panels are clickable, they increase by clicking. Nothing lifts your spirits like that. as a constant reminder of the holiday. And what holiday can be compared with the New Year, except perhaps a birthday. And what is always before our eyes, you can see the New Year's photo panel. I will say right away that such New Year's panels are very difficult to execute, so you should not take on such difficult work. It will be doubly offensive when, after hours of hard work. As a result, you may not be what you expected. I apologize for the full photo...
Overview
Master class: postcard-panel "Winter Window"
Handicraft master class (working with paper, crafts from waste material).
Do-it-yourself crafts for the New Year fill the house with kindness, give an unforgettable feeling of celebration and expectation of a miracle.
Mum! look out the window
Know that yesterday it was not for nothing that the cat
Washed the nose
There is no dirt, the whole yard is dressed,
Brightened, whitened -
Apparently it's cold.
Not scratchy, light blue
Frost is hung on the branches -
Just look at you!
Like someone with a beef
Fresh, white, plump cotton
Removed all bushes.
A. Fet
Crafts for the New Year with your own hands can be created from almost any material. Paper is one of the simplest, most affordable, easily processed materials.
Having created simple crafts from paper with your own hands, you can come up with many other unusual crafts and make them with your child. The richer the fantasy, the more crafts you can come up with. Such activities with a child not only allow you to spend your leisure time usefully, but also contribute to the development of spatial thinking, fine motor skills hands, eye and creative imagination. It is enough to show a little creative ingenuity and imagination.
You can make a postcard-picture and present it for the holiday.
Materials and tools:

sheets of cardboard;
confetti;
ruler;
a piece of lace or guipure;
knitting needle;
Sheets from the old catalog;
PVA glue, glue - pencil, Moment glue;
green napkins;
toothpicks;
scissors.
Stages of making a New Year's card
We take two sheets of A4 cardboard. Color does not matter. Draw a window of arbitrary shape and size on a sheet of cardboard. I used half a sheet of cardboard.

To make our window more realistic, from the inside we glue the “glass” from the multifora and the curtain (lace) onto the “Moment” glue. The cardboard taken for the base is colored and you don’t have to stick anything, but I wanted to change the “wallpaper”. You can cut out a child from an old book, or you can use a photo of your child.

We collect all the parts of the window with PVA glue. We fix it anywhere in our base.

Now we need to prepare the "logs" for the wall. We wind a sheet from the catalog (or a newspaper) onto a knitting needle. We fix the tip with glue.

We begin to glue the tubes to the base.

When all the tubes are glued, let dry well.

Using watercolors or gouache, I painted the "logs". You may not paint.

Outside the window white-white,
During the night it covered with snow.
Everything sparkles, everything glitters.
And beckons to the street.
Snow everywhere - beautiful!
And on the hill there is vanity:
Everyone ran to ride
And they took me with them.
While the paint dries, prepare the design. We take a napkin and cut it into four equal strips.

Fold the strip in half and cut the edge opposite the fold line. Then we wind it in a spiral on a toothpick and fix it with glue.

We glue the finished branches on the Moment glue.

To make our postcard festive, we glue confetti.

Cut the chocolate foil into squares and roll them into balls. We glue the toys on the Moment glue.

Postcard is ready! You can write congratulations on the back and give.

And you can glue the fasteners and hang like a picture.

On the window, silver from hoarfrost,
During the night the chrysanthemums bloomed.
In the upper glasses - the sky is bright blue
And stuck in the snow dust.
The sun rises, cheerful from the cold,
The window shines golden.
The morning is quiet, joyful and young,
Everything is covered in white snow.
I.A. Bunin
In making crafts for the New Year with your own hands, the main thing is to show imagination and be creative in your work. Do not be afraid of experiments, take on the creation of new crafts for yourself - this will bring you a lot positive emotions, and the result will surely please everyone! All family members can be involved in creating New Year's decor and DIY crafts. You can not only decorate the interior for the New Year, but also create a magical Christmas mood that will make your holiday unforgettable. In addition, spending time together common occupation makes the family very happy.
Thank you for your attention.