If you are looking for an original decoration for your home, or if you want to give joy to your baby in the form of a new trinket, then the products from the bags will be just right. There are many types of them: baby products, decoration for home design.
There may even be earrings or necklaces for fashionable ladies. To create crafts from packages, as in the photo, you just need to have scissors and different packages.

Rosettes from packages
Most easy way make something out of the package is a rosette. Moreover, it can be a decoration of a room if it is made from a bright color.

What is needed for this? Wire, scissors, packages of bright and different colors. In order to decorate, you can take some kind of fabric, as well as a thread, but this is in case you want to put flowers in a vase, and not stick on the wall or other part of the fittings.

First you need to divide the wire into equal parts. Twist each segment into a ring with a leg. The rose includes leaves: 6 long and 5 short. Therefore, the conclusion follows that we need such a number of wire parts.

The next thing we do is take a trash bag and cut out 11 squares. They will serve us for wrapping the rings, and on the very leg, which came out as a result of twisting the wire, you can fix everything well. All these actions must be done carefully, otherwise the sheet will break or will not stick to the wire.


One rose is twisted from the leaves that were previously made. First, we take long petals, and then from above we need to fasten larger parts.

Everything needs to be properly fixed and smoothed so that the polyethylene decoration (in our case, a rose) looks like a real flower.


And in the end, you need to decide where you want to place this rose. If it is a wall or a box for jewelry, then you do not need to add anything and you can simply glue the flower in place.

Suddenly you decide to put a rose in a vase, then you need an addition - you need legs. In this case, a high-density wire is attached to the base, and after that you can wrap the rose with green thread, up to the leaves. The fabric on the leg will become a beautiful highlight.

No matter how the flower is decorated, it will look wonderful. If you make a lot of roses, then a real bouquet will come out. Such work can be shared with children if they are interested in this type of crafts from garbage bags.

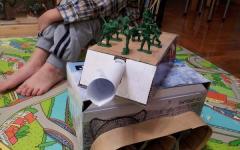
Polyethylene toys
Plastic bags can be the basis for making wonderful toys. You can do such favors together with the baby so that he knows how to use scissors.


Note! Craftsmen advise creativity lessons that make toys from different bags for toddlers from 5 years old.

What do you need to create crafts from packages? New multi-colored bags, hardboard, scissors.

To decorate the toy:
- beads;
- buttons;
- pebbles.

Even if you do not know which pet you will make from the packages, there are many options presented in the photo. Trash bags are easy to create.


First, the base is prepared, two cardboard circles are used for it. It is desirable that the size is the same and the diameter. The circle should look like a disc, with the same hole.


After that, you need to take a plastic bag, turn it out, and cut it into strips so that they are as long as possible. Then wind these strips on discs that are made of cardboard and folded one to the other. You can wind in any direction, but at the same time so that there are no gaps. This is very important, otherwise the pompom will be crooked.

When the strip of the bag ends, you take the next one and continue to wind. And the more wrapped on a cardboard disc, the more magnificent the pompom and toy for the baby will turn out.


This kind of work can be done independently by the baby, because everything is simple and easy.

But the rest of the stages should be controlled by the parents. We'll need scissors because the pompom needs to be cut along the edge.

Next, we need a strip from the bag, and fold it in several layers so that it is more durable. It is wrapped in the middle of two cardboard discs, so as to secure the pompom in the center. Then we remove the cardboard, and we get a wonderful ball, it needs to be straightened to get a large volume.

Likewise, you need to make a larger pompom. The small one is used as the head of a toy animal, and the large one is used as the body. In addition, 4 pom-poms are additionally needed small size- these will be the legs of the animal.


At the last stage - collecting the toy together, you need to connect 2 large parts, and attach the small ones to the large one. Then we glue the eyes, nose and ears, which will be made of beads or buttons.

Hence, one can do a large number of handicrafts from plastic bags on your own, not only a dog or a hare, but also Santa Claus or a snowman for the New Year's holiday.


Paper bag tree
For the craft "Tree" we need:
- paper bag;
- multi-colored paper;
- scissors and glue.

What do we have to do?
- Cut along the side of the bag, with the stripes towards the middle;
- Twist the strips in the form of tree branches;
- Cut fruit out of colored paper and glue it onto your tree.


Crafts from milk bags
Cardboard boxes containing milk - good material for creative ideas of children. They can be applied in different purposes, not just as seedling pots.

If in creative process add imagination, then you can make a lot of milk cartons necessary crafts for the kid while playing.


Toys are something like that, you can buy in the store, but why? Self-made toys have a very beneficial effect on the baby, develop his imagination and creativity.


Milk carton wallet
First, let's talk about the most original idea how to make a purse out of a bag of milk, in which you can store various trifles or even money.

Two parts of the bag on the pattern, you can glue one to the other, preferably with tape, and then bend it according to the instructions.


Conclusion
Trash bag crafting is a creative process that is very exciting for toddlers, so involve them in these activities. After all, it is not only interesting, but also informative.

Photo of handicrafts from packages


2. To make a pom-pom, you will need 2 cardboard rings.
3. To get the strips with which the rings are wrapped, you need to cut off the handles of the T-shirt package, the welded bottom, fold the bag 4 times in length and cut across strips 1-1.5 cm wide. 
4. Take several strips, attach to the edge of the rings and secure the ends with several turns. 
5. If the strips run out above the rings, then you just ... 
6.Cut flush with the rings. 
7. Apply the following strips to the same place. 
8. Align along the edge, secure the previous and new strips with several turns. 
9. We continue to move in a circle, so the shaggy rings are not threatened. 
10. Continue wrapping rings in a circle. 
11. The result should be a chubby blank, with a small hole in the center to make it easier to tighten the ball. 
12. We proceed to the most crucial stage. Cut off a small piece of the edge to get to the cardboard rings. 
13. We cut the workpiece in a circle. 
14. We thread a strong thread between 2 rings and tighten it tightly so that the hole closes. 
15. Remove the cardboard rings, straighten the pompom, shake. If you need to do a haircut, remove the protruding parts. 
16. And here is the finished pompom. 
17. We simply tie the head with the body with the remaining ends of the threads. 
18. Result. 
19. We design the head - ears, if the rabbit is small, you can make it from the handles from the package. If a large specimen, then cut out a double strip the right size from the package - just our case. 
20. Twist the handle in the middle 2 times. 
21. Fold in half. straighten ... 
22. and tie. 
23. We glue the eyes, nose, ears and the head is ready. 
24. The front legs are tied, but not close to each other, but at a distance, we wrap around the neck. We just glue the rear ones. Don't forget about the ponytail. 
25. Rabbit in all its glory, even with carrots. Everything is as it should be. 
26. Slightly sideways. 
27. In the process, you can improvise. The animal looks like a koala. 
28. You can make a snowman. 
29. And you can portray a cat. I wish you wild imagination and creative success. The work will not be difficult for those who knit, pompons are similar. I really hope that everything is clear. First experience. 
A good and caring hostess does not waste a single thing. Even if these are unnecessary old things that have outlived their time, however, you can still fish out the benefits from them. So, today we are going to take a look at plastic bags. Firstly, if you think about it, then from such material it is really possible to make home decorations with your own hands on the eve of such holidays as New Year, Birthday, Easter, March 8 and so on. Secondly, gifts to relatives and friends will turn out quite unexpected. Thirdly, pleasant and bright flowers for mothers and grandmothers, as well as many other things that your rich imagination will give birth to. Such a fascinating handicraft will inspire you, relieve the accumulated emotional stress, bring new colors and some moments of liveliness into the atmosphere of everyday life, and also make loved ones proud of your achievements in the field hand made... If you liked our idea, then plunge into the vastness of the prepared article, where 6 easy and interesting handicrafts from packages with your own hands for prepared beginners will be presented to your attention. Visual photos and accessible videos with step-by-step master classes will help you in your home art.
Flowers from packages
Many amazing crafts can be made from regular packages. One of them is flowers. They are perfect for decorating the interior and creating a cozy atmosphere in the house. Such flowers will become great gift mom or grandmother on March 8. Let's see how to make interesting DIY flowers for beginners.
You will need:
- Plastic bags 2 colors,
- Thin wire
- Thread,
- Scissors.
Progress:
- Cut the plastic bag into strips, about 1 cm wide.
- Weave a long braid from three strips (two colors).
- From the wire, make a blank for the petal with your own hands. Form a loop out of it and fix at the base with a twisting motion. A tail of 2 cm should remain. We need to make 6 petals of this kind.
- We wrap each blank for the petal of the craft in a bag so that the wire is completely covered, and we fix it with a rope in the place where the tip of the wire is.
- Now we start forming the flower. Take the first petal and slightly bend its sides inward, then make a loop from the previously prepared pigtail and fasten the structure with a thread.
- Next, we attach the second petal and loop in the same way.
- For the rest of the petals, bend the edges and attach them to the flower, alternating the petals with the loops of the pigtail. We give a voluminous and beautiful shape.
- When all the pieces are assembled and secured, spread the tips of the petals outward. So you get a voluminous and open flower. We cut off all unnecessary and get a ready-made interesting craft. It can be used as it is, or you can attach a stem by making it out of wire and make a bouquet of several flowers.
Video: do-it-yourself flowers from packages
Wreath on the door
To decorate the door for the New Year 2018, I propose to make a simple and beautiful wreath. It can be executed both from new packages and from old ones. In order to understand the principle of performing this interesting craft, take a look step by step wizard class with visual photos and video instructions for beginners.

You will need:
- White plastic bags,
- Scissors,
- Clothes hangers metal or thick wire,
- Glue gun.
Progress:
- We make a circle from a hanger or wire. This will be our craft base. If you used a coat hanger, use the crochet hook to hang the wreath later.
- Cut the strips from the bags.
- Now, with your own hands, start tying the strips in a circle, leaving the loose ponytails to stick out. Each strip of the bag should be tightly pressed against each other.
- Thus, we tie the whole circle.
- When the wreath is ready, decorate it with small ones Christmas decorations attaching with glue.
- Wait until the glue is completely dry, and your New Year interesting craft ready!
Video: ideas new year decorations from packages with your own hands
Easter basket for kindergarten
If you were asked in the kindergarten to bring a craft for Easter, and you made beautiful eggs with your own hands and do not know what it is interesting to put them in, then you should like such a small and elegant basket. It is made from cheap materials like plastic bags that almost everyone in the house has. For beginners, this work will not require a lot of effort and will not take a lot of time.

You will need:
- Yellow packages,
- Mayonnaise bucket,
- Glue gun,
- Decorative rope,
- Scissors,
- Double-sided tape,
- Needle with thread.
Progress:
- Cut the polyethylene in a strip so that the width allows you to completely glue the bucket. Glue the scotch tape on the bucket itself vertical stripes, and then glue it with a bag. We do this so that after there are no gaps between the shuttlecocks.
- Now we make shuttlecocks with our own hands. We cut off the top and bottom sides of polyethylene and cut it lengthwise into two parts. We need 6 such blanks.
- Use a needle and thread to baste the long section of the polyethylene blank. We need 2 blanks for one row. Need to gather upper part by pulling the thread. Tie the blank. Do not forget to try our shuttlecock on a bucket to find out how much you need to tighten the thread. The shuttlecock should completely "hug" the bucket in a circle once.
- We need 3 of these shuttlecocks. Make sure the skirts are not too long. If you don't like the length, just cut off the excess.
- Now, using glue, attach the shuttlecocks to the bucket, starting from the bottom.
- The top must be glued neatly and evenly along the edge.
- Make a flat pigtail from the bags with your own hands and glue it to the edge of the upper shuttlecock, covering the ugly edge.
- Now we are making a handle. If you have a handle on a bucket, you can simply decorate it with colorful polyethylene wrapping our pigtail around it. If there is no handle, make it out of rope, which you can decorate in the same way.
- Also, the basket can be decorated with flowers or beads.
- The basket is ready, you can fill it halfway with cotton wool or other filler, and now you can put it on it Easter eggs... Such an interesting craft will bring a lot of pleasure and positive to the whole environment.
Video: a master class on making baskets from bags with your own hands
Balloons for room decoration
If you urgently need to decorate the room with balloons, and you have no time to run to the store, you can make interesting DIY crafts from plastic bags for beginners in the form of balloons. Such simple products will perfectly decorate a home party and surprise guests. You can do them with the children yourself younger age- from 3 years old.

You will need:
- Small bags of different colors,
- Thread.
Progress:
- For such balls, it is better to take transparent bags.
- Take brightly colored plastic and inflate it.
- Tie with a string to keep it from deflating.
- We need a lot of inflated bags of different colors.
- Using a thread, tie several homemade balls together, and you will get a beautiful and voluminous interesting handicraft, created with your own hands from the available material at hand.
Elegant Christmas tree
Shops are full of a huge variety of Christmas trees, but the price sometimes "bites". Therefore, I want to offer an option for a budget Christmas tree, which you can make with your own hands from a plastic bag. You can connect the child to the execution process, since the craft is designed for children from 4 years old. Let's see how to complete a Christmas tree with step by step instructions for beginners.  You will need:
- Sushi sticks - 3 pcs.,
- Thick plastic bags (green),
- Glue gun,
- Wire,
- Scissors,
- Cardboard out of the box (thick).
Progress:
- To create an interesting craft at home, glue the sushi sticks together.
- We attach the wire to sticks and make tree branches with our own hands. To prevent the wire from slipping off the trunk, secure it with tape.
- Cut strips from the bag, 3-4 cm wide, and make a fringe, cutting the strip. Leave 1 cm of the width uncut. Make several of these blanks.
- Now paste over the branches of the Christmas tree in a circular motion fringed. Start gluing from the edge of the twig. Thus, you need to glue the whole tree over. At the trunk, the fringe should be facing down.
- If you want to add volume to your craft, you can make additional twigs with your own hands. Roll the paper into a tight tube and fringe over. First, you need to wind it halfway from one tip, and then do the same on the other side, so that the needles are located in a different direction.
- Bend the resulting twig in half and glue it to the bottom of the wire branch.
- Thus, you can add the required number of additional branches.
- Cut a cross-shaped stand out of cardboard. The sides of the cross should be long enough.
- Glue a Christmas tree in the center.
- Now decorate it and the craft is ready.
Video: DIY master class on creating a Christmas tree
A dog made of plastic bags

In order to surprise your children with an interesting do-it-yourself craft from packages for beginners prepared, pay your attention to the step-by-step master class provided by us. He will give you, dear friends, a wonderful idea of how to create a cool toy from available materials at hand easily and quickly at home. She will bring you well-being and many pleasant moments in the upcoming New Year 2018 Yellow Dog... Let's get down to mastery.
To work you will need:
- milky plastic bags;
- scissors;
- base scourers or filler of any type;
- the cloth;
- needle and thread;
- a piece of leatherette for the spout;
- homemade eyes.
Manufacturing process:
- We make the basis of our craft in the form of a dog from the washcloths. We sew all the details with a needle and thread.
- Now we need to cover the sponge base with a cloth. To do this, we take any material unnecessary for household use and gradually hide all the details of the product under it. You will also need a needle and thread for this process.
- After that, create the dog's coat. For this purpose, we cut the existing packages into rectangular strips and fold them in half. The edges of all blanks are finely cut in the form of a fringe. It is necessary to create as many such polyethylene parts as is required for the decoration of the animal as a whole.
- Upon completion of this part of the work, we need to sew all the blanks to the body, starting from the tail and ending with the muzzle. The fringe should stick out like wool and the opposite side should be sewn to the base.
- When you completely complete this creative stage, you need to revive the dog with eyes made with your own hands from leatherette and fabric, with a spout and attach bows or hairpins to the ears, along on their own... Here we have such an interesting craft from ordinary plastic bags. For beginners, this process will not be particularly laborious and will certainly please.
Video: DIY package ideas
If the master has a desire to make beautiful decoration for your home or to please your child new toy, bag crafts are a great choice. It can be children's toys, ornaments for the interior of the house, and even beautiful accessories for fashionistas. For all this, it is enough to have only scissors and a roll of new garbage bags.
One of the most simple crafts from packages with your own hands, but very interesting decoration for the house there will be roses that can be made of bright polyethylene. To do this, you will need: several new bags of different colors, wire and scissors. For decoration, you can take braid, as well as green thread, but this will already be needed if the flowers stand in a vase, and not be attached to any surface.
First you need to cut the wire into even lengths. A ring with a leg is twisted from each element. For one rose you need 6 long and 5 oblong short petals. That is, we cut and twist the wire base in just such an amount.

One of the easiest plastic bag crafts is a rose
Then we take the trash bag and cut 11 squares out of it. They need to carefully wrap the rings, and on the leg that turned out when twisting the wire, fix everything well. This procedure it must be carried out carefully so that the petal does not break and is very firmly adhered to the wire base.
One rose is collected from the finished petals. First of all, oblong petals are twisted, and only then larger elements are attached on top of them. Everything must be carefully fixed and straightened so that the craft made from plastic bags (rose) looks like a real flower.
Further, everything depends only on where exactly this flower will be used. If to decorate the walls or your favorite casket, then you can leave everything as it is and just attach it to the right place. But these flowers can also be put in a vase if you attach legs to them. To do this, a dense wire must be attached to the base of the flower, and then wrap it up to the petals with green thread. Additionally, the stem can be decorated with braid. In any case, it turns out very beautifully. You can make a whole bouquet from such roses. To do this, it is worth calling for help from children who will be very interested in spending time creating crafts from garbage bags.

The rose petals must be very firmly attached to the wire base.
Polyethylene toys
Trash bags can also be a great base for cute toys. You can work on them together with your child, so that the baby learns to handle scissors and improves his creative potential, which in this case will be very relevant.
Important! Experts recommend classes on creating crafts from cellophane bags for children who are already 5 years old or more, because at an early age a child may not understand the principle of work and will quickly get tired of such a process.
So, for the manufacture of toys from polyethylene, you will need: a roll of garbage bags of the color that the toy itself is supposed to be, thick cardboard, scissors and additional accessories, that is, eyes, a nose, or just beads of suitable colors.
Regardless of which toy animal is planned to be made from bags, it will be assembled from pompons. Collecting such crafts from garbage bags with your own hands is very simple. First, we need to prepare the base, which is made from two cardboard discs. They must be exactly the same, and their size will match the diameter of the pompom. You need to cut a hole in the center of the cardboard circle.

Trash bags can be a great base for cute toys.
Next, you need to take a garbage bag, unfold it completely and cut it into strips lengthwise so that they are longer. Now these strips need to be wound around 2 cardboard circles folded together. You can wrap in any direction, but so that there are no gaps on the circle. This is important, otherwise the pompom will turn out oblique. If the strip of polyethylene is over, take the next one and wind it according to the same principle. The more polyethylene you can wind on the cardboard base, the fluffier the pompom and the toy made from it will be.
This work can be performed by the child himself, since there is nothing complicated here. But the further process should take place exclusively under the supervision of an adult. We need scissors to cut the pompom along the edge. Next, we take a polyethylene strip and fold it several times for strength. It needs to be wrapped between two cardboard discs so as to fix the pompom in the center. Then we remove the cardboard, and we are left with a beautiful ball that needs to be straightened to make it more fluffy.
Similarly, you need to make a pompom more size... If the small one is the head of an animal, then the big one will become its body. In addition, you will need 4 more small pom-poms for the animal's legs. To assemble the animal completely, you need to tie 2 large elements, and glue the small ones to a large pompom. Next, we fix the eyes and nose of the animal with glue, and then you need to take care of the ears.
Thus, you can make a lot of crafts from garbage bags with your own hands, not only a bunny, a cat or a dog, but also a snowman for the New Year. There is nothing difficult in working on such a craft, so it is imperative to involve a child in this work. It will be not only very interesting for the kid, but also useful.
Knitting from garbage bags
What the needlewomen will not come up with. Even basic garbage bags have become an excellent material for making unique crafts. Fashionistas invented knitting from polyethylene. Thus, all kinds of handbags and backpacks appeared, which have sufficient strength in order to withstand a considerable load. Moreover, knitted handicrafts from bags look very interesting, but to create them, you need to prepare balls, that is, turn the bags into a thread for knitting.
To do this, we need a clean garbage bag, which is cut across into even strips. You should get plastic rings. Now the task is to assemble one chain from separate elements.

Knitted garbage bags look very interesting
Important! To make knitting comfortable, and ready product turned out beautiful, it is necessary to do this work so that nodules do not form.
To avoid their appearance, we take one polyethylene ring and thread the second into it, which we bend in the middle and thread one end into the other. Then we tighten it and get a strong connection of the two elements. We do this with all plastic rings. Twist the finished thread into a ball and use it for knitting.
It is worth noting that soft polyethylene is needed to make knitted handicrafts from bags, otherwise it will be difficult to make delicate details. The work itself is extremely simple for those who know how to crochet. It will not be so convenient to make the product on the needles, but it is also quite realistic.
With the help of plastic threads, you can knit not only a handbag or a cute backpack, but also a basket for storing small things, as well as a convenient cosmetic bag. If you take tight bags and a thick hook, then it is quite possible to create a rug. It can be knitted with a round or rectangular, decorated with a pattern, etc. Such rugs look good at the doorstep, in general, the hostess will definitely find use for this useful thing.