Birthday is a significant date for every person. It is customary for close relatives to make presents. For dad, the kids are trying to prepare something unusual and touching. Kids do not have the opportunity to buy an expensive and useful gift, but with their own hands they can easily make something memorable that their father will certainly like. The son can design a craft from plasticine, and the daughter can prepare a postcard or a cute drawing.
What to give dad on his birthday?
What present can a child give to his dad on his birthday? Only at first glance it seems that the range of options is very limited. In fact, the prospects are much broader. It is not at all necessary to make a practical, useful gift. The father will be pleased to receive something that turns out to be an expression of love, gratitude, warm and reverent attitude.
A small child can create an original craft under the guidance of a mother. An excellent solution would be:
- photo collage;
- an album with family photos;
- a video clip filmed by a crumb;
- book with pictures and wishes.

From your son or daughter, present your father with handcrafted phone stands, tablet cases, clay figurines, paintings made of sand or natural materials. The child can decorate a T-shirt for the birthday boy. In this direction, it is proposed to create as much as you like, without limiting the child's fantasy. In any case, the father will be pleased to receive a gift saturated with children's love, care and attention.
DIY birthday card for dad - several options
Most often, on his birthday, dad is presented with original handmade cards. The festive composition can be performed independently by both the daughter and the son. In order not to miscalculate with the present, when designing it, it is worth considering the preferences, tastes and hobbies of the birthday person.

If your dad loves to travel, it would be a great idea to create a present for him with a boat. For work, you need to prepare colored paper:
- blue;
- white;
- yellow;
- turquoise;
- blue.
From it you need to create the outlines of the sea. You will need to stick a blue template on the base. A blue part is fixed on it. Then you can attach another turquoise shade template. At the top of the composition, you need to glue fragments that imitate seagulls and the sun.

The most crucial step is the creation of the boat itself. There are two options here. You can decorate the ship using the origami technique. If the child is very small, then with the help of his mother, he can fold a boat from several multi-colored pieces of colored paper.
On a note! To make the present really bright, colorful, original, it is worth reminding the kid about the windows, anchor, sails and other small details.
Postcard in the form of a shirt or vest
A postcard for your father will turn out to be original if you make it in the form of a shirt or vest. A sheet of colored paper must be folded in half. A small strip is cut from the back from above. Next, a collar is made, for which folds are made in both sides in the cuts in the middle. You need to make a tie separately from the texture material, after which it is simply glued to the composition.

If a postcard is formed in the form of a vest, then in the center of the blank, you just need to make a deeper V-shaped cut. A pocket can be formed in the inner part of such a congratulatory composition. It's great if the child makes a small note with good, sincere wishes and puts it there.

You can decorate a postcard made with your own hands with stickers, sequins, fabric, pockets, ribbons, buttons, collages from family photos.
Drawings for Dad's Birthday - congratulatory stories
Another great idea for a birthday present for your dad is a handmade baby drawing. Its plot can be very different, but a family man will surely be pleased to see an original, colorful composition, which depicts him and his close relatives.

The kid will be able to draw memorable moments from the life of the birthday boy:
- the appearance of children in the house;
- wedding;
- celebration of the celebration;
- picnic in nature.
On a note! An unusual congratulatory composition will turn out, which depicts the hero of the occasion surrounded by pets. It's very touching!
If you want to make a person happy, give gifts, and the best ones are put to loved ones. In this article, we will look at: how to make a gift for dad from a daughter with your own hands.
You will need: black cardboard, scissors, felt-tip pens, segment knife, white cardboard, white sheet of paper, aerosol glue or glue stick, printer, cutting mat, silver helium pen.
Master Class

Book safe
You will need: hardcover book, pva glue, water, stationery knife, brush, pencil, ruler.
Master Class

You will need: deep cardboard box, disposable paper plates and cups, acrylic paint, pencil, ruler, scotch tape, stationery knife, long wooden spatulas, 2 orange plugs, red flat button, colored paper, felt-tip pens.
Master Class
- Close and seal the box with tape.
- Draw the silhouette of the doors in pencil.
- Cut out the doors.

- Cut out the windshield across the box.
- Fold the windshield forward and make a wide slot.
- Secure with tape.

- Make the seats by folding the back down.
- Paint the car with acrylic paint.
- Cut off the bottom of the paper cups and glue the headlights. Make the exhaust pipe from the rest of the glasses.

- Make a radiator grill using 6 spatulas.
- Make a sight glass divider from the seventh spatula.
- Make emergency lights out of traffic jams.

- Glue the wheels using plates.
- Draw logos with a felt-tip pen.

- Cover the interior with colored paper. Better to use a brown color that resembles natural leather.
- Glue the red button down by drawing a smiley face on it.
You will need: 2 shells of rapanas of different sizes, a small stone, round large shells, small spiral-shaped shells, glue gun, toothpicks, wooden skewers, varnish, thick cotton thread.
Master Class
- Apply glue to the stone and glue the larger rapana shell. The shell should not wobble; it should be firmly fixed on the stone.

- Glue a wooden skewer to the inside of the smaller rapana shell. This will be the bow of the ship.
- Glue the skewer with the nose to the base of the sailboat.

- Glue 3 wooden skewers perpendicular to the base of the ship.
- Trim the first and third skewers so that they are just below the middle skewer.
- Glue the large shells as sails on the front of the mast, and on the back of the mast, glue the toothpicks to act as rais. Each mast should have 3 shells.

- Make ropes from cotton thread in this way: tie the thread to the back of the ship, then pull it over the masts to the very nose, then pull the thread from the bottom to the top, winding it on yards for each mast, and if the thread slips in some places, fix it with glue.

- Glue the spiral shells to the tops of the masts.
- Cover the craft with varnish.
The shell ship is ready!
You will need: open cones (from 50 to 300 pieces), wire, glue gun or superglue, varnish.
Master Class

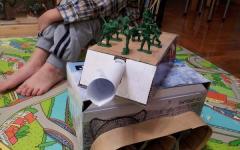
Tank in the style of modular origami
You will need: sheets of colored paper, scissors, 6 matchboxes, glue, a round blank for the base (for example: a bottle of perfume).
Master Class
- Add the modules according to this diagram. The entire tank will need 1408 modules.

- Build a circle of 24 modules, then add 24 modules to the second row of the circle and 24 modules to the third row.
- Place 12 modules in the center.

- Make a total of 7 wheels in this way - 6 for the tracks and one for the tower.
- Make a tank a caterpillar, having prepared 204 modules - the width of the caterpillar is 6 modules, the length of the almost complete circumference of the caterpillar is 34 modules.
- Place the 3 wheels in the nearly complete circle of the track, then continue with 56 modules to finish it.

- Make the second caterpillar in the same way.
- Make a tower for the tank in this way: make a hole in 4 matchboxes as shown in the picture and glue them together.
- Paste colored paper over the base of the tower.

- Insert a round blank into the hole and glue 2 matchboxes as tower supports.
- Assemble the front of the tank from 42 modules - 7 modules wide, 6 modules long.
- Assemble the back of the tank from 30 modules - 6 modules wide, 5 modules long.
- Glue the front and back to the base of the tower.
- Glue the tracks.
- Take the seventh wheel and add 192 modules - 24 in length and 8 in width. Don't forget to leave a hole for the cannon.

- Assemble a cannon from 36 modules - 3 modules wide, 12 modules long.
- Glue the cannon to the tower.
- Attach the tower to the base, it can rotate.
Postcard "Shirt with tie"
You will need: A4 colored cardboard, scissors, a ruler, glue, felt-tip pens, a simple pencil, decoration elements (buttons, sequins, threads).
Master Class

Creative indoor flower
You will need: pot, styrofoam, skewers, artificial grass, glue gun, candy bars, gum, gift cards, etc.
Master Class

The creative indoor flower is ready!
Coffee mug
You will need: mug, coffee beans, cotton pads, thick white thread, brown acrylic paint, superglue.
Master Class

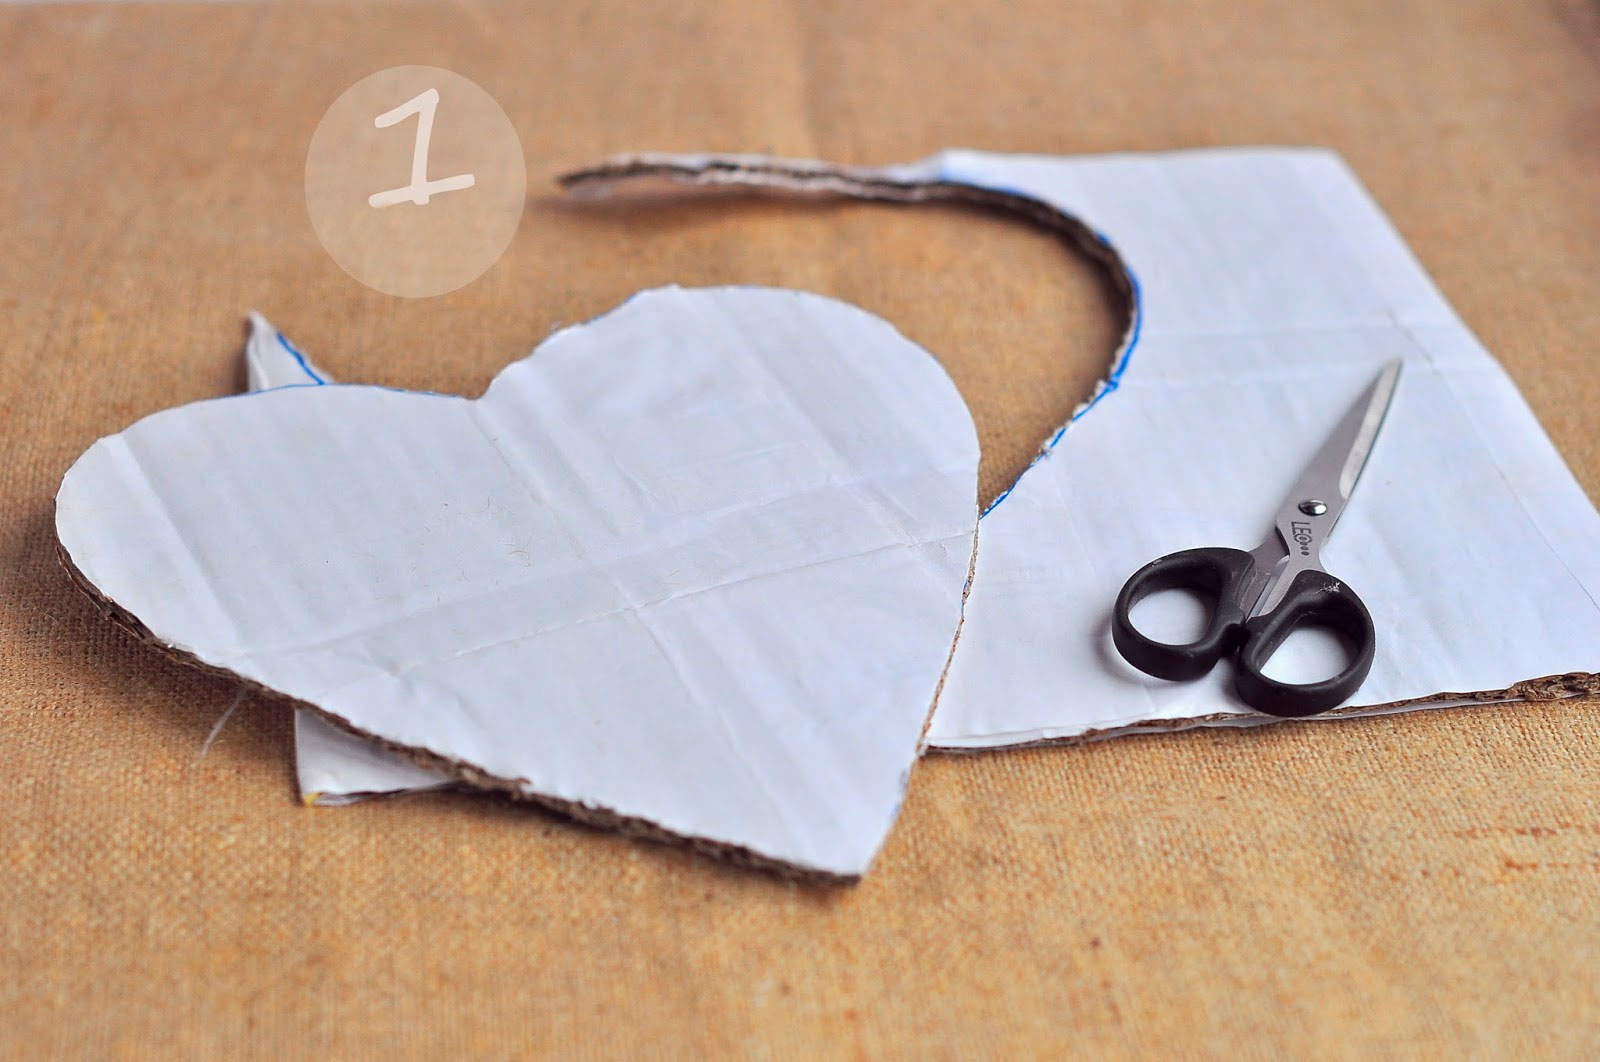
Heart of coffee
You will need: coffee beans, paper, wire, thread, glue, cardboard, jute thread, sponge, iron can, brown paint, ice cream sticks, decoration elements - flowers, ribbons ...
Master Class
- Fold a piece of paper in half and draw a half heart, then cut out.
- Circle the heart on cardboard and cut out 2 copies.

- Wrap 2 pieces of wire with paper and glue to one heart. Repeat this process for the second heart.
- Glue cotton pads in several layers between the hearts to make the design three-dimensional.

- Cover the whole heart with cotton pads and wrap with thick thread.
- Color the heart.
- Glue the coffee beans in 2 layers.

- Place ice cream sticks over the jar.
- Wrap the wires with jute thread.

- Insert the coffee tree into the sponge, then place in the pot.
- Decorate to your liking.
The coffee heart is ready!
You will need: seashells of the desired size, cardboard, scissors, glue gun, a simple pencil, an awl or a hole punch, twine or rope, sesal, burlap decoration elements as desired - beads, beads, starfish ...
Master Class
- Draw a heart on the cardboard.
- Cut it out.

- Punch 2 holes for hanging using a hole punch or awl.
The whole family is getting ready for Dad's birthday. Mom comes up with a festive menu, buys a gift, and the children do it in advance. Even the most strict fathers are very sentimental at heart, so a homemade gift for them will be a pleasant surprise. Adult children can also complement the main present with a handmade postcard - for a father it will be unexpected and pleasant.
How to make a birthday card?
You can make a birthday card for dad with your own hands, without wasting a lot of time and finances. A unique gift will be obtained from improvised means: colored paper, cardboard, buttons, beads, lace, felt, etc.
Postcard ideas that the birthday boy will definitely like:
- Prints of toddler's hands and feet on cardboard. This is the most affordable way to touch a daddy. A similar option: leave prints of Dad's shoe and tiny sandals on the postcard template. Mom will have to sign the gift and arrange it from the inside.
- Papa's portrait. Children will be happy to draw a picture of dad with paints, felt-tip pens or pencils. To make the card even more interesting, invite the children to lay out their daddy's portrait with curly pasta or cereals.
Advice! Add the characteristic features of the birthday person for the similarity of the image: a cap, mustache, pipe, headphones or something else that distinguishes the father.
- Postcard in the form of a typewriter. A car-lover dad will be pleased to receive a typewriter postcard from the children, into which you can paste photos of the whole family.
- Scrapbooking technique. Such a postcard can be made by adult children using decorative elements and small details.
- Volume postcards. There are many different options for volumetric postcards: from the simplest to complex compositions. In addition, a small gift can be hidden in the 3D postcard.
- Vintage postcard. Compose old photographs, blending napkins, copper buttons, artificially aged paper. This craft looks impressive and original.

A gift from the little ones: how to draw a birthday card for dad
The most touching version of a postcard is a drawing of palms or legs. What you need to make a baby gift:
- Cardboard sheet;
- Scissors;
- Glue;
- Colored paper;
- Pencil.
How to make a postcard:
- Fold the cardboard in half to make a template for a future gift.
- Cut a slightly smaller rectangle out of colored paper, glue it to the outside of the postcard. You will have a beautiful frame.
- Take paper of a different color, trace along the contour of the palms, carefully cut.
- Glue colored paper palms onto the front of the card.
- On the inside, adults (mother, grandmother, older brothers and sisters) can write a congratulatory poem and wishes.
On a note! Be close to your baby, because he still does not know how to beautifully cut and glue shapes. But be sure to give your child the opportunity to participate in the process of creating a presentation, do not do all the work for him!
Everyone knows that little kids love to draw. Use their passion to make your daddy's birthday card. You will need paper, pencils, paints or felt-tip pens (depending on what your child likes to draw).

To please dad, you can draw what he has long dreamed of. For example, a birthday boy is staring at new cars or wants to buy a country house. Draw a car with dad driving or a house in the garden of which the whole family is located. And if your father wants to fly to the sea, you can depict the beach, palm trees and all family members with soft drinks and fans. Of course, mother's help is indispensable here: she will be happy to help the children draw small details and think over the plot of the picture.
Another option for a postcard is an applique. It can be balloons, cars, ships and planes, birthday cake with candles. You can use pictures from magazines, print from the Internet, or cut out of colored paper. Complete the applique with buttons, beads, ribbons, twine and other decorative elements.
Kids can present a papule with a postcard with his photo in an unusual frame. For example, you can paste over a photo with images of cars, military equipment, balloons, or cakes with candles.
Advice! A postcard with elements of plasticineography looks cute. Toddlers like to sculpt all kinds of simple figures from plasticine or salt dough that can be used to decorate Dad's surprise.

From daughter
With the advent of a daughter, a man becomes not just a father, but a loving and beloved daddy. Hand-made gifts from girls for dads are the most touching and valuable surprise that touches even a respectable and strict man.
What kind of postcards can a daughter's daughter make with her own hands?
- A funny craft IDAD - a card in the form of a tablet. You will need the following materials: black and white cardboard, felt-tip pens, scissors, glue stick, helium silver pen. Cut 2 rectangles out of black cardboard, glue a sheet of white paper onto one of them. Round the edges, then print and cut out the iPad icons, fold them into envelopes. Glue the icons to the "screen", draw a button from the bottom using a silver helium pen. Glue the two pieces of the card together. It remains to write a congratulation inside each icon.
- Simple card with buttons. Even a very small daughter can cope with such a craft, of course, with the help of her mother. On the front of the postcard, draw with felt-tip pens a dad and daughter who go by the pen. Glue buttons in place of the head. Let mom write congratulatory words below, and inside - wishes from the baby.
- Volumetric postcard with a flower. A simple, but at the same time, beautiful surprise from my daughter - a flower with wishes. It is done very simply. Multicolored ribbons in the form of petals are glued to the cardboard base. A circle of fabric, edged with braid, is glued to the center. Leaves with wishes are attached between the petals. It remains to decorate the craft to your taste.
- Hearts with buttons. Stick a smaller, light-colored rectangle onto the base for the postcard to create a frame. Glue the hearts cut out of colored paper on light paper, place hearts in the middle with smaller contrasting shades. Decorate the hearts with small buttons.
Older girls can use origami to fold the card. Find a master class or detailed instructions with step-by-step execution, and you can independently make an amazing gift that will remain with your beloved dad for a long memory.

From son
Boys usually cook with a masculine pattern, choosing cars, military equipment, tools, etc.
Options for postcards from my son:
- Scrapbooking technique. Such a postcard will delight the birthday man, because it looks like a professional work of a master. In fact, gift making is not that difficult. Use materials that can be found at home: cardboard, paper, buttons, twine, braid, decorative clothespins, plastic and wooden knickknacks. You can decorate a present with lace, ribbons, beads, old jewelry.
- Postcard with ties. Cut rectangles out of two colors of cardboard: one slightly smaller to make a frame. Make a hanger out of the wire, on which to "hang" several multi-colored ties (cut them out of colored paper). Attach the hanger to the smaller rectangle, stick to the base. At the bottom, make a congratulatory inscription.
- Image of coffee beans. Original postcards are made using coffee beans. Print any drawing on the cardboard (for example, a coffee lover father will love a cup of coffee). Stick the coffee beans so that there is no white space left in the illustration. At the bottom, glue a ribbon with a bow, and on top write: "Happy birthday, dad!".
- Steampunk style. For the manufacture of unusual crafts, unnecessary incandescent bulbs, gears, various mechanisms and parts are used. With their help, you can lay out a unique, brutal pattern in the form of an airship, balloons, ships.
It is worth noting that a masculine style in homemade postcards can be created using the image of various accessories:
- Vest watch;
- A tube;
- Hat;
- Classic ties and bow ties;
- Men's shirt or tuxedo;
- Pens, nibs.

Advice! Men appreciate gifts with meaning, so choose a specific theme for the craft. The decor should also carry meaning. For example, a picture for an angler can be supplemented with reeds, mesh fabric, plastic floats.
What text to write?
Father's birthday is a good occasion to once again say how proud and respectful you are, love and value. Small children can write on a postcard: "Happy Birthday to Dad!" And that will be enough. Adult sons and daughters need to try to find the right words for congratulations and wishes to their beloved dad. This can be done in poetic form, better with the help of quatrains of your own composition. Also, the birthday man will be delighted with congratulatory prose, if the words are written from the heart with the most sincere wishes.
What poems can be written on a postcard:
Dear daddy, dear,
The closest, dear!
I congratulate you on your birthday
And I wish you inspiration.
Do not get sick, do not grow old, smile,
Never, never give up.
The whole family is behind you
Like a stone wall.
I wish you the best
Congratulations from the bottom of my heart!
Our dad is, of course, the best
And success is always waiting for him,
Honor and respect
Happy birthday, daddy!
Daddy, this day I wish you
Health and smiles, and all kinds of benefits.
I never and never forget you
You are my protector, and let it be like this all my life.
My birthday boy, dear, I'm so proud of you
Since childhood, you are my best example and my main character.
I'm sorry to be offended by you, and sometimes I am angry,
I congratulate you, dear dad!
Sincere respect, love and appreciation are much more important than expensive things. Let the postcard that you make yourself to the papule demonstrate how much you value your loved one. Take some of your time, inspiration and imagination to surprise and delight the birthday boy.
Each father will be pleased to receive a handmade card from his daughter or son for his birthday, or on February 23rd. A postcard for dad is an excellent and memorable present that remains not only on a shelf or in a frame, but also in the heart.


Postcard for dad on February 23 from pieces of paper
A mosaic card is fast, unusual and cute. With such a product, you can please your father on February 23rd.
The basis should be a regular A4 sheet of paper. Suitable color is white. We bend it in half and get the desired shape.
Now let's get down to the interesting creative part - drawing. It is necessary to portray what has a connection with February 23 - tanks, planes, stars, St. George ribbons and, of course, it is imperative to portray the Pope in military uniform.
It is better to place the main composition on the cover. It is advisable to depict the background and the main character on it. You can place the rest of the items inside the postcard, but first you need to write a congratulation there so that the mosaic does not overlap it. It is better to write the text by hand, because it is not too easy to lay out small letters out of paper.
The next step is to create the paper pieces. This requires plain colored paper of different colors. We take a piece of a sheet of paper and tear it into small pieces.
Next, you need to paste over the drawing with pieces. To simplify the creation of the mosaic, you need to apply glue not to every piece, but to the whole part. It is better to start with background elements so that important elements of the composition look more effective.
You don't have to try to make each element out of pieces of the same color. For example, a tank and clothing can be made in a camouflage color scheme, that is, combine pieces of green paper of different shades in one piece. The inscription can also be made in different colors.
All small details must be cut out of paper separately and glued to the mosaic. If they are too small, you can draw them. This should be done only after the glue has time to dry so that the drawing does not "slide out".
Postcard to your beloved dad yourself (video)
Postcard for dad on February 23 or birthday with a boat
If your father's life is in any way connected with the sea, for example, he served in the navy, you can make a postcard with a boat. There are many different variations of these presentations, and if you find it hard to imagine how at least one of them might look, follow the instructions.
The base material is light blue paper, which should be folded in half. A blue rectangle with a wavy top should be glued to the bottom of the cover - this is the sea. Cut out and attach the sun from yellow paper, and clouds from white paper. 
The base of the boat is a brown unequal trapezoid with a larger base at the top, and a sharper and more elevated angle on the right. The left sail is a triangle of any bright color with a right angle at the bottom right, the bottom side of which should be parallel to the top of the trapezoid. The right sail is a right-angled triangle, the base of which should be rounded and directed to the right side. It should also be located parallel to the top of the trapezoid.
Important details are the steering wheel, windows in the cabins, lifebuoy and flag. The flag can be made in red paper and attached to the top of the starboard sail, the lifebuoy should be on the left sail and the base of the ship, and the windows in the cabins should be on the base of the ship on the right. The steering wheel can be placed near the bow of the ship. 
Inside the postcard, draw a sailor on the deck and seagulls. Be sure to add the inscription "From February 23" or "Happy Birthday" and about the wish, because on such a day it is very important to please your father with good words.
Birthday card for dad
A stylish version of a small birthday present for your father is a tuxedo card. It is extremely easy to make, not requiring a lot of material and time.
The base material is black cardboard. If you think this color is too dark for a birthday, you can replace it with either brown or blue. Another way to add paint is to glue the inside of the cardboard with bright paper. 
After the cardboard is folded in half, you need to decorate the cover. First, cut out a white equilateral triangle from paper. Its base should be shorter than the top of the postcard. And the distance from its base to the top corner should be slightly more than half of the cover.
We glue the triangle to the cover with the base up. Next, you need to make a "butterfly" of black paper and attach it to the shirt in the form of a triangle. We glue a couple of white buttons under the "butterfly", fill the inner space with congratulatory text, and a surprise for your birthday is ready!
How to make a postcard-shirt, see the video.