Fingerless gloves, whether they are leather, knitted or made of any other material, are very difficult to find and purchase, according to your needs. That is why it is often easier to make them yourself. Initially, this type of gloves was considered to be the main attribute of motorcyclists and racers. With their help, the athletes were able to firmly hold the steering wheel, and, of course, looked very stylish in them. Over time, drivers began to use them, and so, according to knurled, such gloves became fashion accessory modernity.
Fingerless and regular gloves
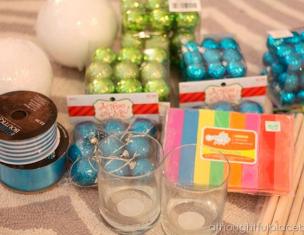
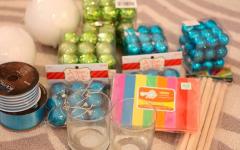
It should be noted that you can sew a fingerless glove yourself, at home. Just like normal gloves. Before you make fingerless gloves, you need to collect everything you need for this. First you need to choose the type of fabric from which the glove will be. It can be leather, artificial or natural fur, the cloth. Next, you need pattern paper. Well, of course, you need to prepare expendable materials: a needle, thread, etc., with which you can sew the desired model of gloves.
Next, we make a pattern on a piece of paper and adjust its size to your hand. Then we need to transfer our pattern to the selected fabric. Do not forget that after the fold line, the pattern should have a mirror image, and you need to cut the element along the double contour that we got. You do not need to make a hole for the finger on the second half of the gloves. Now we need to carefully tuck and stitch the edges of our product. This will prevent the fabric from fraying at the edges, and the gloves will have a nice, neat look. Then we sew together the rest of the fingerless gloves. To do this, you need to make marks on the patterns at the stitching points. And then, the marked elements are sewn together. When transferring patterns to fabric for different gloves, do not forget that the gloves themselves must be mirrored, and therefore the patterns must also be mirrored. Otherwise, at the end of the work, you will have two pairs of gloves. As you already understood, ordinary gloves are made in the same way, but with fingers.
Boxing gloves
If you have not found the right model for yourself, you can figure out how to make gloves yourself. And do not waste your time looking for them on store shelves. Often, people who do not box professionally either train at the gym or at home. At the same time, they do not always buy everything they need. You can also make your own punching bag and gloves. There would be a desire.
By themselves, boxing gloves are not as old as boxing itself. However, in modern world they play a very important role. Earlier, when boxing was not yet considered a sport, people fought without using gloves. And therefore, traces of such competitions were on the face, in the truest sense of the word. And the appearance of boxing gloves made the sport an order of magnitude safer and allowed to maintain entertainment.
For a safe workout or fight, there are a few key points to keep in mind when choosing gloves. The most suitable material is leather. Thanks to genuine leather, they are somewhat larger than gloves made from other materials. Wherein larger size does not affect the convenience of training or combat. Moreover, it is leather gloves that can last much longer than those made from artificial material. The grip of the glove is also of great importance. Lacing is often used. This type of fixation allows you to perfectly fit the glove to your hand. But a significant disadvantage of this method is the inability to dress them yourself, without outside help. But gloves with Velcro or fasteners, you can wear on your own. For non-professional athletes, this type of fastener is most acceptable.
Let's figure out how to make boxing gloves yourself. First we need to draw the template for our glove. Each boxing glove is made up of seven separate parts: palm, fist, two compartments for thumb, cuffs, pinstripes, and closed areas. When drawing such a template, you need to consider that the cut for the palm should be in the middle so that it is covered. The area of the fist must be made from a solid piece of leather to avoid seams on it. You also need to focus on the size of your palms and the girth of the brush. Next, we cut out the templates and lay them on the material from which we are going to sew them, for example, leather. We outline the contours with a pencil and remove the templates. And cut them out along the contours. Now sew the leather pieces together (the pieces should be inside out) with sewing machine. Then you need to sew the compartments for thumbs, but don't attach them. At this stage, you need to fill the glove with the selected filler (cotton wool, synthetic winterizer, horsehair) and then insert the liner. We sew our cuffs along the opening line of the gloves. And now, you can sew on the compartments for the fingers. If everything is done correctly, you will have the desired boxing glove made by yourself.
glove toy
What can be done with a glove? After all, each of us at home has unpaired gloves that lie unused. Oddly enough, they can be made Stuffed Toys. Any handmade toy will give your child a lot of joyful moments. Moreover, a homemade toy has its advantages. It is soft and warm compared to cold plastic. It is pleasant to touch her, you can sleep with her. And there is no need to worry about what it is made of: being its manufacturer, you yourself select the material for the toy. In addition, a homemade toy has a certain unrealism and incompleteness. And what, if not these factors, can contribute to the development of your baby's imagination? It is for this reason that such toys are recommended by most modern psychologists. It is worth considering the moment that such a toy can be made by the child himself, with or without your help.
Krueger's glove
Fans of A Nightmare on Elm Street often try to imitate the main character, Freddy Krueger. Freddy's costume is especially popular during the holidays. For example, Halloween. To make such a suit, you need two old T-shirts of various colors (black or green, burgundy), scissors, an old hat and, of course, gloves.
How to make a Freddy Krueger glove? For this we need: adhesive tape, foil, cardboard and paint. We cut out five rectangles from cardboard, the width of which should be 3-4 cm, and the length should be up to ten centimeters (the length of the claws). Then, folding the rectangles in half, you need to cut the tip so that we get a nail. Then we glue the cardboard with our foil and attach the claws to the glove with adhesive tape. For everything to work out correctly, you need to attach your nails to a dressed glove. Next, paint the adhesive tape to match the glove. For lighter coloring, you can use adhesive tape instead of tape. Before you make paper gloves in addition to the costume, you need to think carefully about the image of your hero, so that later you don’t have to redo it all over again.
As you can see, gloves can not only be worn in the cold season. They can be used to imitate your favorite movie characters. And also, with the help of a glove, you can make a homemade toy for your child.
Instruction
Choose a fabric. If you are sewing gloves for the first time, then it is better to choose a fabric that stretches well.
Make a cutout. Of course, you can also look for a ready-made one on the Internet, but most likely it will be quite problematic. So make it easier. Take a sheet of paper (if you have a medium-sized hand, then an A4 sheet is enough for you. Fold the sheet in half, put your palm on it so that four fingers fit on the paper, and the thumb protrudes from the fold. Circle with a pen or pencil. Remember that the fingers should not be spread apart and should not be pressed against each other.
Mark two points on paper - point A at the upper base of the finger and point B at the lower base of the finger.
Cut out the pattern without unfolding the sheet.
If you are going to upgrade fabric gloves, you need to cut them in the same way as leather ones: mark a centimeter more from the inside, then put and stitch the excess. However, if your gloves are made of knitwear, you better contact the studio, where they can properly process the edges of the fabric so as not to spoil the product.
Related videos
Sources:
- cut gloves
Leather models
Any outfits complemented with fingerless leather gloves will look more sexy and relevant. They can be combined with skinny jeans, leather jackets and black boots. The image will turn out spectacular and rebellious. As jewelry, you should choose large jewelry made of metal.
Satin models
It is desirable to combine satin fingerless gloves with cocktail or evening dresses. Self-confident, who wants to impress, designers are advised to choose a leather black dress for them. The image can be complemented with elegant stud earrings and a small necklace made of pearls. Don't be afraid to experiment and pair fingerless gloves with different outfits.
Lace patterns
Designers advise wearing short lace mittens with various sundresses above the knee length, as well as jackets. Long lace fingerless gloves are often included in evening and wedding dresses. They will look great with long dresses to the floor, sheath dresses, as well as ball gown models.
You can create an image in the style of a vampire. To do this, choose a long dress model for lace gloves, as well as high-heeled shoes. A lace necklace made on a ribbon will help complete the look. Sports gloves without fingers will be best combined with fitness clothing. You can use them with casual outfits.
Knitted patterns
Knitted fingerless gloves look best with warm clothes. The combination with warm jumpers and sweaters remains relevant. Mitts can often be found in the collections of famous fashion designers.
You can choose a fashionable hat or scarf for them. Mitts will keep you warm in the cold season and will serve as an excellent decoration for the image. Also in this season are relevant gloves made of melange yarn.
Related videos
Gloves are different. But they all have two goals - to protect the hands and bring beauty. You can protect your hands from cold, sun, electricity during certain types of work, from detergents during cleaning. Then, probably, it doesn’t matter at all what they look like, as long as they cope with the protective function assigned to them with high quality. But those gloves that are not designed for work must be beautiful. A pattern of gloves so that you can make them yourself and according to an individual size will help you get a quality wardrobe accessory.
Sew for good and for joy
The beauty of gloves is not only style, fashion. They can also be beautiful for their special purpose, for example, a glove doll, the pattern of which is extremely simple, but allows you to create an amazing toy. Its peculiarity lies in the fact that almost every finger of the hand becomes part of a fairy-tale character. Usually, the head is attached to the index finger, the middle and thumb become hands-paws, the ring and little fingers most often do not participate in the game, but can create additional volume, for example, if the toy is a fat bear-bear. It is not too difficult to sew, such a do-it-yourself glove doll. Patterns for her can be divided into two parts - the head of the toy and the glove itself. The head for such fun can be "borrowed" from a plastic toy or a rubber "tweeter". Here's how you can make a pattern:
- per sheet thick paper put right hand the one who will play with the glove toy, placing the thumb and forefinger separately, and connecting the middle, ring and little fingers together.
- Circle the outline, it will turn out to be three-fingered.
- In the same way, circle the left hand along the same contour, aligning the middle finger of both hands.
- Make the contour of the index finger a little wider, so that later, in the process of sewing a glove, you can insert a cardboard or plastic tube-stop attached to the head of the toy. However, if the fabric for the glove is taken thick enough, for example, artificial fur or a thick drape, then this stage can be omitted.
- Merge two paths by drawing common lines.
- Add a centimeter to the freedom of fitting, as the dressmakers say, circle the contour of the glove again and cut out the pattern.
You can immediately cut out two halves of the glove from the fabric by folding it front side inside. You can sew the body with an overcast seam over the edge - the seam will securely connect the parts and prevent the fabric from fraying.
The selected head is attached to the glove with glue and thread with a needle. If plastic or rubber can be pierced with a thick needle or awl, then the head can be sewn on, but still smeared with glue for reliability. However, you can immediately draw the contours of the head of the toy on the pattern and cut it out as a whole to sew.
Apply the necessary decor to the body glove, corresponding to the character. The toy glove is ready.

For autumn coolness and joyful days
But still, a glove in the form of a toy is an accessory for playing with children, which will be of interest mainly to parents and kindergarten teachers. The vast majority of people need gloves to protect their hands from the cold. A pattern of gloves, which will help you create exactly what you need for the weather, is much more difficult to build than a pattern of a toy. An accessory that protects hands from the cold should be not only beautiful, but also comfortable, so designing it is a painstaking task, each finger should feel comfortable, and if four fingers can still be somehow arranged by sketching the contour of the hand, then for the thumb need a separate trim piece. The pattern for leather gloves will be exactly the same as for gloves made from a suitable fabric. The difference will be in tailoring. It’s easier not to build a pattern, but to find a suitable palm size.

Individual pattern of gloves
It is easy to sew gloves with your own hands. Patterns are the main problem. Most often, if they catch the eye, then they are standard and not enough big size. But it is better if you already sew a convenient accessory with your own hands, so that the pattern of gloves is ideal for your own palms. Therefore, you should do this:
- Fold a sheet of paper in half so that the palm fits on one side.
- Place your hand on the sheet so that the fold of the sheet falls on the outer edge of the index finger.
- Close four fingers, and set aside the big one. Gently drawing a pencil perpendicular to the sheet, circle the palm.
- Mark the length of the fingers by putting dots with a pencil.
- Draw the outline of the palm with fingers.
- Transfer the resulting drawing to the second half of the sheet strictly symmetrically (you can use the student method - through glass).
- Divide the contour of the index finger exactly in half, drawing a line down.

- Place your hand on the pattern, slightly turning it to the side and leaving your thumb, mark two points of intersection of the line on the pattern and the thumb as shown in the figure below.

- The points are copied symmetrically about the axis.
- Using the traced points, build an oval - a hole for the thumb.
As shown in the picture below, build a tuck to loosen the fit of the thumb. Hatching indicates the place that will need to be cut.

Thumb pattern
In order for the pattern of gloves to be extremely comfortable, it is necessary to correctly build a pattern for the thumb. It is done like this:
- The sheet of paper is folded in half again.
- The thumb must be attached to the sheet and outline its contour to the points along which the palm pattern was drawn.
- Transfer the contour of the finger to the symmetrical side.
- Expand the sheet and draw a pattern of the thumb, given that the seam will run along the inside, not the outside.

Each finger is in the house
In principle, the pattern is ready, if there is a desire to sew mittens. But in order to get a high-quality pattern of gloves, each finger should be placed in a separate "house". To do this, you need to build patterns. Circle each finger along the contour, alternately on one side and on the other, applying it on the edge of the table with the inner side to the sheet. Be sure to mark the lower points of the connection between the finger and the palm from the back and from the side of the palm, since the bottom line of each pattern will be sloping, due to anatomy. Do not forget to indicate on each pattern which finger and which one should be connected, so as not to get confused during the assembly process.

Cuffs are so different
So, the pattern of gloves is ready. It remains to invent and cut out the cuffs. They can be completely different. So, the pattern of men's gloves implies not too long cuffs of a straight shape. But women's gloves can have not only cuffs that you like, but absolutely any length. It is clear that elegant guipure gloves can be almost shoulder-length. Then the pattern of gloves is complemented by a pattern of the hand to the desired length. When all the details are tailored, you can sew this accessory.

Mitts - fingerless gloves
Mitts are most often used by those who, for some reason, are not very comfortable in gloves, and the fingers should be "free". Or they may be summer version this accessory. And mittens are also loved by athletes, cyclists, for example. The pattern of fingerless gloves is built on the same principle as regular gloves. The only thing is that the length of the fingers depends on the desire of the future owner. In mittens, the pattern of the thumb is important, while other fingers can do without much drawing of every detail. If the fingers on the glove are not needed at all, then an interesting accessory is sewn, which has only a properly designed hole for the thumb. Further, the pattern of gloves without fingers is simply cut off at the level of the beginning of the first phalanx of the fingers.

For all occasions
A well-designed pattern of gloves for a specific hand will allow you to sew any protection and beauty for your hands - summer openwork, winter fur, elegant brocade, sports made of elastane - the gloves will become necessary accessory, moreover, perfectly sitting in the palm of your hand. If you carefully design your own gloves, then both sewing and wearing them will be a pleasure.
It is best to sew your first gloves from WELL-STRETCH fabric. When you become aces, you can sew from anything
Further. How to make a pattern? If you are sewing gloves on medium-sized ladies' hands, then an A4 sheet is enough for the pattern. Fold the sheet in half. Place your hand on this sheet so that the thumb is on the side of the fold

and trace it around the contour (I think many had fun with this in childhood). In this case, it is necessary that the fingers are not pressed against each other and are not spread apart. They should be in a free and natural position. In addition, everything is circled, with the exception of the thumb, which will be cut out separately. Next, mark on the fold point "A" - the upper base of the finger and point "B" - the lower base of the finger.

After that, you can cut out the pattern without unbending the leaflet. At the same time, do not forget that the fold does not need to be cut. You just need to cut the pattern along the contour and cut an oval on ONE side of the pattern. The result should be this:


Cut out the oval.

Now the pattern can be transferred to the fabric. Do not forget that we have a RIGHT hand and a LEFT hand, that is, we need to cut out two parts in a mirror.
Separately, the thumb is cut out. The thumb pattern looks something like this:

The "CFD" line should be the same length as the full length of the oval cut on the main piece of the pattern.
Further, since our fingers are not flat, but have a certain volume, then for the fingers it is necessary to cut out an additional ribbon (or several ribbons) for sewing them along the inner sides, where the fingers touch each other if they are pressed against each other. The width of the tape should be approximately 0.8 - 1.0 cm (in general, it depends on the thickness of the fingers and the allowances for the seams, and beg according to the situation)
Now, the actual sewing. If you are cool and very good at sewing very small details on a typewriter, then you can sew everything on a typewriter with some knitted seam. I personally am not capable of such virtuosity, so I sew gloves by hand with a “back to the needle” seam.
It is convenient to start sewing with the little finger (although you can also use the index finger). If you start sewing from the little finger, then you must first sew PART side seam gloves.

I draw your attention to the fact that you should not immediately sew the entire side seam if you later plan to somehow decorate the edge of the glove (for example, sew lace to it)
You can sew on a single ribbon, or you can make separate ribbons (only three pieces for each glove) at the intervals between the fingers. It makes sense to make separate ribbons if the fingers are thin. At the same time, it is desirable to bring the ends of the ribbons to nothing at the ends of the fingers so that the fingertips of the glove do not turn out to be thick. If the fingers are quite large or just plump and even from the base to the tips, you can sew a single tape along the entire length from the little finger to the index finger.


After you sew all four fingers, you can start sewing in the thumb. First you need to fold the part in half with the wrong side out, aligning
points "C" and "D" sew the part along the line "CE". Then I recommend basting your finger to the hole cut out for it, and only then carefully sew the needle back with a seam.
After the thumb has been sewn in, you can decorate the bottom of the glove with lace, or decorate the glove itself in some other way. At the end, sew the side seam to the end and the glove is ready.


In the last photo, I had to move the edge of the glove to the brush, because I was photographing own hands very uncomfortable, and the whole glove does not fit into the frame.
I hope that my instructions will help someone to master the tailoring of gloves.
The size of the glove is the girth of the palm, expressed in "Paris" inches, measured at the base of the fingers.
Glove pattern
Along with the actual size of the gloves, other dimensional features are also important for the correct design of the glove. It is necessary to determine the length of the fingers, which deviates from the standard. It is necessary to remember: the length of each finger is measured from the highest point at the base of the finger to the tip of the finger. The length of the thumb is also determined.
Ampon is a dimensional sign that is measured from the base of the thumb to the base of the index finger.
Rebras is the main dimensional feature for determining glove length. Rebras is measured from the muscle tubercle at the base of the thumb (wrist) to the desired length.
It is useful to indicate additional information about the deviation of the shape of the hand from the standard (for example, a long, narrow hand, short and thick fingers, etc.).
In addition to complete information about dimensional features, data on the material and processing technology are needed.
Material: nappa, suede, velor leather, jersey, stretch fabrics.
Glove lining: knitted, wool, silk lining, fur lining (short hair).
Glove stitches: Rustic (cut-out) hand and machine stitches, traditional machine stitches (cut-out) wrong side), various decorative seams.
The most common units of measurement in the production of gloves are:
"Paris" inch = 27.07 mm
English square foot = 9.29 square decimeters
Building a drawing of gloves
Glove pattern
Divide the value of the circumference of the palm by 8.
19.2: 8 = 2.4 cm.
Draw five vertical lines about 20 cm long with an interval of 2.4 cm. Draw a horizontal line approximately in the middle (to postpone the finger length values).
On the little finger area, lay down 1 cm from the horizontal and draw another horizontal line here (the base of the little finger on the hand is below the rest of the fingers).
From the horizontal lines, put up the obtained values \u200b\u200bof the length of the fingers. Draw horizontal lines through the obtained points and divide them in half.
Draw rounded lines for the fingertips.
Draw a hole for the thumb, for this, along the line 0/1, set aside 5 cm down from the horizontal (Ampon). From the obtained point, lay down another 5 cm (the length of the muscle tubercle at the base of the thumb).
Set aside from the right outer line and line 2/3 0.5 cm inward.
From a point on the line 0/1, 5 cm away from the horizontal, set aside 2 cm up. From the obtained point, set aside to the left and right 1.1 cm horizontally (if the palm is wide, you can set aside a larger value). Make the top section of the hole for the thumb.
From the resulting horizontal, set aside 1 cm upwards along the 0/1 line. Through this point (on line 0/1) draw a line 2.1 cm long from the upper left point - a slot for the thumb (with a large brush, the line may be longer). Draw line segments c and d.
From the mark corresponding to the lower point of the hole for the thumb (from the lower point of the muscle tubercle), set aside Rebras (corresponding to the length of the glove). Connect the bottom point of the thumb hole with points 0.5 cm away from the vertical lines.
From the material cut out (for one glove):
1 piece with thumb hole;
1 piece without thumb hole - for the top of the glove.

CONSTRUCTION OF THE DRAWING OF THE THUMB
Draw mutually perpendicular vertical and horizontal lines. Vertically from the point of intersection, lay up the length of the thumb, down - the length of the muscle tubercle at the base of the thumb.
Lay horizontally from the vertical line to the left and right equally the value of the girth of the thumb plus 1 cm.
From the top point of the vertical line, set aside 1 cm to the left and right and draw rounded lines of the fingertip. Draw with a smooth line (see drawing) the lower part of the part for the thumb through the bottom point of the drawing.
The length of the line should be the circumference of the thumb hole plus 2.1 cm.
From the horizontal line, set aside up the outer contour of the part 2.1 cm (b) to determine the location of the segment d / c.
On a horizontal line, set aside 1.5 cm to the left of the right side of the outer contour of the part.
From the end point of segment b (2.1 cm up the outer contour of the part from the horizontal) towards a point 1.5 cm away from the outer contour of the part, draw a line 2.2 cm long.

MIDDLE FINGER DETAILS
Draw the middle parts for the fingers in accordance with the drawing. The base line for the fingers was equal to the width of the fingers in the drawing of the glove (2.4 cm).
From the material are cut out (for one glove) all the middle parts for the fingers shown in the drawing once.
Glove technology
Connect the parts manually or by machine in accordance with the markup (the seam allowance is 0.2 cm).
The connection of the part for the thumb with the part of the glove should be started at the slot of the hole and stitch the sections a, b, c, d of the part for the thumb with the sections a, b, c, d of the glove, respectively.
Then stitch the thumb piece into the thumb hole on the glove.
Stitch together the middle parts for the fingers at the base: the part for the little finger - with the first part for the ring finger, the second part for the ring finger - with the first part for the middle finger, the second part for the middle finger - with the part for the index finger.
Interconnected middle parts for fingers connect with top gloves.
Connect the lower part of the glove with the inserted part for the thumb to the upper part of the glove.
The outer sections of the parts of the glove are connected last.

Glove length standards
When determining the length of gloves, the number of loops / buttons of the fastener matters. Despite the fact that the loop and button closure on gloves has almost completely sunk into oblivion due to the widespread use of elastic materials, the classic "button length" still defines the norm for glove length. The length standard corresponds to the measured distance between the seam of the joint of the thumb piece and the upper edge of the glove. The unit of measure for the uncovered part of the hand is the French inch
Let's start with the shortest gloves:
Two buttons: These gloves are traditionally 20-23 cm in total length and end at the middle of the wrist, revealing the beauty of the forearm and wrapping around the hand. The hole on the inside of the wrist serves on the one hand as an eye-catcher, and on the other hand makes it easier to put on the glove. So-called palm-length gloves of this type can be worn all year round.
Four buttons: glove 25-28 cm long, hiding most of the wrist. A successful compromise for a woman who wants to declare her elegance. These gloves look especially good under the cuffs of the jacket.
Six buttons: another compromise, quite exciting. It's less extravagant than the eight-button version, but it's an attractive length that will allow the wearer of the gloves to even glance at the watch - even though it's sometimes tricky! These gloves should be worn with bare hands or under a jacket.
Eight buttons: the glove reaches the middle of the forearm. These are traditional three-quarter gloves that cover the forearm by 14-15 inches. Although the return of these gloves to fashion is not as obvious as in models of other styles, but it is the length that simply radiates charm in Jackie Onassis ail.
Twelve buttons: the so-called queen of gloves, which reaches to the elbow. Such gloves were worn by Audrey Hepburn and a whole horde of trendsetters.
Sixteen Buttons: A classic 24" opera glove that ends exactly midway between the elbow and shoulder. The basic rule for opera gloves is: the shorter the sleeve, the better. longer glove. Therefore, opera gloves should be worn with sleeveless dresses, with short sleeves, strapless or with straps, but without sleeves, as well as evening dresses with short sleeves.
P.S.: people, you will make peppers, Special attention pay attention to the details between the fingers. according to this manual, it turned out that (I made gloves without fingers for myself) the fingers turned out to be a thrash flare, but maybe I'm not catching up with something, but I warned you *O*