Good afternoon. Today we will make crafts for the New Year from paper and cardboard with our own hands. I collected the most accessible and easy-to-use crafts for children and adults. You can find here ideas for activities in kindergarten for the New Year (appliques and paper crafts). Also here you will get ideas for home decor for the New Year made of paper and cardboard.
Let's start doing New Year's tale with our own hands, we will turn paper into an elegant New Year for our family. Let's apply our good mood And skillful hands and start a round dance of New Year's crafts.

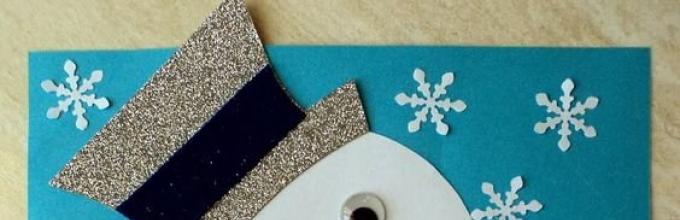
Candlestick for New Year
(made of colored paper and white cardboard).
These cute cardboard snowman candlesticks can decorate your New Year's interior.

Each paper snowman is laid out like a regular postcard. And it can be placed vertically on its edge (like a postcard). Punched holes in the cardboard allow you to use this paper craft for the New Year as a festive candlestick. Let me tell you in detail, step by step, how to make a quick and simple cute craft with your own hands.

How to make this New Year's candlestick craft from paper.
Step 1 – on plain paper (draft paper), print or draw any graphic pattern (the one you want to pierce on the snowman’s belly)
Step 2 – cut out the silhouette of a snowman’s body from thick white cardboard (preferably glossy, double-sided). It will be a silhouette in the form of a hill with rounded edges, growing from left to right (as in the photo above).
Step 3 – we apply our draft with a pattern to this silhouette and fasten it with paper clips. Place a terry towel on the table in 2-3 folds. Place the cardboard with the draft on the towel, the patterned draft side up. Use a needle to pierce the drawing on the draft. So that the needle passes through the draft, through the cardboard silhouette of the snowman’s body lying underneath and sticks into the towel. We cut off the entire drawing in all places.
Step 4 – cut out the snowman’s oval arms and round head from the same cardboard. From colored paper we cut out a nose, an eye cap, and a mouth. We paint the hat with colored felt-tip pens or markers. We assemble the craft entirely from these paper parts. And we get beautiful gift for the New Year, made from paper, made by yourself
And from the remains of white cardboard you can make such a folding craft on New Year. From colored paper we make candle flames and green sprigs of holly with red berries.

It’s also very beautiful to make LAYER crafts in the form of houses and Christmas trees from white thick paper for the New Year. Placed on the edges of the folds, they will be held vertically straight - between the rows of houses they can be laid out Christmas garland and turn it on - the lights of the garland will illuminate the windows and highlight silhouettes.

Snowman for New Year
from paper.
You can make funny little SNEWS BALLS from white paper rounds. Decorate them with hats different styles, tie with colored satin ribbons(like scarves). Glue the paws and noses and use a black marker to draw a dotted smile and eyes.
This craft is suitable for children middle group in kindergarten. You just need help tying the ribbons.

You can make a snowman from three cardboard circles different sizes. Between the layers of rounds, place a three-dimensional spacer (a thick piece of cardboard, a paper folding spring, thick Velcro tape, etc.). So the snowman will be voluminous and puffy. We attach paper paws to the first bottom layer, put a scarf on the second round piece, and a nose, eyes, and hat on the top round piece. This New Year's paper craft is suitable for children. senior group kindergarten.

Here's a craft idea for little ones. We attach a white snowdrift to a sheet of blue cardboard at the bottom. We paste a piece of paper with a calendar print on it (it can be printed from the Internet and photocopied according to the number of children in the group).
All the children have to do is glue the round snowman’s face and the round handles on top of the calendar sheet. Then cover your head with a hat, add eyes, a nose - draw a smile later with a marker. Decorate the blue background of the craft with paper snowflakes.

And also from large sheets paper (A2 size) can be made beautiful craft on the window. This snowman can decorate the window frames in your child's nursery. And kindergarten workers can turn the group’s windows into a whole series of funny adventures of the snowman Vasya- here he is sweeping snowflakes with a broom, here he is performing an acrobatics act, here he is with the birds, here he is juggling snowballs, here he is sleeping under the Christmas tree. The poses are easy to form and change; all you have to do is turn the body, legs and head over - and now the snowman himself has turned around, somersaulted - oh yes Vasya!

And since we started making crafts for the New Year from white paper, let's continue. And let's see what else can be made from inexpensive landscape or office paper.
Craft - wreath for the NEW YEAR
(white paper + pizza box).
Here's a beautiful piece of work that your children can enjoy this New Year. From plain white paper and old cardboard box You can make a New Year's miracle. Wreath with white lace New Year's silhouettes. All details are cut out separately - and from the outside it seems that this is a single large openwork paper cutout.

How to make the basis for a New Year's wreath.
We take a large pizza box. Place the largest pan lid (or round dish) on it. We trace with a pencil. We get the contours of the outer ring. We put a smaller plate in the center, trace it with a pencil - we get the contours of the inner ring, that is, a hole. Cut it out.
Note - to get an even-sided ring for a wreath, you need to place a small plate (for the hole) exactly in the center - so that on the right and left and above and below the plate there is the same distance to the edge of the ring.
From ordinary white office paper we cut out the details-symbols of the New Year:
- 3 large snowflakes
- 8 Christmas tree silhouettes
- 4 house silhouettes
- 1 white ring (you can use 2 halves of a ring - from two sheets of paper)
This white ring will lie on top of our round dance of houses of Christmas trees and snowflakes. AND by inner diameter this white paper ring should match the inner circle of our cardboard wreath base(which we cut out of a pizza box).
The process of assembling a New Year's craft.
On our gray cardboard ring we glue all the Christmas trees, houses, snowflakes in a circle - in any order. We make a round dance of silhouettes - without bringing them too close to the inner edge of the wreath (since there they will be covered too much by the white paper ring). The thickness of the ring should not greatly overlap the New Year's silhouettes made of paper - but only cover their lower part.
We glued the silhouettes in a round dance and then put a white paper ring on top of them - also with glue. It is better to work with a glue stick - it is drier and the cardboard does not warp from moisture and the paper does not wrinkle from dampness.
And here's a snowflake template to help you , which is perfect for this paper craft for the New Year. To reduce the size of the template, press and hold the ctrl button and at the same time roll the mouse wheel - towards you (or away from you) to change the size. Then place a sheet of paper on the monitor screen and trace the outline of a snowflake glowing through the paper.


And here are some more ideas for silhouette round appliques made from paper for DIY decorations for the New Year.
Cut out a ring from black cardboard. At the bottom we glue a semicircular white snowdrift. – we attach white silhouettes of Christmas trees to it. Using a hole punch in the shape of snowflakes or stars, we make a small scattering of stars and glue them onto the black ring. Cotton swab and with white gouache we apply small white dots on a black background.
Or we cut out silhouette layers from white paper (a row of houses) and red paper (Santa Claus’s sleigh and horse). Stack the layers within a circular silhouette.

Carved crafts
made of paper for the New Year.
If we bend the paper slits from their cut place, we will get the effect of a voluminous paper craft. Below we see a paper Christmas tree made using this technique. A sheet of paper was folded in half along the axial vertical line. And they made oblique cuts - 2 small ones at the top, then two larger ones below, two even larger ones, and so on. Then they unfolded the paper and folded each cut section downwards - it turned out to be a carved paper Christmas tree for the New Year (left photo below).
You can only make small CORNER cuts with a paper cutting knife - and bend these corners, getting the shape of triangular teeth.

Using the same technique, you can make three-dimensional In the same technique, you can make three-dimensional 3D crafts. This is how they are made New Year trees made of paper or white cardboard.
Take a flat triangular piece of cardboard and use a knife or blade to make it vertical cuts(without touching the edges of the triangle with scissors). And then we bend these cuts - one forward, another back, the third forward, the fourth back and so on - alternating. Before you start bending, you need to fold our triangle in half along the central vertical line - then all these bends will have an even central edge - both in front and behind.
If the cut lines are made not straight horizontal (as in the left photo), but wavy or oblique like on other Christmas trees with photos, then we will get interesting silhouette volumetric crafts Christmas trees made of paper.

You can also turn a flat paper piece into a voluminous convex Christmas tree (3D craft) in this way (as in the photo below).
We cut an ordinary flat round piece of cardboard in a spiral - (draw a snail on it, and make a cut along the line with scissors). And then we lift the middle of this snail up and create a spiral-spring in the shape of a herringbone.

To prevent the Christmas tree from folding back, it can be supplemented with a ROD - an axis holder, so to speak (as was done in the right photo below). There, a wooden stick on top holds the center of the spiral (on glue), and at the bottom the stick is based on a piece of plasticine or another pedestal.
And please note that the edges of the Christmas tree in the photo to the right are curly (with a lace border). This is achieved if the spiral snail is drawn not with straight lines, but with wavy lines, and cut accordingly along these lines.
We also have a very large and detailed article on our website. There you will find a lot of ideas for creating paper Christmas trees for the New Year.
And in this article I will give an idea for a very simple Christmas tree made from paper disks. We cut paper circles - 2 pieces of each size. Fold each paper circle in half. We put halves of the same size into each other - with a corner in the shape of a house roof. It turns out 5 corners of different sizes. And from them we begin to collect our paper Christmas tree- first we glue the smallest TOP PAIR onto the sheet, then inside it - we put a little more, then even more and so on until we assemble a Christmas tree - a great idea for the New Year from paper white, which is always in abundance.

Crafts for the New Year
FROM STRIPES OF PAPER.
Here are a couple of ideas for you on how you can make original Christmas wreaths from paper cut into short strips with your own hands and with your children’s hands.
In the first master class, we cut green (double-sided in color) paper into strips 10 cm long. We fold each strip into a small bowl. Cut out a donut-shaped base ring from a pizza box. And onto this base we glue our pots of paper strips– glue them with the jagged “comb” facing up (as shown in the photo below).

And here’s another idea for the New Year made from paper – also from strips and also in the form of a wreath craft. You can cut each strip on both sides into 2 cloves (like a flag). And just glue them onto the base ring for the wreath. We glue them - wrapping them around the ring and gluing the two sides of the flag together. We decorate the paper wreath with sparkles and fluffy balls,
You can roll up a SPRING from two long strips of paper - glue a bright light made of colored yellow and red paper to it - and you will get a candle.

Craft-POSTCARD
for the New Year made of paper.
For this Santa Claus clamshell craft you need two-way red paper - and a sheet of white or blue cardboard.
- We glue the red silhouette onto a rectangular sheet of paper so that its HANDS extend wide open beyond the edges of the blue cardboard sheet.
- Then all that remains is to glue on this red silhouette of Santa Claus a white silhouette of a beard, with a pom-pom, and in the middle of the beard, stick on a pink face detail.
- Use a black marker to draw eyes, buttons, pockets. Draw a nose with a red marker. And then draw a line onto which the children will glue a chain of flags.

So I drew the outlines of all the details of this New Year's paper craft. You can trace the outline of Santa's details by placing a piece of paper directly on your glowing computer monitor. To enlarge or reduce a picture– roll the mouse wheel while holding down the CTRL button on your keyboard.

You will find even more ideas for creating Santa Claus crafts from paper and more in our special article dedicated only to this character beloved by all children.
Paper accordion crafts
for the new year.
An ordinary paper fan, which children love to fold in hot weather, can warm you with the flame of warm ideas on cold New Year's days.
You can make a multi-tiered paper Christmas tree like this for the New Year. In it, each tier-floor is a long wide strip of paper folded into a small accordion. Each accordion is glued overlapping each other - starting from the bottom, and slowly moving to the top.

And if such a strip is twisted in a circle, we get the shape of a corrugated pancake. Different sizes of such corrugated rounds will give us a pyramid in the form of an elegant Christmas tree made of paper. For the New Year you can put it in the center of the table a real masterpiece, made with your own hands. Tiers of colored paper can be sprayed with hairspray and quickly sprinkled with fine nail glitter.

Such a Christmas tree made of paper will look elegant and beautiful if you use ordinary gift wrapping as the paper material - it will already have a beautiful colored pattern - for example, with cheerful polka dots, as in the photo below.

You can also use these round accordion fans to make beautiful New Year’s crafts in the shape of a snowman or a decorative paper snowflake pendant.

We make a round fan from music paper (before this, we artificially age the paper, yellow it with tea or grease it with a brush dipped in coffee, dry it, and smooth it with an iron). Using hot glue from a Klim gun, place a store-bought plastic snowflake in the center of the round fan. And from the old one New Year's cards cut out the round element of the picture and paste it in the center - you get a paper snowflake craft for the New Year.
Your round fan doesn't have to be in the shape of an EVEN CIRCLE. You can give the fan a patterned shape - jagged edges, openwork holes (as in the photo with the snowflake craft below).

Below I found a diagram that shows how to create such a patterned round fan in stages. Please note that the edge teeth are obtained from the fact that the fan, while still folded, is cut at an angle at one end.
The holes come from triangular slits in the side of the fan. And so that the fan itself easily assembles into a circle, we see a round hole punctured by a needle - from the opposite end of the fan - in this place all the blades are threaded through the needle and thread - and thanks to this, the fan is pulled together tightly in its center and fixes this tie with a knot of thread ends.


Of course you can get by and without thread and needle– fold a round fan from several coal fans. The photo diagram below shows how this is done with your own hands.

The shape of the fan teeth gives interesting shapes to these paper snowflakes. In the photo instructions below we see different variations such paper crafts for the New Year. Every new pattern cuts and cuts gives us a new interesting snowflake when turning.


Angels for the New Year
Made from paper and cardboard.
You can make an angel craft using the fan fold technique from white office paper. First, fold a round fan out of white paper (in the same way as above we folded it for a tiered Christmas tree - also with the center gathered on a thread). Then, on this fan circle, outline the outlines of an angel (head, wings, dress) and cut along the drawn line. You will get a paper angel craft for the New Year as in the photo below.

And for children at school you can make something like this simple crafts angels from a narrow paper cone. The wings are a semicircle with two cuts in the middle - the top of the cone is threaded through them (see photo below).
Then a face is glued to the top of the cone (a semicircle made of cardboard). Then we make the hair - we bend the rectangle of paper into two unequal parts - a short fold for the bangs, a long one for the back of the hair. We cut each part into a fringe.

You can make such a solid angel for the New Year from thick paper with a foil side or from shiny cardboard. For this craft, we make only one flat piece (as in the photo below). We make 2 cuts with scissors - then we bring the two sides of this workpiece back, join them and put the cuts on each other. It turns out voluminous New Year's craft Angel (as in the photo below).

And here is an angel made of paper - as a window sticker for the New Year. Below I give a diagram for cutting out such an angel for a window. You can translate a picture with a pencil directly from your laptop screen by placing a piece of paper directly on the monitor screen. If you want to enlarge or reduce the drawing diagram, you just need to roll the mouse wheel while holding down the Ctrl button on your keyboard.


If you have lace paper napkins, you can make from this openwork paper such an elegant angel for the New Year. They can decorate a postcard, front door, or use as a toy on christmas tree.

You will find even more ideas for crafts in the form of angels in our special article
Paper crafts for the New Year,
cut into strips.
And here is a packet of ideas for New Year crafts made from paper strips. From colored paper (colored on both sides) we cut out strips of the same width. And by gluing them together in a given fold position, we get shaped frames - in the form of a snowman’s hat, in the form of his body, the head of his arms. By connecting the strip frame parts with each other, we get a solid craft made of colored paper for the New Year.
For crafts made from thin frame parts, it is better to use strips of paper glued together (3-4 pieces each, or cardboard (two-color) - this is how we get dense craft, which will not deform under its own weight.

For the same technique (paper strips), you can use not only colored paper as a craft material, but also any other one. Ordinary strips of paper can be cut out from a magazine or gift wrapping - as was done in the example of the fake snowflake in the photo below.
After gluing the craft, the end edge of the flat cut can be dipped first in glue and then in nail glitter.

You don't have to be a quilling master to make an elegant paper snowflake. It is enough just to cut strips of paper of the same length, then glue loops from them (they will also turn out to be the same size). And then fold these loops in a circle (gluing in the center) - and we get a round base for the snowflake (as in the photo below). We decorate the glued loops in the center with cardboard snowflakes (or store-bought plastic ones), then with round pieces and small paper fans.

You can come up with a different pattern using paper loops of different sizes and get new results. For example, you can hang this paper star as a Christmas tree decoration for the New Year.

New Year made of paper
for quilling.
In city stores you can find kits for children's creativity in the Quilling technique - these are bags with strips of colored paper - already cut evenly. You can use these strips to make any New Year's decorations. paper crafts. There are already ready-made diagrams Snowflakes using the quilling technique, with a ready-made number of stripes of the desired color.

Or you can simply buy multi-colored quilling kits (without being tied to a specific craft) and create your own fantasy works from them for the New Year. You can create entire small masterpieces from paper. Look at the photo below - nothing complicated or scary - all the shapes are simple (drops, circles, curved drops). A small Christmas picture inside a single ring.
By the way, the ring can be made from a wide round sleeve of adhesive tape. Using a knife (or better yet, a file), cut off a narrow ring from the tape sleeve. Paint it white gouache, spray it with hairspray (to set the color) or wrap it with glitter tape. And then, inside this closed form, create your New Year’s picture. So you will get a DIY Christmas tree pendant for the New Year from plain paper.

You can make THICK cast crafts from quilling material. This New Year's penguin is a large winding in the shape of a droplet.

A few drops different shapes create the image of an angel using the quilling technique.

Using the same principle, you can make a Santa Claus craft from twisted paper.


The youngest children, who are just beginning to master the basics of quilling techniques with their own hands, will be able to try their hand at a craft in the form of a simple placement of droplets. In a circle. In the image of a Christmas wreath.


Non-standard quilling technique
In crafts for the New Year.
Paper strips can be laid not in round rolls, but in puff layers. The Christmas flower craft with the photo below was made using this laying technique.
You can make a similar thing using a regular comb.

In the photo below we see a master class on this craft. The paper is twisted through the teeth of an ordinary flat comb (or a special quilling comb).

Using this technique you can make elegant round decorations for the New Year tree. Or create decor for a postcard. Decorate gift wrapping for the New Year with your own hands.

These are the ideas I have collected for you today in our article.
I am sure that you will find your New Year's craft from paper and the magic of your hands. May the holiday be joyful and successful for the accomplishment of good deeds and good desires.
Olga Klishevskaya, especially for the site ""
If you like our site, you can support the enthusiasm of those who work for you.
Happy New Year to the author of this article, Olga Klishevskaya.
Guys, we put our soul into the site. Thank you for that
that you are discovering this beauty. Thanks for the inspiration and goosebumps.
Join us on Facebook And VKontakte
Many people notice that the older they get, the more difficult it is to re-experience that magical feeling of a fairy tale and miracle that always came to us as children on New Year's Eve.
But we're in website sure - Christmas mood will not keep you waiting if with my own hands make one of these wonderful decorations for your home and Christmas tree. Almost all of them, with the exception of two or three, do not require much time and any special materials - they can be made in half an hour from what is at hand.
Stars made of threads
Wreath made of balloons and an old hanger
In just half an hour, you can make a colorful wreath by purchasing a couple of sets of inexpensive balloons. Blogger Jennifer, the author of this article, recommends straightening out an old hanger, but if you don't have one, a piece of strong wire will do just fine.
- You will need: a couple of sets of balls (20-25 balls different colors and sizes), wire hanger or wire, fir branches, braid or ready-made decoration for decorating a wreath.
Tablecloth made of snowflakes
A delicate and surprisingly festive tablecloth will be made from snowflakes, which we have gotten our hands on since childhood. You can sit down and cut out snowflakes with the whole family, and then lay them out on the table and fasten them with small pieces of tape. A wonderful solution for entertaining guests or just having lunch with the family during the holidays.
Multi-colored hats
The cutest colored hats can be made from leftover yarn, from which you can put together a garland for a Christmas tree or to decorate a wall. Or hang them on a window or chandelier at different levels. Children over five years old will also cope well with this simple decoration. See details.
- You will need: bushing toilet paper for rings (or regular cardboard or thick paper), scissors, colorful yarn and a good mood.
Lamp “Snowy City”
For this charming lamp, you need to measure a piece of paper around the circumference of the jar with a small margin (for gluing), draw and cut out a simple city or forest landscape. Wrap it around the jar and place a candle inside.
- You will need: a jar, thick paper of any color, maybe white, any candle. Alternatively, you can cover top part cans with “falling snow” using a special “snow” spray, which is sold in hobby stores.
Balloons with photos
A great idea for decorating a Christmas tree or as a gift for relatives and friends. The photo needs to be rolled into a tube so that it fits into the hole of the ball, and then straightened out with a wooden stick or tweezers. Small black and white rectangular photographs are suitable, and you can also cut out the photo according to the shape of a ball or a silhouette (as in the case of a cat in the snow).
- You will need: plastic or glass balls, photographs, various things to fill the ball - tinsel, garlands, coarse salt (for snow).
New Year's lamps
And this miracle is a matter of five minutes. It is enough to collect balls, fir branches, cones and put them in a transparent vase (or a cute jar) and add glowing garlands.
Embers
Glowing garlands, hidden among cones, branches and pine paws, create the effect of smoldering coals in the fireplace or a cozy fire. They even seem to be heating up. For this purpose, a basket that has been lying on the balcony for a hundred years, a nice bucket or, for example, a wicker container for small items from Ikea will be suitable. You will find everything else (except for the garland, of course) in the park.
Floating candles
A very simple decoration for New Year's table or for a cozy evening with friends at New Year holidays- a composition with candles floating in a vessel with water, cranberries and pine branches. You can use cones, orange slices, fresh flowers and leaves from a flower shop - whatever your imagination tells you. And as a candlestick - deep plates, vases, jars, glasses, the main thing is that they are transparent.
Snowman on the refrigerator or door
Children will definitely be delighted with this - it’s fast, fun and very simple, because even a three-year-old can handle cutting out large parts. It is enough to cut out circles, a nose and a scarf from self-adhesive paper, wrapping paper or colored cardboard and attach them to regular or double-sided tape.
Snowflakes on the window
Interesting use for a glue gun lying around. In order to glue these snowflakes to the glass, just press them lightly to the surface. For details see our video.
- You will need: a stencil with a snowflake drawn with a black marker, tracing paper (parchment, baking paper), a glue gun and a little patience.
Christmas trees-candies
Bright Christmas trees can be built together with the kids for children's party or decorate with them festive table. Cut out triangles from colored paper or cardboard, attach with tape to a toothpick and stick the resulting Christmas trees into the candies.
- You will need: Hershey's Kisses or any other truffle candies, toothpicks, tape, colored paper or cardboard with a pattern.
Garland with photographs and drawings
New Year, Christmas - warm, family holidays. And it will come in very handy with photographs, children's drawings, and pictures. The easiest way to secure them is with clothespins, which can be decorated with hearts or snowflakes.
Origami star
Painted spoons
Regular metal spoons or wooden spoons for cooking with acrylic paints turn into interesting New Year's decorations. Kids will definitely love this idea. If you bend the handle of metal spoons, you can hang them on the Christmas tree. And wooden spoons will look great in the kitchen or in a bouquet with fir branches.
Snowman made from a sock

Undoubtedly, best gift- a handmade gift. But this not only applies to gifts, but also to decorations for the Christmas tree, wall, closet, etc. Everything will be discussed in more detail later in the article.
Snowflakes
The first and probably simplest thing is snowflakes, a symbol of frost. They are different. I'll start with the simplest option.
So, let me prepare:
- Scissors.
- Paper (a4 format).
- A simple pencil.
- Eight-pointed snowflake
The blank is folded from a square sheet of paper, so I cut off the excess part.
Since the square is folded in half, we should get a triangle. We fold the resulting triangle in half perpendicular to the base. Then I fold it in half again.
After that, I fold it again and cut off the excess part. I outline the outline of the snowflake. I lay out what I cut out - I should get a snowflake. Now let’s start making a six-rayed snowflake.
For this snowflake I will need a square piece of paper. I fold a square sheet of paper in half. Then I bend the resulting blank, but do not fold it, but only squeeze it on the first fold, thus forming a notch in the center of the folded sheet.
I bend the second corner in the same way, only I make sure that the second corner overlaps the first. Next, I fold it in half along a vertical axis drawn from the notch. After that, I take a pencil and draw the outline of a snowflake. Then I cut along the contour.
Christmas tree
What would New Year be without a green beauty? For our first idea, we need to make a cone out of paper. The “twigs” for our Christmas tree will be roses made from napkins.
I fold each napkin in half, and then in half again. After that, I fasten it all together with a stapler in the middle. After I stapled it, I cut out a circle from the napkin. I think it should be multi-layered.
I'll take the most top layer and twist it. This is what I do with all the layers. When I'm done, I straighten the rose a little. Now you need to cover the cone with roses so that there are no gaps or bald spots.
Christmas paper toys
Let's move on to Christmas tree decorations made of paper. What am I? Christmas tree without balls, icicles, cones and other decorations?
So let's do it for our forest beauty Christmas tree decorations? For this I will need:
- Thick paper.
- Old magazines, cardboards and candy boxes.
- Scissors.
- Glue.
- Compass.
To begin, I take cardboard and trace twenty-one identical circles and cut out the resulting circles with scissors.
I need to fold each circle in the following way: I bend the circle in half twice, on one side and on the other. After this, I unbend and mark the center of the circle. Then I bend it again, but this time on one side, so that the edge of my circle is exactly in the intended center. I bend it again on both sides. I should get a triangle.
In one of the twenty circles I need to cut out this triangle, which will serve as a kind of stencil. Next, all we need to do is apply the triangle to the remaining circles, tracing it and bending the edges of the circles outward along the contour.
Now I need to take the first ten circles and glue them into stripes, alternating: five down, five up. Now I need to glue the strip into a ring, which will serve as the basis of our toy.
Now I'll take care of the top and bottom covers. I need to glue them to the base in exactly the same way. And now it’s time for the loop by which the toy will be hung.
Flashlight toy
I'll start by taking two sheets of paper of different colors. For example, white and red. Next, I cut out two rectangles. White will be 100 by 180. Red will be 120 by 180.
I'll start with red. I'll fold it in half and make cuts so that there is room at the edges. We do white in the same way as red.
Star
To do this, I need to prepare 10 by 10 squares. First, I need to make two folds and then folds diagonally. After that I need to make cuts and fold them into the corners. Next, glue the corner in the center.
Repeat the procedure with the second sheet of paper. Then glue the two halves together.
Charming ball
For this venture I needed eight circles. Then I cut out two more circles, which should be half the size of the previous ones.
I folded each circle in half, and then in half again. Now you need to glue four large circles onto one small one. Next, you need to position the quarters correctly. We straighten the resulting pockets. Now you just need to make the other half of the ball as well. All I have to do is glue the two halves together and the ball is ready!
Candles
It is necessary to prepare two strips of paper approximately 20 millimeters wide and 30 centimeters long. I will also need red and yellow paper to make the “flame”.
I glue the ends of the strips at right angles.
I fold the candle body from the strips so that they overlap each other.
I cut out the candle flame and glue it to the candle body.
Now you need to bend all the piles in half and collect the snowflakes into a crystal. I tied the end of the blank with fishing line. I need to make eight more. This work is not easy, I tell you.
One pack of strips needs to be bent and secured with fishing line, but along the outer edge. It should be a circle.
I fasten all the crystals with hot glue to the prepared circle. I almost forgot. And four more blanks must be inserted into the spaces between the first ones.
I also fasten the side parts of the crystals.
Sprinkle with glitter and the openwork snowflake is ready.
Do you think that's all? But no! I left the most interesting thing for last – the voluminous snowflake. Don't worry, it's very easy to do.
Option 1 volumetric snowflake
I draw a sheet of colored paper into rectangles measuring 5 by 6 centimeters. Next, we do the same with white paper, but in rectangles measuring 3 by 4 centimeters.
After that, I take 3 by 4 rectangles and also twist the icicles and glue them onto the workpiece with large icicles. I cover a small circle with glitter and glue it into the middle of the resulting blank.
Option 2 volumetric snowflakes
For this venture I will need:
- Glue.
- Scissors, stapler.
- Stationery.
- Paper.
- I warn you right away that this snowflake is much more difficult to make than the previous one.
First, I'll prepare a stencil. For the stencil we need cardboard. We draw six lines on it at right angles. The lines should be 1 cm apart.
Now we have to bend six album sheets diagonally and make cuts according to the stencil. I should end up with 6 triangles with cuts running parallel to each other.
After that, I take one of the triangles and unfold it. That is, I should end up with a square containing even smaller squares. You need to start from the center. I turn the corners of the central square towards the center. I glue it. I turn it over to the other side and do the same as with the central square. As a result, I should end up with an icicle.
There's just a little bit left to do. Fasten all my icicles together and our snowflake is ready.
Option 3 volumetric snowflakes
For this option I will need:
- A4 paper.
- Threads.
- Needle.
- Red patch.
- Stationery.
On a sheet of paper I draw four circles, which must be the same diameter. I cut out the circles and mark eight equal parts. I make cuts along the marked lines towards the center. After that, I bend the tip of each such “petal” and glue it.
I do the same manipulations with the remaining circles and sew them together. The red shred is needed to give the product completeness. Cut out a circle from the scrap and glue it together.
Having rummaged around on the Internet again, I came across another version of a three-dimensional snowflake. This snowflake is made from strips of paper. So, I'll cut the paper into strips. The strips should be five millimeters and 21 centimeters long.
A snowflake consists of two halves. That is, one half needs 10 strips. I glue the first two strips together so that I get a cross. Then I glue two more strips.
Next, I pass two strips through the beam and glue them. There should be two free strips left. After that I also do the other half. I fasten the halves together with loose strips and intertwine them with each other.

New Year's paper crafts
DIY voluminous paper snowflake
This voluminous snowflake made of paper is a wonderful New Year’s decoration for any interior. A paper snowflake will definitely delight your children, relatives and guests.
For a snowflake large size We use only thick paper, and also add more lines.
A snowflake can be made from paper of any other color - it all depends on the color of your New Year's decor. You can also use wrapping paper.
Materials, necessary for making paper snowflakes:
six squares, cut out of paper, preferably white and the same size.
Any paper is suitable for making snowflakes. The side of each square cut from paper can be from 10 to 25 cm.
Tools:
- ruler;
- simple pencil;
- scissors;
- stapler
Manufacturing method volumetric snowflakes from paper:
1. Bend each of the six squares diagonally in half. We make markings of three parallel lines on each of them. The width of the segments should be the same. We draw the lines with a simple pencil (in the photo they are drawn in red only so that they are better visible). Then we cut the outlined lines with scissors, starting from the edge and not reaching a little (leaving a couple of millimeters) to the middle.

2. Now open the square folded diagonally and place it face up in front of you.


4. Then we turn the snowflake to the other side and connect the next two strips closest to the center, fastening them with a stapler.

5. We continue to turn the snowflake over and fasten the remaining strips with a stapler.

6. We do the same with the five remaining squares of paper. Then we staple the three parts of the snowflake together in the middle. We do the same with the remaining three parts of the snowflake.

7. Now we connect these two large parts of the snowflake to each other.

8. At the points of contact of each individual part of the snowflake, we also fasten it with a stapler. This is necessary for the snowflake to keep its shape.

9. Now we decorate the snowflake according to our own taste, for example, you can stick on sequins and sparkles.
That's it! New Year's decoration is ready! A snowflake can be hung on a Christmas tree, window, wall...
Another option for snowflakes. It is made from two sheets of regular or thicker paper.
1-2. First we bend the sheets as in the picture.
3. Cut out a tick from the resulting triangle.
4. Make cuts on the remaining tick, but do not cut all the way through, otherwise the snowflake will break.
5. Bend the rays so that the snowflake is voluminous.
6. We bend each middle ray on all four petals of the snowflake inward and glue it in the center.
7. Repeat operations 1-5 with the second sheet of paper. Then we place it under the first half of the snowflake, so that the lower rays are between the upper ones. Then we bend it as in step 6, but glue the rays not in the center, but in the places where the rays diverge at the top snowflake.


Snowflake made from strips of paper

See the photo master class for the sequence of making a snowflake:
Prepare two fragments of a snowflake, each of which is made of 6 strips of paper, then connect them, as in the photo

Glue the strips together as in the photo and secure with paper clips until completely dry.

4.

We made two “half snowflakes”: 
Place them back to back
Connecting with glue 
Secure with paper clips and wait for it to dry: 
This is what the junctions of the ends of the strips look like: 

And again, all in one photo:

A more complex version of a snowflake made from stripes:


Balls imitating cones from strips of colored cardboard different lengths , folded like an accordion


You can make more snowflakes from old magazines
master class from Tiffany Lin

Tiffany marked out one-inch petals for future snowflakes. We can focus on two centimeters, for example.
In total you need to cut 140 strips. Of these: leave 20 strips along the length of the page, cut the next 40 by 1 cm, cut the next 40 by 2 cm, and cut the last 40 by 3 cm shorter. Refer to the photo above.

Fold each petal using 5 strips of each size. We take the longest strips, for the central ray of the snowflake, once, and the rest twice (once on each side).

Glue it and place it under a press while gluing.

To be safe, you can temporarily tie the tip of the petal.

Additionally, we cut out more stripes for the central part of the future snowflake.

We also glue this ring and fix it so that the glue sets successfully.

When the petals are glued, use a glue gun to process the end of the workpiece.

No need to spare glue! We process it well.
Then we glue the petal blank to the central ring.

We do this with four petals, gluing them so that we get a cross.

Then we glue the remaining petals. This method allows you to symmetrically glue all the blanks.

After this, we glue the petals together so that the snowflake does not fall apart.


Decorate the snowflake with sparkles. 
You can make snowflakes like this

Birds of happiness for your home:
Fold the paper in half and cut it out as in the photo on the left: Then unfold the wings and secure them to the body of the bird. Glue the body halves together.


How to make a snowflake like this:
Nov 28, 2016 Galinka
Let's create a festive mood and decorate the house in a stylish and original way - we'll make magnificent New Year's decorations with our own hands!
Any New Year's decorations, made with soul, are unique, so to prepare for the holiday all you need is a couple of free evenings, and a few inspiring ideas to create New Year's decorations with your own hands. Moreover, for this purpose you need to use items that are probably available in every home. So, let's go.
We make cool DIY Christmas decorations from Christmas tree balls
1. Balloon from a Christmas tree toy
It will require a beautiful Christmas ball, a piece of cardboard, thick thread and adhesive tape.
You will have to cut out a blank for the basket from colored cardboard. This will be a small box. Its bottom should be such that you can put a coin in it for weighting. Glue it from the inside and attach the threads to the corners of the box with adhesive tape. It should look like a basket with two handles.
All that remains is to assemble the New Year's decorations with your own hands. To do this, remove the fastener from the ball, throw a thread through it and put it back in place.
2. Teddy bear.
To make it you will need a plain ball and cotton wool. Glue will help give the cotton balls shape. They also need to glue the parts together.
3. Personalized New Year's ball.
On plain Christmas ball leave your own handprint. Sign the date and save it for many years.
4. New Year's garland of hearts.
The easiest New Year's crafts to make are DIY New Year's decorations made from paper. They are done literally within half an hour. And there are a huge number of ideas. Garland of paper hearts It will look great on a forest beauty. It is made from strips of double-sided colored paper. You need to fasten the parts together using a stapler.
5. Ice cream - creative DIY decorations for the New Year.
Cut a circle out of brown cardboard and divide it into two semicircles. Roll each one into a cone. Glue well. Form balls from colored paper and attach them to the cone. First pierce the top one with a needle and thread.
6. Snowflake is a ballerina.
These New Year decorations are made based on snowflakes. You just need to cut out the ballerina’s body from white paper according to the template and insert it into the center of the snowflake
Cool ideas for decorations for the New Year are made from natural materials, such as thread. All thread crafts can be coated with sparkles or shiny varnish and they will perfectly decorate a Christmas tree or home.
7. Toy - a horse made of paper and thread.
Cut out two parts of the future toy from cardboard from the box. Place them together and wrap them tightly with thread or twine.
8. DIY Christmas balls made of thread for home decoration.
Inflate round balloon to the size that the finished decoration should be. Wrap it with thread so that the gaps are visible. Apply PVA glue to all threads. After drying, deflate the ball and remove it from the New Year's decoration with your own hands. They can be hung in the room or placed on a table with tinsel and candles.
9. Winter vase
Great idea to make decorations for the New Year from scrap materials. A beautiful bottle or glass vase will become magical if you draw a semolina pattern on the glass surface. And you will immediately be transported to the lands of the Snow Queen.
10. Pasta garland
These Christmas tree beads will delight children with their uniqueness.
11. Wooden Christmas tree toys.
Skates made from twigs will give dad something to do and the kids will love coloring them.
12. New Year’s decorations for the house made from pine cones
Painted in green tint the cone will become a Christmas tree.
13. New Year's funny gnomes
Unshelled peanuts are a reason to create funny people out of them.
14. Snowman made from socks.
White socks or tights filled with millet make cute snowmen. They can be dressed in jackets and hats made of colored socks. And make the noses from the core of an orange pencil.
15. DIY Christmas snowmen
Burnt out light bulbs are the basis for drawing funny gnomes that will decorate the Christmas tree for the New Year.


