Marina Shevelkova
Crafts from autumn leaves
Autumn is a great time for an in-depth acquaintance of the child with natural material. Such a wonderful time of the year provides us with numerous opportunities for the implementation of various creative ideas related to the manufacture of flowers, paintings, bouquets from autumn leaves.
There are many ways to create beautiful crafts and interesting appliqués using autumn leaves.
1. Application of dry leaves
The simplest and easiest form of creative activity to perform is the application. It can be created even with the smallest children. At the same time, we use templates on which dry leaves are glued.
Also, the missing details of the images can be completed with colored pencils or felt-tip pens.
At the same time, as the child grows older, you can complicate tasks and use more complex figures.
By creating crafts from autumn leaves with your child, you not only form an emotional and trusting relationship with your child, but also develop his creative abilities.
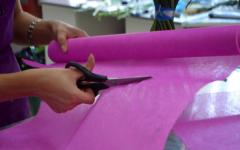
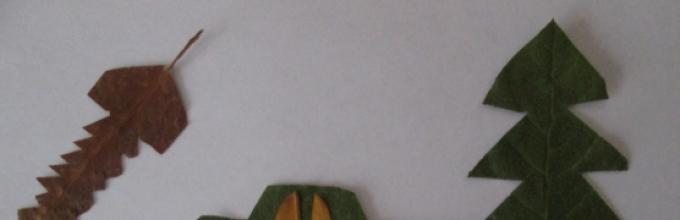
2. Cut out figures from fallen leaves
Here, autumn leaves are used a little differently - it's just a material for cutting out simple figures and letters. This must be done BEFORE the sheet is dry, otherwise it will crumble. First cut, then dry. So you can cut
simple silhouettes (animals, houses, clouds).

3. Pictures of flowers and leaves
With older children (from 5 years old), you can create more complex crafts using dry leaves. For example, to make whole pictures.


We glue dry leaves of the desired color on the picture.
Additionally, you can use branches, sticks, dry leaves of small size.
Such work is simple in its implementation, but quite laborious and requires perseverance. Therefore, you should choose whether this way of working is right for your child.
4. Leaf frames
You can also create a frame of autumn leaves with your child. A child over 4 years old can create such a craft.

To create a frame, you need to take the leaves and dip them in hot water to make them soft. After dipping, it is necessary to smear glue on each leaflet and stick it to the frame itself.
After complete drying, it is necessary to coat the leaves with a matte varnish.
For the autumn exhibition, you can make frames for photographs and for the design of essays and poems on the theme of autumn.
5. Roses from autumn leaves.
For autumn roses, we need ordinary fallen maple leaves.
To create one rose, you need only 4-5 leaves, which are folded one by one. The whole flower is fixed at the base by tightly winding ordinary threads of yellow or orange color to match the autumn leaves, and the stems of the leaves gathered together during the formation of the rose act as a flower stem and allow you to collect a whole bouquet from such roses or create a composition.
6. Herbarium
From dried leaves and flowers, you can make a herbarium with your child. Participating in the process of creating a herbarium, the child gets acquainted with the outside world, he develops observation skills. In addition, the design of the herbarium contributes to the development of accuracy, composure, and the ability to work with literature.
7. Crafts from flowers. Leaf crafts

The technique for making this original craft from flowers and plant leaves is very simple.
You will need an old toothbrush and watercolors. A composition of leaves, blades of grass and flowers is laid out on a sheet of paper, after which paint is sprayed over them with a toothbrush.
8. Leaf prints on paper
You can paint the leaves with paint and make prints on paper.

9. Create a picture of broken leaves.

A child is a creative and creative creature. To develop his abilities and for general development, regularly create masterpieces with him. Crafts with children will help you make him a multifaceted personality.
If you start creating masterpieces with your child, your child will not only throw out his emotions in creativity, but after a while you will get to know his world, desires and fantasies, and this is the most important thing in the relationship between parents and a child.
We wish you creative success!
Children are always interested in novelty. Many of them love to sculpt and draw. To these activities in the form of alternation, you can add creative work - making crafts from beautiful autumn leaves.
It will captivate children - from ordinary leaves and simple materials available in every home (glue, thread, paper), very beautiful crafts are created with their own hands.

When working on applique, making vases, bouquets, children not only reveal their natural abilities, develop their imagination, but also learn about the world around them.

Collecting a herbarium with children, you can discreetly and unobtrusively introduce them to trees of different species. How can you make crafts from leaves?

Preparing craft material
Since fresh leaves straight from the tree are not suitable for work, they should be dried well. It is not difficult to prepare the leaves, but, firstly, this process will require considerable time. Secondly, drying leaves has its own rules. To prepare good material for future crafts, you need to stick to them. The drying method depends on the type of crafts.
- Dry in a large container - in a basket, box, placing it in a ventilated place. The leaves dry well and do not rot. This material is suitable for those crafts in which the leaves do not have to be even.
- Arrange the leaves in books or albums and press down with a weight on top. This type of drying will take at least two weeks. Leaves will be perfectly smoothed.
- If patience runs out and you want to start work faster, a press invented for a herbarium will come to the rescue: put the leaves in a pile, shifting with paper. This material will dry in 3-4 days.

How to perform leaf skeletonization
This is a special technique for making leaf skeletons. They give crafts a special effect, as they are very light and transparent.

For work, collect fresh leaves, prepare soda, dyes for eggs, a toothbrush, simple paper napkins, and small dishes.

Mix it with 1 part baking soda and 4 parts water. Dip fresh leaves into the mixture, covering them entirely with a solution. Put the container on the fire, let it boil and leave on a small fire.

After half an hour, turn off the heat, remove the leaves, laying them shiny side up on a flat surface.

Carefully blot excess moisture with paper towels. With a toothbrush, gently scrape the pulp from each leaf (gently, so as not to damage the leaves).

Rinse the remaining skeletons with water, paint them in the chosen colors. After staining, the skeletons must be dried, and they are ready for use.

Bouquet of flowers from leaves
This is the easiest craft that is made from leaves. For beginners, especially children, it is better to start with this species. It is not necessary to add dried fresh flowers to the bouquet. Leaves of different colors are suitable for buds in the autumn season. Children can participate in the process at all its stages.

What do you need to have on hand to create a Bouquet of Flowers crafts?
- Fresh maple leaves on stems;
- Lesson threads.

Steps for making buds:
- Turn the sheet glossy up.
- Roll it up into a tube.
- Bend the second sheet and wrap around the prepared tube.
- Wrap with many leaves until the flower of the desired splendor is obtained.
- Fasten the bottom of the flower by wrapping it with thread.
- Having prepared many flowers, make an original bouquet out of them.

Topiary from autumn leaves
For a topiary - a tree of happiness, coffee, banknotes, sweets, etc. are suitable. Try to make it from maple leaves.

Prepare for crafts:
- pot as a base;
- stick-barrel;
- foam (foam) ball for the base;
- gypsum;
- paints;
- ribbons, beads, artificial flowers, twigs and other elements suitable for decoration.

Stages of work:
- Heat glycerin with water 1x2 to a hot state, lower the stems of the collected leaves into it, keep for 10 days in a dark place with good air circulation.
- Fix a wooden stick with a solution of gypsum in a pot until it is completely stable.
- Paint the entire structure in the chosen color.
- Put on the top of the stick and fix the ball.
- Insert leaves into the ball, interspersed with decorative accessories.
- Fill the rest of the composition with moss, bark.

How to make a decorative fall wreath
Autumn colorful, bright leaves will be an excellent material for weaving a wreath. It can be attached to windows, doors, walls.

Assemble a set of material:
- flexible branches from any tree;
- dried leaves of contrasting colors;
- bunches with red berries;
- glue, strong threads;
- metallized threads;
- tiny figurines of birds;
- physalis berries.

Action process:
- Bend the branches into a circle or an oval, winding them with threads in several places - it turns out the frame of the future wreath.
- Carefully wrap the frame with prepared threads, leaving protruding branches in some places.
- Glue leaves to them.
- Attach bunches of mountain ash or viburnum, physalis to the frame with glue or thread.
- Attach birds to branches.

Hang the finished wreath in the chosen place. A bright, colorful craft will delight its creators and home.

Fruit bowl
It's time to move on from small, easy children's crafts to crafts suitable for decorating the house. For this purpose, you can proceed to a vase for fruit.

Before work, we collect material:
- glue;
- Balloon;
- a tube of vaseline;
- scissors;
- leaves (maple leaves are best).

Actions in order:
- Inflate the balloon to your desired size.
- Coat it with Vaseline over the entire surface, then the leaves will not stick.
- Secure the ball firmly so that it does not move, for ease of operation.
- Lubricate the leaves with glue and stick them to the ball.
- It is advisable to glue the leaves in several layers.
- Lubricate the last layer with glue and dry for 3 days.
- Carefully pierce the ball and remove its pieces from the craft. It remains to put the vase in the prepared place.

Autumn style photo frame
Not a single child can resist the temptation to hang his own drawings, photographs on the walls of his room. Carried away by a new kind of creativity - leaf crafts, he will not give up the idea of mastering a photo frame decorated with unique autumn leaves.

Help him prepare:
- sheets of cardboard;
- paper glue;
- leaves to choose from

Making a frame:
- Immerse the leaves in advance in warm water to soften.
- Draw the cardboard in the form of a frame of the desired size.
- Glue the cardboard frame with prepared leaves.
- Leave to dry.
- Fix inside the photo with glue or tape.

Children's applications from dried leaves
This is the easiest kind of work. From leaves of different sizes, colors, it is easy to create whole pictures that can become an interior decoration. A series of panels on one theme will look impressive: animals, landscapes, etc.

Owl
If you want to make an application depicting an owl, you need to prepare:
- oak, birch, willow leaves of a brown tint;
- a set of colored paper;
- thuja branch;
- a piece of cardboard;
- rowan brush;
- a twig from any tree;
- glue.

Start work by drying the leaves and berries. When they are ready, we make the application.
- Cut out an owl from a cardboard sheet.
- Glue birch or oak leaves to depict ears and paws.
- Feathers are made from willow leaves.
- Colored paper is needed for the eyes and beak.
- We put the owl on a stand - a tree branch.

Firebird
A beautiful application will be made up of birch, linden leaves (you can use wild rose), paper, pumpkin seeds. It is performed as follows:
- A linden leaf will go on the body of the firebird, a head will turn out of a birch.
- Rosehip leaves, glued one at a time, will be the tail.
- Glue birch leaves to the body - wings.
- Pumpkin seeds will serve for the eyes, they also decorate the body.
- Make a crest from a tree branch.

a lion
Making it will be a joy for any child.

He needs help picking up yellow round leaves, ash seeds, chestnut fruits, a pine twig, a yellow sheet of paper, orange cardboard.

Craft from leaves on a yellow sheet of paper, start by drawing a black head with a felt-tip pen. Cut it out, glue it around with yellow leaves - this is a mane. Glue a chestnut in place of the nose. Pine needles will become mustaches. The ash seed will turn into a tongue. It remains to dry the craft, and the child will have a perky lion cub created by his own labor.

Rybka
You can please the kids by creating a fabulous golden fish with them. She needs brown and yellow leaves, oak acorns, ash seeds, blue paper.

We start the work with drawing - we make a contour on a blue sheet, cut it out. Linden leaves will be scales glued to the outline. The tail is decorated with brown leaves. The acorn caps turn into a head, and the fish is ready.

Optionally, you can decorate applications with moss, thuja sprigs, rowan berries.

Any natural materials are useful for decoration: berries, cones, beautiful plants, nuts, seeds, acorns, fruits of various shrubs.

It is important to start creating, and then fantasy will tell you a lot. Leaf crafts will be a joy for children. In addition, the child will receive a lot of emotions during walks to collect leaves and other natural gifts. He will have a useful occupation, which over time can develop into a hobby. Moreover, the modern problem of all parents is being solved - the child has an alternative to a computer, smartphone and other gadgets.
Photo ideas for crafts from autumn leaves


Autumn is an amazing time, embraced by a special natural charm. Everything around is transformed and plays with bright colors: red, orange, yellow. It's time to take advantage of the situation and get creative. Especially if the kid was asked to prepare a craft from autumn leaves or some kind of composition from leaves on an autumn theme as homework.
In contact with
A child from an early age should be instilled with a sense of beauty. Do-it-yourself leaf crafts will help develop your child's artistic taste, aesthetic perception of the world, as well as fine motor skills. In addition, the production of artistic compositions is a great alternative to leisure, which will be of interest to all family members.
Do-it-yourself options for autumn crafts
Autumn crafts are a great idea for spending your leisure time. Such an activity will appeal not only to children, but also to their parents. What could be better than a family evening in the circle of relatives and friends, busy with creativity! There are many options for crafts on the theme of autumn. Here are just a few of the most interesting and popular options:
- leaf applications;
- wreaths of berries and acorns;
- various animals, birds and flowers;
- herbarium.
 It is easy for children to be carried away by something new and interesting. And if drawing is already boring, then it's time to start making crafts on the theme of autumn. Before starting production such crafts need to be thoroughly prepared and select the material necessary for the work. In dry, clear weather, you can go for a walk with your child and collect dry multi-colored leaves. They must be selected whole, not damaged. It would be great if they were different colors. The richer the color palette, the more interesting the composition will turn out.
Of particular value in the collected herbarium are maple leaves, since crafts made from maple leaves are especially elegant and interesting.
During a walk, you need to pay attention not only to fallen leaves. Dry berries, nuts, twigs - all this is an invaluable building material for the master.
Handicraft workshops
The process of making crafts from dry leaves, acorns and berries is a very exciting experience. And although this is painstaking work, doing crafts with your own hands is not as difficult as it seems. You just need to follow the instructions, as well as stock up on patience, imagination, good mood and faith in yourself.
Collection of herbarium
The most favorite craft on the theme of autumn, of course, is the herbarium. Collecting a herbarium is not only very exciting and interesting, but also informative. After all, collecting the leaves of various trees in his collection, the baby gets acquainted with various types of plants and begins to understand them. . In order to collect a beautiful herbarium, you will need:
- an old newspaper, in order to dry the collected leaves;
- album for drying plants;
- sheets of thick cardboard or a special folder for creating a herbarium.
 Collecting a beautiful herbarium is not so difficult. First you need to collect the leaves that have fallen from the trees. Then each individual leaflet is neatly laid out on newsprint. After that, they are stacked and sent under the press in order to dry. On average, herbarium leaves dry for 2-3 days. After that, the listened leaves are laid out in envelopes and signed. It is important to remember that the leaves after they have dried become very thin and fragile. Therefore, when working with them, you need to show maximum delicacy, caution and patience.
Leaf applications
One interesting and uncomplicated type of creativity is the manufacture of all kinds of applications from autumn leaves. If desired, you can make a whole series of paintings- applications in the same style and use ready-made works to decorate the house.
In order to make an application of autumn leaves, you will need the following materials:

The leaves of the trees must be carefully dried. From paper, cut out the outline of a bird or any other animal. The silhouette cut out of paper is pasted over with dry leaves of different colors. Then eyes are cut out of colored paper. There are dry branches left. They make excellent paws and a beak. A wonderful and bright application will decorate the walls of the house for many years and delight the eye.
Crafts in the form of animals, birds and insects
Preschoolers and children of primary school age usually show great interest in the animal world. It is at this age, when the child actively explores the world, that children learn to love all living things. . Children get excited when recognizable images are obtained from improvised materials (cones, leaves, acorns): a cheerful puppy, a dragonfly jumper, a small perky bird. Making such crafts is very simple, but first you need to find a suitable natural material. It is best to harvest natural material for a walk. Let the child himself select the most interesting cones, acorns and pebbles, you can look for interesting twigs of a bizarre shape. Here are some interesting crafts:

 Before proceeding with the manufacture of crafts, it is necessary to dry all natural materials properly. It is necessary to harvest cones, acorns and leaves for crafts only in dry weather, when there has been no rain in the forest for several days. If you start harvesting on a rainy day materials will get wet and soon become unusable.
For gluing parts, it is best to use PVA glue. If the PVA glue does not hold very well, you can also use plasticine. But you need to take plasticine quite a bit so that the junctions of the parts are invisible at first sight. Having made several crafts, you can place them on a "clearing" made of colored paper. To do this, you need to take a cardboard box and paste over it from the inside with green colored paper. A fabulous forest clearing for animals and birds is ready!
Decorative autumn wreath
The tradition of decorating the home with decorative wreaths came to Russia from the West and gained great popularity. Of course, any wreath can be bought at a decor store, but it is best to make an original decoration yourself. For this you will need:
- Round or oval wreath base;
- Dry leaves of maple, mountain ash, birch, ash;
- Dry flowers, such as immortelle;
- Nuts or chestnuts;
- Any autumn berries, for example, physalis or lingonberry sprigs.
 You can attach materials to the base in any order, as fantasy tells. It is desirable that different colors alternate beautifully with each other. The most striking autumn colors are traditionally considered red, yellow, green and brown. When the wreath is ready, you need to carefully mask the place where its ends are connected.
The wreath closes in a circle or oval and hung on the door to adequately meet the beautiful autumn. But you can hang it at home, so that a look at the bright sign of autumn immediately cheers up all the household members. You can make a wreath with the whole family so that everyone contributes to the common creation. And in winter, you can make a similar wreath with Christmas symbols.
Leaf photo frame
 Autumn photos can be very bright and interesting. So, you can take a picture of children collecting autumn leaves, or capture a walk with a dog in the autumn forest as a keepsake. Such photos will look especially impressive if they are placed in the original frame. Making an autumn photo frame is very easy.
First you need to make a regular cardboard passe-partout of the desired size, and then stick autumn leaves on the passe-partout. You can use real autumn leaves, or you can cut out the leaves using a stencil made of cardboard or colored paper. The latter option is preferable, because such a frame will retain a spectacular look longer. You can also cut autumn leaves out of gold or silver chocolate foil. You can place more leaves in the corners, and smaller ones around the perimeter.
Fall crafts are a great way to get creative. Making original souvenirs will help you pass the long rainy evenings and really fall in love with autumn. Such crafts will bring great joy to children and adults, as well as create a cozy atmosphere at home.
Craft from an autumn leaf


Good afternoon. Today we will see with you New Cool Leaf Crafts. You definitely haven't seen this before. Let's expand our vision of this natural craft material. Leaves can be a real beauty tool. Creativity from autumn leaves fascinates with its beauty. You will be inspired by these leaf crafts and want to make them yourself with your children. All crafts have detailed instructions. You can make them at home. The selected leaf crafts are suitable for kindergarten if you need to bring work to a competition or an autumn exhibition. Schoolchildren can make simple crafts in the classroom for creativity or art.
DIY package #1
SKELETONS from leaves.
As we can see here, the autumn leaves of the trees were turned into transparent skeletons of their veins and painted with paint. Let's see how easy and very fast to make a lot of leaf skeletons at home. In order to later make beautiful crafts from such leaves (not only a peacock, the photos below will show you the beauty of a lacy autumn leaf in crafts on any topic).


transparent leaf skeletons can be done in 4 ways. Let's look at them in order.
Method #1 is the lazy WATER method). Any biological material rots in water. If you put the leaves in a jar of water for 2-4 weeks and close the lid, they will fade and begin to rot. Soft tissues will rot faster, but the veins will remain unaffected by rot. We take out these slimy leaves, transfer them to a bowl of clean water and with three hands, erasing the rotten mucus, but carefully so as not to tear the veins (the skeletal tissue of the leaf). If the leaf has unrotten areas of pulp, they can be removed with a toothbrush. We put the leaf on the board and knock on the pulp of the bristle brush, the bristles pierce holes in the flesh of the leaf and gradually the flesh separates from the skeleton of the veins.

Method number 2 - the method with SODA. In a bowl of water (500 ml) dilute 150 gr. washing soda. Cook together with the leaves for 90 minutes over low heat. Then we pour out this soda water, fill the leaves with just clean water - and cook for another half an hour. We check the leaves with a fork, if the flesh of the leaf has already begun to separate from its veins, then it's ready. We take out the foliage and wipe the leaf with a toothbrush, freeing it from the softened tissue. If uncooked places remain, boil these leaves in water again. . Important: remove the skeletons from the water with a spatula so that they do not break. Dry flat and then iron. Then dry skeletons can be painted with any paint (gouache, food coloring, watercolor),

Method number 4 - a method with aggressive chemistry (carefully dangerous poisonous). We put the leaves in a plastic sudok, take a toilet bowl cleaner, any other with a strong alkali (the Mole powder is suitable). We must work with gloves, the room is ventilated, we close the container with a lid tightly so that it does not evaporate, we hide it from children (for example, under the bath in the darkest far corner).
Method number 3 - a method for dry leaves. If the autumn leaf is already dry (as from a herbarium), then there is another method. We need a clothes brush with soft bristles made of natural bristles (a household brush with hard plastic bristles will not work). With this horse bristle brush, we need to beat off the leaf like a chop. It turns out that all the dry dust flies out of the sheet, and a grid of skeleton veins remains on the table.
The resulting skeletons can be bleached or dyed.
Bleach - in liquid bleach with chlorine (such as means "Whiteness")
Usually skeletons are painted in food coloring, like eggs for Easter. Or you can try an aqueous solution of gouache, soak the scleton for an hour and get it with a spatula.
Leaves can be dyed paint from cans- including a metallic effect.

Very beautiful skeletons are obtained from the fruits of physalis. Such a plant with domed orange boxes. They can also be boiled in soda and get transparent boxes for autumn leaf crafts.

If you take glass vase and PVA glue, then wet skeletons can be laid in vases smeared with PVA glue. Wet, not yet dried, the skeleton of the sheet will easily fall on any shape. And after drying, the fragile shell easily peels off from the smooth glass of the vase. Charming delicate craft made of leaves.

On skeletons, you can draw well with felt-tip pens. Only the base of the sheet is best bleached in a chlorine-containing liquid bleach. And then it is better to laminate such a sheet-drawing (at the printing points, there is a lamination service for any flat objects).


Beautiful pictures of night and day landscapes can be made from leaves = skeletons. Very gentle and beautiful paintings from the leaves are obtained.

The delicate lace structure of the skeleton of the sheet itself suggests what kind of crafts-appliqués can be made from this transparent material. Below is a beautiful craft made from bleached skeleton leaves.

DIY package #2
LANDSCAPE MOSAICS FROM LEAVES.
The simplest work is to make a landscape out of leaves. It's simple here. We take a strong, rigid cardboard (you can glue the school cardboard in several layers - only with dry glue (better, double-sided cattle). And apply a drawing of future fields and rivers on such a “wooden” cardboard. And then fill these contours of a pencil sketch with already dry material from autumn leaves .
How to quickly dry the leaves (with an iron) I described in the article Paintings from leaves and flowers.

You can buy broken flowers at a flower shop for cheap, or roses that have begun to fade. And pull them on the petals.
For fields in landscapes, leaves from corn cobs are very suitable. They are like corrugated paper, flat, dry, painted with gouache, glued well.


It is also good to cut the field lines from a large burdock.

You can create just such an alley with the effect of PERSPECTIVE - that is, looking into the distance. Large trees near, small ones in the distance. This effect is created only when you use the largest leaves and twigs for the nearest trees, and the smallest leaves and blades of grass for distant trees.

Winter pictures can be drawn from white velvet leaves.
Leaves of SILVER POPLUS, SILVER WILLOW, white panicles of herbs, velvet bushes from white flower beds are suitable.

White small flowers of Yarrow look like snow grains. An asterisk is cut out of a maple leaf. It is good to cut out the outlines of the house from a sheet from a cob of corn (since just a striped even structure, the effect of a house from the boards is obtained). Beautiful and relatively simple craft. The main thing is to MAKE A SOLID BACKGROUND FROM CARDBOARD (pizza cover) and figure out which glue works best (heat glue is excellent, double-sided tape is also excellent) - pva does not always work.

IT IS POSSIBLE (and it is very beautiful) to draw the BACKGROUND of the picture with gouache ... as if it were the background in the photo. And in the foreground, place a Twig made of natural material, leaves and berries pressed with an iron.

Leaf Craft Pack #3
A simple application for children and parents.
For a competition in a school or kindergarten, they often require an autumn craft made of leaves or other natural material. Well, let's see what simple autumn foliage crafts you can do with your children in one evening.
The easiest way to make an ARTISTIC leaf craft application is to USE THE REGULAR CHILDREN'S COLORING.
That is, we find on the Internet a large coloring book for children. For example, a coloring book with a fox face. On a sheet of paper, we translate this coloring with a pencil with thin lines (putting it on the window glass).
And now we have to COLOR the silhouette of the fox, but not with pencils but with hardwood. These can be coniferous branches (fir trees are green, and in some places dry brown paws hang, collect such paws). If there are no fir trees nearby, we take dry leaves and grind them into dust, and fill the application with this dry powder from a torn sheet (we pour PVA and pour dry filler from leaves on top of the glue). A beautiful craft and simple for parents and children.

In the same way, based on the coloring of the nursery - with the silhouette of a bird, such a bird craft is made.
We find in Google a coloring with a bird. We print. And we fill it with glue with leaves (we cut the leaves with scissors, to the desired size of the feathers).

IMPORTANT - for such work we take black cardboard, the silhouette of a white paper basket, a bag of pumpkin seeds. And tiny twigs of dried autumn leaves and herbs (I told how to quickly dry the material for crafts with an iron in the article Paintings from flowers - all the technology and common mistakes of beginners are described in detail there.)
If you have planted on a plot or in a flower bed velvety white leaves(I don’t remember the name of this plant, tell me who knows). Then you can make applications with fluffy animals (for example, with a cat).
We also find a beautiful coloring page with a cat on the Internet and fill the sections of this coloring page with natural material from pieces of leaves.

You can make portraits from leaves- where a face can be drawn on paper, or facial features can be laid out with thin blades of grass (but this is a piece of jewelry) and there is a risk that when transporting crafts, some facial features will peel off and will be ugly. Then you can first draw with a pencil clearly and boldly, and then lay the blades of twigs on top, if something falls off, then a pencil line will remain below and the portrait will not suffer visually.

Imagine your own work. Attach large seeds or seeds to hot glue with a hot gun. Basis for applique choose hard, hard cardboard(pizza covers) or plywood. The main thing is that the base does not bend, so you will not peel off the natural material

Leaf Craft Pack #4
SMALL APPLICATIONS
For school work.
In the classroom, children themselves make crafts from leaves. The teacher can hang application examples on the blackboard. Print the photo from this article. So that children do not look for ideas in an empty head, but are inspired by ideas, they understand that the principle is simple (like puzzles) and dare to embody THEIR AUTHOR'S PUZZLE from leaves.
The teacher must to give the child visibility, and not as we do in schools, “think up something yourself.” Everything goes according to the laws of development. First, the child must repeat someone else's idea, try to copy it, and only then will he be able to generate ideas himself. Like in the classroom in mathematics or Russian (there are always already solved sample problems). The same laws of dialectics and pedagogy work in the lessons of creative activity.


Let's see what kind of visibility a teacher can give to children. Here is a beautiful gift of leaf crafts for kids at school or kindergarten.


Leaf crafts
Idea Pack #5
Children's leaf crafts can be paired with an appliqué on a cardboard silhouette. Here is an owl craft made from leaves and colored paper.

If the leaves are strung on a needle and thread (like beads) or glued on a drop of glue. Then you can assemble a long caterpillar craft. A simple leaf craft for kids.

Wreaths are made according to the same principle. 
And here is a craft where the leaves are glued with an EDGE to the base (they are sunk with their edges into hot glue). This craft is quick to do if the leaves are glued immediately in PICKLES. We collected the leaves in a pile, took them with our fingers, trimmed the bottom edge (which we will paste). They poured a puddle of glue and put a stack of leaves in this hot glue, held it and waited until it seized. And so on.
Then the edges of the hardwood cover were trimmed with scissors (as in the photo below)


The leaves can be glued lapped on top of each other like a tile. To get an imitation of owl feathers.

To keep the leaves neat, you can cut them with scissors from any other leaves (even maple ones).
Here's how to make such a leaf craft - an owl:
- WE MAKE A STUD-OWL. From the newspaper we crumple a lump, we coat it with plasticine. We coat the plasticine with PVA glue and put a paper napkin on it (we make several such layers of napkins on the glue). This will be a BLUE BLANK for an owl craft.
- Next, we take a double-sided tape (thin tape) and paste it on the bottom of the owl blank and put the leaves on this tape.
- Then we wrap the adhesive tape over the cuttings of this first layer of leaves. And on this sticky tape we lay the next row of leaves,
- Again, on the cuttings of this second row of leaves, we wind the adhesive tape of double-sided tape and also lay the third row of leaves on it. You have a simple and clear craft.
If you have slats on your farm (or you bought them at a hardware store), then you can make such a craft with a bird. A beautiful autumn craft for a competition in kindergarten.
You can make fences not from wooden planks, but from pieces of packaging cardboard. Paint or wallpaper over.

You can also make just such a composition with a fence and decor from autumn leaves.

From branches and leaves, you can build a pig house. We take a pack of juice and branches. We glue all sides of the pack with branches. Separately, we make a door. We glue the roof with branches, and then with leaves. Beautiful children's craft.

DIY package #6
Crafts-convolutions of leaves.
If a wide leaf is wrapped in a roll, we get a rosebud. If the next leaf is wrapped around this bud, then the next leaf is wrapped around ... then we get a ROSE. Beautiful rose from autumn leaves.


From such maple roses you can make crafts-installations. On the basis of hemp, jars, with other dry leaves and twigs in the overall composition.

In class at school, you can make simple snail crafts from twisted leaves. All children like it very much.

DIY package #7
Crafts from leaves on the FRAME.
You can make a frame from natural material (it can be branches). And on this frame already tie autumn leaves.
Even the frame itself can be designed in the form of a leaf of a tree.

You can come up with your own silhouette of the frame - for example, the LION'S Muzzle, and the leaves will be his mane. Or a skeleton of a squirrel, and the leaves will be a magnificent tail. Fantasize, think what asks for your soul. And make your own unique handicraft. Don't copy these - they are just a starter for your own idea.

The frame can be made from wire and wicker and styled like an UMBRELLA SILHOUETTE. And then on threads to this frame, wind autumn foliage, pieces of moss, cones, dried flowers from a bouquet, spikelets, blades of grass.


ANY natural material can serve as a frame for crafts from autumn leaves - including pumpkins. What do you think?

The base for handicrafts from leaves can serve as a USUAL CUT OF LOGS.

If you have two saw cuts (one wider, the other smaller), then you can put them on top of each other. Connect with a pin so that they do not move and arrange in the form of a cake of leaves and flowers.
Attach with hot glue or double sided tape.

Here is another beautiful craft idea using leaves. Beautiful dense leaves can be found under the aspen - they are dense and bright and keep their color for a very long time, even when they start to dry out.

Idea Pack #8
Leaf crafts
Decorative Autumn Wreaths
You can also make beautiful crafts in the form of wreaths of autumn leaves. From cardboard, you can cut the BASE-RING. And glue the autumn leaves in the order convenient for you.

If the wreath is thick (as in the photo below), then you can attach the lines immediately in bunches - wrapping them with threads on the cuttings.

The base of the wreath can be made of twigs, and then on separate bends of this twig frame, we thread leaves for cuttings, dry rowan twigs, dried flower stalks and other natural material (cones, stars cut from birch bark).

I told more about the PROCESS of making wreaths with my own hands in a special article.
You can make such leaf crafts yourself at home for an exhibition at school or kindergarten. Beautiful bright original crafts will delight both you and your children.
Do, create, fantasize.
Olga Klishevskaya, specially for the site
The autumn period is famous not only for rains, cooling, but also for the charm of colors that colorful leaves give. By connecting fantasy, with the help of the gifts of nature, it is possible to create delightful creative works. Crafts from leaves on the theme of autumn for kindergarten are an ideal option for parents to spend time with their child in an interesting, useful way, open up new opportunities for him, and unleash his creative potential. The beauty of such needlework is that all materials are free, and the result of the creative process is limited only by the imagination of the child and parents.
What craft to make from autumn leaves in kindergarten
The kindergarten regularly hosts exhibitions of crafts created by children and their parents. The main goal of such events is to involve mothers and fathers in activities with the child in order to unleash the creative potential of the baby, to acquaint him with the nuances of working with natural materials. Often, leaves (oak, maple, linden, etc.), dried flowers are used for such creativity. As a craft in the garden, you can do:
- application of an animal (squirrels, bear, mouse, peacock), autumn forest, cars;
- topiary;
- wreath;
- beautiful autumn bouquet;
- ekibanu;
- garlands, pendants.
Step-by-step instructions for crafts on the theme "Autumn"
To create crafts based on autumn leaves, you do not need special knowledge, skills, the main thing is desire, a little imagination and the materials necessary for work (as a rule, these are natural materials, glue, colored paper, felt-tip pens). To make the work look beautiful, work as carefully as possible, slowly - then at the exhibition in kindergarten your work will not be left without attention. The workshops below will help you create the perfect fall-themed craft.
Application "Autumn Forest" on paper
An unusual application on the theme of "autumn" can be created using only dried tree leaves, felt-tip pens, glue, cardboard or paper. Even a child can cope with such work, and the finished result will give a sense of pride and pleasure to the little master. Use the step-by-step instructions for creating an autumn forest application:
- On paper with felt-tip pens, draw tree trunks in the forest.
- Choose beautiful leaves that are shaped like tree crowns and help create a realistic appliqué.
- Glue all the elements with PVA glue, and a beautiful craft for kindergarten will be ready.
How to make a "Bouquet of Roses"
To please educators with an original craft, make roses using maple leaves. The beauty of such a composition is that it retains its original appearance for a long time, pleases the eye, and does not require any maintenance. Children can create this bouquet if you help them a little. To work, you will need a minimum of attributes, tools: maple leaves, threads, scissors.
Step-by-step instructions for making roses:

- Fold the maple leaf in half, twist it into a tube - the middle of the rose is ready.
- Wrap the second element around the middle, forming the second petal. To get volume, do not press it hard.
- In the same way, wind a couple more elements to make a rose or its bud. The volume, splendor of the flower depends on the number of petals.
- Wrap the bottom of the flower well for fixation.
- Combine several roses in a bouquet, decorate with branches or petals to give the composition a complete look.
"Hedgehog"
It is possible to create a beautiful funny hedgehog using fir cones. To work, you will also need cardboard, which will form the basis of the craft, plasticine, glue, tree leaves (or moss). To create a hedgehog, you need to make him a body. For this, plasticine or a plastic bottle can be used. Consider the option of creating a small hedgehog:

- Lubricate the cardboard well with glue and randomly glue multi-colored autumn elements (leaves, moss). Such a background will become an impromptu forest glade, along which a hedgehog walks.
- From plasticine, create an oval that will serve as the body of a hedgehog, and attach it to the "clearing". Stick cones into it, leaving a place for the muzzle in front.
- Using a small piece of plasticine, make a muzzle, and chokeberry berries or beads can be used for the nose and eyes.
- A beautiful hedgehog in an autumn meadow is ready for kindergarten.
Volume application "Owl"
The variety of autumn colors strikes the imagination, gives free rein to the imagination. As a craft for a kindergarten, an original three-dimensional application can be created - an owl, which, due to its multi-layeredness, looks magnificent, interesting and quite realistic. To create a masterpiece, you need to prepare the following attributes:
- cardboard (colored or white - optional);
- dried autumn leaves - the main elements;
- PVA glue, brush for it.

Step by step work:
- On cardboard, you need to draw or print the outline of an owl. Only outlines without details and colors are needed.
- Gradually, glue should be smeared along the contour with a brush (very carefully so that the work is as accurate as possible) and glue the leaves. Do this from top to bottom, overlapping the previous layers to get the volume you want.
- When the entire contour is filled, you need to cut out the beak, eyes and glue them on the muzzle.
- The original application is ready. In order for the creative process to be not only interesting, but also developing, during work it is worth telling the child cognitive facts about the owl, its life.
How to make an application "Rooster"
To create an original painting, you need desire and creative inspiration. A bright application with the image of a rooster is sure to please the child and is ideal for an exhibition in kindergarten. For creativity you will need:
- white cardboard;
- colorful leaves;
- PVA glue;
- scissors;
- ashberry.

Instructions for creating a rooster:
- On cardboard, draw the outlines of a rooster (or glue the cut-out blank). For more experienced craftsmen, it is possible to lay out the contours immediately with leaves.
- Glue leaves of different shapes, sizes and shades, creating feathers for a rooster.
- Cut out an eye with scissors, glue an eyebrow to work, make a pupil using rowan berries.
- When all the elements are glued, the work must be put under pressure for several hours, and a wonderful application will be ready.
Autumn wreath for children
Not only applications, compositions or decorative elements, but also an original wreath can be created from autumn gifts of nature. In order for the decoration to keep its shape, you will need thin branches that bend well and do not break. In the creative process, it is necessary to use threads, glue, elements for decoration: leaves, rowan branches, raspberries, cones, vegetables, fruits, etc.
Step by step instructions for creating a wreath:

- Make a circle from the branches, fasten with a thread so that the product keeps its shape.
- To give additional volume, branches with berries or a vine can be used.
- When the base for the wreath is ready, you should start decorating it. To do this, glue cones, leaves, flowers or other decorative elements in a circle. It all depends on the imagination of the child and the availability of natural materials at hand.
- The original autumn wreath can be used for decorative purposes or as an element of costume at a holiday in honor of autumn.
original postcard
You can congratulate a teacher or a loved one on the holiday with a unique handmade postcard. In the autumn period, there is no need to buy special attributes for decoration. Nature took care of everything, creating a variety of materials for creativity. The postcard looks original, for the decoration of which dry leaves of birch, oak, maple, cherry or other trees and bushes are used. To work, you will need glue and cardboard.
Step by step product creation:

- Fold a sheet of cardboard in half to make a postcard.
- Arrange leaves and flowers on the front side of the product, creating a beautiful composition. Do not limit your imagination, this will allow you to create an unsurpassed postcard. It is important to ensure that everything looks harmonious (parents should help the child in this).
- If the desired result is achieved, and all participants in the process like the design, glue all the elements with glue and a brush to make the work as accurate as possible.
- The original postcard is ready and can please the addressee.
The craft in the form of a fire bird looks original. It is difficult to name a clear list of materials that will be needed for work, it all depends on the creative imagination and vision of the child and parents. Consider the instructions for creating a unique composition, for which you will need:
- cardboard, colored paper or a beautiful napkin for the base of the composition;
- a variety of leaves, thuja sprigs can be used;
- pumpkin seeds;
- PVA glue.

Step-by-step instruction:
- We select an element that looks like the body of a hot bird, and glue it so that on one side there is room for the head, and on the other - for a chic tail.
- We glue a birch leaf, which will serve as the bird's head.
- We make a tail using elements of the same color.
- We decorate the tail: we glue beautiful rowan or arborvitae leaves to create volume, a play of color.
- We make wings for the bird, use birch leaves.
- Glue pumpkin seeds to the head as eyes. With their help, it is easy to decorate the tail or body of a bird.
- We glue a small branch of thuja to the head, creating a tuft.
Master class with step-by-step production of "Butterflies"
With the help of simple leaves of different shades, you can create a beautiful craft for kindergarten - a butterfly. The child will like the creative process, it will allow him to take a fresh look at familiar things and reveal his potential. For work, you need to prepare the following materials:
- leaves from trees of different colors;
- scissors;
- double-sided tape;
- glue stick or PVA;
- colored cardboard or paper;
- hole puncher.

Step by step creation of a butterfly:
- Cut off the stems and middle parts from the leaves.
- Peel off the top layer from double-sided tape and glue a small leaf (butterfly head), the middle part - wings.
- Do the same with the middle part of the second maple leaf. It is recommended to use legs as antennae, and an oblong thin element (part of a leaf) for the body.
- Using a hole punch, make circles for the eyes and decorations for the wings. Glue them.
- Attach butterflies to colored paper.
How to dry leaves for crafts
To prepare the leaves for applications and crafts, they must be dried, and you can do this in several ways:
- Classic variant. Put the elements under the press or between the pages of the book. They must not touch each other. To prevent natural materials from spoiling the book, put tracing paper between the pages of the book.
- Hot drying with an iron. Put paper on the ironing board, put the leaves on it, straightening them. Cover the material with another page and iron using a dry iron without steam.
- To preserve the natural color and shape of the leaves, dry them by spreading them on the windowsill. So the elements will retain their natural appearance, which will allow you to make the most realistic paintings or compositions.
How to make DIY leaf skeletonization
Crafts for kindergarten look original, where skeletonized leaves are used. Many discard the idea of working with such material, fearing the fragile structure and not knowing how to make such beautiful elements. To create skeletonized elements, it will not take much effort, time, and the resulting result will please not only the child, but also everyone who happens to see the result of creativity.
For work you will need:
- tree leaves;
- baking soda;
- cold water.

Master class on creating skeletonized leaves:
- Make a solution: one liter of cold water and twelve tablespoons of soda. Boil the mixture and place the leaves in it for about 25 minutes.
- After the allotted time, rinse each element under cold water and remove the greens with a toothbrush.
- Rinse again under running water and you're done.
Video
The creative process with natural materials will give not only a delightful ready-made autumn-themed leaf craft for kindergarten, but also a lot of fun while working. It is sometimes difficult for young children to correctly compose a composition or make an animal using the gifts of nature. Parents also sometimes have a creative crisis, and creating a simple work causes difficulties due to lack of imagination. Watch below a selection of video tutorials on creating autumn crafts for inspiration, additional knowledge about the process.
A very simple craft for kindergarten "Fish"
Children's crafts from natural material "Fox"
"Hedgehog in the grass" from leaves and flowers with your own hands
Photo of interesting crafts on the theme "Autumn" from leaves
Each child, together with their parents, by connecting a little imagination, is able to create with the help of leaves, chestnuts, acorns a unique craft on the theme of "autumn". Using elements of different shapes, shades, textures in your work, you can make a real masterpiece that will decorate an exhibition in a kindergarten. There are no rules and restrictions in creativity - everyone creates crafts by virtue of their abilities or the availability of materials that are at hand. To get some inspiration, find the right idea and enjoy amazing fall crafts, check out the photo.