New Year and Christmas are the two most anticipated holidays for every person. This is not only a time of festivities and celebrations, but also an occasion to do something pleasant and present your loved ones with an original and unforgettable gift. Naturally, the best gift will be the one that will be made with your own hands.
The most universal and favorite gift is a homemade one for New Year or Christmas. If you may not be able to deal with expensive or complex gifts, then a postcard will be much easier to deal with, even if you are a child. Any adult would love to receive a homemade Christmas card from their child. The main thing in creating such a gift is to show your creativity and fantasies.
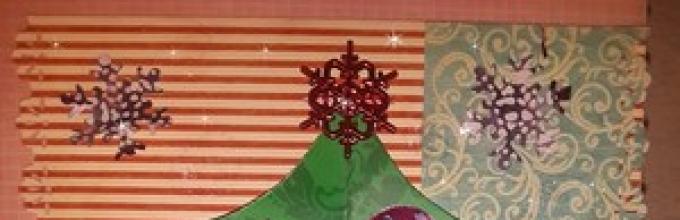
Christmas tree shaped card
 This product has a huge amount variations, and sometimes choosing the best one is not so easy. Like other volumetric New Year cards, the Christmas tree is being made fast and quite simple. To create it you will need:
- corrugated cardboard with images;
- pastel paper;
- dye;
- double-sided tape;
- rhinestones;
- cutter;
- pigment cushion;
- decorative cord OK;
- ruler;
- pencil;
- glue;
- mock-up rug.
Master class on making postcards:
- First of all, we create a blank. To do this, take pastel paper and cut out a rectangle 29 cm long and 13 cm wide.
- Fold the sheet so as to divide it into five parts (4.5x5x10x5x4.5 cm).
- We give the extreme parts the shape of a Christmas tree.
- On the inside of the product from corrugated cardboard apply paint.
- From the prepared cardboard, carefully cut out four identical parts of the future Christmas tree. We also make a small triangle-shaped Christmas tree and a ball. After this, cut out a 13x2 cm rectangle from cardboard.
- From pastel paper we cut out another geometric figure with dimensions of 12x9 cm.
- Using a pigment pad we tint all the cut out blanks.
- Glue the prepared Christmas trees, decorative cord and backing.
- Glue the chosen wish and just a photo on top. Then we attach the bar and the New Year's ball.
- We decorate the card with rhinestones and glue.
Christmas tree using origami technique
With the passage of time, people's preferences also change. For example, lately postcards in the style of scrapbooking. They are colorful, original and stylish looking.
In order to make such a postcard, you need 5 multi-colored squares of different perimeter.
 Stages of work:
- Take the largest square of paper and fold it in half to form a triangle.
- We bend the opposite side of the square in the same way.
- Unfold the sheet and place it in front of you.
- Using the resulting bends, we fold a volumetric triangle.
- We bend one of the sides of the workpiece inward.
- We bend the opposite side in the same way.
- We perform all the same operations for the remaining four squares.
- We attach a small piece of tape to the top of the largest module. We place the largest module inside the smaller one. We do the same with the rest.
The finished product can decorate any New Year or Christmas card. With such a Christmas tree it will turn out unique.
Card made of colored paper
 Using colored paper you can create beautiful postcard. This work will not take you a lot of material and time.
Procedure:
- From paper green cut out a circle.
- Cut it into two equal parts and bend the edges at an angle.
- We make the next bend in the same way, only in the opposite direction.
- Glue the resulting Christmas tree to the base.
- We decorate the card at your discretion.
Crafts with beads or seed beads
 To carry out work on creation For a three-dimensional tree with beads, you need the following: colored paper, a blank postcard without a design, glue, scissors, a ruler, tape, pins for decoration.
Instructions and design:
- Cut out 12 rectangles from paper different sizes.
- We wrap the cut out rectangles around a pencil.
- Glue the resulting tubes together, starting with the largest.
- Glue the finished product onto a postcard and decorate it with pins.
Using decorative tape
 This is a very simple option for creating a Christmas card and any child can do it. Be sure to involve him in this activity. Thanks to this, you not only benefit you will spend time, but also make Beautiful gift for family and friends.
Manufacturing procedure:
- Take a piece of single-sided tape and stick it vertically onto a cardboard blank. Glue it so that upper part the strips were slightly narrower than the bottom. This will be the trunk of our future tree.
- Cut the tape into strips different lengths. We cut their edges at an angle, creating something like branches.
- Glue the strips onto the cardboard blank. Glue the largest of them at the bottom, gradually reducing them towards the top.
Three-dimensional 3D postcard
 A three-dimensional postcard is made simply, and the resulting 3D effect will amaze anyone for whom it is intended. To work on a postcard you will need: cardboard of different colors, double-sided tape, scissors, glue, a figured hole punch.
Getting the job done:
- The basis of the postcard will be a sheet of cardboard, folded in half.
- Cut strips of cardboard of the same color at least one and a half centimeters wide. We also fold them in half.
- We bend the edges of the strips at different levels.
- We distribute the strips inside the product. We fix them with glue.
- From cardboard more light shade cut out 3 circles of different diameters.
- Glue the circles on top of each other to create a snowman.
- Use scissors to cut out snowflakes and Christmas trees. For this work, you can use a figured hole punch. It will make cutting much easier and faster.
- We glue the finished parts to the strips. We decorate all the trees with cut out snowflakes.
How to make Christmas balls
 Any product can be decorated not only with standard Christmas trees or snowflakes, but also with various balls. They are made quickly and simply. For the balls you need the following: paper different colors, glue, scissors, ballpoint pen.
Operating procedure:
- Take the paper blue and bend it in half. Having completed this task, we get a finished base.
- Cut out several circles from blue paper.
- We bend each of them in half and attach it to each other. We do this in such a way as to form voluminous balls.
- Take the base and glue the finished balls to it.
- Using a pen or pencil, we finish drawing the threads on which they hang.
Quilling postcard
To create such a craft you will need: multi-colored cardboard, glue, scissors, colored strips, corrugated paper light shade, toothpicks.
The work is as follows:
- We take quilling (green stripes) and make cuts at equal distances.
- We wind strips on a toothpick and get several skeins.
- We attach the bottom with glue and straighten the fringe.
- Glue the resulting balls to cardboard in the form of a Christmas tree.
- We decorate the finished product.
Christmas tree
In order to make a beautiful Christmas tree, we need to prepare: various colored paper different textures, glue, double-sided tape, rope, decorative hole punch.
Step by step instructions:
- Take colored paper and fold it in half.
- On top we glue triangles in the shape of a Christmas tree in brown and green.
- We cut out circles of various diameters and use a figured hole punch to make snowflakes out of them.
- We glue all the finished parts onto the Christmas tree.
- Decorate with beads and openwork paper ribbon.
- We wrap a rope around the card and tie a bow.
Santa Claus and snowman
Any application with the image of Santa Claus will turn an ordinary card into a holiday one. As a rule, only Grandfather’s head with a hat and beard is placed on the postcard. It can be done using absolutely any technique.
Another famous New Year's character is the snowman. Most often he is depicted in the form of three balls of snow, with a carrot instead of a nose and a bucket on his head. But if you approach the process creatively and use your imagination, you can achieve a more interesting effect. For example:
- We take a finished card with a picture of a snowman and cut it into different strips. We use them to create an applique in the shape of a Christmas tree.
- Printing sheet music on paper New Year's song and from these sheets we cut out circles for the snowman. This option looks original and will definitely appeal to music lovers.
- Making a snowman from a paper fan.
- We make a Christmas character using the quilling technique.
- Instead of a bucket, we put a hat on the snowman’s head and dress him in a suit.
These are just a few of the most popular options. Feel free to figure out how to design cards and surprise your loved ones with them. Ready-made figurines of New Year's characters are glued to the base from which the postcard is made.
Attention, TODAY only!
What could be better than a handmade New Year or Christmas card? This gift is made with love and with all my heart. Homemade greeting cards always original, unique and carry a special warmth. And most importantly, they give joy not only to those who receive them, but also to those who create them.
It takes very little to make New Year or Christmas cards. You will only need colored paper of various textures, scissors, glue and decorative elements for decoration: ribbons, buttons, beads, seed beads and more. And several of our master classes will help you quickly and easily create New Year cards, delighting your family and friends with unique creations.


We will need: cardboard or any thick paper, 2 satin ribbons 2 meters long and 0.5 cm wide, lace fabric, transparent Moment glue, ballpoint or gel colored pens, beads, bugles, a bright bead or button.

Step one. We cut out a rectangle measuring 10 by 15 cm from cardboard - this is a postcard blank. Other sizes can be taken upon request. We cut out decorative elements from lace and decorate the card as shown in the photo. Carefully glue the lace elements using a small amount of glue. Next, with a colored pen we write a congratulatory inscription in the corner. Then we move on to making a Christmas wreath. Take two different colored ribbons and tie them together at one end.

Step two. Fold part of the green ribbon in half so that its ends are placed crosswise - this way a loop is formed. We also make a loop from beige ribbon. We pass these two loops one into the other and press well. As a result of this, a new green loop is obtained; we form and thread a new beige loop into it, after which another beige loop appears. Thus, forming loops and threading them into the resulting ones, we weave a wreath about 20 cm long, after which we glue its ends. This Christmas wreath can be woven from three or four multi-colored ribbons using any of the existing options braid and he will become even more elegant.

Step three. Glue the wreath to the card and start decorating it. Glue a lace bow onto the wreath, and snowflakes cut from lace fabric onto the card. We decorate the wreath with glass beads, and glue a bright button or large bead onto the bow.

Step four. Adding the final touch to the festive background - using a needle, glue on small white beads as snow. We decorate the back side of the card with lace snowflakes and write warm words of Merry Christmas. The Christmas card is ready. During the creative process, you can change the size, number of decorations, add new details, so that the result is an original and bright congratulation.
New Year card using scrapbooking technique

We will need: scrap paper, thick colored paper, PVA glue, pencil, elements for decorating the Christmas tree.


Operating procedure:
- We cut out a single or double base from scrap paper with a fold according to your desire. You can take any sizes.
- We decide on the size of the Christmas tree and, depending on its size, cut rectangles out of colored paper, starting from the largest (the lower part of the Christmas tree) to the smallest (the upper part). Each rectangle should be slightly shorter than the previous one in length, as shown in the photo.
- Using a pencil, roll each rectangle lengthwise into a tube and secure it with glue to maintain its shape.
- We connect all the tubes with glue, adhering to the shape of the Christmas tree. Next, glue the resulting Christmas tree onto the front side of the card and decorate it. The design can be very diverse. We attach rivets, beads, bows, sequins, sparkles or other decorations using double-sided tape or glue.

We will need: scrap paper, green strips of paper and glue.
Operating procedure:
We make the base of the card with a fold and decorate its inner part with the symbol of the New Year. We make the Christmas tree from strips of paper folded like an accordion, and the tiers are made from strips of different widths. At the bottom we have the widest stripes. The closer to the top, the narrower the stripes become. The depth of the accordion bend is also different. We bend the bottom strip into an accordion with the largest “step”. With each tier, the depth of the bend decreases. Such New Year cards are very simple to make, which even a schoolchild can do.


We will need: buttons, glue, thick paper and various decorations.
Operating procedure:
Decorating New Year's cards with buttons different forms, colors and sizes remaining after sewing. We sort them by color and glue them to the base. You can use buttons to make any New Year or Christmas attributes: a Christmas tree, a snowman, a snowflake, a deer, a Christmas wreath - in a word, everything that your imagination suggests.

We will need: colored cardboard, glue and colored paper.
Operating procedure:
We make simple and very cute New Year cards together with the children. Cut out various types of colored paper geometric shapes: circles of various diameters, rectangles, squares and triangles of various sizes. We compose from ready-made elements compositions and glue them onto a base cut out of colored cardboard. You can make a snowman with a bird, Santa Claus or Snow Maiden, as shown in the photo, or come up with your own stories.
New Year card with voluminous herringbone from tea bags - master class
For such an original and cute card, you only need colored cardboard for the base, glue and colored tea bags. In the absence of such bags, you can take colored paper. We make the Christmas tree, strictly following the diagram, and glue the green beauty onto the base, decorating it with sequins.


A few more ideas for cards for the New Year and Christmas
From colored paper circles you can create a bright and cheerful congratulations for friends with one of the main characters New Year's holidays- Santa Claus.

An interesting version of a postcard with Christmas trees - the main attribute of the New Year. Attached to the photo is a very simple master class, according to which New Year's greetings to friends can be made in just a couple of hours.


This simple and sweet Christmas card is sure to delight your loved ones. A master class with step-by-step photos will help you make a Christmas wreath from colored paper.

The original idea is to make New Year's greetings in the form Christmas balls with warm words to each family member and hang them on the Christmas tree. Such congratulatory balls are decorated with Christmas tree figures, snowflakes, serpentine, rhinestones and sparkles.

Making an unusual and elegant card using the quilling technique requires a minimum of materials, a little skill and a small amount of time.

Amazing and simply fabulous New Year's scenes can be created from ordinary millet and rice.

Make your own unforgettable card, breathe a piece of your soul into your creation and give the holiday to your friends and family.
This section contains large collection handmade Christmas cards. From the simplest, which any child can do, to the complex: voluminous; in the techniques of “paper tunnel”, “isothread”, “iris folding”, etc. It just so happened that Christmas in many countries of the world has become something more than religious holiday, and postcards with congratulations on this day are given to each other not only by convinced Christians. Moreover, they try to make Christmas greetings themselves, if possible, rather than buy them.
On our selection of Christmas cards you will see religious symbols: angels, Star of Bethlehem, the den in which Jesus was born; as well as traditional snowmen and snowflakes, Christmas trees, candles and bells.
A great selection of ideas for beautiful Merry Christmas greetings.
Contained in sections:Showing publications 1-10 of 48.
All sections | DIY Christmas card
Performance of children of senior and preparatory groups at the competition " Christmas meetings"2019 Leading: Christmas is a time for miracles, it's time for execution cherished desires On the eve of a glorious holiday, in one of the millions of houses, an important conversation took place (Mother's conversation with their kids...
DIY Christmas card - Photo report “How we made Christmas cards”
Publication “Photo report “How we made Christmas...”  A bright star is burning in the sky, Mom says to the children at the Christmas tree: “There is a celebration in the whole world, Christmas has come!” Christmas card is one of sincere gifts, which can be presented on the holiday - Christmas. Dear colleagues, I present to your attention a photo report...
 Image library "MAAM-pictures"
 How to make a Christmas card "socks" ( step by step lesson applique No. 7) Christmas socks - postcard 4+ Applique on a colored figured background. This material is addressed to everyone who wants to learn how to create from colored paper! And also to caring parents, grandmothers,...
  For two years in a row, my boys and I have been taking part in an international project for exchanging Christmas cards. What is needed for this? You must apply to participate at iearn.org in early fall. By November, groups of participants begin to form. Teacher...
 This bright holiday– Christmas holiday We will tell each other Warm words. The snow is falling quietly: It’s winter outside, A miracle will happen here and will set hearts on fire. May your smiles on this wonderful day be our happiness and a gift to everyone. The sounds of life flow, Happiness and goodness, Illuminating thoughts...
DIY Christmas card - Photo report “Drawing “Christmas card”
 After New Year holidays we are with the children preparatory group began to study how Christmas was celebrated in Rus'. We watched interesting cartoons, presentations, and read books. After studying, we drew a Christmas card with a picture of the temple. The children were very interested...
 Photo story “Christmas cards from my collection.” Looking through Christmas-themed cards, you remember a lot: you remember who gave them and where these people are now, you remember family holidays, and, of course, you remember the biblical story about the birth of a baby...
Handmade gifts will give you a storm of unforgettable emotions. It is not necessary to buy expensive ones, the main thing is to put your soul and love into them. Christmas cards can be called “magical” gifts.
Christmas cards with an angel are the personification of warmth, tenderness and purity. Creativity is very multifaceted, so you can use completely unpredictable materials in your crafts.
To create such a wonderful gift you will need:
- 3 coffee filters;
- triangle made of white cardboard 9 cm high;
- mugs with a diameter of 2.5 cm;
- white thread;
- glue;
- gold thin ribbon;
- toothpick.
Below you can see the steps to create a Christmas card with an angel:

- Glue a toothpick to the back of the triangle. Its fourth part should be visible.
- Place coffee filters on the triangle.
- Glue two circles onto a toothpick. It must be inside them. These fastened balls are the head of an angel.
- Place a coffee filter on top.
- Tie the angel's neck with a thread.
- Fold the third filter in half and tie it in the middle. Attach the resulting wings to the back of the angel.
- The angel's head can be decorated with a gold ribbon. It will serve as a cute headband. If you wish, you can draw the face of a cute angel.
This craft will fit very well into the Christmas atmosphere. The angel is a symbol of purity, peace and goodness. Everyone will be glad to receive such an unusual handmade gift.
Christmas card in English
Christmas for real magical holiday. sitting behind festive table, everyone wishes each other all the best. Of course, I would like to send congratulations to those who are not at at the moment with friends or family. Then the urge to send a greeting card arises.
You can write a Christmas card in English.
Here are some congratulatory phrases:
- May this Christmas be bright and cheerful! - May this Christmas be bright and merry!
- May this season of joy open doors to new opportunities!
Merry Christmas! - Let this winter open the doors to new opportunities for you! Merry Christmas! - My best wishes for a healthy and happy! - My Best wishes health and happiness!
A Christmas card written in English is very unusual gift. The main thing is that the person you want to give it to knows English language. Otherwise, such a present will not be entirely appropriate. Often such gifts are sent as gifts to friends from other countries. Congratulatory notes must be written correctly, so if you don’t know English well, then it’s not worth the risk.
Using quilling technique
Using the quilling technique you can create a very unusual Christmas card for a competition. At first glance it may seem that doing such work is quite difficult, but this is not so. It is enough to try to create at least one postcard using the quilling technique to see how easy it is to make such a beautiful and unusual craft with your own hands.
To create a gift you will need the following materials:
- cardboard;
- quilling strips;
- scissors;
- toothpick;
- glue.
In order to make a Christmas card using the quilling technique, you must follow the following steps:
- Take a thin strip of paper and secure the tip into the slot of a toothpick.
- You need to take a toothpick to right hand, and the tape to the left.
- The toothpick is rotated clockwise. The spiral is held from below and from above.
- The end must be fixed with glue.
A tight spiral is the basis of quilling.
- Place a little glue on the end of the tape and attach it to the spiral.
- The spiral needs to be untwisted a little so that it becomes “free”.
- Next you need to make an element such as an “arrow”. To do this, press on three sides of the spiral to form a triangle.
- For the Christmas card you will need 6 arrows.
- We need to make an element such as a “heart”. Fold the ribbon in half. Twist the right end counterclockwise, and the left end clockwise. For the postcard you will need 6 “hearts”.
- Next you need to make the “eye” element. Pinch the spiral on both sides and then release.
- You will need 6 “eyes” and 12 pieces of “tight spiral” made of blue paper.
- Black cardboard is best suited for the base of this card.
- Fold a piece of cardboard in half.
- Glue a tight spiral in the center.
- You need to attach “arrows” around it.
- Glue “hearts” between the “arrows”.
- Add an element such as “eye”.
- Decorate the edge of the card with curly scissors.
- Glue the inscription “Merry Christmas”.
If desired, you can add “snow” to the craft. It can be made using white gouache.
Scrapbooking technique
Scrapbooking is very unusual technique creation holiday cards. It allows you to create unusual and original craft with your own hands. Even a child can use this technique, as it is quite simple.
To create a “Snowy Winter” postcard, you will need two types of napkins from which the paper will be made.
Here are the steps to create a Christmas card:
- In the foreground you need to place a postcard with bullfinches.
- Attach a label for writing.
- Attach to front side button with the image of Santa Claus.
The postcard is ready. You can give it to your dear and loved one. Scrapbooking allows you to create wonderful works with your own hands in a short time. This saves both time and cash. Such small gifts will delight everyone with their simplicity and accessibility.
Volumetric Christmas card
Volumetric crafts have been very popular lately. They look intricate and unusual. It seems that voluminous postcard It is very difficult to create, but it is not. Just follow the instructions carefully and you won’t have any problems creating voluminous postcards.
In order to make a three-dimensional card with a Christmas tree, you will need:
- scissors;
- glue;
- cardboard for the postcard base;
- green cardboard for the Christmas tree;
- glitter, beads and hole punch;
- fluff and cotton wool.
It is important to follow these steps:
- Cut 5 strips from green cardboard. They should be of different lengths and widths. They need to be folded like an accordion.
- Cut cardboard for the card and fold it. Glue a large strip to the bottom of the fold, stick further strips, closer to the top - less and less.
- Cut out snowflakes and glue them to the base and Christmas tree.
The gift is ready. This postcard will become pleasant surprise. Such a sign of attention will cause very pleasant emotions.
Don't forget to delight your family and friends with little surprises. A gift made with your own hands is considered quite budget-friendly, but at the same time very pleasant, and most importantly, from the bottom of your heart. Such a gift will leave very good memories.
Photo ideas


