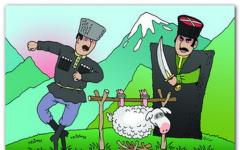
Corrugated cardboard- packaging material with increased rigidity, Made using the technology of gluing paper sheets corrugated paper on both sides. Such cardboard is made single-layer with one layer of corrugated paper and multilayer with several layers of corrugated paper. Increasingly, you can see 2-, 3-, 5- and 7-ply cardboard. It can also be made a separate element for decoration or for use as a basis for frames or cards. The cost of corrugated cardboard can reach 120 rubles per sheet.
The birthplace of paper making is China. It was first used in this country. It became very popular in China and spread all over the world. Paper and cardboard are used everywhere. Without them, it is impossible to decorate the interior of any room.
Many countries use cardboard and paper for decoration. These materials are constantly being improved, and also new ways of using them appear. They now occupy the first place in the repair. You can choose many ways how to use them in the interior of the premises.
Paper in the interior of the premises
Until now, paper wallpaper is the leader in the construction market. Every year, new and new collections are released with different patterns.
Environmentally friendly materials are most often used for wallpaper. Designers also pay a lot of attention to this and use them all the time.
Depending on the tasks in the interior, you can choose wallpaper with a small geometric pattern, or you can do with plain colors. Wallpaper can be the basis design solution... Furniture and decor are matched to them. Wallpaper can replace voluminous posters.
With paper wallpaper, it is very easy to change the interior of an entire room. She's starting to look fresher and more comfortable. In addition, you can change the wallpaper very often. Wallpaper is the easiest way to use paper in your interior.
Corrugated cardboard for furniture
The second idea is the use of ecological furniture made with cardboard. This is the last word in ecodesign.
Gradually, she begins to gain popularity. Its advantages are obvious: it is very light, it can be used in an interesting way and it has great possibilities in terms of recycling. All this makes this material the main one among the supporters of an environmentally friendly lifestyle.
In most cases, furniture made from this material does not differ at all in quality from furniture made of wood. Corrugated cardboard cabinets do without cracks. Paper pieces of furniture have a significant drawback: they do not tolerate moisture.
Moisture can cause cardboard and paper to flake and break. There are designers who believe that this is the most common material and the most affordable. In their work, they use only it.
Many popular furniture companies hold exhibitions of their cardboard furniture. They put it on the industrial stream. Almost all types of furniture are made from it. At exhibitions, they often show how strong cardboard can be.
According to this indicator, it does not lag behind wooden or plastic furniture at all. In addition, this material is very easy to cut and model various details.
Corrugated cardboard storage
Storage for many years. What to do if there is not enough space for various things in the room? After all, if all things are in their places, it is very convenient.
Cardboard containers and paper cabinets will come to the rescue. Cardboard products of different volume and density are easily located under a berth or under the ceiling.
Items can be stored in a variety of cardboard products.
They have been at one of the first places in decoration for a long time - their different colors make brighter room in the style of minimalism. Such boxes can be decorated in different ways and in a special way. They can change a lot.
Paper decor
Recently, the attention of designers has been drawn to this type of decor. These are origami-style paper parts made by professionals, greatly decorate the interior. Of course, all designer jewelry can be made with paper.
Vases, curtains, figurines, frames are easy to make from this material. You can connect your imagination and embody the most various ideas... A wide variety of things can come out of paper.
Children's room decor
This material is completely suitable for children's rooms. It is very light, it cannot harm the child, since there is no harm in it.
It is completely non-toxic and does not release any harmful substances. The child can also easily move such furniture himself. A positive point is the relative cheapness of such products: over time, you can easily replace all the furniture in the nursery without financial damage.
It's not a pity to throw away cardboard furniture. It is easily recyclable and does not pollute the environment. It will also help keep the family budget.
So, paper and cardboard are the most convenient and simple material for design. Such materials are the future in interior design. It can also be a great solution for using waste paper.
After all, such material takes up a lot of space and just a large amount of it is burned. And this is very irrational. After all, a lot of trees are used for the production of paper. This idea will help save many trees that are the lungs of our planet. The future belongs to paper in the interior and cardboard furniture.
How to make a chest of drawers out of cardboard, see the video below.
Corrugated cardboard is a convenient and practical material for crafts.
Recently, he has become very popular, and this is quite justified, because corrugated board is flexible, dense and keeps its shape perfectly.
The child will easily cope with this material and, over time, will learn how to make amazing crafts.
You can find corrugated board in any specialty store. It is for sale in sheets and stripes.
For crafts in style quilling, that is, paper rolling, it is better to use stripes. They can also be cut from sheet cardboard, but in this case, you will be limited in size.
Corrugated board in sheets suitable for creating appliques and postcards. Crafts made using both types of corrugated cardboard look extraordinary.
Corrugated cardboard crafts
Craftsmen quickly appreciated the benefits of corrugated board and learned how to put together amazing things. Incredibly, from ordinary stripes you can make realistic animal, adorable toy, amazing doll.
The child will certainly be interested in the opportunity to learn this art, especially since this is not difficult to do.
To make crafts from corrugated cardboard, you will need, in addition to the main material:
- scissors or utility knife
- glue, brush
- ruler with geometric shapes(we need circles) - with its help it is easier to make identical petals
- decorative elements (beads, pebbles, sparkles, etc.)
Flowers
 For beginners, it is better to start with simple crafts in order to master the technique. Invite your child to do applique with flowers from corrugated cardboard strips... To do this, prepare everything necessary materials and take a thick sheet of paper or cardboard.
Stripes will be needed in three to four colors: green - for leaves and stems, yellow - for cores, orange, red, blue (according to your taste) - for petals.
- First, take the yellow strip and roll it into an even circle.
Thoroughly coat the side that will be attached to the base with glue.
To prevent the circle from spinning, glue the edge. Press the "core" to the paper and hold it a little so that it sticks. - Take the strip for the petal. Twist it in the same way as the previous one, but do not squeeze tightly, but slightly loosen it and press on one edge to make a drop.
Cover with glue and attach to the base. Make as many petals as needed. - Twist a few more colors using the same principle.
Then make the stems by gluing the green strips with an edge. - We make petals from the same green stripes. Twist a few ovals and press them around the edges to make them sharp. Lubricate with seamy side glue and place along the stem.
- As a finishing touch, all that remains is to add a few vignettes. Twist the green strip halfway around a pen or pencil and release. Then paste these vignettes between the leaves.
The application is ready.
Can be successfully combined in products with corrugated board in strips and sheet
Can be done corrugated cardboard flowers, not sticking them on the base, but creating a wonderful bouquet.
They are all made according to the same principle - take the desired strip, twist, shape, glue - but at the end the elements are not glued to the paper, but connected together.
Decorate it with beautiful matching beads, pebbles or ribbons. It remains only to write a wish inside.
Believe me, such a postcard will definitely not leave anyone indifferent, and the person will appreciate the effort expended.
In general, if you like to craft and delight friends and loved ones with original and unique gifts, then you just need to master the art of creating crafts from corrugated cardboard.
 Cheerful rabbit made of corrugated cardboard
  Cartoon crab, material: corrugated board

 Corrugated paper flower bouquet
Painting "In the meadow". Master Class
Age: 13
Head: Chagan Ekaterina Alekseevna, educator, MCU ASGO "Social - rehabilitation center for minors",Anzhero - Sudzhensk.
The painting process is very simple. In work, corrugated cardboard, which can either be purchased ready-made or made by yourself from ordinary cardboard box.
For work you will need:
Any even solid base (fiberboard, chipboard, building board, etc.), wallpaper, corrugated cardboard, ruler, pencil, brush, gouache (black), Master glue (Moment glue is also suitable), scissors.
Progress:
1. Preparing the base. We paste over it with wallpaper. It is advisable to use light-colored wallpaper in your work.
.jpg)
2. Apply the drawing to the base.
.jpg)
3. We paint the drawing with gouache. Let's wait until it dries.
.jpg)
.jpg)
4. We prepare corrugated cardboard. We draw and cut strips 5 mm wide.
.jpg)
5. Carefully apply glue to the strips and glue them along the contour of the picture.
.jpg)
6. For the frame, cut strips 1-1.5 cm wide and 2-2.5 cm wide. Glue them.
7. Work is ready! Now you can decorate your interior or donate to her.
.jpg)
.jpg)
.jpg)
Thank you for the attention.
Details and techniques for working with corrugated cardboard
Disk
Twist the corrugated cardboard strip tightly, glue the tip of the strip.
Oval
Roll a strip of corrugated cardboard like a disk, but back off from the beginning 1 cm or a little more.
Petal
Roll a strip of corrugated cardboard like a disk, then loosen it a little and pin it on two opposite sides. Glue the tip.
zebra
Zebra is a disc twisted from 2-4 multi-colored corrugated board strips. glue the strips in the form of steps, then twist the part. Cut the ends of the strips with a ladder, as shown in the figure, and then glue them to the part.
Dome
Twist the disc and form a dome. shifting the layers so that you get a hemisphere. Then, on the inside, grease the entire surface of the part with PVA glue, which, after drying, will fix the resulting shape. Or cross-coat the "dome" with a glue gun so that all layers of the part are captured.
Cone
Twist the disc of the required diameter, form a cone out of it. Fix the shape with PVA glue or a glue gun, like a dome.
Crafts from corrugated cardboard for children - examples of work
Piglet
1.
Body. Twist 2 discs from strips 2.5 m each. form domes from the discs. Fix this shape with glue from the inside.
2.
Legs. twist the disk from a strip 50 cm long glued from 2 strips of a contrasting color, 25 cm each. Make the disc a little convex and fix this shape with PVA glue on the inside. Work your front legs in the same way.
3.
Ears. From a thin strip 0.5 cm wide and 50 cm long, twist the disc and form an ear. Do the second ear as well.
4.
Assembly. Glue all the parts with a glue gun. Make the eyes. Decorate the ears and cheeks with colored paper figures made using a curly hole punch. 
Frog
1.
Head done in the same way as a pig.
2.
Eyes They are made in the same way as a head, only each hemisphere is twisted from a strip 50 cm long, and the lower part is white or yellowish. make the pupils out of black paper.
3.
Torso- twist the disc out of a 3 m long strip. Form a cone approximately 8 cm high. Fix the shape from the inside.
4.
Paws- glue 2 strips 50 cm long in a contrasting color with the smooth side. shape your fingers into loops and lock the shape from the inside.
5.
Assembly- glue all the parts with a glue gun. Decorate the frog with buttons. 

For sunflower Cut a petal out of a 1.7x3.5 yellow corrugated cardboard rectangle and make 17 of these petals. For the middle of the flower, twist 2 strips of yellow and brown 0.5x50 cm each. Form a low dome and fix it.
Sunflower assembly: Cut a 4 cm circle out of cardboard. Glue a stick to it along the radius and the petals around the circumference. then glue the second layer of the petal center on them with a shift in the center of the petal.
Cut the leaves out of green corrugated cardboard and glue them to the stem.
Flower- the petals are made like this - twist the disk from a strip about 5x25 cm. clip it in one place. glue the end. Make 5 petals. For the middle, twist a disc of 2 strips of contrasting colors, 0.5x12 cm each - make 2 such parts.
Assembling a flower- glue the cakes together, glue the stick-stem between 2 cakes, glue the core in the middle - on both sides. for leaves, take a green strip 0.5x25 cm and form a leaf with glue, glue to the stem.
Fast navigation through the article
Cardboard can be easily bent, cut, painted, glued, stitched and held in shape, and it is also always available. What you need for children's creativity, development fine motor skills, hand-eye coordination, logical thinking and imagination! In this article, we presented 13 super ideas, 100 photos, 1 step by step master class and a selection of video tutorials on making cardboard crafts with your own hands.
Where can I get cardboard?
For the manufacture of children's crafts, in addition to sheet colored or corrugated cardboard from the store, you can use the following improvised and junk materials:
- Cardboard boxes (you can ask the warehouse workers of the nearest store);
- Disposable paper tableware;
- Bushings from toilet paper and paper towels;
- Packing cereals and sweets, such as cornflakes;
- Egg packaging (good to use cells);
- Dairy packaging.
13 Cardboard Craft Ideas + Master Class
Idea 1. Construction toys
Cardboard "constructors" are good because they are easy to make and decorate, interesting to assemble and, of course, to play with. You can come up with and design such a toy yourself, or you can do it with finished circuit from our article or found on the Internet.


Click on the photo to download the templates of these figures

Click on the photo to download the templates of these figures


Idea 3. Puppets or just dolls with moving parts
Making a cardboard puppet is very easy and fun. You just need to draw the details of the little man, cut them out and fasten them with mini-pins (sold in scrapbooking stores).

- Instead of special fasteners, you can use a thin wire (for example, for beading). Just cut a piece of wire 2 cm long, thread it through the holes of the parts and twist its ends from the front and back sides as shown in the photo on the right. You can also use metal rings as fasteners.
If you want the figurine to become a real puppet, then you can:
- Connect the arms and legs with a single thread, as shown in the photo below, or with two threads (one thread connects the legs, and the other connects the arms).


- Tie a string to each arm and leg, then tie all 4 ropes to the ends of the sticks folded crosswise. An example of such a puppet is shown in the following photo.


Idea 4. Finger puppets
Finger puppets are made even easier and faster: a small figure is drawn, then two holes are cut out in its lower part. Woo-ala, the first "actor" for puppet theater ready! In the next selection of photos, you can glean some ideas for finger puppets.


Idea 5. Land, air, water and space transport
A car, plane, bus, ship, boat or rocket made of cardboard is no worse than one bought in a store. After all, making such a toy with your own hands with your parents already seems like a fun adventure. And when the cardboard vehicle gets bored, it can be used to make other toys and crafts.


Idea 6. Kitchenette
If you have a couple of boxes square shape, why don't you turn them into a mini cooker and sink?


You can make a refrigerator from one rectangular elongated box.

If there is enough space in the room, a washing machine can also complement the kitchen.


For a master class on how to make a cardboard craft in the form of kitchen furniture, see the next video.
Idea 7. Toy equipment and household items
Do you need props for role-playing games or things for arranging a cardboard house? We suggest making them out of cardboard with your own hands.


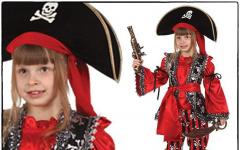
Idea 8. Fancy dress
V kindergarten or school is nearing a matinee or a performance? Or is it just that your little one loves transformation? You can make an amazing outfit out of cardboard. Here are photo examples fancy dress made of cardboard for boys.


And here are photo examples of cardboard costumes for girls.


Idea 9. Bookmarks for books
For making bookmarks, it is better to use not too thick colored cardboard, and in order for the craft to last as long as possible, it should be laminated with transparent tape.


Idea 10. Aquarium with fish
Cut off the lids of a cardboard box and paint the inside of it in blue-blue tones, if desired, decorate the aquarium with applications made of plasticine, glitter, colored paper, etc. Cut 3-5 holes along the top of the box and pass through each hole along the thread. Next, cut 3-5 fish out of colored paper. Attach a large button (from the outside of the aquarium) and a fish to each thread. That's all, the aquarium is ready.


Idea 11. Town in a box
You just need to trim the sides of the box and paint on the inside and ... voila! You get a city with roads, with which the child will play for hours, moving cars and figures of little people.

Idea 12. Volumetric corrugated cardboard toys using quilling technique
Volumetric crafts can be "wound" using the quilling technique from corrugated cardboard. Having mastered the skill of forming various shapes, the child will be able to experiment with shapes and colors and even create figures of his favorite cartoon characters.

Materials and tools:
- Cardboard box;
- Tracing paper or white tissue paper;
- Black cardboard (you can paint ordinary cardboard with a thick layer of black paint);
- White pencil;
- Wooden skewers, straws, or wire;
- Scotch tape and / or glue;
- Scissors;
- Stationery knife.
Step 1. First, we need to make the building of the theater. To do this, cut off the lids from the box, and then cut out its bottom.
Step 2. Cut a piece of tracing paper that is larger in relation to the box. Gently glue it to the sides of the theater with a slight tension, as shown in the photo.
Step 4. Now it's time to cut out the characters of the future show from black cardboard. Keep in mind that the more detailed the silhouette of the figure is, the more realistic the shadow theater will be. Therefore, it is best to draw figures using templates found on the Internet and printed.

Step 5. The shadow theater is almost ready, all that remains is to glue the figures to wooden skewers or wires. You can glue them as shown in the photo below or perpendicular to make it easier to control the characters.