
The main symbol of the New Year can be made with your own hands using scrap materials. A Christmas tree made from threads, PVA glue, cardboard beads or sequins looks original. This art tree will decorate your home or office, and will also become interesting souvenir for friends and colleagues. Attract to creative process children, and several pleasant evenings are guaranteed for the whole family.
Take the master classes below as a basis, add imagination, and you will get a unique Christmas tree made of threads. Materials for creativity can be found in every home. And the instructions for making such a craft are extremely simple.
For inspiration, look at photos of decorative Christmas trees made from threads. The craft can be not only green, but also red, blue and even multi-colored. Lots of ideas!
Universal method
The first option on how to make a Christmas tree from threads is to use a cardboard cone as a base. Before starting work, prepare:
- dense green threads (you can dye white ones yourself);
- PVA glue;
- elements for decoration: beads, seed beads, sequins, charms;
- tape and a sheet of cardboard for the base;
- scissors;
- glue brush;
- compass or round template.

To begin, draw a circle on cardboard, divide it in half, cut it out and roll it into a cone. Cover the cardboard base with tape. This must be done so that the future Christmas tree does not stick to the cardboard and can be easily removed from the workpiece.
Next, form a frame of threads, winding them around a conical base. You can do this in any order. The frequency of winding will depend on whether you want a more airy or, conversely, dense tree.
Then generously coat the thread workpiece with PVA glue. Place it in a warm, well-ventilated place. After it is completely dry, carefully remove the craft from the base. The result will be an airy and light Christmas tree.
The final stage is decoration. Glue or tie beads to the finished decorative Christmas tree made from threads. You can attach one large bead to the top. Using the tips given in this master class, you can experiment with decoration, the color of the future Christmas tree and the winding density.

Christmas tree on a plastic base
Another way is to use a plastic cone as a base for a thread tree. The instructions for making the craft are similar to the first option.
To make such a Christmas tree with your own hands, you will need:
- knitting threads;
- thin transparent plastic folder;
- PVA glue;
- various decorations;
- scotch;
- scissors;
- container for glue.

To begin, we twist a fragment of a plastic folder into the shape of a base for a future art tree. Secure the cone with tape. We trim the bottom edge so that the workpiece is stable.
After the tree has dried, carefully remove the plastic and decorate the resulting airy craft to your liking. The Christmas tree made of threads is ready!

Meet interesting videos when foil and cardboard are used as the base for a thread tree. Will be needed following materials:
- foil;
- sheet of cardboard;
- dense threads;
- PVA glue;
- beads for decoration;
- scotch;
- scissors.

Cover the cardboard base with foil. Then the threads moistened with glue can be easily removed when dry.
Do you want to create original New Year decorations and souvenirs? There are a lot of ideas. For example, you can make beautiful ones from threads. It's easy to make such a thing. You do not need any special devices or materials. Everyone has everything they need in their home. The process of making this souvenir is very simple and exciting. Even a child will be happy to take part in this.
How to make a Christmas tree from threads
Such crafts are the simplest in terms of production. You will need the following materials:
- whatman;
- scissors;
- or any other;
- threads;
- needle.
There are two technologies for manufacturing these objects. They are similar in the sequence of actions, but in one case a film and a needle are required, and in the other - not. Which method you choose depends on the materials you have on hand. If a child is making the Christmas tree, it is better to do without a needle (or use a plastic one).
Master class: Christmas tree made of threads
The manufacturing process consists of the following steps:

Your souvenir is ready. You can make Christmas trees with your own hands from threads different sizes: from 5-10 cm to meter-long room decorations. The color scheme is used both traditional (green shades of one tone) and decorative (red, white, alternating circles of several colors). Don't be afraid to experiment.
How to decorate a made souvenir
When your thread tree is ready, you can leave it or decorate it with various elements. The following options are usually used:
- an asterisk or ball on the top of the head (plastic, paper);
- beads;
- sequins;
- beads;
- bows;
- snowflakes
- tinsel;
- rain.
Now you know how to make a Christmas tree from threads and how to decorate it.

It is worth showing your imagination and using any available materials for decoration. Depending on the size of the souvenir, colored cereals, beads, buttons, pine cones, and candies may be suitable. The main thing is not to overload the tree. Openwork product not intended for large quantity heavy decor.
Balloons and subject compositions
A Christmas tree made of threads can be decorated with balls made in the same way. They are used as a basis balloons, which, after the glue has dried, are pierced with a needle and removed.
If the Christmas tree large sizes made for interior decoration, you can complement it with other similar objects: a snowman stylized by Father Frost and the Snow Maiden. Combination different colors and textures will create a spectacular stylish decor.
How to make a souvenir lamp
Christmas trees made of threads (photos of them are presented in the review) are used to decorate the interior as lampshades for night lights. They create fancy shadows from the openwork structure and look very unusual, stylish and romantic. There is nothing difficult in creating such a thing. You just need to pick up a small lamp. Having purchased the base, calculate the required diameter of the base of the tree, take measurements and begin creating a lampshade using the technology described above.

In addition to the Christmas tree or as an addition to it, you can use other objects that are described in previous section. Christmas tree lamps, snowmen, balls will be excellent decorations New Year's Eve or even gifts for relatives and friends.
We use weed threads
Modern possibilities for needlework are very wide. The yarn store offers a large assortment of this product, not only in terms of quality and colors, but also the texture of the future product. Try making your own Christmas trees from threads different types. The “grass” looks original, and most importantly, very natural and natural looking.

It is worth saying that in this case the threads should be wound onto the base in clear horizontal rows or in a spiral. If you do this process chaotically, the Christmas tree made from grass threads will turn out to be disheveled. However, if you want to surprise the audience, then you can experiment. For example, try to make such a souvenir from yarn that consists of several multi-colored threads. Combining them with “weed”, you can get original effects.
Christmas tree made of thread strips
In addition to the one mentioned above, other decorative yarns are also sold, for example, those made in the form of ribbons. They can resemble lace, frills, sewing. At the edges, such tapes have a thread with loops, which are used to connect the yarn into single canvas. How to make a Christmas tree from striped threads? Yes, very simple. All you need to do is glue these strips of thread onto the base, which you won’t need to remove.

You learned how to simply and easily make Christmas trees with your own hands from threads. Such a souvenir can decorate as festive table, and the interior of a large room. Prepare yarn, decor, glue, base. And begin the exciting creative process.
We will send the material to you by e-mail
There was a desire to do New Year's decor is this year special? The editors of the online magazine site suggest making small Christmas trees that will not be cold in winter, because they will be born under caring hands right in the house. So, the simplest and most wonderful craft is a DIY Christmas tree made from threads and glue.
A garland on the wall, consisting of a Christmas tree made from a skein of thread and glue, looks original.
No drawings are required to make your own Christmas tree from threads and glue. Let's use any cardboard we have on hand. It is better to take thick cardboard left over from the boxes, then the product will be more impressive in thickness. You also need scissors, PVA glue, thick threads. Iris, woolen threads, and any crochet yarn are suitable. The only thing left to do is choose the decor. Various sizes of beads and lace are good for decoration. If your drawing skills are very, very sad, then we offer diagrams or templates for a Christmas tree that will be made from thread and glue with your own hands. Let's get to work and take a look step by step photo creating a Christmas tree from threads and glue with your own hands.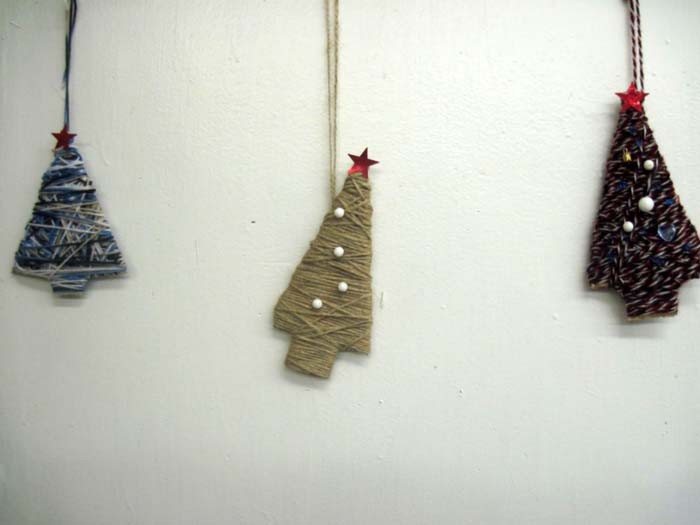
What do we need
The process of making a flat Christmas tree
| Illustration | Description of action |
|---|---|
 | We'll prepare everything at once so you don't get distracted and run around the house looking for the right thing. |
 | Roll a bag out of a sheet of paper. |
 | We straighten it, glue the joint with tape, cut off the excess. |
 | Wrap the cone with cling film, one layer is enough. |
 | Let's cut a small slot at the bottom of a tube of cream or paint and pour PVA into the bottom. We pull the thread from the ball through this slot, it will itself be lubricated with the required amount of glue. |
 | We wrap the cone in one direction, gradually filling almost the entire space. We cut the thread and wait about three hours for our beauty to dry completely. It will dry faster in a warm place, but you should not place it close to heating areas to avoid deformation. |
 | Carefully crumple the paper and remove the cone. Since we initially wrapped it with cling film, this will be easy to do. |
Now let's start coloring the craft if the desired color of thread is not available. Spray paint will help with this.
Related article:
How to make your own wreath, garland, balls, angels, snowmen and Santa Claus for the Christmas tree for the New Year, animals, birds, topiary, flowers - read the publication.
Ideas for decorating a Christmas tree using thread and glue
A cone made of threads just won’t look stunning, so don’t skimp on decorations!

It becomes a tradition for many. But in the holiday bustle it will be difficult to find time to make Christmas trees and items for. It’s better to prepare in advance, making sure to involve the whole family in the creative process. One of the amazing ideas that will require very little time and money is a DIY Christmas tree made from threads and glue. It’s enough to look for fluffy threads in your grandmother’s and make them out of cardboard, and then completely trust your imagination. . Believe me, all guests will be fascinated by the unusual design and decoration of the interior.
Christmas trees can be used to decorate the photo area with New Year's gifts
What will you need at work?
For work you need to prepare the following materials and tools:
- cardboard;
- thick threads, preferably with a small pile;
- for the trunk you will need a small stick;
- decor;
- a yogurt cup;
- and scissors.
Operating procedure
The operating procedure is as follows.


Step-by-step master class on making your own Christmas tree in the shape of a cone from threads and glue
It will become beautiful volumetric herringbone made from threads. The manufacturing principle is quite simple, you can make a whole New Year's composition on the windowsill and additionally decorate it with lights.
What you need to prepare for work
For work we will need:
- new or old fluffy threads of green or any suitable color. It could be mohair, grass, twine;
- wallpaper glue or PVA - if it is thick, you can dilute it a little with water;
- glue gun;
- cardboard or a finished plastic cone;
- tape or polyethylene for wrapping the cone. It can subsequently be easily removed from the finished Christmas tree;
- decorative snowflakes, beads, rhinestones, ribbons, small buttons with which we will decorate the finished product;
- scissors and a brush for adhesive;
- a jar or container that will serve as the basis for the Christmas tree;
- wooden clothespins, popsicle sticks will also work.

Two ways to make a blank cone for a Christmas tree
If you don’t have a cone-shaped container on hand suitable for making a Christmas tree from threads and glue, you can make a template with your own hands. To do this, use the following diagrams.
1 way
Roll a thick sheet into a cone shape, secure it with glue or tape and trim off the excess at the base.

2 way
Prepare a circle of cardboard, cut out a segment in it and glue the edges.

Step-by-step process for making your own Christmas tree using thread and glue
After preparatory work You can start making our beauty.
| Illustration | Description of action |
 | Wrap the Christmas tree in cellophane or tape and secure it to the body. |
 | Prepare an adhesive composition in a wide cup, dip a thread in it and wrap it around the workpiece in a chaotic manner. You can pre-soak it completely with glue. There is another option for impregnating the thread with glue: take plastic cup, make a small hole in the base, thread a thread from the outside in and pour glue. When pulled, the thread will be completely saturated with the composition. To prevent the glue from staining, the container should be placed on a pallet. |
 | After wrapping, you need to additionally coat the entire Christmas tree with glue. |
 | After the adhesive has completely dried, remove the cone along with the polyethylene. |
 | Glue the top with a glue gun. |
 | Glue the decorations in any order. |
 | Take the clothespins into two halves and cover the base of the jar with them. |
 | Glue a decorative ribbon around the jar, which will additionally hold the clothespins. |
 | Place the Christmas tree on a decorative jar. |
The decorative Christmas tree will become real. For a more detailed master class on how to make a Christmas tree with your own hands from threads and glue, watch the video:
Related article:
: step-by-step master classes with photos of production using origami, vytynanka, quilling and others techniques original ideas- see our publication.
How to fasten and wind a thread to obtain an openwork or dense coating
To make a tighter winding, you must first secure the thread in several places with needles. It will not slip and will allow the adhesive to set. Winding can be done in a circular motion sequentially, circle by circle, in a spiral upward or in a chaotic manner, passing the thread under the base.
Advice! It’s okay if gaps remain - they do not affect the strength of the Christmas tree in any way. At the end of the work, you can place a small garland with a power supply, which will beautifully decorate the room on winter evenings.
How to remove a blank from cardboard
4 hours after the adhesive composition has completely dried, you need to carefully cut the threads at the base of the Christmas tree and remove the cardboard cone from the workpiece. It is the cellophane wrapping or tape that will help you remove the template without much effort. The threads will hold their shape firmly, since they are completely saturated with glue and act as a frame for the Christmas tree decorations.
Advice! If glue is visible in the spaces between the threads, it can be cut off with nail scissors or decorated with beads.
Ideas for decorating a Christmas tree
To decorate the Christmas tree they use tinsel, colored buttons, sequins, rhinestones - here the craftswoman’s imagination has no limits. You can make an interesting or toy Christmas tree on legs made of cardboard or a Kinder Surprise shell, and additionally decorate it with small or winter hats. A wire star is suitable for the top, and you can also plant a miniature angel.
For inspiration, we have prepared a whole selection of unique ideas for decorating a Christmas tree with threads for the New Year.
1 of 8


Craft Christmas tree made of threads. First, we make a cone from whatman paper or other dense material. We attach polyethylene on top. Without polyethylene, removing the thread cone will be problematic. Polyethylene on paper, and then threads. To make it easier to wind the threads, make small cuts at the bottom of the cone along the entire circumference and hook the thread to these cuts, it will not slip. You can smear the cone itself with glue or pass a thick thread through the glue. It is advisable to dilute the PVA glue a little with some water. We are waiting for it to dry. Remove the thread cone. We decorate with beads and the bottom with decorative ribbon.
take a regular cardboard or a cone-shaped figure, select the color, quality, thickness and strong thread, and start wrapping the cone-cardboard, then wet the cone with the wrapped threads, sprinkle with diluted PVA glue with beads or beads and that’s it
Craft christmas tree made from threads can serve not just as interior decoration or New Year's table, but you can also make a beautiful and bright lamp from such a craft.
To make a Christmas tree from threads, we will first need to build a cone as the basis of this craft.
A cone can be made from thick paper or thin cardboard. After it is made, we take the threads and begin to wind them on it in any order. Next, these threads need to be secured with glue.
To do this, you just need to coat this structure with glue. To prevent this design from sticking to the cardboard base, it is necessary to first cover this base with plastic wrap or cling film. When the structure is completely dry, we can separate the base in the form of a cone and we will be left with an openwork Christmas tree made of threads.
This Christmas tree can be additionally decorated with small toys or beads and sequins. The internal structure can accommodate Christmas garland from LEDs.

Have a nice creative evening!
A Christmas tree made of threads will be an unusual addition to your New Year's interior. It must be done with a frame, and it is also advisable to have paint (gouache or acrylic) green or silver. For decoration you can use foil, sequins, glitter.
A very beautiful and original room decoration for the New Year, this decorative Christmas tree. It will decorate your apartment, and you can save it for the next New Year, the needles will not fall off, like in a real Christmas tree. To do this, you can use a cone made of cardboard or foam, it all depends on your decorations, whether you will glue them with glue or put them on with a hairpin.

We wind our thread on a cone, as in the photo

and on top, we fasten the end of the thread with pins.

and you can decorate our Christmas tree with beads, beads, rhinestones, buttons, you can glue it with glue, or you can secure it with pins.

And from wire, you can make a star and also wrap it with thread.

This is what we got, it’s not difficult, and very beautiful.

To make a Christmas tree from threads, you need to stock up with threads of sufficient thickness, it is better to take wool threads or other thick threads.
First you need to make a cone out of paper, preferably dense and stable, so it is better to use cardboard.
I think I can help you. It's very interesting and simple.
for this you will need a skein of thread, PVA glue, cardboard with which you need to make a cone-shaped base for the hatch. Apply glue to the thread and wrap it around our cone!
For example, I posted pictures. This is roughly how this thing looks from the outside.


There is nothing easier than making a New Year's airy New Year's box from threads.
You will need a piece of paper or cardboard from which you will need to make a cone the right size for your future locker, which one you want to get in the end.
Then thoroughly coat this cone with white PVA glue and then wind the thread around the entire cone.
Wait for our glue to dry and then just take out the cone and the whole tray is ready, it’s okay if you damage the cone in the process of removing it, it will still go into the trash later.
A visual diagram of how a thread box is made and what is needed for it.

The main thing is not to forget to decorate your box afterwards; glitter, beads of different sizes, small candies and small New Year’s decorations, balls, gifts and others cannot serve as decoration.
Happy New Year!
Can be done fluffy Christmas tree, using threads of grass. To do this, make a cone out of cardboard so that it is stable, stuff the inside with paper and seal the bottom with cardboard. Cover the cone with double-sided tape. Then wrap the cone tightly, turn by turn, with grass yarn. You can decorate the Christmas tree with bows and balls made of foil.

To make a Christmas tree from threads, we will need hard cardboard, PVA glue, woolen threads. Take cardboard and make a cone. As shown in the picture.

Wrapping the cone threads, coat with PVA glue.

We are waiting for everything to dry, and take out the cone. You can also add all sorts of multi-colored dyes.


