Tatiana Cherdantseva
2016 is the year of the red monkey.

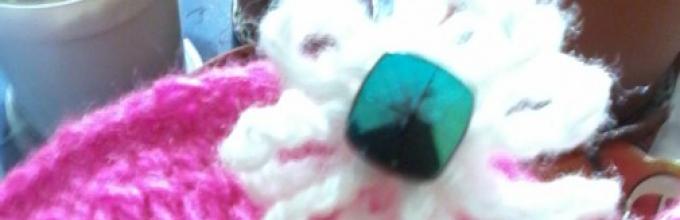
on the finishing circle we embroider the mouth, glue the eyes and nose
I bring to your attention a craft - the talisman of the year.
This will not just be a talisman, but a multifunctional toy.
You can use it as a puppet theater character, or for group registration, and also in any regime moments, etc.
What a wonderful gift this would be!

We tie the ears with single crochets, the seam should remain on the back side

we knit the sole either directly from the foot, or separately, and sew it on
Material:
Multi-colored threads for knitting, several colors are possible (there should be more of the main color, the rest are used to design some details)
I took threads of fuchsia, coral, and white colors.
Hook (we select the hook according to the thickness of the thread)
Ready-made eyes or buttons, at the request of the manufacturer (for a nose button)
Colored ribbon (this will be a bow on your head)
Red floss threads
Shiny button

PROGRESS OF WORK
these are such neat little fingers
Let's start with the head.
For the head we knit two large circles in the main color, diameter = 12 cm.
We start knitting with a chain of air loops, connect 3-4 loops into a ring, then knit in a circle, gradually adding loops (you can knit single crochets or single crochets, at your discretion)
To decorate the muzzle, we knit a circle from threads of a different color, diameter = 5.5 cm.
Now, not with this date, we embroider the mouth with red floss threads.
Glue on the eyes (or sew on buttons)
Sew the finished small circle onto the muzzle, at the bottom of the front half.
Putting the two halves of the head together front side to the top, and crochet it.
Fill with filler (preferably cotton wool)
Ears
Knit like a head
Two circles, diameter=6cm.
We tie the finished circles on the sides of the head, the seam should remain behind the ear
Torso
We knit a chain of 16 air loops, and knit with gradual addition of loops.
Body length (from head to bottom edge = 15cm.
From the neck you need to tie 4cm
We divide it into 2 halves, tie it in this position, each half separately for another 4 cm.
We tied the body, tied the bottom edge, you can make it a little wavy.
Paws (upper)
Along the edge of each side slot we knit a foot in a circle (gradually, closer to the fingers, narrowing it.
Leg length=7cm.
About knitting, the width after tightening should be = 2.5 cm.
Fingers
Tie the edge of the paw with one loop, i.e. i.e. in double form (front side and back side together.
The fingers are knitted one at a time, first one, and so on for all five.
The finger is knitted first in length, and the second row goes back to the wrist, then the next finger.
The fingers are knitted the same way on all feet, with differences in size.
Focus on the fingers of your hand.
Lower legs
They are knitted from the bottom edge of the body, but a little from the inside (the effect is as if from under a skirt).
The width of the paws and the length of both the upper and lower ones can be made the same.
We also knit both halves of the bottom of the leg together (front and back together, in single crochet stitches.
Sole
The last loop, it will be our first loop for the foot.
Foot-2.5 cm. ,Now we knit the fingers.
Bend the foot at a right angle and knit behind the heel to highlight it (single crochet)
The sole on the lower legs is knitted from threads of a different color.
Can be knitted separately and sewn on. You can immediately tie it from the foot.
Bow
We knit a chain of chain stitches - 8p. , we return to the first loop, we connect, we get the first petal, the next ones are knitted similarly, only the number of loops changes.
We decorate the finished bow with a shiny button or bead.
Attach a bow to the monkey's head.
Our monkey is ready, all that remains is to come up with a name for it.
Thank you for your attention.

The bow is knitted very simply, from air loops, the number of loops varies

Publications on the topic:
Over the summer, my kids have grown up a lot and become noticeably smarter! There was a strong interest in reading and looking at “smart” books. More and more often children.
New Year's crafts for decorating the group and locker room. New Year, a long-awaited holiday! On the eve of the holiday, children expect miracles and magic.
To work you will need: 1. A pair of crazy pens; 2. Cones; 3. Green gouache paints, brushes; 4. Tinsel; 5. Vata; 6. Plasticine; 7. Colored cardboard;.
Materials: birch bark, dry leaves, colored cardboard, file, glue pencil, scissors, bright tape. 1. Measure the tape in length and width.
Master class " New Year's ball with your own hands" The most long-awaited and beloved holiday is ahead New Year. Take part in preparing for this.
“Light with your own hands” is a competition that takes place in Polevskoy, the goal of which is to create clothes or a keychain, pendant.
There are many opportunities on the Internet on how to make a wonderful craft yourself from available materials, they are all varied and interesting, some can be done quite easily, just a few movements are enough. And there are more complicated options that require more time and effort. Let's consider several options. A DIY craft for the New Year 2016 (symbol of the year) can be made from beads, paper, fabric, paper rolls, bottles, packaging bags - there is a lot of variety, you just have to want to make an unusual Monkey yourself.
It’s quite easy to sew a fabric monkey, and there are many options, so consider two interesting toys, for the first one you only need a few scraps different fabrics and minimal sewing skills. For the second option - a pair of children's socks.
Monkey made from scraps of fabric
To sew such a monkey we will need to prepare the following materials:
- scraps of fabric, preferably cotton or chintz;
- threads;
- scissors;
- black floss;
- a pencil for drawing a pattern on fabric or a piece of soap;
— sewing machine– if you know how to use it;
- needle;
- foam rubber, padding polyester, cotton wool;
- chalk;
- a stick that will be needed to carefully fill the toy.
Now that everything is prepared, we can start sewing our symbol. By the way, such a product can decorate!
1. The first thing you need to do is prepare a pattern, then we will cut out all the details using it. An example of such a pattern can be found online. One part includes the body, head and tail, separately the muzzle, ears and pocket. Carefully draw all this and cut out along the contour.
2. Then you need to take fabric - for the body of one color, and for the remaining parts - another. To cut out the body, you need to fold the fabric in half, with the pattern inward, trace the pattern with a pencil; for the ears, we also do the same thing, only on a different fabric. We only need one pocket and muzzle each, so there is no need to fold the fabric in half.
3. After you have already outlined everything, you should add 0.5 cm to the seams, only then you can cut out the parts. As a result, we will have two parts of the body, 4 parts of ears, and one pocket and one muzzle each.
4. First, let's start designing the face - on a white fabric that has already been cut out, you should first draw closed eyes, a nose and a mouth to make it easier to embroider. Now you can quickly do everything using a needle and black floss thread. It is worth embroidering with a stem stitch, it will be beautiful.
5. Then we proceed to sew this part to the front of our toy. We apply the finished muzzle to the head approximately just below the middle and sew it on using a machine, retreating slightly from the edges so that the fabric does not stick out in different directions. If you don’t have a machine or experience using it, you can carefully sew it on by hand using an overcast stitch.
6. On the same part you should immediately sew a pocket in which you can put something. It is this fact that you need to take into account when you sew, so as not to accidentally make a fake. Since the fabric can fray, it is best to bend the edges slightly inward when sewing. Then sew with a machine or by hand.
7. Now we proceed to the ears - we sew two parts each wrong side leaving a hole for stuffing.
8. Next, we turn the ears inside out and stuff them with the material that we have prepared - padding polyester, foam rubber or cotton wool. The finished ears need to be put into the toy so that they can be sewn on later. To do this, you need to place them on the head and body between the front sides inward so that the edges touch each other. To avoid unevenness and shifts, they should be pinned, or even better, basted, then when stitched with a machine they will remain in place. This DIY craft for the New Year 2016 (symbol of the year from the photo) will serve as an extraordinary decoration!
9. It is best to start sewing the entire toy from the wrong side from the tail, because this is painstaking and delicate work, because it is rounded. Then make a stitch on the rest of the toy, only leaving room for stuffing - a small hole at the bottom.
10. There is very little left - turn the toy inside out and stuff it so that it is soft and pleasant to the touch.
This toy is a great option for small children. New Year's gift, if you wish, you can sew a whole family so that they are bright and beautiful. If you have already thought about it, then you can safely start crafts!

The history of children's toys made from socks goes back decades; such crafts were quite common in North America in the 18th century, because gifts for children were almost impossible to find or they were expensive and mothers came up with their own. It became popular for a long time, but with the development of various spheres of life they became a relic, and now they are back in fashion, because they are made by hand, independently. This technique is called Hand-Made; many craftswomen invent something unusual using available materials.
So, let’s start sewing such an interesting product. By the way, such a DIY craft for the New Year 2016, namely the symbol of the year, is perfect for kindergarten, because quite often you need to bring something interesting. Here's an ideal option for parents.
To sew a monkey, we need to collect the necessary components:
- a pair of children's socks - the color is not important, but for 2016 it is better to choose something bright, fiery;
- scissors;
— threads, it is better to choose to match the socks;
- any filler;
- sewing pins;
- eyes for a toy - they can be found in any hardware store.
Let's start sewing:
1. One sock needs to be turned inside out and placed with the heel up, the resulting folds should be pinned together - this way the fabric will not move.
2. Making the legs - start cutting the sock from the elastic to the heel with scissors, not reaching about 1 centimeter.
3. Sew the resulting legs together, leaving part of the elastic unsewn - these holes are needed for stuffing. We turn the finished part inside out and you can start filling our monkey with any filler you have. Then we carefully sew the remaining holes.
4. Then we cut out the second sock, because we do not have all the parts for the finished toy. We cut off the toe along the contour, it will serve as a muzzle. We cut off a thin strip - the tail, and for the handles there will be smaller strips, to mark them you need to cut the heel along the contour, cut one of the resulting parts in half.
5. We carefully sew all the resulting blanks together, first leaving a hole so that we can then stuff this part. After the tail and arms are filled with filler, they can be sewn together. Now you need to sew all the parts into place.
6. Now we need to sew a muzzle on our toy - put a little filler in the toe and place it in the head, tucking the edges. To make it easier to sew, you should first pin it with pins. It is worth sewing with small stitches, the threads should match the color of the part.
7. Now we glue on the eyes; if you haven’t found a similar product in the store, you can make it yourself from buttons, beads or fabric.
8. From what is left you need to make ears and carefully sew them on, and embroider a mouth on the muzzle.
This is such a wonderful craft for the New Year 2016 with your own hands in the form of a symbol of the year for 1st grade, and you can take it to school for an exhibition of New Year's products.
Remember, everything should be perfect for the New Year: your image, the decoration of the Christmas tree, the decoration of the hall, and, of course, delicious!

You can make many variations of monkeys out of paper, all of them interesting and funny. When involving children in this process, you need to choose something simple but creative, for example, a craft using cereals - applique.
You need to prepare the following:
— cardboard in A4 format;
- glue;
- felt-tip pens or pencils;
- brushes;
- corn and buckwheat cereals.
Execution steps:
1. We draw a picture of the monkey itself on cardboard; for little ones, parents should do this, but those who are already creating masterpieces on their own can cope with such a task. All details of the design should be as large as possible so that they can be easily decorated with cereal.
2. Then we coat all parts with glue, except for the stomach; the layer should not be too thick. After this, you need to apply the cereal to the smeared areas - children can easily cope with this task, so you can entrust it to them. In some parts you need to sprinkle a little more so that the pattern is a little varied, namely along the contour of the muzzle and ears.
3. Now we start laying out the buckwheat - coat the stomach with glue and give the child the opportunity to put the cereal on this area again, there should be no gaps left anywhere.
4. Once everything is ready, you need to carefully shake off the remaining cereal and the craft is ready - you can make a postcard out of it or just put it in a beautiful frame.
A DIY craft for the New Year 2016 (symbol of the year) from paper is an easy way to make a beautiful souvenir with your child, involve him in decorating the Christmas tree or his room, or make small greeting cards for relatives and friends.
There are also other examples of how to make a paper monkey.
To do this you will need this:
— cardboard, preferably colored, several sheets or one large and two small;
- glue;
- scissors;
- multi-colored paper;
- pencils, pens, felt-tip pens.
Draw a monkey with arms and legs on cardboard, or find an image on the Internet and print it out. Cut two such parts along the contour and glue them together. Then you need to cut out a muzzle from white paper and draw eyes, a nose and a mouth, and also glue it onto the monkey’s head. Now you need to decorate the craft with a cap, collar and shoes - two parts each and glue them to the appropriate places.
All that remains is to give your hands a small surprise - a Christmas tree - cut out two parts from green cardboard and glue them together. Of course, it is not necessary to cut out just a Christmas tree - it can be anything - a gift, New Year's ball. Decorate as you wish and glue to the hands of the finished monkey. Such a wonderful craft will delight those around you. For children's matinee you can make a beautiful mask - all you need to do is take brown paper, cut a strip so that it fits on the child’s head and glue it together - you get a circle. Then prepare two parts for the ears from the same paper and cut out two parts of the same shape, but slightly smaller, and glue them to the ears. To attach the ears to the mask, you need to bend the edge, just a little, spread it with glue and attach it to the product, hold it for a while. You also need to glue the eyes and muzzle to the mask, and draw a mouth on it. And that’s it, the mask is ready, you can use it.
By the way, when decorating your home and getting carried away with crafts, don’t forget to think about it!

As you can see, each craft is quite simple to perform; you don’t need to have any special skills to sew or glue something beautiful and original. Moreover, there are many on the Internet step-by-step master classes with photos, you can find various video instructions. Such an activity will help bring back childhood or entertain a child who does not know what he can do, but quite often you need to carry it to school or kindergarten. interesting crafts to arrange exhibitions.
Of course, often the parents themselves are engaged in their manufacture, but you can still involve the child by entrusting him with small areas of work. The kid will be delighted, he won’t make trouble while you’re busy, and you can say that he will enjoy such an activity. Find interesting ideas and try to bring them to life so that it becomes brighter, the house is beautiful, and time is not wasted.
Say thanks for the article 0

or the monkey's face itself.

Very unusual craft the monkey is obtained from the disk.

Children's hands can make a very touching drawing of a monkey.


Making a paper monkey is quite simple; even a preschooler can make it with his own hands.
What to prepare for work in advance:
- cardboard tube from toilet paper;
- an ice cream stick (you can do without it);
- colored paper and cardboard in dark brown and beige color(you can also use foam board of the same shades);
- toy eyes;
- piece of brown chenille wire;
- scissors;
- pencil;
- black marker;
- glue.
Before you make a monkey with a child, you need to prepare a cardboard toilet paper tube. It needs to be covered with dark brown colored paper or painted with dark brown paints.

Then an oval is glued to the center of the tube light shade- this will be the tummy. If paints are used, an oval is drawn.
Glue an ice cream stick to the inside of the tube so that its edge protrudes.
From dark brown paper (it is better to use foam board or corrugated cardboard) cut out a circle. This will be the monkey's head.
Cut out a muzzle from beige paper and glue it to the head.
Glue the eyes to the face.
We cut out two small semi-ovals from cardboard, glue them to the head along the top edges - we get ears.
Draw a nose and mouth with a black marker.

Glue the head to an ice cream stick. You can also glue it to the tube itself if you don’t have a stick.
We cut out two more larger half-shafts from beige cardboard, bend their straight edge upward and glue it to the monkey’s body, like paws. Draw fingers with a black marker.

We make a small hole on the back of the body and fix a piece of chenille wire in it. It turns out to be a tail.


"I am pleased to offer to your attention original master- a class on making a fruit Monkey - the symbol of 2016. This craft is made with your own hands from fruits. This master class is very detailed and you can easily make this delicious Monkey with your children. Creating such a miracle with your own hands you will get a lot of pleasure. Be sure to make this cool monkey!
New Year's master class: Symbol of 2016 - DIY Fruit Monkey
Happy time is coming New Year's holidays. Recently it has become fashionable to decorate festive table symbol of the coming New Year eastern calendar. And since the coming 2016 will be the year of the Fire (Red) Monkey, we will devote our traditional Master class to creating an original symbol of the New Year. "New Year's Teremok" is pleased to share with you detailed master- a class on making a Fruit Monkey for the New Year's table.

So, we will need a large grapefruit, 3 medium-sized tangerines, prunes, honey, the peel of one tangerine, scissors, toothpicks, a piece of colored paper, New Year's tinsel and PVA glue.

Prepare tangerine peel and scissors. We cut out our Monkey's eyes.

Use toothpicks to attach the tangerine to the grapefruit. We get the face of our Monkey.


Attach the prunes to the tangerine. We got a beautiful nose.

Use honey to glue the eye blanks to the grapefruit.


Useful tips
The symbol of 2016 is the fire monkey, which represents fun, inventiveness, activity and unpredictability.
According to tradition, on New Year's Eve it is customary to give souvenirs associated with the symbol of the year. And of course a good gift For friends and family, this could be a DIY monkey craft.
Here are some ideas and workshops for creating such a wonderful souvenir:
DIY sock monkey toy

You will need:
· 1 pair of socks (striped socks are easier to cut)
· White felt
Eyelets or buttons
· Stuffing material
Cotton pad or filter padding
Cut out eyes from felt.
Turn the sock inside out and smooth it with a warm iron

Draw the pattern on the sock using a dry erase marker or fabric chalk.


We secure the parts with pins. We sew the parts together on a sewing machine.
Cut out the details.


There will be a hole between the monkey's legs through which the sock can be turned inside out.
We turn out the legs, torso, arms, ears, with the exception of the tail.


We fill the parts with stuffing material.
We sew up the hole between the legs with a hidden seam. To hide the thread, thread it side by side and pull it out on the other side, cutting off the excess.


Fill the arms with stuffing material and sew the raw edges together, gathering them so that they are on the inside.

We stuff the ears with filler and sew the raw edges together with a blind stitch. Fold each ear vertically.


Cut a piece of cotton lining that will be three times the width of the tail and the length of the tail when stretched.
Fold the lining three times and sew the end to the end of the tail (from the wrong side).


We turn the tail inside out, pushing the lining inside.


All that remains is to sew all the details.
Symbol of 2016: o monkey from a brush with your own hands
You will need:
Chenille wire (fluffy flexible wire)
· Marker (for giving shape to parts)
· Scissors

- Make the shape of the head. Curl your tail.
- Form the body and insert into place.
- Attach the front and back legs and twist to keep them in place.
- Attach the ears to the head, bend the tail.
- Cut a banana from yellow chenille wire.
Paper monkey: DIY craft

This monkey craft can be made to wrap sweet gift, for example, packaging of sweets.

Cut out a monkey from brown construction paper or kraft paper, cutting the tail in a spiral.
Wrap the tail around a banana (or an extra-long package of candy) and secure the legs with a paper clip or tape.
You can also make other monkey crafts from paper and other available materials.


DIY felt monkey
This felt monkey can be a good craft and a gift as a keychain, interior decoration or car decoration.

We cut out the felt parts according to the template.


We glue the white felt pieces to the ears using glue. We sew the parts of the arms, legs and tail with a buttonhole stitch. We put the filling inside.

We attach the parts of the arms, legs and tail to the body, and sew them to the back of the body.

We attach the white felt piece to the muzzle piece and glue it with glue, and then sew it with a buttonhole stitch.
We sew on a beaded nose and also embroider a mouth. Using blush we create cheeks.

We sew the two parts of the head together with a buttonhole stitch, first inserting the ears and a loop so that the toy can be hung. Do not sew up the area at the bottom, filling the head with stuffing.

Then we sew on the beaded eyes.


We put filler into the body and sew the head to the body.
DIY paper monkey mask

You will need:
· dark brown and light brown colored cardboard
· big toy eyes
· black marker
· clothespins
· scissors
· pencil


Start making the monkey's head. Cut a piece of cardboard in half and glue the two halves together. Secure them with clothespins and leave to dry for 15 minutes. You can also use a stapler instead of glue to hold the two halves together.

Cut out the shape of the monkey's mouth and draw a smile on it using a marker.
Cut out monkey ears from light brown cardstock. Fold the ends of the ears over and glue them together. We fasten them with clothespins.
Glue the monkey's eyes and ears to the head and let dry for 30 minutes. Ready!
DIY monkey made from nylon tights
DIY New Year's craft: pencil with a monkey (video)
This monkey souvenir can be easily made from polymer clay. For the craft you will need polymer clay, acrylic paints and tools for modeling from polymer clay.


