"Spider" made of paper for children 5-7 years old. Master class with step by step photos.
author: Tabunkina Julia, pupil preparatory group MBDOU " Kindergarten No. 315 "Nizhny NovgorodSupervisor: Kutyanova Lyubov Alekseevna, educator, MBDOU "Kindergarten No. 315", Nizhny Novgorod
Spider Tale
In a dark dense forest there lived a family of spiders: dad was a spider, mom was a spider and a little son was a spider. He was not a very obedient son. One morning, after breakfast, he decided to go for a walk. Mom - a spider and dad - a spider told him: "Take a walk, but just don't go far from home. You can get lost and get into trouble. The forest is big, and there are many dangers in it."
"Don't worry, I will play with my friends - spiders near the house, we will not go far into the forest," - promised the Spider.
After playing a little with his friends - the spiders, he wanted to walk to the sunny meadow, which was very close. Usually Spider went to this meadow with his dad and mom, but this time he decided to go there alone, imagining himself old enough for such a trip. It's funny, it's so exciting to walk in the woods alone! The spider completely forgot that he had promised mom and dad not to go far from home.
The Spider is walking along the path, listening to the birds singing, picking berries. And the birds above the path flutter anxiously and seem to say: "Chirr-chirr-don't go!" But Spider does not pay attention to it and continues
go deeper into the forest. I didn't even notice how I wandered into the thicket and got lost. Suddenly he sees: there is a small rickety house in front of him.
“Where does this house come from? Last time, when we walked with mom and dad, I didn’t see any house,” thought Spider. He had not yet realized that he was lost. The spider became very interested in who lives in this house, and he timidly knocked on the door.
And in the house there lived an evil and harmful Cockroach. At that time he was lying on the stove and wondering what to eat, because he was hungry. Hearing a knock on the door, the Cockroach grumbled: "Who's knocking? I didn't invite anyone!" Cockroach had no friends, because he did not know how to be friends! It was a cunning, greedy and evil Cockroach. He opened the door and saw a smiling Spider. The cockroach was very happy that the "dinner" had come to him himself. "Oh, Spiderman, hello, how glad I am to see you!" - Cockroach pretended to be polite.
"And I am still unfamiliar with you, what is your name?" - Asked Spider.
"Oh, of course, now we'll meet you, get on the stove!" - the Cockroach grinned.
The spider, suspecting nothing, settled down comfortably on the stove and began to listen attentively to the Cockroach. He thought that the owner of the house would entertain him with an interesting conversation, make him laugh and surprise.
"Well, let's get acquainted! My name is Cockroach. And I know you. You are a Spider, and you often walk with your mom and dad in the woods. But now I'm terribly hungry and will cook dinner. Will you help me cook soup?" - Asked and ominously flashed a round black eye Cockroach.
"Of course, with pleasure!" Spider answered happily. "And what are we going to cook soup from?"
"We will cook a very tasty soup. From one curious little Spider who came to visit me! Hahaha!" - Cockroach laughed maliciously.
And only then did Spider understand in what scary story he hit. He was very frightened, cried and began to beg Cockroach to let him go to his mom and dad. But Cockroach was heartless and never pitied anyone. He grabbed Spider and put him in a box. The spider cried a little, and then began to ponder how he could be saved. He thought, thought - and suddenly remembered how the spider-mother and the spider-father weave a web. And they taught him too, but he still did not succeed, because he was a little Spider. He remembered how Spider-dad told him that whoever gets into the web will no longer be able to get out of it, it is so sticky and strong ... Sitting in a stuffy and dark box, Spider began to remember what his mom and dad had taught him, and finally decided to try.
What do you think, did he succeed? Of course, those who try will always be successful in business!
And the Cockroach was already ready to have a delicious lunch and opened the box: "Well, come out, friend. I want you to jump into my plate yourself!"
The spider pretended to be very afraid and asked in a trembling voice:
"Excuse me, Uncle Cockroach, but I can't get out of the box because I got caught on something. Please help me to get out."
"Okay, stupid little spider, so be it, I'll help you," roared the Cockroach. If it weren't for his intense hunger, he would never have helped. '' The cockroach peered impatiently into the box, and at that time Spider deftly threw a sticky web over it and began to entangle it. What started here !!!
The cockroach floundered, cursed, trying to free itself, but only became more entangled in the web that held him tightly. Exhausted, he remained lying in the box, and Spidey rushed home as fast as he could. He told Mom and Dad how he outwitted the evil Cockroach. At first, the parents scolded Spidey for going into the forest without permission, but they were very glad that their son was saved, and praised Spidey for learning how to weave a web and not being afraid of the malicious Cockroach.
And Spidey promised to always obey Mom and Dad. Mom - Spider baked a delicious pie with wild berries. The forest animals were invited to visit, everyone drank fragrant tea with a pie and rejoiced at the salvation of the Spider.
Marina Feigina
Description: This master class is designed for children 5-7 years old, educators, teachers additional education, parents who love to be creative with their children.
Purpose of work: Participation in the competition, decoration of the corner.
Tasks:
1. Teach children to do the "Spider" craft out of paper;
2. Teach children to roll paper with a thin stick;
3. Develop in children fine motor skills hands;
4. To cultivate perseverance, accuracy when performing work.
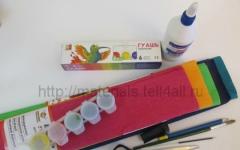
Materials and tools:
1. Colored paper blue, pink, purple, black, yellow;
2. Thin stick;
3. Scissors;
4. Hole punch;
5. Ruler;
6. Markers;
7. Pencil;
8. PVA glue

Progress:
1. From blue paper, cut one strip of 1.5 * 11 cm and 8 strips of 1 * 8 cm.

2. Take 8 strips and use a thin stick to twist them. We get the arcs. Tighten the ends of each arc with a stick in the opposite direction. You get 8 legs.


3. Take the remaining wider strip. Lubricate the tip with glue and join the strip into a ring. The torso is ready.

4. Glue the tabs to the ring from the inside.
5. Cut out a 1.6 cm circle out of pink paper.

6. Make eyes out of purple paper with a hole punch, and make a nose out of black paper with a hole punch. Draw a mouth with a red felt-tip pen. And with a felt-tip pen yellow color decorate the eyes in a circle.

7. Cut 2 thin strips of 3 cm long out of yellow paper. Twist them at one end using a thin stick. Glue the antennae to the muzzle.
In this work, we will tell you how to make a spider out of paper. Paradoxically, many adults and children are afraid of various small insects, including spiders. Even the smallest spider can seem intimidating and dangerous. In order to overcome your fear, first of all, you need to look into his eyes!
To work on a future arthropod you will need:
- two sheets of A4 format;
— small piece cardboard;
- black paint;
- paint brush;
- scissors;
- PVA glue;
- Scotch;
- two black beads;
- thin knitting needle;
- pencil (pen or felt-tip pen);
- a plate from tablets.
Performance:
1. You need to take an A4 sheet and cut it into pieces of 5 cm (4 strips are obtained).

2. Making the tubes for the feet. Wrap the strip tightly on the knitting needle, you get a tube. After complete twisting, a free edge remains, which must be glued so that the structure does not collapse.


3. Glue the tubes onto a small piece of cardboard (connect the cardboard to each other).


4. On sheet A4, draw two parts of the future shell in the shape of a figure eight. The bottom should be slightly smaller than the top. Draw "fasteners" to the smaller detail for the subsequent fastening of the parts together.

5. Cut.

6. Work with the top part. Mark lines in the middle of the head and abdomen, make small cuts along the lines.

7. Glue the free edges of the cut. The head is glued from bottom to top, abdomen - from top to bottom (indicated in the photo). You will get a convex shell.


8. Glue cardboard with tubes to the middle of the bottom part.


9. Connection of parts. Wrap the clasps and glue the bottom to the base, starting from the head.

10. In the area of the abdomen, tuck the tubes - these are the future legs of the spider. Trim the tubes to one size, while cutting off about 5 cm.


11. Bend each tube in the middle so the spider can stand on its legs.

12. Paint the structure black. And now the spider is almost ready to use.

13. The last stage is the assembly of the eyes. It is necessary to cut out two convex parts from the plate from the tablets, cut out circles of paper of exactly the same size, which are glued to the tape. Put one bead in the cut-out plates and glue it with the paper circles with the help of adhesive tape. The bead in the eyes will wiggle depending on the position of the spider. Attach the finished eyes to the head with a piece of tape. That's all! The design is ready!


Such a spider can be used for playing with a child, as an interior in the house, as well as for playing tricks on friends.

I myself came up with two options for how to make a spider (tarantula) out of paper or cardboard.
But in the lesson the question "How to make a spider out of paper?" I asked the students, and offered to look for the answer ourselves, I did not offer my own methods. And the guys invented their spiders, going completely different ways. I will also present their work to you, but I'll start with my own, because I can show them how they were made in stages, and not because they are better.
First, let's recall the structure of the spider: the cephalothorax (yes, like that - two in one) with jaws - chelicerae and perioral leg jaws - pedipalps. On the lower side, eight articulated legs are attached to the cephalothorax. And there is also an abdomen, it is attached to the cephalothorax. From above, the abdomen and cephalothorax look very convex. We remembered the appearance of the spider, now I will tell you how to make a spider out of paper.
Spider made of paper or cardboard - option 1
We will give volume to our spider with the help of darts.

We cut out the part, slightly start the darts and glue them.
It is very important to monitor the symmetry of the resulting figure.

Glue the fangs and jaws in front. Here, the torso is quite convincing.
How will we make our legs?

At first, I came up with four pairs of arched legs to connect in the middle (with glue or masking tape) and attach from below to the spider's cephalothorax.

Good way. If the legs are made of thin cardboard, then the spider will turn out to be very stable and will keep its shape remarkably.

I was proud of such a model, but the lesson continues, there is time. So you can think of something else. For example, other legs.
Spider made of paper - method 2
Gently peeled off the arched ones, cut eight strips - legs.
 Made additional detail- the underside of the cephalothorax and pasted these legs there.

In the part itself, I forgot to provide valves for gluing to the spider's body, so I used narrow strips of masking tape.


Thus, I have ... one and a half spiders.
In the morning, depending on what his plans are for the day, my paper spider can wear either cardboard legs of the same shape, or paper ones that can bend.
This review presents a selection of master classes on how to make a spider. Such spiders will perfectly fit into the decor of the premises for Halloween. By the way, we showed earlier, and we also have a separate one.
How to make a spider with your own hands
1. Made of plush pom-pom and foam ball
WHAT YOU NEED:
- Black plush pompom;
- Foam ball;
- Black acrylic paint;
- Brush;
- Toothpick;
- Toy eyes;
- Chenille black wire;
- Colored pom-poms for legs.
Paint the foam ball black. We pierce it with a toothpick and put it on a plush pompom. We glue the eyes to the head. And in the body we insert the legs created from chenille wire. Legs can be supplemented with colored pompons.

2. Spider with Chupa Chups
WHAT YOU NEED:
- Chupa Chups;
- Chenille wire;
- Scissors;
- Toy eyes;
- Glue gun.
We cut the wire into lengths of 13 cm. We put them on the table, and put Chupa-chups on top. We wrap the lollipop with wire. We bend the tips of the legs. We turn the spider over and glue the eyes.


3. Out of the juice box
WHAT YOU NEED:
- PVA glue;
- Juice box;
- Brush;
- Pieces of newspaper;
- Black chenille wire;
- Toy eyes;
- Black acrylic paint;
- White paint;
- Red paint.
We glue the juice box with newspaper pieces, which we put on PVA glue. We paint the blank black acrylic paint... Use scissors to create holes in the box, and insert fluffy legs into them. Next, paint the torso with red acrylic paint, paint the mouth with white paint, and glue the eyes. For a more terrifying picture, use a clerical knife in the mouth area to create a slot into which we install a miniature doll. As if the monster is eating her.


4. From garbage bags
WHAT YOU NEED TO PREPARE:
- Garbage bags;
- Paper or unnecessary items;
- Expanded polystyrene tubes (for pipe insulation);
- Insulating tape;
- Red acrylic paint;
- Brush.
We stuff garbage bags unnecessary things... You should end up with two parts, one smaller for the head and one larger for the torso. We seal the packages with electrical tape, and glue the same tape together. Cut 8 pieces of the same length from expanded polystyrene insulation. We create creases at the place where the legs are bent, and fix them in this position with electrical tape. Glue the finished legs to the body of the spider. Paint the eyes with red acrylic paint.


5. From balloons
WHAT YOU NEED:
- Two round balloons black color;
- Four long black balls;
- Two small white balls.
We form legs from long balls (see photo below). In total, you will get four parts with paws at the edges, for a total of "8 paws". We twist all the legs in the center together. We inflate two black balloons, so that one is smaller in size. We link them together. We fasten the spider's paws between them. On the head we fix the eyes from white balls using double-sided tape. Pupils can be drawn with a black marker or cut from black self-adhesive tape.

6. Out of the sock
WHAT YOU NEED:
- Black sock;
- The two foam balls are different in size;
- Chenille black wire;
- Two pins with hats.
We put foam balls in the sock. With the extra part of the sock, we re-wrap the ball, tuck the sock. We fix the hairy wire legs between the head and body. Well, two pins with hats will act as eyes.


7. Beaded
WHAT YOU NEED:
- Wire;
- Beads;
- Beads;
- Pliers;
- Hats;
- Bugle.
You can study all the stages of creating a spider from beads in the photo below.


8. From paper
WHAT YOU NEED TO PREPARE:
- Black paper;
- Scissors;
- Glue stick;
- Toy eyes;
- White marker.
We cut out a black circle from paper, glue four strips to it on the sides. If the legs seem long, just trim off the excess paper. We glue the eyes and draw a smile with a marker. Such a spider can be glued to a cocktail stick and you get an excellent topper for cakes or cake.


9. From plasticine
WHAT WILL BE USED:
- Black plasticine;
- White plasticine;
- Plasticine knife;
- Toothpick;
Slightly sharpened sushi stick.
We form two balls from black plasticine, one of which should be smaller. We prick any ball on a toothpick, and attach the second to it. We fix the eyes on the head, and also form the claws. We cover the entire body of the spider with a relief, which is done with a knife. We form the legs and fix them to the spider.

10. Origami spider (video)
11. Spiders do it yourself from hot glue (video)
Here are so many great ideas for the formation of spiders, we have collected for you on this page. All of them are very simple and easy to make with your own hands at home without using any intricate materials. Visit our site for different ideas decor for Halloween.

Here we have such a cute spider!
You can paint it with paints or felt-tip pens, draw a mouth and eyes. You can clearly see all the steps in this video:
And so, we got a spider. And now he needs a cobweb. It is not difficult to make it. You will need black thread, a board, a hammer with nails, and black paint.

Sometimes it is easier for a person to navigate in a visual diagram rather than watching videos and photos. We offer you schemes for assembling a spider. Immediately, we note that the work will consist of four parts, you will have to go through 43 steps. Do not be afraid, everything will work out, the main thing is a positive attitude!
Draw lines from a piece of paper. Fold along the marked lines. Fold back the triangular edge. Raise the bottom edges up. Further steps should be repeated, be guided by the scheme.