The postcard is designed to express your attention and cheer up the person to whom it is intended. Postcards for Victory Day have acquired particular significance, because with their help we express our gratitude, respect and eternal memory to those who defended our Motherland! We invite you to make festive cards for May 9th with your own hands in various techniques handicrafts.
Postcards for May 9 with paper flowers
The easiest way to decorate a postcard, which even small children can handle, is to make an applique from colored paper.
Cards with rainbow carnations

And even a child can do this
Carnations can be easily and simply made from colored paper or napkins.


...and napkins
How to make a carnation incredibly similar to the real one, see the master class ABC TV:

Postcards for May 9 using Quilling technique
Quilling is the art of making paper compositions, voluminous or flat. It involves twisting long pieces of paper into spirals. The resulting spirals or “rolls” can be used to decorate postcards.
It’s worth starting small, studying the basic elements from which the entire composition is formed:


Photo of the main elements of Quilling from the site vscrape.ru.
Having mastered the twisting of the basic elements, you can assemble simple but original postcards from them:

Beautiful inscription made of small elements

And here is a version with an apple tree branch
Before starting work, you need to decide what decoration elements you have available. Perhaps you have old, unused May 9 greeting cards lying around, or you have the opportunity to print out elements to decorate the card.

Strict postcard...

…Darling…

...and retro
A red star can be cut out of cardboard or felt, or a three-dimensional star can be glued together from paper and combined with other elements:

Star with leaves...

...roses...

...Ribbon of St. George...

...and other decor
Even a small wooden airplane clothespin can be used to decorate a card. Everything is very simple and original!

St. George's ribbon made of any materials (fabric, paper) in combination with clippings, floral elements, aged paper will always add brightness and symbolism to the author's postcard:


You can also use a ribbon with the colors of the Russian flag:

You can “scrape” either using glue or sewing elements of your story onto a postcard (on sewing machine or manually):


Battle maps, military documents such as the “Act of Unconditional Surrender” and others will all draw children's attention to our history when creating a holiday card:

He clearly shows how and from what materials to make such a postcard in his master class. MASTER FOREVER:
You can watch how to artificially age military documents or maps in the master class DIY Creative Ideas HANDMADE CRAFTS:
Decorative elements can be anything that reminds us of the Great Patriotic War and Victory Day: camouflage fabric, stars for shoulder straps, small cartridge cases, patriotic poems, old military letters or artificially aged notes.
In his master class, Podarki.ru shows how to make a scrap card with a gift using camouflage fabric:


Or photos of war heroes, perhaps your close relatives, grandparents...

Don’t forget that May 9 is a holiday, so your postcard can be decorated with joyful moments of Victory Day

Drawn postcards for May 9
If you are good with a brush and paints, as well as colored pencils, you can draw bright postcard yourself. For this you can use colored pencils, watercolors or gouache, etc.

First you need to make a sketch using a soft pencil. Next, draw out the main details of the drawing more clearly and begin coloring.

Children's drawing...

...no worse...

...the creations of the masters
Postcards that can be sent by email
Nowadays, you won’t surprise anyone with electronic congratulations. If you want to congratulate someone by email or via social networks, then these postcards will perfectly cope with the task:

Happy Victory Day!


Master class on quilling.
Target: to contribute to the formation of teachers’ ideas about new arts and crafts - quilling.
Tasks:
Introduce a new decorative and applied art form - quilling;
Learn how to twist strips into spirals and modify their shape;
Initiate interest in this technique;
Create a comfortable communication environment;
Develop artistic taste.
Event plan:
1. Introduction to history quilling.
2. Acquaintance with tools and techniques.
3. Practical part.
Story quilling
On English this handicraft is called "quilling"- from the word "quill" or "bird feather". Unlike origami, which originated in Japan, the art of paper rolling originated in Europe in the late 14th and early 15th centuries. In medieval Europe, nuns created elegant medallions by twisting paper with gilded edges onto the tip of a bird's feather. When viewed closely, these miniature paper masterpieces created the complete illusion that they were made of thin gold strips. Unfortunately, paper is a short-lived material and little has survived from medieval masterpieces. However, this ancient technique has survived to this day and is very popular in many countries around the world. Paper rolling quickly spread in Europe, but because paper, especially colored and high-quality paper, was a very expensive material, paper plastic art became an art for ladies from wealthy sections of society.
Nowadays, paper rolling is widely known and popular as a hobby in countries Western Europe, especially in England and Germany. But this art became most widespread when it "moved" to the East. The richest traditions of the finest graphics and plastic arts, papermaking and working with it have given the art of paper sculpture a new life.
In England, Princess Elizabeth was seriously interested in art quilling, and many of her creations are kept in the Victoria and Albert Museum in London.
It should be noted that the Korean school quilling(they call it paper rolling) somewhat different from the European one. European works, as a rule, consist of a small number of details, they are laconic, reminiscent of mosaics, decorate cards and frames. Europe is always in a hurry, so it loves fast technology. Eastern masters create works that resemble masterpieces of jewelry art. The finest voluminous lace is woven from hundreds of small details. Masters Eastern schools prefer to perform twisting using a thin awl. It can be replaced make from a thick needle and cork. Also, children are good at winding on a toothpick.
Tools for quilling
To master the paper rolling technique, you do not need any special tool. At the initial stage, a visit to a regular department store is quite enough. Here short list essentials to get started training:
A device for twisting paper tapes. Tool for quilling It is quite possible to make it yourself. To do this, take a toothpick, cut it on both sides so that there are no sharp ends, and then use a sharp knife to make a longitudinal cut 1 cm long on one side.
This can be a wooden stick 10 cm long and a tapestry needle with a large eye. Insert the point of the needle into the end of the stick and "take a bite" Use pliers to cut the tip of the ear so that there is a gap.
Paper for quilling. The paper must be colored on both sides. You can buy cut paper at a specialty store or cut it yourself. The width of the strips should not usually exceed 3-7 mm. Standard strips are considered to be 27 cm long and 3 mm wide. If it is not possible to purchase specialized paper, then it can be replaced with white printer paper or colored origami paper. White makes excellent workpieces for snowflakes and other winter patterns. The colored one must be selected according to density and see if it is completely painted, that is, if there is a white stripe on the cut. You can cut with scissors along the markings or with a stationery knife along a metal ruler.
To work with corrugated cardboard, the same paper rolling technique is used. As a result of the fact that the strip of corrugated cardboard is thicker and more elastic, the crafts are large and voluminous, and less time is spent on their production. The most beautiful works are obtained from colored corrugated cardboard, painted not only on both sides, but also on the inside, that is, in bulk.
Tweezers with pointed ends will be needed for working with small parts
Cardboard (to create the main background of the picture).
Technique quilling
At first glance, the paper rolling technique is simple. Strip of paper for quilling twists into a tight spiral. It will be convenient to start winding by twisting the edge of the paper tape to quilling onto the tip of the twisting tool. Having formed the core of the spiral, it is advisable to continue working without using a tool for quilling. This way you can feel with your fingertips whether the roll is being formed uniformly and adjust the effort as you go. The result should be a dense spiral less than a centimeter in diameter. It will be the basis for the further diversity of all forms. After which the paper spiral unfolds until the right size, and then the necessary quilling figure.
Technique for manufacturing basic elements.
Tight spiral. Twist the ribbon and glue the tip without removing the spiral from the needle so that the ribbon does not unwind.
Drop. Make a loose spiral and squeeze it on one side so that it takes on the shape of a drop.
Free spiral. Twist the ribbon, remove the spiral from the needle and let it unwind before gluing the end.
Curved drop. Make a drop and bend its corner.
Eye. Make a loose spiral and press opposite sides together to form an eye shape.
Rhombus. Make an eye and pinch both corners to give the piece a diamond shape.
Sheet. Make a loose spiral, compress it into the shape of an eye and bend the corners in different directions.
Triangle. Make a loose spiral and squeeze it in three places to form a triangle.
Arrow. Make a loose spiral and compress it into a triangle. Press the two corners together to create an arrow.
Semicircle. Make a loose spiral and squeeze two corners so that one side of the workpiece is flat and the other is rounded.
Crescent. Make a loose spiral and squeeze two corners and bend the workpiece into a crescent shape.
Cone. Twist a tight spiral into a cone, glue the tip of the tape, then remove the workpiece from the needle.
S-shaped elements. Twist one end of the strip, then twist the other in the opposite direction.
C-shaped elements. Twist both ends of the spiral in the same direction.
Branches. Fold a strip of paper to form a V with branches different lengths. Use an awl to twist one end of the folded paper strip. Twist the other end of the paper strip in the same direction.
Weaving technique
Take the strip with two fingers.
Pull the end of the strip with pressure with two fingers of your other hand, running your nail along it so that the end bends slightly. This is necessary to make the tip easier to wrap around an awl or toothpick.
Twist several turns of paper tightly around the awl.
When the diameter of the roller becomes 3-4 mm, it can already be removed from the awl and further turned by hand.
Twist the dense disk with both hands, always intercepting it with your fingers so that paper tape didn't bloom.
Roll up the entire strip of paper.
When the paper is all folded, relax your fingers and let the paper spiral unravel a little.
Glue the end of the strip with a PVA strip.
If you squeeze the workpiece with two fingers, you get the workpiece "drop".
The tip of the paper is grabbed by a drop of glue. Rolls can be given a variety of shapes by performing compressions and indentations.
There are a total of 20 basic elements for quilling, but the principle remains the same same: fold, pinch - using your imagination you can always come up with new elements yourself quilling.
Classes on quilling you can start with the oldest preschool age, gradually increasing the level of complexity of the work.
Learning the Basic Elements quilling techniques must be carried out according to principle: from simple to complex, later, by combining different elements, children will create new images that they can realize with the help of paper strips.
The best option would be to lay out the pattern, after which each of the elements quilling needs to be glued in place.
Meaning quilling for development baby:
Will help in the development of aesthetic taste and artistic imagination.
Develops design thinking.
Develops tactile sensations and motor skills.
Helps in learning colors and shapes.
It will develop perseverance, accuracy, and imagination in the child.
The child learns in practice the concept of the word "technology".
Practical part.
« Postcard to the 70th anniversary of the Great Victory"
To make such postcards using quilling technique will be needed:
A 5 format cardboard (white);
Set of strips for quilling 5 mm wide, length 40 cm;
PVA glue (with a convenient dispenser spout);
Scissors;
Ruler;
Toothpick for rolling paper strips.
Make a small one in a toothpick (length 5 - 7 mm) longitudinal cut. Insert the tip of a paper strip into it (in this case orange). Roll the strip evenly into a tight roll. Then loosen the resulting spiral a little and glue the free end.
In this way, twist 5 equal-sized circles of orange color, 16 - red, 7 - green.
To make carnation petals, the spirals must be pressed down on one side and bent on the other, pointing inward.
In order for the spirals to take the shape of a leaf, they must be squeezed simultaneously from both sides.
The pointed star is formed by five elements arranged in the shape of an irregular rhombus.
Everything is ready to make the applique. For the inexperienced beginner masters You can apply barely noticeable thin lines to outline the composition. Having determined the location of the carnation buds, first glue the base of the flower, and then attach the petals to it on top. The glue should be applied in a small layer so that it does not spread.
Also glue two red flowers. Let it dry a little.
Now, from the bases of the carnations, shoot three stems diagonally, connected at the bottom. Also fix with small drops of glue.
Then attach leaves to the stems in random order. Let it dry a little.
In the lower left corner postcards glue a star, neatly and evenly connecting the component elements together.
All! Our the postcard is ready!
I hope that the knowledge you acquired today has enriched you and will help you in solving creative problems not only in art lessons, but also in life.
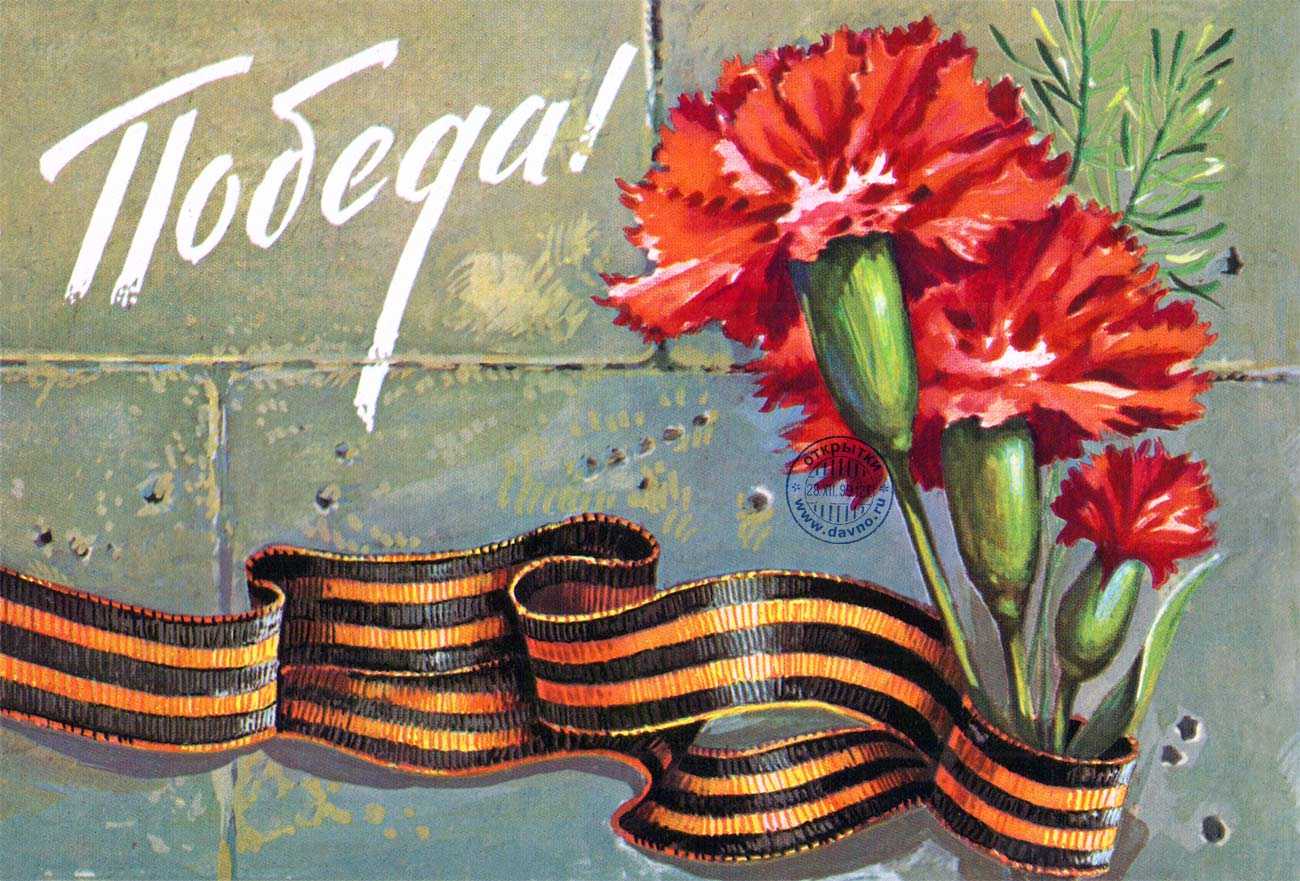
May 9 is not just a holiday, it is one of the great days, revered not only in Russia, but also in many other countries of the world that suffered from the invaders. Victory Day is a holiday important for every family and every citizen. It is difficult to find a person who was not in any way affected by the terrible war that claimed the lives of millions of soldiers and civilians. This date will never be erased from history, it will remain forever in the calendar, and will always remind of those terrible events and the great defeat of the fascist troops, which stopped the hell.
The first Victory Day in history was celebrated in 1945. Exactly at 6 a.m., the Decree of the Presidium of the Supreme Soviet of the USSR designating May 9 as Victory Day and assigning it the status of a day off was solemnly read out over all loudspeakers in the country. That evening, the Victory Salute was given in Moscow - a grandiose spectacle at that time - thousands of anti-aircraft guns fired 30 victorious salvos. On the day the war ended, the city streets were filled with jubilant people. They had fun, sang songs, hugged each other, kissed and cried with happiness and pain for those who did not live to see this long-awaited event.
Quilling (English quilling - from the word quill “bird feather”) is the art of making flat or three-dimensional compositions from long and narrow strips of paper twisted into spirals. The finished spirals are given different shapes and thus the elements of rolling paper, also called modules, are obtained. They are already the “building” material in the creation of works - paintings, postcards, albums, photo frames, various figurines, watches, jewelry, etc.
A little about the history of quilling... The art of paper rolling arose at the end of the 14th - beginning of the 15th centuries in Mediterranean Europe. It is believed that quilling was invented by monks. Trimming the gilded edges of the books, they wound them onto the tips of bird feathers, hence the name (quill - translated from English as “bird feather”), which created an imitation of a golden miniature (especially often used in poor churches). In Russia, this art became popular only at the end of the 20th century, and quilling is also very popular in Germany and England.
What tools are needed for quilling? Tools for quilling are the most ordinary objects at first glance: a quilling tool, scissors, a ruler, a pencil, PVA glue and, of course, paper. The paper consists of long strips from 1.5 to 10 millimeters wide in a variety of colors.
Basic quilling technique All the secrets and techniques for obtaining a wide variety of shapes used in quilling, from fancy to strictly geometric, almost always start with simple circular shapes. This dense circle twisted from a strip of paper is called a roll, and the basic shapes of the quilling elements are made from the rolls. Here are some of the most common ones encountered when working with this technique. Basic Shapes: Primordial Roll
Quilling - beauty made from paper. Quilling is a great way to make a card, decorate a gift, or spend time doing something that gives your head a rest. But its special charm is that beautiful work comes out the first time. It is enough, following the master class step by step, to try to make a postcard with paper flowers- and in an hour you will not be ashamed to attach it to the gift.
Postcard with carnation Others traditional flowers For May 9, red carnations are given, they are given to veterans and placed at the monuments to fallen soldiers. We will tell you how to make a card with the main decoration in the form of carnations. It will require: red and green paper strips for quilling; cardboard; glue; toothpicks; St. George's ribbon; scissors.
Let's prepare the base of the postcard. Fold a sheet of white cardboard neatly in half. To the bottom front side we'll glue the postcards St. George's ribbon or it can be drawn with paints or felt-tip pens. We make blanks of carnation petals from red paper. To do this, twist the strips into loose spirals and fix the tip with glue. Use your fingers to form a petal. Each carnation will require seven of these petals. We glue three blanks together, leaving three petals separately. We make six leaf-shaped elements from green paper. In order to make cuttings, we wrap the green strip into a tight spiral, glue the tip, and gently squeeze out the middle. We make three such elements, glue strips to them, and we get stems. We collect the elements into a flower, as in the photo. We glue the flowers to the card and add a congratulatory inscription.
Primary school work
High School Works
Conclusion: the quilling technique allows a child to develop not only hand motor skills, thinking, imagination, but also to create magic crafts with your own hands, requiring diligence, patience and imagination.
Thank you for your attention!
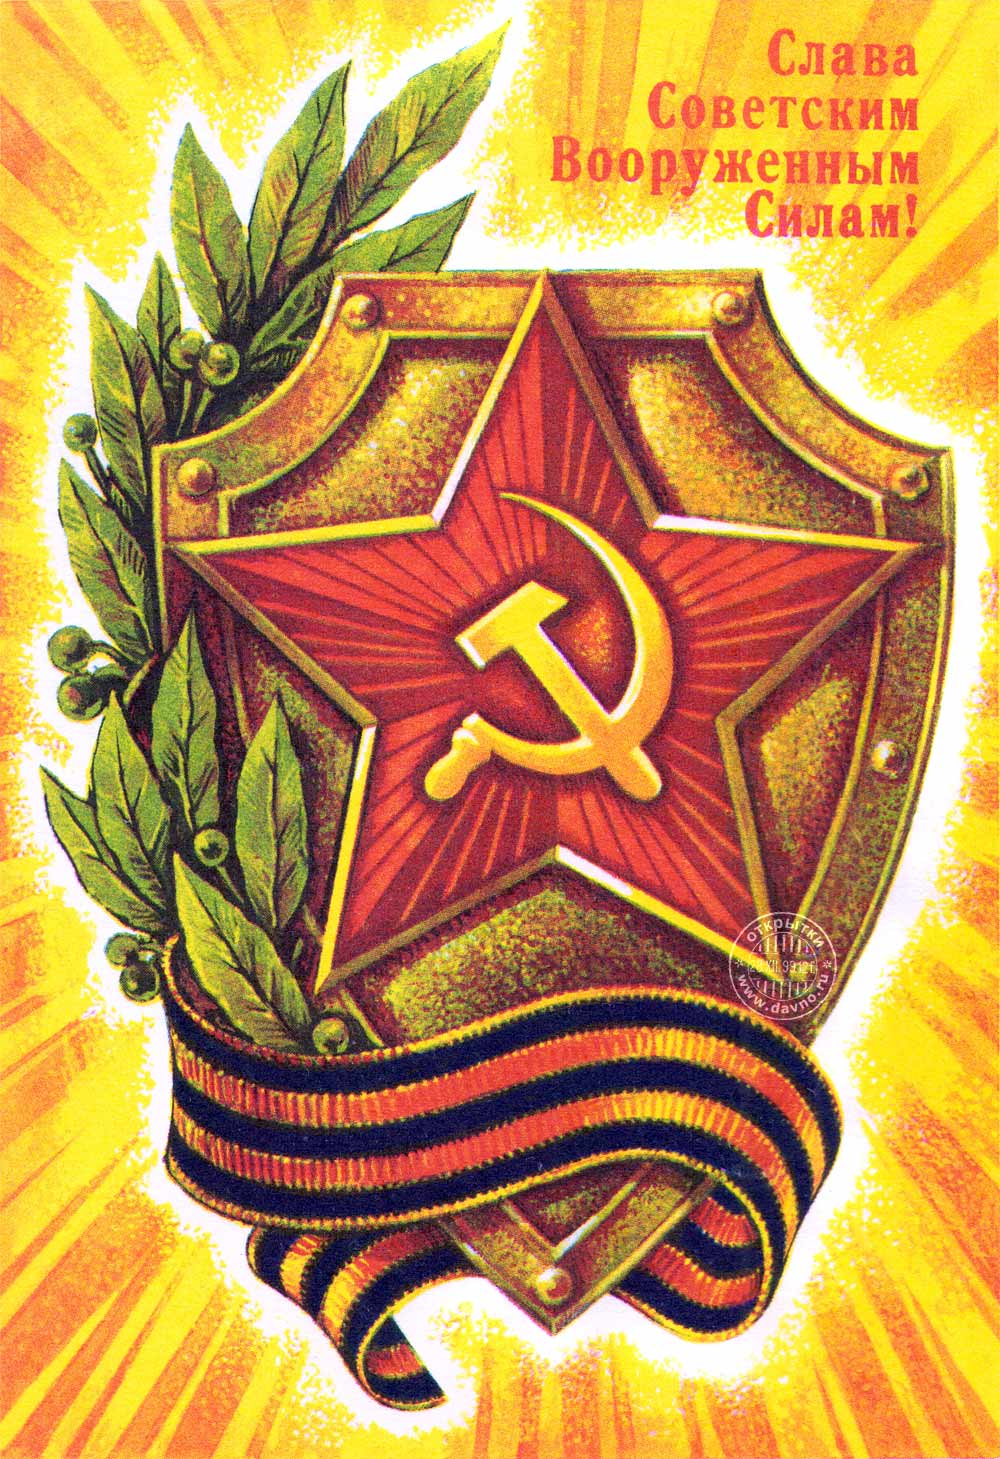
The Defender of the Fatherland Day holiday is one of the most famous in our country and for good reason. After all, many people suffered, died and fought for victory over the fascist invaders during the period Great Patriotic War . You can pay tribute to the past in different ways, but the most the best solution in this case it will become art. It is this that makes it possible for the greatest and most powerful nations to live and prosper. Therefore, quilling postcards for May 9 is your contribution to the creativity fund of the entire country. Making such a postcard, as it turns out, is not at all difficult. Even an ordinary amateur can cope with such work. In this application we will try to convey Victory Day symbol- scarlet carnations with a red star! How is a Postcard with a carnation for May 9th created in quilling style?
So, we will need the following materials:
- Cardboard A5 (Blue, yellow)
- Strips for working with quilling (width - 5 mm, length - 40 centimeters)
- PVA glue with dispenser
- Quilling board or ruler with diameter
- Ordinary scissors
- Curly scissors
- Toothpick or quilling device
- Ruler
Warp
Perhaps this is enough to arrange it yourself beautiful postcard. First of all, you need to prepare the background of the postcard, on which our flower will be located. To do this, take curly scissors and trim the edges on yellow A5 cardboard. Next, we prepare the interior background using blue A5 cardboard. To do this, we make the outline of a rectangle and cut out the relief edges using curly scissors. Then, using glue, we fasten the base yellow with background blue, rotate the second one slightly (angle 75 degrees).
Modules

Next, we work on the composition and twist it necessary elements. It's very easy to do. You need to take a quilling tool or pick up a toothpick, cut off the sharp edge and make an incision in the middle of the trunk by 5-7 mm inside. Next, insert the end of one of the pieces of paper and roll it into a tight roll. We get a tight roll. Next, we unravel the spiral, and then, at the free end, we drip glue and glue the composition together. In this way you can do large number different circles. In our case, there will be 16 red, 5 orange, 7 green, which will be needed for work. If you want to make the circles the same diameter, use a ruler with notches or a quilling board.
Petals for carnations

Next, we prepare the petals for the future carnation. In this case, the spirals must be pressed down on one side and bent deeper on the other. Thus, we form special sheets. Making petals is even easier. It is enough to make exactly the same blanks, squeeze them on both sides once and you will get the shape "eyes".
Other decorations

In order to make a star, you need to make an element from quilling module "Rhombus". Then, 5 such modules are made, which are folded into one five-pointed star. Afterwards, we begin to work with the application. For an inexperienced craftsman, it is best to draw the outline of the future composition. Next, take a clove bud and 5 petals. The bud is down, the petals are up accordingly. Our postcard will feature 3 carnation flowers. One is orange, the other is red. They are secured with glue, and then, from the edge of the card, they are connected using quilling lines. Then, we attach our sheets to the lines, in any order, as desired. After this, we place our star on the left edge and secure it with glue, and on the right side we make number 9. It can also be formed using quilling paper.
Now our preparation is ready!
Schoolchildren's crafts contribute to development creativity, attentiveness and accuracy. The work may be thematic or educational new technology arts and crafts. We suggest doing voluminous crafts for Victory Day, which will remind children of the events of 1941-1945. In this collection of crafts we propose to make beautiful panel using the quilling technique, a three-dimensional craft for Victory Day from a box of chocolates and a postcard - fireworks for May 9th.
Panels are the simplest DIY type. From inexpensive materials can be done original gift veterans, to reflect the mood of victory that many people had in those days.
Materials:
- colored cardboard;
- thick cardboard for the frame;
- ruler;
- pencil;
- PVA;
- scissors;
- glue gun;
- quilling paper;
- corrugated paper.
Master class on crafts for May 9th postcards - quilling
1. If you don't have quilling paper, cut 0.5 cm strips of double-sided colored paper. You will make blanks using the quilling technique in the shape of an arrow.

2. For one carnation you will need 6 arrow blanks. First glue 3 parts together. And then glue this part onto the same one, you will get a three-dimensional carnation.
3. Start forming leaves in the shape of eyes. For this you will need green quilling paper. You can make them the same or different sizes up to 10 pieces for the entire card.

4. Now you need to make the sepals. Glue two green quilling strips together and then roll them into a roll. For strength, coat it with PVA glue.
5. Glue two more green strips, but not completely. This will be the stem of the clove. It needs to be glued to the sepals.

6. Connect the stem with the flower made in step 2.
7. Start decorating the base for the panel. You need to cut it out of thick cardboard suitable size rectangle. Wrap it in corrugated paper.

8. Hot glue the flowers, leaves and St. George's ribbon.
9. Separately, make from gold cardboard volumetric star and glue it onto the card.

10. Additionally, you can cut out laurel leaves or some kind of inscription from cardboard.
Quilling panel for May 9 ready.

Many kindergartens and schools will hold separate classes dedicated to the 70th anniversary of the victory. Volume craft children younger and older will be able to make fireworks preparatory group in kindergartens.
Materials:
- corrugated paper;
— colored paper;
- colored cardboard;
- scissors;
- PVA glue;
- ruler;
- pencil;
- stapler.

Master class with photo crafts for May 9
1. Using a stencil, draw circles of different diameters on corrugated paper. It is best to fold the paper several times so that you immediately get 5-6 circles of the same color and the same size.

3. Raise the top circles to create voluminous firework flowers.

4. Cut out rectangles from colored paper - at home.

6. Now stick on some burning windows using yellow construction paper.

Children can also make three-dimensional models for Victory Day. We invite you to watch a master class of a monument to fallen soldiers.

Materials:
- cardboard;
- glue;
- pencil;
- ruler;
- corrugated paper;
- pen rod;
- a box of chocolates.
1. Draw squares measuring 1.5x1.5 cm on white cardboard to create a field for tiles. The tile itself must be cut out of gold or gray cardboard 1x1 cm.
2. Let the child glue the tiles onto the white field in squares.

3. Made from red and corrugated paper green cut out the squares and wind them onto the rod using the trimming technique. Lubricate each twisted square with glue and glue it to form flower beds.

4. Make flowers from red paper and grass from green. Glue them to our field from step 2.
6. The monument should be made of cardboard. To do this, make volumetric parallelograms of different heights and a pedestal.

8. Make a small star out of cardboard and glue it corrugated paper, simulating an eternal flame.
In this way you can make a model of the monument to the heroes that exists in your city. The child will be interested in recreating a city landmark with his own hands.
Crafts for Victory Day will help children become more familiar with the events taking place in World War II, and will also serve as a good visual aid for training.


