Salt dough dolls - original gift with your own hands for your mother, sister, lover and friends!
It seems to me that every woman at heart is a little girl who loves to play with dolls.
Only someone has forgotten about it, someone forbids themselves to think about it (because they are an adult), and someone still collects dolls and dolls or makes them with their own hands.
Therefore, if you want to give your mother, sister, wife, lover or friend an original gift for March 8, you can bake and decorate (or dress in beautiful dresses) all sorts of different dolls.
The gift will be unexpected and pleasant, because you will make it with your own hands and put your warmth and love into it.
Who can make dolls from salt dough
I think it's so simple and original surprise Even a child can cook by March 8th. Well, until the age of 10-12, you probably need to do this with adults, because you will have to use the oven.
And one more thing - not only a girl or a woman, but also a boy or a man can make and decorate dolls from salt dough. You know how to sculpt from plasticine, right? It's no more difficult.
What else can you make dolls from?
Using the same technology and templates, you can bake gingerbread dolls and decorate them with or or marzipan.
Examples of how to make figures from gingerbread dough, a dough recipe, and painting of finished gingerbread cookies can be found in the recipes:
(painted).
Technology for making dolls from salt dough
What you need to make salt dough crafts
for 7-8 dolls (2 baking sheets)
- Flour – 2 cups;
- Salt (finely ground) – 1 cup;
- Water - a little less than a glass (add 3/4 cup and top up as needed). It took me almost 1 glass;
That is, the proportions for salt dough are: 2:1 (flour:salt), you can take 1:1, you can put even less salt. Greek housewives generally take 2 tablespoons of salt for 1 glass of flour. But I haven't tried that yet.
For ease of working with salt dough
Preferable, but not required
- Baking paper (parchment) – 2 sheets (one sheet per baking sheet);
- Stacks for plasticine (clean, washed) are plastic sticks. You can take a simple knife;
- Rolling pin or clean glass bottle (roll out dough);
For doll dresses and face painting
- Multi-colored napkins (preferably multi-layered, they don’t come apart, they’re stronger) or rags thin fabric(calico, for example). You can make dresses from pieces of felt, colored paper, lace and anything else you can get your hands on;
- PVA glue;
- Thin markers (you can use thin markers for writing on CDs, glass or other smooth surfaces);
- Gouache or acrylic paint.
At the same time, if you are completely painting the doll, then paint (gouache + PVA glue or acrylic paints). The remaining materials are only needed if you are making clothes for a doll using appliqué technology.
How to make a doll from salt dough
Prepare salt dough
Mix flour and salt. Then add more than half a glass of water and knead the dough.
Gradually add water to the dough until the dough stops crumbling and becomes smooth and pliable. It should be comfortable to sculpt with, you will feel for yourself when it becomes suitable for sculpting.

At first the dough is crumbly and breaks down into crumbs. As water is added it becomes like plasticine or strong clay.
Make figures from salt dough
- Break off a piece of dough and roll it out with a rolling pin. The thickness of the dough can be from 0.8 cm to 1 cm. I didn’t sprinkle anything on the table or rolling pin; this dough doesn’t stick to the board.
- Using a stack or a knife, cut out doll figures from the dough. Iron the contours of the doll (external lines) with your finger to remove all irregularities.

The process of cutting out figures from dough
I made ladies in dresses, peasant women in sundresses and headscarves, and nesting dolls. And from the leftover dough I made a rose with leaves. The fewer small parts, the less likely it is that something will fall off or break.
Therefore, the doll’s neck should not be long and thin (like the waist or long arms, toys extending from the body), it is better to attach hair and strengthen the neck with it. Otherwise the doll will come out without a head (it will fall off while you are working with the figurine)).
The ideal figure of a woman is a doll, in this sense, it is a nesting doll. There are few details, the lines are smooth and rounded.

Doll in a sundress and headscarf (peasant woman)

Doll in a dress

Blank for matryoshka

Dough lady doll

Doll in dress

Doll in a skirt with an apron and vest
- Transfer the figures to a baking tray lined with baking paper. I lifted the dolls with a plastic plate (separated them from the table) and, supporting them with my hand, transferred them to a baking sheet. You can use a cake spatula or a simple thin wooden spatula.

The dolls lie on baking paper, which is convenient. They do not stick to the baking sheet and do not burn

Second baking sheet with dolls and rosette
Bake salt dough dolls
- Bake the dolls in the oven at a temperature of 160-170 degrees C until the dough dries. Readiness can be determined by touch - touch the dough with your finger. Just be careful, it might get hot. I kept the first baking sheet in the oven for about 20 minutes, the second longer.
Decorate the dolls (dress and draw a face)
How to make clothes for a doll from napkins or pieces of fabric
- An underskirt will add fullness to the doll's main skirt or dress. If you are making the petticoat, glue it on first. And then glue the top one. I only coated the edges of the parts with glue so that the skirts would not stick to the toy, but would be fluffy.

I made this lace skirt from a paper napkin for pastry products.

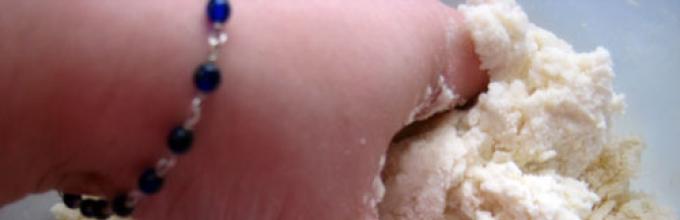
This doll's clothes are made of napkins, there is a sequin on the belt, and the bracelet, beads, face and hair are drawn with a felt-tip pen (regular, but thin)
- Places of connections (joints) different napkins(at the waist, for example), you can cover it with a strip of napkin or colored paper (there will be a belt).
- It is convenient to draw various small details (eyes, lips, jewelry) with a thin felt-tip pen. You can also use sequins, rain (for the Christmas tree), beads, bugles, beautiful buttons, coins and any interesting little things that come to hand. They are easily glued with PVA glue.
- A scarf for a flat doll is made like this: you need a rectangle with an oval cutout (for the face) and slits (so that the scarf does not cover the entire chest, but you don’t have to do it, it doesn’t matter). Then the excess edges are folded behind the back of the doll and glued there.

A bare-haired doll and a blank for a scarf

Now you need to tuck the ends and glue them (secure) at the back

Salt dough toy doll
Making clothes from napkins is the easiest and fastest way. This method is especially good if the doll is uneven. But you can also draw clothes on the doll.
How to paint a doll with paints
If you have acrylic paint, just paint what you want. If it’s gouache, so that the toy doesn’t get dirty later, you need to mix gouache and PVA glue (1:1 ratio).
Very small and delicate details can also be drawn with a felt-tip pen.
I painted a matryoshka doll.

Matryoshka is the most simple doll, it is convenient to cut it out of dough.
I will make the rest of the dolls later. Or I’ll give the blanks to girls I know so they can play with the dolls.
From the leftover dough I made a rose with leaves - it's very simple. Even a preschooler can do it.
How to make a doll neat
When you have glued all the clothes to the doll, you can cut out the silhouette of this doll from plain paper and seal the back of the doll with this paper. This way you will hide all the tails.
How to make a rose from dough
Roll out the dough (thinly). Cut out circles with a small glass. Lay out these circles so that the edge of one touches the other. (you will get a stripe). You can see more details (how to do it) in the story about it, there is even a video there.

This way you can make roses from dough, mastic, vegetables or fruits. Circles or flowers are laid out in one line, layering. You need 5-7 circles. And then they roll it into a tube.
And then roll everything up into a roll. This will make a rose. The petals can be slightly bent. And cut the leaves from the remaining dough with a knife.
Master class “Gift for Mom” using custard modeling technique salt dough.
Author: Nazarova Tatyana Nikolaevna teacher additional education MBU DO DDiU MillerovoThe master class is intended for additional education teachers, technology teachers, and for those who want to make gifts with their own hands.
Purpose: gift for March 8th.
Target: making a decorative cutting board using the modeling technique from choux salted dough.
Tasks:
Educational: master the technique of making a decorative cutting board using the technique of modeling from choux salted dough;
Educational: develop accuracy, artistic thinking, and the ability to arrange elements from the dough on the board;
Educational: instill a love for modeling;
Required material:

Cutting board, stack, marzipan cutter “leaf”, “flower”, “cloud”, “circle” diameter 7 cm, garlic press, rolling pin, pencil, brush, PVA glue, felt-tip pen cap.
For choux pastry: 1 cup premium flour, 0.5 cup Extra salt, 0.5 tablespoon citric acid, 0.5 tablespoon vegetable oil, 1 cup water.
Recipe for salted choux pastry.
Combine salt and flour in a bowl, stir until smooth. Pour 1 cup of water into a small saucepan. Add vegetable oil and citric acid to the water. Put it on fire. As soon as large bubbles begin to appear, pour the water in a small stream into the bowl of flour. The dough will brew and roll into a large lump. When the dough cools down a little, start kneading it for 5-7 minutes. You should have an elastic lump. Let the dough cool slightly and place it in a plastic bag. You can start working.
Work progress:

While working, glue all the elements of the choux pastry together with PVA glue.
Form several thin flagella. Apply glue to the board and glue the tree trunk, then the branches. Stack the veins along the tree trunk.

Place a small lump of dough into the garlic press and squeeze out thin flagella. Cut off several flagella in a stack and glue a nest to the top branch. Roll two balls and glue two eggs into the nest.

Glue a crow next to the nest. Form three leaves different sizes. The largest leaf is the crow's belly. The middle leaf is the head. The smallest wing. Glue the tail and eyes.

Glue the kitten to the bottom branch. The cat holds onto a branch with its front paws. Form a small ball and glue the head. The head lies on a branch. Glue eyes, antennae, ears. Glue the front legs next to the head. Since the kitten is hanging on a branch, it is completely invisible. A belly peeks out from under a branch. Glue a lump that looks like a voluminous drop. Make the hind legs a little larger.

Let's start sculpting the mother. Form a small cake oval shape. Make cuts along the sides. You'll get hands. Cut off the bottom edge of the oval, forming the length of the dress. Glue the feet and sandals. Place a small lump of dough into the garlic press and squeeze out short flagella. Glue the hair. Use a simple pencil to push in the eyes. Glue on a small nose.

Roll out a lump of dough with a rolling pin. Use a die cutter to cut out a circle. Cut the circle in half with the stack. Using a felt-tip pen cap, press the patterned bottom of the umbrella. Push the knitting needles in a stack. Glue the handle to the umbrella. Mom is holding an umbrella in her hand.

We sculpt the girl in the same way as the mother. Only the oval should be smaller.

Glue a small kitten near the girl. The kitten's belly looks like a leaf. Small tail. Make a head the same as that of a kitten hanging on a branch.

Glue a sun on the top of the board. Glue the sun rays only at the top. Glue the sun's nose. Clouds will cover the sun up to its nose.

Roll out the dough thinly. Use a die cutter to cut out two clouds. Glue the clouds so that the clouds cover half the sun. Up to the nose. Using a pen without paste, press out the sun's eyes. Form small flagella and glue the handles. The sun holds onto the clouds with his hands.

Form several small droplets and glue the rain.

Roll out a small ball of dough. Cut out the grass and glue it at the very bottom of the board. Make cuts along the grass with a stack.

Use a die cutter to cut out a few flowers and glue them onto the grass.

Roll out the dough thinly. Use a die cutter to cut out a few leaves and glue them to the tree. Glue a small caterpillar onto the tree trunk. The main work has been done. Leave the decorative board to air dry for 4-5 days and only then you can paint it with paints. After the dough and paint have completely dried, coat the board with a glossy varnish.
The gift for mom is ready.
You can make a huge number of crafts from salt dough, for example: flowers, animals, various figures, inscriptions, numbers, toys, paintings and whatever you want! Modeling from salt dough is called bioceramics. The advantage of salt dough is that it is convenient to work with, this material is absolutely harmless and crafts made from it will delight you for several years. In this article we will look at how to make crafts from salt dough with your own hands.
You will need: a glass of wheat flour, a glass of extra salt, half a glass of cold water, a bowl.
Recipe
The finished salted dough should not stick to your hands or crumble. It should be cool and easy to sculpt. I recommend watching the video master class!
There are two most common ways to dry salt dough. The first method: the finished craft will dry on its own. The main thing is that it should not be exposed to direct sunlight, otherwise it will crack. The craft can be placed on a flat surface and wait a few days. Second method: dry the finished craft in the oven for 3 to 6 hours (depending on the size of the craft). Drying occurs in batches with breaks. One approach is 1-2 hours. For quick drying in one go, set the oven to 75-100 degrees, and then the craft will dry in an hour. At a temperature of 120 degrees, the craft will dry in 30 minutes, but it is better to dry it naturally.
There are two most common ways to color salt dough. First way: ready-made craft after drying, paint with acrylic paints or gouache using a brush. Second way: food coloring diluted in water, then added during dough preparation. When the craft is completely painted and dried, it must be coated with transparent manicure or furniture varnish in 2-3 layers. Each layer must dry before applying the next. This way the craft will last for a long time.
You will need: colored salt dough, stack, clear manicure polish, toothpick.
Master class

The salt dough star is ready!
Salt dough caterpillar
You will need: colored dough, knife, pva glue, toothpick, pendant, clear manicure polish.
Master class
- Roll out the sausage.
- Cut it into 6 equal parts.
- Roll into balls.
- Glue 5 balls together.
- Glue the head.
- Make a nose and eyes, then glue them on.
- Poke a toothpick into the hanging area.
- Dry the craft.
- Attach the pendant.
The salt dough caterpillar is ready!
Salt dough apple
You will need:
Master class
- Make half an apple, make the inside flat, pressing it onto a flat surface.
- Make a thin flat center and glue it to the main part.
- Roll 6 seeds and a stick, then glue to the apple.
- Blind the leaves, then glue them.
- Dry the craft.
- Apply varnish and wait until completely dry.
The salted dough apple is ready!
Salt dough elephant
You will need: colored salt dough, pva glue, clear manicure polish.
Master class
- Make the elephant's body by rolling an elongated ball.
- Make 4 legs in the shape of plump sausages.
- Make a proboscis.
- Make the elephant's ears in this way: roll out 2 flat cakes, glue flat cakes of the same shape of a smaller size and a different color to them.
- Make a small ponytail.
- Blind your eyes.
- Assemble the elephant in the following sequence: glue the legs to the body, then glue the proboscis, then the ears, eyes and tail.
- Dry the craft.
- Apply varnish and wait until completely dry.
The salt dough elephant is ready!
You will need: salt dough, foil, a candy bowl or similar plastic container, gouache, a brush, clear manicure polish, a modeling board, a knife or a stack.
Master class

You will need: salt dough, nail scissors, PVA glue, acrylic paints or gouache, manicure brush.
Master class

Salt dough hedgehog is ready!
Owl (eagle owl) made from salt dough
You will need: salt dough, pva glue, nail file, manicure scissors, acrylic paints or gouache, brush, wooden board with a pendant, clear manicure varnish.
Master class

The salt dough owl is ready!
You will need: salted dough, the base on which the craft will be attached, for example, a board or plate, a glass or a knife, a sheet of paper, a simple pencil, a garlic press, a rolling pin, pva glue, acrylic paints or gouache, a brush, clear manicure polish, cloves.
Master class

Salted dough fruit basket is ready! I recommend watching the video master class!
You will need: salt dough, knife, rolling pin, simple pencil, sheet of paper, sandpaper, acrylic paints or gouache, brush, transparent manicure varnish, glue gun or pva, base for crafts, for example: a board with a frame, transparent manicure varnish.
Master class
- Draw a cat or print a template.

- Roll out the dough into a thin layer.
- Attach the template and cut out the cat.

- Dry the craft.
- Sand the craft with sandpaper, removing any unevenness.
- Using a simple pencil, transfer the desired design onto the cat’s body.
- Paint with paints and wait until completely dry.

- Glue the cat onto the base with the frame.
Salt dough pencil
You will need: water, flour, extra salt, cardboard jar for the frame, PVA glue, scissors, a piece of decorative rope or corrugated paper, gouache, brush, button, stacks, acrylic varnish for crafts, toothbrush.
Master class
- Knead the salted dough in this way: add a glass of flour, a glass of salt, add water, then knead until the desired consistency of the dough. Separate part of the dough, add beige gouache, then knead.
- Roll out the cake to a thickness of 10-15 mm.

- Apply PVA glue to the outer rim of the jar and wrap it with dough. Cut off the excess with a stack and smooth the joints with a damp brush.
- Create a small dotted texture with a toothbrush on the surface of the dough.
- Knead the dough brown, roll it into a flat cake 10-15mm thick.

- Cut a 5cm wide strip of brown pastry and glue it to the bottom of the jar.
- Make 2 from white dough large bases for the owl's eyes, then glue them on.
- Make a beak out of brown dough and glue it on.
- Make eyes from turquoise dough and glue them on.
- Roll out 8 strips of pink dough, twist them into 4 flagella and make a bow, then leave it to dry for 2 hours.
- Make droplet-shaped owl wings using brown dough, then glue them on.

- Weave ropes of beige dough and glue them onto the neck of the jar.
- Roll out a sausage from white dough, draw the texture of the lace with a stack and glue it as a collar under the beak.
- Place the craft in a warm place for a day.
- Paint the bottom and wings with brown gouache and decorate with white dots.

- Draw the pupils and eyelashes with black gouache, wait until the paint dries, then paint white highlights on the eyes.
- Glue a pink bow above the wing.
- Glue a button with a bow from a corrugated strip onto the lace.
- Cover the craft with varnish and wait until it dries completely.
The salt dough pencil is ready!
Salt dough dachshund
You will need: salt dough, simple pencil, scissors, cardboard, paints, brush, rope, toothpick, foam sponge, clear varnish, PVA glue.
Master class
- Draw a dachshund on the cardboard as shown in the image.
- Cut out the template.

- Roll out the dough to a thickness of 5 mm and cut out the dachshund according to the template.
- Roll out the oblong eyes, then glue them on.
- Blind the eyelids and glue them onto the eyes.
- Use a toothpick to outline the paws, nose, mouth, ear and body contours.

- Roll out an oval, then glue it onto the ear and smooth the seam with a wet finger. Use the same method to add volume to the dachshund's back and tail.
- Mark the stripes in different directions along the perimeter of the entire dachshund, in such a way that the stripes resemble wool.
- Dry the figurine.

- Glue a piece of rope to the back of the craft for further hanging.
The salt dough dachshund is ready!
Boletus mushroom made from salt dough
You will need: salt dough, light bulb, paints, brush, foil, cardboard, masking tape, superglue, PVA glue, paper napkins, clear varnish, stack.
Master class
- Cover the light bulb with tape, then cover it with dough and dry the workpiece.
- Cut a ring out of cardboard and place it on the light bulb as a base for the hat.
- Form a hat from crumpled napkins, then secure with tape.

- Wrap the hat with foil.
- Roll out the dough to a thickness of 5 mm and stick around the cap.
- Remove the cap from the stem, cover the bottom with dough and make stripes in a stack.
- Glue the hat onto the leg.

- Mold the mushroom's arms, legs and nose, then glue them on PVA.
- Make a caterpillar and glue it to the hat.
- Dry the figurine.

- Paint the figurine, then leave to dry.
- Cover the craft with varnish and wait until it dries.
Boletus mushroom made from salt dough is ready! I recommend watching this video!
Funny salt dough pigs
You will need: salt dough, paints, brush, foam sponge, stack, thin rope, toothpick, black gel pen, PVA glue.
Master class
- Roll 2 balls for the snout and use a toothpick to make the nostrils.
- Make a muzzle, glue a snout and eyes above it.
- Blind the ears triangular shape, glue them, then mark stripes with a stack at the junction of the ears and head.

- Make a heart and glue it to the bottom side.
- Make indentations along the edge of the entire circle.
- Using a toothpick, make 2 holes on the top for attaching the rope and 2 holes on the bottom for the legs.

- Roll up the arms and glue them in such a way that they hold the heart.
- Make the hooves and make holes in them for the rope.
- Dry the workpieces.
- Paint the blanks black paint and let them dry.
- Wash off the paint from the convex parts of the workpiece under running water with a sponge and wait until it dries.

- Prime the figures with a sponge and white paint.
- Color the piglets.
- Draw small details with a black gel pen.
- Cover the craft with varnish and wait until it dries.

- Glue wool threads as hair.
- Make a pendant out of rope.
Funny salt dough pigs are ready! I recommend watching this video!
Hello everyone, hello!! Today on the agenda is the expected topic of everyone - crafts for International Women's Day. After all, immediately after February 23, we begin to prepare for March 8. Therefore, dear educators, teachers, parents and children, let’s quickly start viewing this post, choose a gift and start making things!!
Let me remind you that there is already a selection on making spring cards on March 8, so if you missed it, take a look. Well, in this article we will look at the most popular DIY crafts and it won’t just be flowers!!
We will start with the newest ideas for making congratulations. After all, on this wonderful spring day we so want to please our mothers, grandmothers, sisters, girlfriends, teachers. Therefore, for you a small photo selection of the most interesting things for the current year!!
How do you like these green horseshoes for good luck, decorated with flowers made of ribbons and beads?! Isn't it very beautiful!!

Or such voluminous flowers made of beads?? But this will require special beadwork skills.

But gentle eights made of felt are also very useful.

Look what a delicate basket with flowers from satin fabric looks very festive!!

Volumetric eights made of paper are always in place, especially if you know how to work with such delicate patterns.

Well, this beauty is made using quilling technique, it looks amazing!!

A stunning firebird that brings happiness to the home!!

Or a simple chamomile in a pot. This gift is easy to make and very harmonious in appearance.

And what lovely button lilies of the valley, I think you will definitely surprise those around you with such a gift.

I also really liked the idea with the pincushion, and we get not only a pincushion, but also a jar for storing various small items. Look how easy it is to do!!

Of course, the female sex is very fond of sweets and flowers. I decided to combine these preferences and make such a nice present.
- Basket with flowers
We will need: a candy box (preferably with candies), colored paper, cardboard, colored table napkins, scissors, glue stick.
Manufacturing process:
1. Use a whole box of rectangular chocolates as a background.
2. Take two sheets of colored paper different shades brown, cut them into strips 1 cm wide.
3. Now intertwine stripes of different shades perpendicular to each other (Fig. 2).

4. Cut an oval 13 cm long and 10 cm wide from cardboard of any color.
5. Glue this oval to a woven rug with wrong side(Fig. 3).

7. If you have ends protruding from the canvas, tuck them in and glue them to the oval from the wrong side. You should get our basket.
8. Stick it on a box of chocolates.
9. Now take 6 napkins of different colors and, folded, cut out circles with a diameter of 4-5 cm. Glue these circles together and make a circular cut.
10. And from yellow paper, cut out circles with a diameter of 1-1.5 cm and also make a circular cut. These centers need to be glued to the center of the flowers.
11. Using the stencil given below, cut out 9-10 leaves and stick them on the basket (Fig. 5).

12. Glue flowers between the leaves and your congratulations are ready!!

How do you like this idea?! In my opinion, it was very excellent and original, since they made it with their own hands and also treated them to sweets.
Crafts made from paper and cardboard from the first to the senior kindergarten group
I cannot leave aside creativity for our children. As always, popular materials are paper and cardboard, and various additions. In general, I won’t languish you for long, now you’ll see everything with your own eyes!!
Excellent butterfly flowers made from folded paper like a fan; the background can be decorated with watercolors.

But for the original bouquets, make a tube base out of green cardboard and glue the cut out buds and leaves onto it.

Or such cute hearts. For pots you can use sour cream jars.

Here is an interesting clearing made from ordinary juice tubes and colored paper.

And these eights are made of toilet sleeve, cut it off, glued a cardboard bottom, and decorated it. By the way, if you don’t connect the circles, you’ll end up with little boxes.

A craft made from paper plates looks very impressive.

Well, how could we do without voluminous postcards, I think you have already learned how to make them!!

These are so beautiful paper flowers You can frame it and get a picture.

Again, cute, amazingly beautiful pots!!

Or you can make cards from colorful napkins.

And don’t forget about origami, the picture shows a diagram of folding daffodils.

And if you want something special, then I suggest making a paper cake like this.

We will need: colored photocopier paper, colored paper napkins, beads for decoration, stapler, glue.
Manufacturing process:
1. Make the cakes out of paper by folding them like an accordion, then folding them in half and gluing them together. One cake will require 6 sheets.

2. Make three cake layers in total.

3. Make flowers from napkins.

4. Large peony.

5. And little roses.

6. Connect everything together by decorating with beads.

This is such an inedible beauty!!
We create souvenirs with our own hands from corrugated paper
Also, don’t forget to make crafts from corrugation, it makes all the actual bouquets look like they’re alive, real!!
I won’t give a detailed step-by-step description, but if you’re interested, go to the article, you’ll find master classes on bouquet and floral products there. And now small selection and video story.


And as promised, a short video on how to make a bouquet of roses with your own hands from corrugated paper.
The most beautiful crafts for March 8 made from felt
Well, those who love to sew and are familiar with such an amazing material as felt know that there are a huge number of different souvenirs for the spring holiday. Look at what I liked, maybe you can sew something from the suggested options.
- Multi-colored flowers

- Cute birds

- Heart-shaped keychains

- Cheerful bouquet

- Red eight

- Adorable ladybugs

- Photo frame made of flowers

You can also sew the following potholders:

Or make a pincushion in the shape of this bug))
We will need: red and black felt, threads, cotton wool or padding polyester for filler, threads, needles.
Manufacturing process:
1. Cut out the template and transfer it to the fabric. Make blanks from felt.

2. Sew all the pieces together, leaving a small hole.

3. Fill the cow with stuffing and sew up the remaining part.

4. Your pincushion is ready.

And here is the template for making it:

Master class on making a gift for mom from salt dough
Remember, I once told you about making and what can be made from it large number souvenirs, including for March 8th?! So, if you missed this article, be sure to go and have a look, maybe choose some interesting ideas for congratulations.
Well, now I suggest you make these cute gifts for our mom and remind you of the technology for producing salt dough. 😉
- "Gift for Happiness"
We will need: flour - 2 tbsp., salt - 1 tbsp., water - 1/2 tbsp., gouache, colorless varnish, ribbons, templates.
Manufacturing process:
- Start salt dough according to the recipe above.
- Roll out the mass and cut out a heart and a horseshoe according to the template.
- Design souvenirs according to your imagination.
- Next, let the crafts dry. Ideally, leave them for 5 days.
- Then paint with gouache and let dry again.
- Cover with clear varnish and insert a ribbon.

Let's see what else you can make from this excellent material for creativity.
Multi-colored eights, decorated with flowers and sparkles, can be glued to a magnet and make a great gift.

You can make a bouquet of any flowers, which is also always relevant.

Heart with an inscription, decorated with buds of your favorite flowers.

Simple photo frame. This kind of work can be done even by small children.

Spring suns, very funny and warm!!

Real picture!!

But this is an awesome candlestick, it looks incredibly beautiful!!

Or maybe you like adorable cats or a bunny?!


Or these angel girls?!

How do you like this doggie with a gorgeous bouquet?!

In general, everything here depends on your imagination, and the rest will work out!!
Video about how to make roses from cotton pads
And no matter what you say, the main gift on International Women’s Day remains flowers, and most often they give roses and tulips.
Turns out beautiful bouquets can be made not only from paper, but also from cotton pads. And this is done very, very simply, I think you will see this when you look at the following story:
Well, were you impressed?! Now we’ll see what types of flowers can still be made from this available material.


I would never have thought that such masterpieces could be made from ordinary cotton pads!!
DIY children's crafts made from beads
You know, I also remembered how as a child I wove various baubles, bracelets, chains and pendants. And I thought that beads could be used to make unusual and festive souvenirs.
I scoured the Internet and it turned out that the most popular thing in beadwork on March 8th are flowers, who would doubt it!! I have selected the prettiest job options for you.
You can weave such a bouquet of mimosa from thin wire.

This is a figure eight of ribbons, decorated with blooming flowers.

This is such an original decoration.

Or a cute heart-shaped topiary.

A simple card: apply glue to the design and lay out beads.

You can also weave such a basket, it turns out to be a real gift.

Floral applique option.

How do you like such cute jewelry?! Wonderful for spring!!

A bouquet of unbloomed tulips!!

Here is such a charming selection of beaded crafts!! Beauty in one word!!
Interesting ideas for congratulations made from threads
While still writing this article, I came across some very magical and soft-looking works made from threads. Mostly fluffy threads are used for knitting. The manufacturing technology is simple, it is either appliqué or joining into a bundle and cutting to the desired shape.
Here's a look at how you can make a yellow dandelion like this step by step.

Based on the cannons, you can also make a mimosa sprig.

Or applique: draw a plot on the base, and wind the threads and glue it along the contour.


And if you know how to knit or crochet, then make such a lovely box and decorate it with beads.

DIY craft templates for March 8
According to the tradition that I have developed when preparing similar articles, I conclude by offering different options stencils and templates. So hold, trace and create!!
- Paper flower

- Wreath with butterflies

- Birds. Can be made as an applique or sewn from felt

- Flower vase

- Postcard in the form of an apron

- Flower card-mug

Well, that's it, my dear friends and lovers of creative works. I hope you liked the craft ideas, dedicated to the holiday March 8. Write your reviews, I will be glad!! And see you later!!
Hello dear friends!
The long-awaited spring will come very soon, and this means that the most women's holiday- March 8. And as a rule, in every kindergarten they prepare a congratulatory party for mothers, grandmothers and sisters, at which the child gives a gift in the form of handicrafts made with his own hands for his loved ones and relatives! And the teachers give these gifts to the children; they help the kids make wonderful works that will undoubtedly move their mothers to tears, of course, tears of joy.
And I prepared interesting selection beautiful crafts, For different groups kindergarten, choose and create beauty, and this selection of ideas will also be relevant for mothers who want to make crafts with their children as gifts for grandmother, kindergarten teacher, aunts and sisters.
Choose the most beautiful work and create with pleasure with your little ones, and don’t forget to cook something delicious together for the holiday.
Craft for March 8th in kindergarten from plasticine and corrugated paper
Of course, a bouquet of tulips will be the most suitable gift on this day.

We will need:
- plasticine (old one will do just fine);
- glue stick;
- scissors;
- plastic spoons - 9 pieces;
- disposable cup;
- corrugated green paper;
- red and white paper napkins.
Stages of work:
We form a large layer of plasticine and place it inside the glass. So that the bottom is completely covered.
Cut the napkin into two parts. As a result, we get two red two-layer squares. We coat one of them with glue. First along the edges, then in the middle. This must be done very carefully, otherwise the square will simply tear.
We place plastic spoon on a napkin, diagonally.


For a whole flower, you need to make three such petals.
Roll the plasticine into a small ball so that it can fit inside the spoon. If you use new plasticine, you will need about half a brick to make a ball.
Place a plasticine ball into one of the petals.

Thus we attach two more petals. We get one tulip. Don't forget to fix the bud near the beginning of the handle.

Now let's start making the flower stem. Cut out a small strip of corrugated paper and coat it with glue.

Wrap paper around spoon handles. We start from the place where we tied our bud.

The red tulip is ready. In this way we make two more flowers: red and white. Then we decorate them with leaves and insert them into a previously prepared glass vase.
The bouquet of tulips is ready. Here are a couple of similar ideas:


Making paper flowers for mom
A very easy bouquet of flowers. Little children will love making such a bright gift.

We will need:
- ruler;
- scissors;
- paper glue;
- simple pencil;
- double-sided colored paper.
For grass we will take 2 green leaves. And for flowers - any tones you like.
Stages of work:
First, let's make the base. Fold the green sheet of paper in half. From the opposite edge of the paper fold, measure 6 cm and draw a line.


Carefully cut perpendicular strips. From the fold line to the place where we drew the very first stripe. We make another, exactly the same, blank.
So that the remaining lines of a simple pencil are not visible, we turn the sheets of paper over to the opposite side. Then we glue our blanks into one sheet.

Apply glue to one of the uncut edges. And we attach the second side to it. As a result, we get green grass. As we already remember, the pencil marks remained inside.

We twist the paper grass into a small flower bed. We glue the outer edge so that the structure does not turn back. Now we straighten it and make it more magnificent.

Let's start making flowers. You can simply cut them out. But if you want them to be the same size, make a template.

Draw a flower, cut it out and trace it according to the template. As a result, we get twelve flowers.

To ensure that the circle is even, take a cap of glue stick and trace it with a pen.
Now we cut out the centers and glue them to the flowers.
To decorate the bouquet we will make a bow. To do this, cut out four yellow stripes. One: 1.5 cm wide and 30 cm long. And three more: 1 cm wide and 15-20 cm long.
We coat the largest strip well with glue and glue it to the middle of the base of the flowerbed. This will be the ribbon of the future bow.

Take one of the remaining strips and coat its edges. Now we bend them towards the middle, slightly overlapping. We do this with two more stripes.

Next, we re-coat the middle of the bows and stick them on top of each other. As a result, we have a beautiful yellow bow. Glue it to the yellow strip. Finally, we glue the previously prepared flowers.
Here is another version of this craft, but with the addition of leaves.

DIY gift for March 8th for the second youngest group
Even the smallest children can make such a simple flower.

We will need:
- cardboard toilet paper roll;
- glue stick;
- red cardboard flower;
- two green pieces of paper;
- green felt-tip pen;
- scissors;
- a strip of green paper (to wrap the sleeve).
Stages of work:
Let's start gluing the green strip. It should be slightly wider than the bushing itself. 1.5 cm on each side.
Coat the green paper with glue. We place the bushing on it and wrap it. Now we bend the paper on both sides, inside the sleeve.

Now we decorate the leaves. To do this, use a green felt-tip pen to draw veins on them. Then we bend each leaf about 1.5 cm.

Coat the bent corner with glue, with front side leaf, and attach to the green stem. We make a cut above the leaves, about 1 cm on each side.

Insert a red flower into the resulting cuts. If you get a little creative, you can get something like this: interesting options this craft.


Making a lily from cotton pads for the kindergarten by March 8, 2019
But I also found a simple way to create volumetric applique, children of average and junior group. You can make calla lilies using this principle; they also turn out very beautiful!
Crafts made from salt dough for older children
And of course, don’t forget about crafts made from salt dough. Today we will make flowers like these. Even a child can make them.

We will need:
- salt dough;
- brush;
- watercolor.
Stages of work:
First you need to prepare the dough. Mix: A glass of flour, half a glass of salt and half. glasses of water. Mix everything well. The dough should come out soft and pliable, but not stick to your hands.
For small children, modeling from salt dough is much easier than from plasticine. After all, you don’t have to knead it in your hands for a long time to warm it up.
Don't forget to put the dough in a bag so it doesn't dry out.
Now let's start making flowers.
Roll half the dough into a log and place it on a piece of cardboard. Now you need to flatten it into a layer.

Roll the second half into a sausage. Cut it into small pieces. Roll each into a ball.
We flatten the first three on a large layer. These are the future centers of flowers.
Before gluing all the parts, brush the dough with water.
Now we roll three elongated droplets. Attach to the main part, narrow side out. We draw veins on them. And in the middle of the flowers there are small holes. This will make the flowers look more realistic.

To make the patterns even, you need to sharpen the end of the brush.
Then we form flowers from the remaining balls. In the middle of each flower petal, make a couple of folds.

All that remains is to decorate our craft.

After that, dry it in the microwave or oven. At the lowest power, no more than five minutes. This will make the product more durable than when drying on radiators.
You can decorate your refrigerator with this gift if you attach a large magnet to the back.
How to make a 3D postcard for March 8
A good present for World Women's Day would be this 3D card.

We will need:
- scissors;
- black marker;
- glue;
- glitter;
- double-sided cardboard in three colors: yellow, green and fuchsia.
Stages of work:
And cut out a square of yellow cardboard 15 by 15 cm. Bend it in half, then again. As a result, we get a smaller square.

Bend one half of the sheets into a triangle.

We do the same with the second one.

Using scissors, we round off one edge of the triangle and get a petal connected to the rest on both sides.

We unfold it in the form of a flower. In the middle, draw a small circle with a marker and paint it black. Then carefully cut off one of the petals.

We coat the edge of the petal with glue and glue the opposite one onto it. We get such a voluminous flower.

We coat the middle, near the black circle, with transparent glue and decorate with sparkles. Turn the flower over to remove excess glitter. We also make seven more flowers.
Now we bend them in half and glue three flowers together. The picture shows the places that need to be coated with glue.

Apply glue to the places that are also highlighted in orange.

Glue another flower.

We attach two more flowers. Places that need to be lubricated are also indicated.

We only have one yellow flower left. Glue it on top of the entire composition.


Finally, fold the fuchsia cardboard in half. Glue it inside, first one side of the composition, and then the other.

We unfold the card and we get a voluminous bouquet yellow flowers. Here's a postcard with a surprise.
The most beautiful gifts with patterns and templates for International Women's Day
Paper shoe for mom
Inside you can put sweets in a beautiful little bag or a small souvenir.

All you need to do is transfer the design from the provided stencils onto the velvet paper.
This is the main part of the shoe:

And this is a flower and a heel:


We assemble the shoe and glue it together. We decorate according to your wishes.
Is it true amazing craft It worked out, and moms will be absolutely delighted!
DIY round paper cake
And in a box in the form of a piece of cake you can put candy as a gift and write a note with kind words and wishes, I would definitely be delighted with such a present.

Here is a template for making a cake

We transfer it to a beautiful one, colored paper You just need to draw or print it on the inside of the cake.

Now we need to carefully cut out the part and bend it along the dotted lines, and glue the free edges. We decorate the top of the cake with flowers, beads, buttons and other beautiful details.

And if you have enough time, you can make a whole cake!

Phone charging holder for socket
And a cool gift for mom would be a holder for mobile phone while charging, made with your own hands. Very practical gift, which mom will use often and the phone will be in its place!

And here is the diagram by which this useful thing is made

Now we need to cut out a semicircle, look carefully at the picture, everything is shown there:


You can color it in another way, for example, draw bouquets of flowers, the number 8, or in one word depict the theme of March 8th.
You can also simply print out the pictures and let the kids color them themselves:


And here's what beautiful postcard it will work for grandma:

These are the simple gift options presented in our article. The child can cope with many of them on his own. You may need a little help from a teacher. But still, be sure to try at least one of the gift options for March 8th.
And I wish that everything would work out for the children, and that their craft would please their mothers and grandmothers, and that they themselves would be delighted with the work done!


