With the arrival of spring, everyone is waiting for the coming have a great holiday March 8. On this day, all women are given gifts and flowers, regardless of their age. You don't have to go to the store to buy a souvenir. You can do it yourself. A postcard embroidered using the isothread technique will be an unexpected surprise for a mother from her child.
Presented master class with step by step photos, will demonstrate how to fill in a circle and a corner on a piece of paper. For beginner lovers of the isothreading technique, this will be the first object lesson.


Greeting card for the holiday

Before starting work, it is necessary to study the schemes for filling the corner and circle. Then, you will need the following materials:
- cardboard or whatman paper;
- multicolored floss threads;
- needle, scissors;
- pencil and ruler.
First of all, you will need to draw a future postcard by March 8 on paper. It will have three fields. In the center of the scheme will be placed embroidery using the isothread technique. Left-hand side will cover the pattern, and on the right side you can place congratulatory words... Draw a picture that you would like to design. Since this is the eighth of March, depict the same figure accordingly. Mark with dots where the punctures will be made. In this master class, a postcard is presented that even a child can handle. Using a ruler, mark the frame on the card, and draw two circles with a compass to represent the number eight.
The first stage of isothreading begins with embroidering the frame on the card. It will have four corners. If you are new to the isothreading technique, then number the points from the seamy side. This is done in order not to confuse from which hole the needle should come out. Using the markings that you made, start filling the corner. Do such manipulations with all angles. To simplify the process of creating isothread, apply the markings, alternating them on each corner of the postcard. Use two threads in the needle. When the thread runs out, make a small knot or secure it with tape. It must be remembered that the knot should not be too large and noticeable. 
After you have embroidered a frame diagram that will work for a photo frame, you can move on to number eight. It is embroidered by filling a circle in isothread. The photo shows the diagram step by step instructions postcards for the eighth of March.
When you are done embroidering the pattern using the ison thread technique, to add even more beauty, decorate the figure eight with lace flowers. Apply small rhinestones to the flowers and glue them in the place where you see fit. Now the gift for March 8 is ready. 
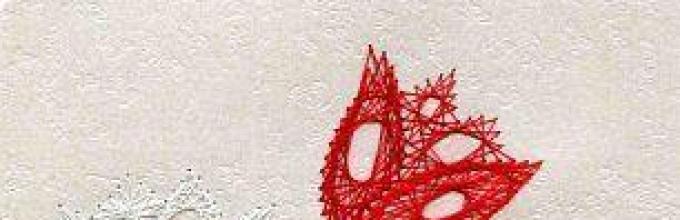
It is also very easy to embroider a tulip using the isothread technique. With a minimal set of materials and patterns, you can embroider beautiful postcard on colored cardboard. In any case, you will end up with an unusual and unique craft. For beginners, it is recommended to take schemes with simple images without ornate patterns. 


Gift embroidery color schemes


Video: Learning to embroider a flower with threads
Comments
Related posts:
 Isothread for beginners schemes with butterfly numbers (pictures)
 Isothread a circle: learning to fill a circle
 Isothread a lamb diagram and a master class with a photo
First, insert the tape into the needle and stretch it 5 cm. Then pierce the tape in the center, stepping back 5 mm from the edge.

Slowly pull the tape up to the puncture site.

A knot should form at the tip.

1. Stick a needle in from the inside of the canvas and pull it out from the front at point A. Now place the needle on top of the tape, and then bring it underneath.
2 Wrap the free end of the tape around the tip of the needle in a figure-eight fashion. Pull up the tape, stick the needle near point A, and pull it out from the inside out.
Such knots can be used to embroider bunches of berries, small leaves and flower centers.

1. Use a wide tape. Pull her out on front side at point A. Make a loop, as for a small rose, only backing 5 cm from point A.
2. String the tape on the needle with an accordion length of 6 mm, stick the needle near point A and pull it out from the wrong side.

1. Pull out the needle with tape from the front at point A, and stick the needle at point A to make a large loop (petal).
2. Re-stretch the needle to the right side of the fabric and make the same petal. Above 5 loops and secure the end of the tape from the wrong side.

1. Embroider one petal, as in a five-leafed leaf (see above), draw out the needle to the right of point A, and then stick it in the left, over the loop of the petal.
2. Repeat several times to make 10 petals.

1. Pull out the needle from the front side and make the first petal, stepping back 1 cm from point A.
2. Pierce the petal at the base by pulling the needle out from the front and make a second petal. Say it again.
3. Make two stitches with the green ribbon so that the small pink petals are partially hidden inside.

1. A piece of fabric, a hoop, thread, ribbon 0.5 cm wide and a needle with a large eye (I work with a tapestry needle, its tip is dull and the fabric is not damaged). We apply an oval made of cardboard to the fabric, outline and draw a schematic of a chamomile flower (an oval, inside there is also an oval and a stem). I embroider the middle of the floss with yellow French knots in 2-3 naviv.
2. The tape is white. We cut off about 25-30 cm, one end is sharp, we fix it at the needle, so that it is more convenient to work. We do this: insert the tape into the eye of the needle, drag in a little and pierce the tape with the tip of the needle near the sharp end, stepping back 1 cm. You can see in the photo. I drag the tape back and pull it up near the ear.
We scorch the other end of the tape with a lighter so as not to wrinkle and make a knot (the knot is made on the tape very simply: we fold the end of the tape 2 times about 3 mm each and pierce the resulting fold with a needle and drag the entire tape through this puncture).
The needle and tape are ready to go!
3. Now the stitches. They are familiar to everyone, only we make them with a ribbon. I brought the needle to the front one near the middle and made a stitch forward with the needle (so the same stitch along the entire oval - from the middle to the edge and vice versa). Pull out the needle with the tape carefully and carefully, because we do not need holes in the puncture site, wiggle and twist the needle a little if it resists, but do not jerk. Working with tape is leisurely and beautiful. Let the tape have its say: is it twisted? let the stitch lie like this, because in nature the flowers do not look perfectly even and smooth, chamomile petals can be ruffled by a light breeze and they will be a little disheveled. Let it be so on embroidery. When working with ribbons, there is no marriage)) Look at the flower after each stitch, admire it. Leave a bit of fluff for each stitch; don't tighten too much. And if you tightened it carefully with the blunt end of the needle, correct it, release the tape and it will delight you with a beautiful volume in the finished work!
Here is the flip side of the flower. After embroidery, cut off the ribbon by stepping back half a centimeter and carefully singing it with a lighter (press the still hot tip of the ribbon to the fabric with scissors or sew with thread to match the base)
4. Stem and leaves. After doing the same manipulations as with the white ribbon, secure and make a knot on the green one. They brought a green ribbon between the chamomile petals to the left side, as close to the middle as possible (do not pierce the ribbon of the flower on the wrong side, otherwise the flower itself may lead and ruin the petal). Twisted stitch - brought the tape to the front, twisted the tape with a tube (simply rotating the needle in the same direction) and introduced the needle to the point where the stem should end. It will turn out to be such a long twisted stitch. it must be fixed so as not to unwind. We do this with a needle with a thread inside out, sewing the stem to the base (thread to match the base) or a secret - before inserting the needle into the fabric, you need to push it through the stem itself (the tape is pulled through itself and at the same time through the fabric). We make several leaves by bringing the needle near the stem to the front side and taking it away at some distance to the wrong side. You can also fasten the tape by pulling the needle at the end of the leaves through the tape itself and through the fabric (this is called a tape stitch). You can also play with the tape by piercing it in the middle or near the right (left) edge, you will get slightly different curls at the end of the tape.
5. Cut the finished embroidery with an allowance of 1.5-2 cm and singe the edges on the candle.
6. Glue the cardboard oval on top with a foam (or other soft and fleecy cloth) oval. I used a drop of PVA.
7. Put the embroidery on the parolon and glue the edges on the wrong side to the cardboard. I use the glue moment.
8. What is missing. There is too much empty space on top in my opinion. Let a bee (or bumblebee) fly to our flower. On the piece left over from the embroidery, draw an oval 1 cm on the larger side. I embroider with black threads in 3 folds the loops not tightened on the front side, the head is 3 stitches across the body and the eyes are 2 beads. Among the black thread, there are several stitches of yellow and white near the butt. A drop of glue on the wrong side will keep the threads from slipping. The glue is frozen and we cut all the loops with sharp scissors on the front side. We carefully make them the same length. We draw the wings on organza (you can use any thin synthetics that match the color), cut them out with an allowance of 2 mm and burn them over the fire.
Sew on the wings and cut out the entire bumblebee with an allowance of 3 mm. I singe very carefully the edges of the base over the fire. Then I sew our bumblebee (or bee) near the flower. The legs will be the stitches.
I apologize for the quality of the following photos, the device is dead.
9. Preparing paper for the postcard. I still have my scrapbooking. I cut off the desired size, fold it in half (I draw it with the blunt end of the scissors along the fold line so that there are no ugly creases on the paper) and fold it in half. Trying on a blank with a flower.
10. Instantly glued the blank to the postcard. I choose lace for framing. Lace in yellow or green colors would suit us. I have the most suitable golden one. I took into account the advice of the commentators and glued the lace on a double-sided scotch (I used to glue it at a moment-crystal, but the glue was still visible), fixed the beginning and end of the lace with glue.
Holiday greetings!
In 2012, I went to school. There are many clubs in our school. After consulting with my mother, I enrolled in an embroidery circle. There, the guys embroider with a cross and ribbons. Now I already know how to embroider with a cross and a little ribbons. I want to present this work to my grandmother. I also suggest you try your hand at ribbon embroidery and make such a card with ribbon embroidery.
For the manufacture of postcards with ribbon embroidery you will need:
1. Colored threads
2. Silk ribbons
5. Scissors
7. Colored pencils, helium black pen, chalk pencil
8. A sheet of white pastel paper folded into three equal parts and with an oval hole at the top
On the embroidery canvas, draw a circle around the oval hole with a chalk pencil so that the embroidery does not go beyond the hole in the paper. We make the line barely visible.

We apply the ribbon embroidery scheme to the canvas.

We embroider the stems with a stalk seam.

We embroider the leaves with a simple ribbon stitch with a green ribbon.


We embroider the French knots with a yellow ribbon.


Now we embroider wicker roses, I did it for the first time, I was so worried. We embroider a large rose with a red ribbon 1 cm wide. 5 mm, and small roses with a red ribbon 6 mm wide.

We glue the finished embroidery into the already painted postcard. Let it dry. We glue the left side of the postcard to the wrong side of the embroidery. We decorate the embroidery on the oval with a golden outline and in empty space add the golden tendrils.

Inside greeting card We glue the congratulations (I myself am still bad at writing).


Embroidery patterns:
Stem seam.

Recently, embroidery with silk ribbons has become a favorite again. And this is not surprising, because it has so many advantages! It is performed much faster than other types of embroidery and does not require high precision. In addition, embroidery with silk ribbons can be called a truly artistic work, since it involves complete freedom of imagination.
: video
Embroidery technique
The ribbon embroidery technique is quite simple.Method number 1
The ribbons are threaded into large-eye needles and sewn over the fabric as with ordinary threads.Method number 2
The ribbons are laid in the form of rosettes, bows and other shapes and sewn to the fabric with threads for embroidery or sewing. 1. Silk ribbons go well with shiny mercerized cotton or silk threads for embroidery, as well as with beads, beads, sequins, rhinestones. You can embroider with threads or beads not only on the fabric, but also on the ribbons themselves.2. Embroidery with silk ribbons will perfectly complement any patchwork work or help to unite different fabrics in one product.
You will need:
the clothRibbons
Embroidery frame or hoop
Embroidery and fabric scissors ()
Thimbles
Compass
Simple pencil
Markers ()
Tailor's chalk ()
Ruler ()
Triangle
Measuring tape ()
Devices for transferring the motive to the fabric
Sewing threads and needles
Cloth adhesive tape ()
Candle or lighter
Beads, beads or other decorative materials on request
Choosing a fabric
For embroidery with ribbons, you can take any dense fabric: moire, velvet, silk taffeta, felt, jersey, cotton, linen, canvas. For thinner and lighter tapes, it is better to take more thin fabric... Delicate transparent fabrics such as silk, tulle or chiffon should be reinforced with a liner before embroidering. The most important rule when choosing a fabric is that it should hold the embroidery well.Choosing needles
The eye of the needle must necessarily be large: long and wide - so that the tape can easily be threaded through it. This needle will make a large enough hole in the fabric so that the silk ribbon will not be damaged as it is pulled through the fabric.Choose from darning, tapestry, quilting, knitwear, wool or beading needles. There are also special sets of needles for embroidery with silk ribbons on sale.
Embroidery ribbons

Silk ribbons for embroidery can be of different widths and weights. For embroidery, only those ribbons are suitable that can be easily folded and wrapped in the desired shape.
Ribbons can be made from silk, organza or polyester. The embroidery from velvet ribbons and lace braid looks interesting. You can also make original embroidery from torn stripes from various fabrics, using their colorful prints or textures with imagination. In this case, the sections of the fabric can not be burned or overcast, but, on the contrary, can be pulled through a short fringe. But still it is traditionally embroidered with silk ribbons of different widths and colors.
The main rules for working with ribbons
1. Use narrow ribbons that easily thread into the eye of the needle for traditional embroidery stitches. Wider ribbons can also be threaded into a needle by folding them in half, three or four, but most often rosettes are made of them: they are gathered along one edge, and then sewn to the fabric with sewing threads suitable color.2. Do not work with silk ribbons that are too long. The optimum length is 35-50 cm. Cut the embroidery ribbons obliquely with special embroidery scissors. To prevent the cuts from crumbling, lightly burn them on a candle or lighter flame.
3. On countable fabrics such as canvas or stramin, it is better to embroider with polyester satin ribbons, and it should be borne in mind that these ribbons are rather hard, do not fit in soft folds and do not form petals, causing the impression of tenderness and airiness
4. An interesting effect can be achieved by adding several elements embroidered with knitting ribbons or ribbon yarn to the embroidery with silk ribbons. Initially, these ribbons were designed for knitting, but now they are also used in embroidery. Ribbon yarn sold in balls, its assortment also includes melange and section-dyed yarns, including those with the addition of metallic threads.
Tip: For embroidery on thick fabrics (denim, leather or sheepskin) or very wide ribbons, you will need an awl to punch holes. You can also make holes with the sharp ends of small scissors.
Transfer of motive to fabric
Method number 1
First transfer the motif onto a sheet of tracing paper, then place the tracing paper on the front side of the fabric for embroidery and sew along the lines of the motif with basting stitches, remove the tracing paper.Method number 2
Draw on the fabric or transfer the motif to the fabric with a marker with fading paint, tailor's chalk or a simple pencil.Securing the beginning and end of the silk ribbon on the wrong side

A neat knot can be made at the end of the silk ribbon to start embroidery. However, it is preferable to avoid knots, which can cause ugly "bumps" to appear on the face of the embroidery. You can hold the tail of the silk ribbon on the wrong side of the embroidery with your fingertip until it is secured with a few initial stitches. The end of the tape can also be secured with a pair of blind stitches with matching thread for sewing without piercing the needle on the right side of the embroidery.

To complete the motive, bring the end of the tape to seamy side embroidery and pass it through a few stitches on the wrong side without piercing the ribbons, or carefully, without piercing the needle on the right side, sew one straight stitch along the end of the silk ribbon or along the ribbon stretched along the wrong side of the ribbon. The tip of the ribbon can be fastened with a pair of blind stitches with sewing threads of a suitable color, just as at the beginning of embroidering the motif, without piercing the needle on the right side of the embroidery.
Basic stitches
Knowing how to sew just a few stitches with silk ribbons, you can already embroider motifs on clothes and even pictures.Chinese knot
This stitch is sewn to fill the center of the rosettes and also to the middle of the flowers with petals embroidered with silk ribbons. In addition, interesting patterns can be created with this stitch. Chinese knot resembles a knot stitch simple threads, but it turns out to be more rounded and voluminous. 
Withdraw the needle with the silk ribbon at a specific point. Then place the loop around the needle and insert the ribbon needle into the fabric in the middle of the loop near the ribbon needle exit point, bring the ribbon needle out to the wrong side and tighten the knot.
Double chinese knot

A few centimeters before the point where the tape comes out on the front side of the embroidery, fold the tape several times with an "accordion", pass the needle with the tape through this "accordion" and only after that, having laid the loop, as described above, insert the needle into the fabric in the middle of the loop near the point of output needles with tape on the right side.

Finally, tighten the knot, but less tightly than usual. For flowers with large petals, when you only want one knot in the middle, this is the easiest method.
Ribbon stitch
Ribbon stitch is best known and most commonly used in silk ribbon embroidery, especially when sewing leaves and petals. The stitch is sewn in several ways. It differs from other straight stitches in that the outer ends of the petal are folded or tucked from bottom to top and inward. We will show this with the example of a classic flower embroidered with ribbon stitches.Master class on
Step 1

Draw a circle on the fabric (an oval or any other geometric shape) and put the center point - we have this the center of the circle. Thread a silk ribbon into the needle. If the height of the eye of the needle is less than the width of the tape, fold the tape in half and thread the sharp end into the eyelet, carefully pulling the entire tape out completely. Remember to cut the end of the tape diagonally!
Step 2

Bring the needle with tape from the wrong side to the right side in the center of the circle. Draw the silk ribbon face up to the circumference line, smooth out the folds nicely at the point where the ribbon comes out to the front side - in this place the ribbon should be more or less curved or concave. With a needle and silk ribbon, connect the edges of the ribbon about 5-10 mm beyond the circumference line, depending on how convex you want your petal to be. Pass the needle and tape from the wrong side to the right side of one edge and then from the right side to the wrong side of the other edge.
Step 3

When you pull the ribbon over the edges of the ribbon, you will have a knot at the end of the petal. Now wrap the end of the petal and the ribbon up and over the petal. The petal itself should remain convex. Insert the needle into the ribbon at the circumference line from the top of the petal to the wrong side of the embroidery.
Step 4

Bring the needle with the ribbon from the front to the wrong side and tighten the knot - you have a petal that is convex at the base and wrapped up and inward.
Step 5

We will embroider the third petal with a ribbon stitch in a different way: bring the needle with the ribbon to the front side in the center of the circle, draw the ribbon to the line of the circle and, going beyond the line of the circle by about 5 mm, twist the ribbon, as shown in the photo. Then insert the ribbon needle through several layers of twisted ribbon and at the same time bring the ribbon needle through the top of the petal to the wrong side of the embroidery.

Gently tighten the removed tape and gently straighten the upper ends of the petal. Thus, you have a petal, convex at the base and with edges curled inward.

You can twist the tape around your finger ...

... and around a wooden stick, pencil and other suitable items.
Step 6

Another way to sew a petal with a ribbon stitch is to pull the ribbon out at the center point and place it face up towards the circle. Fold the end of the tape up and then over the tape so that a fold is formed, and insert the needle with the tape from the wrong side of the folded tape into this fold ...

... and then into the embroidery fabric. You will also end up with a ribbon stitch petal.
: video
Tambour stitch with fastening

With this stitch, you can embroider both large and small leaves, as well as petals from narrow or wide ribbons. We will show its implementation on the example of a flower embroidered from narrow silk ribbons of two colors. Such flowers can be embroidered from ribbons of different widths, and it is easy and quick to embroider with such a stitch.
Step 1

Draw a circle, place a dot in the center and divide the circle into several segments so that the flower petals are evenly spaced.
Step 2

Withdraw the needle and ribbon at the center point from the wrong side to the right side, and then at the same point, insert the needle with the ribbon from the front to the wrong side, while leaving a loop on the right side of the embroidery, approximately equal to the radius of the circle.
Step 3

Now bring the needle with tape from the wrong side to the right side exactly on the line of the circle.
Step 4

Thread the needle and tape inside the loop and pull the loop so that it forms a petal from the center to the circle. Do not pull the buttonhole too tight, especially if you are embroidering with wide ribbons.
Step 5

Now insert the needle with tape from the front to the wrong side at the point of its output to the front side on the line of the circle - as shown in the photo. In this case, the needle with the loop tape captures the loop from the tape, made earlier and pulled from the center of the circle.
Step 6

Bring the needle and tape to the wrong side and tighten the second, short loop on the line of the circle. The loop will be almost invisible, but if you embroider with a wider ribbon, it will form a noticeable knot at the end of the resulting petal. Arrange the petal ribbons nicely.
Step 7

Now bring the needle and tape from the wrong side to the right side again at the center point and repeat the chain stitch described above with a tack.
Step 8

Having embroidered 8 petals, we will change the color of the ribbon and we will embroider the petals with a chain stitch, fastened with a beige ribbon over the blue one.

For the training sample, we took ribbons that are very different from each other in color. But if you use ribbons of similar shades, then as a result you can get beautiful flower with a lighter top, that is, to depict the transition from shadow to light.
Tip: When sewing a chainstitch stitch, always try to place the buttonhole so that the fabric of the embroidery is not visible between them.
Socket

The rosettes are made of delicate transparent or flaky ribbons of any width and length. The wider and longer the tape is, the larger and more magnificent the outlet will be.
Step 1

Cut the tape diagonally and sew along one long side very close to the edge with straight stitches. middle length sewing thread of a suitable color. Stretch the gathering thread: the tighter you pull the thread, the thicker the rosette will be.
Step 2

Fold in the beveled end of the tape and begin sewing the tape onto the fabric along the gathered edge in a spiral fashion, starting from the center.

The narrower the distance between the spiral lines of the sewn-on gathered tape, the more magnificent the rosette will be. You can sew a rosette in the shape of a circle, that is, in one row, or sew on each other two rosettes, made up of one row, from ribbons of different colors, with some offset relative to each other (no more than 2-3 mm). Sew with straight stitches, do not worry if the threads are visible - you will cover the middle of the rosette with decorative elements.
Step 3

At the end of sewing the rosette on the fabric, hide the other end of the tape under the already sewn tape, tucking its end inward.
: Master Class
Narrow ribbon rosette

In a similar way, a rosette is made from a narrow ribbon, and often it looks more elegant and makes the embroidery more graceful.

We pinned this tape very tightly and sewed it to the fabric in a spiral in a radius of several millimeters.
Step 4

Now all that remains is to fill in the middle of the rosette: on the scarlet rosette made of a wide ribbon, we embroidered knots with a pale pink narrow ribbon, and we sewed elongated black beads into the purple rosette. 1. Do not pull the bands too tight.
2. For embroidery on outerwear do not use stitches in the form of loops - they will cling to the surrounding objects, the embroidery will be easily damaged.
3. The ribbons tend to curl during use, so be sure to make sure that they lie face up on the surface of the fabric.
Embroidery care
Never iron your embroidery with silk ribbons! Have it dry cleaned. It is best to pull the embroidery into a frame with glass after hemming the edges so the ribbons will not fade. Do not expose embroidery to direct sunlight.For storage, it is best to roll the embroidery into a roll (do not fold it - then you will not be able to smooth out the jammed folds).