Quilling style birch is not much different from a simple tree in the same technique. Upon constructing the composition of Birch includes all the same elements - trunk, crown, branches, leaves. However, Birosis has distinctive features: Black spots on the extended trunk, seelings and pointed leaves. On these features, birch can be distinguished from any other tree.
Bereza is a symbol of life and death at the same time. In the spring, the first kidneys swell on it, so many nations of Bereza are a symbol of spring, the start of life and purity.


Ideas for the image of birch in Quilling will be prompted by fantasy, skill and experience. For beginners, it is better to take a diagram easier: drawn or made from the base elements of the barrel and crown with leaves from the corresponding basic forms. For more experienced masters, come up with how to make the composition is more interesting, will not work. It can be a separate branch with large leaves and servants or stylized birch, inscribed in the circle. This master class gives several tips, how to make up and make a craft of birch in the Quilling technique.
This MK will suit beginners and will explain the basic principle of operation in the queening technique. You can make a spring gift for your own hands: panel, picture or postcard with blooming birch. To do this, prepare:
- paper strips for queening under the color of Birch: White, Black, Green, Yellow, Brown;
- cardboard or paper as a basis;
- pVA glue;
- scissors;
- tweezers, ruler, awl.
General description of the work:
- prepare the basis: draw landscape or glue colored paper, applique, etc.;
- make a sketch of future birch: designate the barrel, branches, leaves, seelings;
- based on the sketch, start twist all the necessary parts for the trunk and crown;
- glue all items on the outlined places;
- supplement composition composition: make a frame, grass, clouds, etc.
The trunk can be made from both twisted basic elements and from the curved strips. You can combine stripes with figures. The branches are usually done in one style with a barrel.
The instruction of creating birch leaves and their options is presented here in more detail.
First option: iz basic figuresoK. This is a simple way, which is also useful to assimilate novice, as the basic elements create most paintings in the Quilling technique. For a leaf of Birch, several basic forms may come. For example, "drop", "eye", "boom", "triangle". All shapes are made from twisted paper spirals, which you need to dissolve a little and put the tip.
- "Drop": gently surpassed the spiral on one side with your fingers;
- "Eye": Press the workpiece from two sides;

- "Arrow": with the help of a handle or a special tool to sell one side of the spiral inside, and make the other side of the other side;
- "Triangle": one side is squeezed and pulls out, the other slightly pressed to the middle so that it turned out to be smooth.
Option two: Simple openwork leaflets. To create it, it is necessary to prepare a calcination preferably with rare teeth (with a large distance) and strips of green paper.


Phased creation of sheet: fasten with glue tip strips on the teeth of the church. Evenly (for example, on each teeth or through two teeth) to wind the strip on the discourse.


Make several turns (5-6) and secure the tip with glue.
Third option: List with streaks. It is also easy to make it with the help of a calcination. It is only step by step to follow the rules of execution, relying on the photo. You need to glue two green stripes for queening. Secure the tip on the calcination and start winding the strip around two teeth of the "accordion":


Remove the workpiece with the calculation. Capture the resulting sheet in the middle of the tweezers, fold and glue along the edges.


"Curly" birch can be created from a spiral of different shapes. It is enough to harmoniously combine the blanks to get the crown. To understand how and where the branches should be bending, it is better to pre-schematically draw patterns on a cardboard basis:

Corps quilling can also be made from small basic figures, for example, from "crescents" composed by a column, or from the alternation of the "semicircular" with the "crescent". If a composition with a small format tree, then the servants are better to draw:

It is more interesting to make a whole grove with slender trees. As a sample, you can take any pictures with birch scenery and make sketches on them.
Birch twig with leaves
To make a branch with quilling leaves in more detail, it is recommended to use templates. For example, such:


Galina Alekseevna Mikheev
Master Class« Registration of autumn birches using
provillian techniques»
Learning only then good
when it goes ahead of development.
L. S. Vygotsky
Paper is one of the simplest, available, accessible materials. With paper products, we get acquainted from the earliest childhood. Paper as material for children's creativity incommunicate (ease of processing, mining tools).
Any work with paper is folding, cutting, twisting - not only fascinating, but also informative. Paper gives a child the opportunity to show his individuality, to embody the idea, feel the joy of creativity.
One of the ways to develop artistic and creative abilities is to work in technician quilling(art twist long and narrow paper strips in spirals, modify their shape and compose from the obtained parts volumetric or planar compositions).
The basis of art modeling from paper strips is the simplest ready-made elements: Ring, drop, leaf.
In this master class i will showhow can you with children using machinery Quilling to arrange autumn birch.
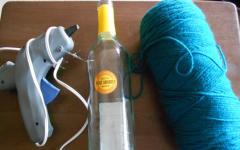
What you need:
production strips (better adult, they must be even, the aesthetic type of craft depends on it;
width strips 3 mm, for marking used ruler;
for strips I. i use tinted paperIn our case, you will need yellow and green;
strips drawn on a sheet parallel to his long side.

tree can be painted independently or - more easy option - Print on the printer (for the basis of me used tight cardboard) .

Then toning is done: bottom - green (grass, top - blue, blue (sky, sky can be made gloomy - wood autumn.
we start twisting strips - you need to get free spirals.

when you screw the required number - we are made of spirals. You yourself choose which leaves will be more - green or yellow (Early, Golden fall) .

Start K. design of the tree itself.

You can add leaves to the ground - already opal! Dorisite birds.

My children and I performed work on registration of spring trees. Here are some children's work.

Good luck in job!
Publications on the topic:
Unconventional drawing is very attractive for children and gives them many positive emotionsSo this year we, with the guys,.
"What a miracle, the fan is not interested in the clearing! Beauty of that lord, proud tail your peacock! " (V. Siberians) Peacock is considered to be.
COMPOSIT OF THE ODO "Tulips for Mom" \u200b\u200bin the senior group (using unconventional appliqués "Quilling") Tasks with integration educational regions: Cognitive development: - expand children's knowledge about international women's Dn.how it is celebrated.
Willing-paper in simple, the art of the manufacture of flat or volumetric compositions from twisted in the spirals of long and narrow strips.
Plane Lapk B. senior group Planny, plot modeling based on Russian folk fairy tale "Masha and the Bear". Purpose: - Create knowledge.
Hello respected colleagues and guests of my page. Glad to introduce you to events that pass in our children's garden. I want today.
I propose a master class for the manufacture of winter crafts - volumetric Applique "Hello from the North Pole!". Objective: to acquaint children of the eldest.
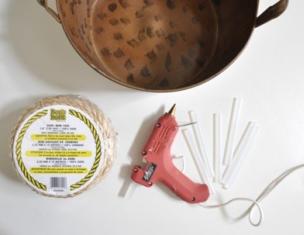
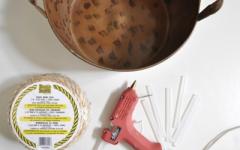
Quilling - This is a simple kind of needlework in our country, which does not require high costs and participation of masters. Paper ribbons can be beautiful decoration Interior, as well as transform gift packaging or postcard. In this master class, we will tell you how to make an original tree in Quilling technique. Now you can independently make confession in love or beautifully present a gift for your favorite people.
Materials:
- sheets of paper for queening;
- cardboard or frame for postcard;
- glue;
- Set for queening.
First of all, you must decide on the type of product: panel, postcard or gift wrap. After that, you can draw a scheme on paper on which you will stick up a queen paper. If you do not have such a paper, you can prepare the blanks yourself. To do this, buy double-sided colored paper and cut it on a strip of 0.5 and 1.0 cm.
The peculiarity of the Quilling technique is that the paper strip is bought with scissors or a special typewriter in roll. At the same time, each workpiece can be given a defined form.

Master class tree in the technique of quilling
There are several forms of workpieces for work in a quilling technique:
1. Eye. In order to make this workpiece, the quilling paper is twisted into the roll and is clamped along the edges.
2. Square. The paper strip is twisted into the roll and clamped on the sides.
3. Rhombus. The workpiece can be made of square.
4. Triangle. Paper twists in roll and turns into a drop. After that, the base is aligned, and the billet turns into a triangle.
Using normal roll as the basis, you can make a blank of any shape and completely fill the panel or card.


After that, you need to fill the hearts with rolls in a quilling technique, while you yourself can choose the fill form.


We make a paper from paper in a quilling technique, video
A tree in a quilling technique looks original enough, and even a beginner can make it easily. Tired of identical gifts and postcards? Enter individuality to your life - make quilling in simple technique.
Quilling "Rowan": Three Master Classs for the manufacture of panels, compositions and postcards with rowan in a quilling technique. Ideas for creativity with children.
Quilling "Rowan": Three Master Class
In this article you will find three master classes in Quilling technique. And all of them are devoted to one topic - a wonderful Russian tree Ryabinushka.
In the first master class You can do with children a small postcard with rowers.
In the second master class You are waiting for ideas for the collective work of many children - the general big Punk In the technique of quilling with rowan branches.
Third Master Class - This is a video master class. He is very detailed. You can see all the tools for queening, the wonderful features of this technique, as well as all the techniques for the manufacture of rowan sprigs from paper in quilling - very detailed and step by step.
So, proceed!

Postcard "Rowan": quilling. Step-by-step master class
The master class has prepared faith Parthenteyev - Teacher Technology, Head of a Mug of Children's Creativity, Permanent Reader of "Native Tropick" and participant of the online workshop of educational games "Through the game - to success!"
Making a rowan with children in the technique of Quilling, tell them about how our ancestors were carefully and trembled to this tree, why they were as gentlely called Ryabin - "Ryabinushka". This will help you
How to make a postcard with rowan in a quilling technique
You will need for the manufacture of postcards:
- narrow paper strips for queening,
- scissors,
- PVA glue,
- the basis for the postcard ( dense paper or Cardboard size A4),
- Template for queening with circles different size.
- Toothpicks or a special queen tool

Making a postcard "Rowan" by steps
Step 1. - We make billets for rowan twigs. How to make rowan twigs
Need to cut strips brown color different lengths, bend them in half. And glue almost the entire strip from the bend, leaving the non-glued plot from the opposite side of the fold (on one side of the strip you will be folded, on the other hand the ends of the strips are "watching" in different directions).
The photo shows different stages of the manufacture of strips - future sprigs of rowan and ready-made glued stripes.

Step 2. We make rowan leaves in a quilling technique
First you need to turn out of the strips of different colors (colors of rowan foliage) free rolls in the technique of quilling.
How to make a free roll in a quilling technique:
- We take a toothpick or a special tool for queening, screw the strip on them - it turns out roll.
- We glue the end of the roll.
How to make rollseye shape: To do this, press the ends of the roll from opposite edges. It turned out the shape of the eye or leaflet.

We glue the leaflets in the twigs (look at the sample twig at the bottom of the photo).
If you want more and clearly consider this process - you will find it full detailed description and showing techniques in the third master class of this article (see video about quilling).
Step 3. We make rowan berries in Quilling technique
First we make rolls of red strips also as we made rolls for rowan leaves: screw the paper on the toothpick or a special queen tool and glue the end.

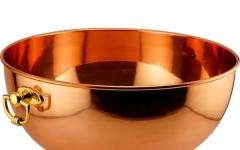
Step 4. Making the basis - background
From cardboard cut circle. Smooth paper of blue color And shook it a circle. At the request of the edge of the circle, you can toned the paint of any color of autumn.

Step 5. Create a composition of twigs and berries based on - Circle
Sharpe a bunch of rowabins and twigs based on the basis of the Bourge. Adhesive pieces of paper doom.


Step 6. Register quilling - a postcard with rowan
We glue the workpiece with the rowan branch on the basis of the postcard. Card ready.

Panel "Rowan" in the technique of quilling
Of the same elements - berries, sprigs and leaves of rowan, made in a quilling technique, you can make very bright and children and beautiful panel. This is Panel big size And it requires the manufacture of many small parts: berries, leaves, rowan twigs. Therefore, it is especially good to do it with a group of children as a collective creative work. Or make the whole family immediately - adults together with children - as a gift for autumn holiday near man.
Details on the manufacture of a large panel in the technique of Quilling "Rowan" - in the video below:
Composition "Rowan" in a quilling technique: showing elements
In more detail step by step video On the manufacture of rowan in the technique of quilling with children , You will see:
- What wonderful crafts are obtained in children engaged in quilling - whole fairy tales! I have never seen this before and did not even imagine that children can create such a miracle with their own hands!
- Look very detailed step-by-step master class on the manufacture of quilling compositions with rowan branch. Leads master class Master - Teacher by Qwill Galina Sergeyevna Amelina. The master class will be interesting for children, and for adults.
In B. the ideule below shows very detailed all tools, materials, how to make it possible to perform every action in the manufacture of rippers in a quilling technique. This is a telecast from the series "Mine School" of the first educational channel.
Magnet "Rowan" in kvilling technique
Your children learned from your help to make berries, branches and rowan leaves. It's time for creative task.
Ask children a creative task with a rowan branch: questions for creativity, reasoning
- As you can, instead of a postcard with a cluster of rowan, make the same magnet to the refrigerator. Come up with how to do it? Make it.
- Come up with your version of the autumn greeting card with a bunch of rowan. How else can it be located on a postcard? on a magnet? on panel?
We wish you creative success! To new meetings on the "native path"!
Yet interesting ideas For the manufacture of autumn gifts and crafts together with children, you will find in the articles of the site:
"Development of speech from 0 to 7 years: what is important to know and what to do. Cheat Sheet for parents"
Click on or on the coup cover below for free subscription