Hello, dear friends!
The topic has been brewing for a long time, because sew related details so that the seam is practically invisible, you also need to be able to. And finally, my hands (not without the participation of my head, of course) got around to writing such a post.
As I studied the material on this topic, my surprise grew. It turned out that for a long time I used a method that was not described in these books. Well, since I really like it, I didn’t have any desire to switch to generally accepted ones.
Today I will introduce you to all the stitching methods that are now known to me. knitted products and, of course, I’ll share my trick. And your old friends Lenusya and Nikolavna will help me with this:
- Hello, Nikolavna.
- Well, hello, hello, Lenusya. I just heard out of the blue that you were talking about some kind of “proprietary” method. Maybe he will be eligible for the Nobel Prize? 😉
-Are you laughing? I didn’t come up with this “proprietary”, as you put it, way of sewing parts together, I just don’t use it where it is recommended. But more on that later.
- Oh, she really intrigued me! So what are you going to tell me about now? What did you learn from your books?
— I learned a lot of new things for myself. It turns out that if the knitted fabric is not too thick, then its details can be JOINTED with large stitches on sewing machine. I've never used this method. And you, Nikolavna?
“I once sewed a factory knitted sweater that had ripped along the seams on a machine, but it didn’t work out very well—everything was so tight that I had to unravel it and sew it by hand.
- It's clear. Or maybe some of you, dear readers of this post, sew parts on a machine? Please share, do you get any distortions when stitching? Do you baste the edges of the pieces before joining this way?
- Instead of telling a story, you ask only questions, Lenusya.
- Don’t rush, Nikolaevna, everything has its time.
I also learned that seams vary depending on whether the knitted item needs to be sewn vertically or horizontally.
- Well, this is not news to me!
- And this is news for me. So, to make VERTICAL knitted seams (they are used to sew, for example, a back with a front, sleeves), the parts need to be laid out with the right side up, and their edges should be joined end-to-end.
Then, using the needle to grab the broach between the edge loop and the adjacent loop of one part, insert the needle into the symmetrically located broach of the other part. Repeating this technique and alternating sides, sew the product (as in the picture).The thread does not need to be pulled too tightly so that the seam is elastic.
- It’s somehow strange... I’m used to putting the parts face to face and sewing them with small stitches either along the edge loops, or at a distance of half a centimeter from the edge loops.
“I also read about this method of joining the parts of a knitted product. But besides him there are others.
So, for example, if you need to sew the parts of a product made with stocking stitch or elastic, they are laid out face up, joining the edges end-to-end, and the needle is inserted not under the broach, as mentioned above, but under the arc of the front loop located next to the edge loop, picking up alternately each loop of one fabric, then another.
- Wow! Do you have any recommendations for garter stitch, Lenus?
- Yes, of course. Garter knitting is also sewn from the front side, but at the same time the edge loop is picked up by a needle on both walls, while simultaneously inserting it into the edge loop of the adjacent fabric so that the stitch has a horizontal direction.
- Yeah... Live forever and learn! How then are HORIZONTAL seams made? Is it really different?
- Completely different! The horizontal seam is made using the “loop-to-loop” method. For example, to connect parts related stockinette stitch , insert the needle into the first loop of the lower part from the bottom up, then insert it into the first loop of the upper part from top to bottom and bring it out through the next (second) loop.
Next, we again insert the needle into the first loop of the lower part and bring it out through the second loop. Then we insert the needle into the second loop of the upper part and bring it out through the third loop, repeating in this way until the end of the seam. In this case, the thread must be pulled so that it takes the shape of a loop, as when knitting with stockinette stitch (see picture).
Horizontal seam connecting the loops on stockinette stitch
- Wow! Without a hundred grams (just kidding), without a drawing, you can’t figure it out...
- Joker... When connecting parts related purl stitch, the seam is done the same way. The figure shows this more clearly.
Horizontal seam connecting the loops purl stitch
- Lenusya, when are you going to tell me? how to sew a knitted product the way you use?
— I make vertical seams using the “loop-to-loop” method just described. But the difference is that I insert the needle (or hook) not into the horizontal loops, but into the edge loops, having first folded the parts face to face.
If the yarn used to knit the pieces is thick, I don't put too much tension on the thread I'm stitching with. If it is thin, then after sewing a small section, I stretch this thread until gathers form, and then I stretch this section again. As a result, the seam connecting the parts is front side completely invisible.
If the thread sewing the parts is not pulled together, a nice seam appears on the front side, which can sometimes be left (not pulled) to decorate the product.
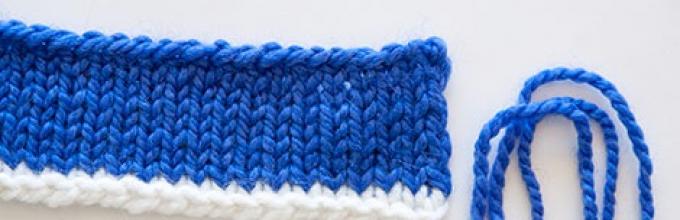
In the photo, I specially selected contrasting threads and spread the seam so that it was clear how the parts were connected.
My “signature” way of stitching parts
That's my whole secret! And I’ve been using this method for a long time!
Yes, here's another thing. When sewing parts together using this method and the one Nikolavna uses, you need to periodically look at the front side so that the pattern or stripes of the two parts coincide with each other.
- Well, you stunned me, Lenusya! So simple!..
— First, you need to understand the “loop to loop” method so as not to get confused with which edge to insert the needle into, and then, really, it will be simple, clear and beautiful! 😉
- So, our dears, study all the ways of sewing knitted items and choose to your taste!
— And we would be interested to know which of the methods described above do you use? And did you find the answer to the question today? ?
— And if you liked the material you read, please share it with your friends and acquaintances by browsing through the social buttons. networks!
Sincerely, . Good luck to you!
One of the important stages of knitting is the process of joining the parts of the product. Incorrectly or carelessly executed seams can ruin the most beautiful thing. You can sew elements in different ways, but in any case, the seam should not tighten the product and be invisible. The exception is decorative seams - they are usually made with a contrasting thread and serve as an additional decoration for the product. In this article we will look at how to connect knitted details needle, knitting or crochet.
General instructions
- The connection of knitted parts is best done with the threads from which they are knitted. You can replace them with a flat thread suitable color. It should be strong enough and not fade;
- pre-sewn parts need to be WTO, taking into account the features of the pattern. After drying, it is advisable to sweep the product and try it on;
- The seams must be performed in the sequence as recommended in the description of the model. If there are no such recommendations, then first stitches are made on the shoulders, sides, and sleeves. Finally, the sleeves are sewn in and finishing is done;
- The length of the sewing thread should not be very long. Comfortable length – no more than 45cm;
- try to keep the thread tension even. The seam line should be smooth: for horizontal, you need to focus on the stitch of one row, for vertical, on the vertical row. one point at a time For beginner knitters, you can mark the stitching line with a contrasting baste;
- if necessary, small errors can be adjusted by fitting different lengths stitched parts. But keep in mind that such adjustments can be made to a difference of no more than 1.5 cm;
- For some parts such as golf collars or cuffs with cuffs, part of the seam is done on the faces. side, part - on the wrong side. This is done to ensure that the sewing line is always inside the part.
Loop-to-loop seam
The connecting seam follows the line of the eyelets, so it is almost invisible. In this way, you can connect the fabric with both open and closed loops.
Sew two closed edges
Place the prepared parts (see recommendations above) on a horizontal surface, face up. We move the edges to be sewn closer to each other. We pass the needle through the edge stitch of the lower fabric and pull out the thread. We stick the needle into the edge. stitch of the top fabric and prick it out in the center of the next stitch below the closed edge. Next, we move as shown by the arrows in the diagram - we poke out a needle in the next loop.
On the upper fabric we move along the loops, passing the needle through the walls of the last one and the one following it. We make punctures in the center of the loops. After sewing about 2cm, we tighten the thread. The parts are pulled together to form a continuous web.
This is how it looks on canvas.
Sew the two open edges
Combine the edges with the loops. We insert the needle into the 1st stitch of the lower fabric. Pull the thread through and lower the loop. We pass the needle through the loop on the top part and, pulling the thread through it, lower the stitch. We continue like this, alternately stitching the stitches of the lower and upper fabric.
We get a neat seam line. The main thing is to maintain uniform thread tension.
We connect the knitted parts. Loop to loop: video master class
Vertical seams “Mattress seam”
On the front surface
In this way, the parts are connected from bottom to top.
We start with the cross thread. Passing the needle under the broach between the edges. loop and 1st p., pull out the thread. On the counter piece we also pull out the thread, passing the needle under the broach between the edge and trail stitches.
We repeat such movements for several cm. Tighten the thread.
This makes it great for stitching together a fabric of colored stripes.
On purl loops
Knit according to the previous method. The thread should pass under the middle part of the purl/p next to the edge/p, alternately on both parts. The seam is thicker than the previous one, but also almost invisible.
For serrated edge
Insert the needle alternately into the knot of the left and right parts. The thread does not need to be pulled tight. The completed seam looks like an additional purl stitch.
We connect the knitted parts. Mattress knitted seam: video MK
How to connect transverse and lobar knitted parts
This way you can sew the sleeves to the back and front pieces.
We pass the needle one row below the closed edge and pull out the thread. Then we pick up the broach between the edge and the next stitch and pull the thread. We repeat the steps for a short distance and tighten the thread.
Seam for elastic
Let's consider execution for open loops. You need to knit two additional rows with an auxiliary thread. Steam the parts. After the WTO we dissolve additional rows.
Lay out the knitting on a flat horizontal surface. First, we will sew a seam on one side of the fabric, then move on to the second. Insert the needle into two stitches of the lower fabric. We tighten the thread and insert a needle into two matching stitches of the upper fabric. We continue to pull the thread.
Having finished work on one side, we move to the opposite. Align the loops and repeat the algorithm as recommended above. Periodically tighten the thread.
We get an invisible seam that repeats the main pattern.
We connect the knitted parts. Seam for elastic: video master class
Hand stitching
The execution of this seam imitates machine stitching. Its second name is “back the needle.” The hand-sewn knitted fabric does not shrink. The sewing line is neat and invisible. When performing this, it is very important to ensure that the edges of the parts are aligned. It is also important that the seam runs along the same row of eyelets on both one and the second piece.
We step back from the row with closed stitches at least one row and insert the needle between the stitches without damaging them.
Having laid the stitch back, we poke out the needle in front at a distance equal to the stitch. Again we make a stitch back and poke the needle out in front. This is how we complete the entire seam.
Chain stitch
Outwardly, it looks like a chain of VP. The method is used when processing armholes, bottom edges, and necklines of products. The decorative binding of the parts is knitted from the loops of this seam.
Having secured the thread to wrong side, we take it outside. Forming a loop (see photo), insert the needle into the hole in the pin. Pull out the needle and tighten the thread. For the next stitch, insert the needle into the middle of the previous one.
It is very important that all stitches are the same length.
Kettel seam
This option is used when a small finishing piece needs to be sewn to the main part or when edging the edge of the product is required.
The knitted fabric must be ironed so that the edge is even. The part to be sewn must have open stitches. To do this, you can knit two rows with waste thread, then unravel it.
There are two ways to make a quilt stitch.
Method one - with a needle
We use the yarn from which the main fabric is knitted. The thread should be three times longer than the intended seam.
We poke the needle from the inside out onto the faces. side into the 2nd st., then through the 1st st. we go down, prick up again through the 3rd st. Again down through the 2nd st. and up through the 4th st.
Method two - crochet
Making this seam is more difficult. If you need beautiful view on the wrong side, then it makes sense to choose this option.
We hold the stitched parts from the inside. side towards you, thread at work. We make a chain stitch by piercing the fabric with a crochet hook - see photo.
We connect the knitted parts. Kettel stitch: MK video
Kitchener seam
The toe on Earl Kitchener's socks was sewn in this way. The count was not satisfied with all other options. This is where the name of the ordinary horizontal knitted seam comes from.
Initially we have two knitting needles with open stitches. We place them nearby. Thread at work.
Insert the needle into the 1st st on the 1st knitting needle, as when knitting purl/p, leaving the st on the knitting needle. Then insert the needle into the 1st st on the 2nd knitting needle, as when knitting k/p, leaving the st on the knitting needle. Next, on all the loops we work alternately, first with 2 stitches of the 1st needle, then with 2 stitches of the 2nd needle.
Operating procedure:
- Insert a needle into the 1st stitch on the 1st sp, as in k/p, remove this stitch. We insert the thread into the 2nd st, as in purl/p, and leave it on the sp. Tighten the thread.
- Insert the needle into the 1st st on the 2nd needle, as in k/p, lower this st. Insert the needle into the 2nd st on the 2nd sp, as in purl/p and leave it on the sp. We tighten the thread.
When we have 1 stitch left on the knitting needle, insert the thread into the stitch. on the 1st, as in k/p, we lower it. Insert the needle into the stitch. on the 2nd sp., as in p/n, we lower it. We bring the end of the thread to the wrong side and carefully weave it into the fabric.
Place the pieces to be sewn facing inwards. We hook two loops, one from each part.
Then we grab the two trailing loops and pull them through those on the hook. We continue like this for the entire length. We get a neat and elastic seam in the form of a pigtail.
Crochet connection - one edge open
If you have both edges closed, then one needs to be opened.
Fold the pieces inside out. We pierce the closed edge between the loops with a hook, pick up 1 stitch from the open ones and pull it out through the fabric.
We pierce the fabric again, pick up the loop and pull it not only through the part, but also through the loop on the hook. Continue this way until the desired length.
Cord connection
We place the details side by side. For the cord we cast on 3 stitches.
We lift the 1st stitch of the right part onto the knitting needle. We knit this loop together with the 1st loop of the cord in 1 k/p.
Next we knit 1 k/p on the cord. The third loop of the cord and the 1st stitch. We knit the left part in 1 k/p with a broach (= 1 knit stitch, remove 1 k/p, pull it through the removed stitch). Repeat the steps until the full length of the seam.
Stitching knitted fabrics. Selection: methods, knitted seams, master classes + MK videoIn this collection:
1. Choosing a needle for knitted seams.
2. Knitted seams: vertical seam, horizontal seam, loop-to-loop seam, kettel seam
3. Stitch a loop in a loop along the front loops.
4. Vertical knitted seam along the front surface.
5. Vertical knitted seam along the reverse surface.
6. How to sew two knitted fabrics with closed loops.
7. Knitted kettel stitch with a needle. How to sew a collar
8. Professional kettel stitch.
9. How to sew knitted items with CROCHET! Perfect machine stitch!
1. Choosing a needle for knitted seams.
In this video about knitted seams, I will show you which needles to use for sewing knitted fabrics so that you can achieve “seamless knitting”.
Knitting without seams - special equipment, which requires considerable experience and skill and is not suitable for all knitted models. For now, we will simply imitate this technique and our knitted seams will be almost invisible.
Choosing the right needle when sewing knit stitches is very important. The needle should help in working with knitwear, and not cause problems, right?
2. Knitted seams: vertical seam, horizontal seam, loop-to-loop seam, kettel seam
The knitted stitch "loop to loop" is used when knitting. The seam is used to connect parts along open loops. This seam is completely invisible. We bring to your attention a photo and video lesson on how to perform a loop-to-loop seam using open knit stitches ( stocking knitting).
To make a seam, you will need to leave a free end of the thread 3 times longer than the seam, plus 15 - 20 cm for holding and sealing the thread. The parts to be sewn are folded with open loops facing each other. The number of loops on both parts should be the same.
A loop-to-loop stitch can be made directly from the knitting needles or by first ironing the parts - depending on what is more convenient. In the latter case, knit a row with an additional thread (preferably a different color) and close it. Do wet-heat treatment and the additional thread is unraveled. Pressed open loops remain, which are convenient for making seams. If the seam is long, then the loops from the additional thread can not be unraveled immediately, but gradually, so that the main loops do not unravel. 
Rule: the needle enters the same loop 2 times: first from below, then from above.
The working thread is located on the bottom part. Insert the needle from bottom to top into the lower first (edge) loop and pull out the thread. 
Then we return to the lower first loop, inserting the needle from top to bottom. Immediately remove the needle from the second lower loop in an upward motion. 
Now we return to the first upper loop, insert the needle from top to bottom and bring it out into the next loop from bottom to top. 
We return to the bottom row, insert the needle into the second loop from top to bottom, and bring it into the third from bottom to top. 
And so we continue: from bottom to top, the needle is inserted in “your” row, from top to bottom - when moving to another row.
This is what the finished seam looks like. This is the most invisible cross knit seam 
Video tutorials on making a loop-to-loop seam using knit stitches using knitting needles
In this video about knitted seams, I will show you how to sew knitted fabric using a loop-to-loop stitch. This invisible seam allows you to sew a sweater or knitted sweaters almost imperceptibly in detail. And also, carefully sew the details of children's knitwear so that the seam does not put pressure on the baby. This seam can also be used to repair knitted items.
The seam is truly invisible on the product and can be used in both crochet and knitting. It's easy and you'll learn it quickly. Use it!
4. Vertical knitted seam along the front surface.
In this video you will see a vertical knitted seam in knitting and learn how, when knitting a sweater with sleeves, sew the sleeves, back and front of the product so that the seam is not visible. In this video, a knitted seam is made along the stockinette stitch.
This seam can be done not only on knit stitch patterns, but also on any other knitted fabric. The main thing here is to pick up the broach not from the edge loop, but from the loop adjacent to the edge loop. When knitting, there are fewer opportunities to knit in the round than when crocheting, and the question of knitted seams becomes very relevant. In this video, I offer you one of the options for vertically connecting knitted fabric along the front surface.
5. Vertical knitted seam along the reverse surface.
In this lesson you will see a vertical knitted seam in knitting and learn how, when knitting, for example, a hat or a beret, purl the edges of the product so that the seam is not visible.
In this video, a knitted seam is made along the purl stitch. This seam can be made not only on patterns of purl stitches, but also on garter knitting (we knit the front rows both on the face and on the back), but also on any other knitted fabric. Here, the main thing is to pick up the broach not from the edge loop, but from the loop adjacent to the edge loop.
When knitting, there are fewer opportunities to knit in the round than when crocheting, and the question of knitted seams becomes very relevant. In this video, I offer you one of the options for vertically joining knitted fabric along the reverse surface.
6. How to sew two knitted fabrics with closed loops.
In this video you will see how to make a butt seam on a knitted fabric with closed loops. In this case, the seam technique is the same for both fabric knitted with knit stitches and knitted with purl loops.
Bring the working thread from the wrong side of the face to the middle of the front loop. Hook onto the broach of the loop of another knitted fabric and insert the needle again into the middle of the front loop, only from top to bottom.
This invisible knitted seam can be used to join two knitted fabrics with closed loops. For example, this is how you can sew the back and front of a product, or attach (sew) pockets to a knitted sweater. This way you can lengthen (adjust) the sleeves and legs of children's knitted items, because children grow so quickly. Good luck to you, now you have one more knitted stitch in your arsenal.
7. Knitted kettel stitch with a needle. How to sew a collar
In this video tutorial on knitted seams, you will see how to professionally knit (sew) a stand-up collar to a sweater, cuffs knitted with an elastic band to a child's blouse that the child grew out of, or to a sweatshirt that you sewed yourself. This seam can be used to sew a placket to a jacket, or to lengthen a child’s warm bollon pants.
In general, there are many options for using this knitted kettel stitch. By learning how to perform a kettle stitch, you will give your knitted items respectability. This is a professional seam, which is performed in factories by special sewing machines. You will learn how to do it only with the help of a needle and thread, and your sweaters and blouses will always surprise your friends with the accuracy and professionalism of their production.
8. Professional kettel stitch.
How to sew cuffs?
In the second part of the video tutorial about the knitted stitch, you will see how to stitch from the front side. I will show you the secrets and features of this knitted stitch. You will learn how to fasten the outer loop, how to hide the threads, where to insert the needle, how and which broach to hook it to and which loop to remove it from. Now you can attach collars, cuffs, placket, etc. Good luck).
9. How to sew knitted items with CROCHET!
We sew the product with a crochet and get a machine seam - very beautiful and even.
How to beautifully connect the details of a knitted product.
Connection Masterclass
I have already written a post-selection about possible ways of decoratively joining knitted parts -
Here is my “favorite” and most often used option on how to beautifully sew knitted parts so that it looks neat and impressive. This method can be used for both crocheted and knitted items. The connection itself is made with a crochet hook.
I usually connect the sleeves on the outside this way, and if you “add” a similar pattern on the cuffs and along the bottom edge, then the decorative component of the product looks very harmonious and stylistically consistent)))


But the connection of the back and front on the sides is also very beautiful and rational, for example, in summer tops, knitted with an openwork pattern or ribbon lace crochet


The connection of two parts of the back or front is very impressive in some models made using a certain knitting technique, in particular the “hexagon”, where a beautiful wide strip of openwork adds a special zest to the product!

The connection can be made both on crocheted items and on knitted models, including on the edge with already closed loops, and on open loops simultaneously with the last row of closure.
So, for this method, initially a complete vertical repeat of the connection pattern is knitted along the side of one part - in a “simple, narrow” case, these are 2 rows: approximate pattern No. 1.
Scheme No. 1
1st row: 2 VP lift, 3 VP, RLS (= “small” arch from VP), 5 VP, RLS (= “large” arch from VP). Next, we repeat the alternation of “small” and “large” arches from the VP through the sc, ending the row with an edge sc
2nd row: 1 VP lift, *sc under the “small” arch from VP, 7 dc under the “large” arch from VP*. Repeat from * to *. Finish the row with an edge dc.
For a beautiful result, it is advisable to start and end the row with a “small” arch made of VP.

At the beginning and at the end of the row, we knit the outer loops without a pattern, like edge loops: at the beginning of the row - 1-2 stitches, at the end of the row - Dc.


Then, on the corresponding side of the second part, the 1st row is first knitted, then in the process of knitting the 2nd row, both parts are connected at the central points of the “shell” of the pattern: a connection is possible at three points, perhaps at one.
Depending on the model, the desired width of the entire openwork strip can be increased by adding rows of the same “shells” to a row of connections on each of the parts, or you can knit the pattern used in the product, which includes similar elements of “shells” or “fans”.
For example, for a “wide” stripe along the back of this cardigan, several rows of the pattern were first knitted on each of the two parts of the back: on one part the row of joining was completely completed, on the second part the penultimate row was knitted.

The connection pattern is always large, with large openwork shells. If desired, you can reduce the size of the pattern elements being performed, for which you need to recalculate the number of knitted loops and posts in pattern No. 1.
The MK text proposes a connection principle that you “adjust” to the knitted model you choose.
MASTER CLASS
Option 1. Pattern on closed loops of the edge of the product with a connection at one point
Using the example of connecting the outer sides of a sleeve for a product, crocheted. Suitable for products knitted with knitting needles on the sides with already closed loops.
There is a completely prepared side of one part A: 2 rows are knitted according to pattern No. 1.
There is a blank on the side of the second part B: 1 row is knitted according to pattern No. 1.
Working row for part B: 1 VP lift, sc for a “small” arch made of VP, 3 sc for a “large” arch made of VP, 1 VP.
Remove the working loop from the hook. Insert the hook from the outer (front) side of part A into the 4th central point of the “shells”

bring a working loop through it, perform 1 VP, under the same “large” arch of 5 VP on part B, knit 3 DC = the “shell” is ready in the current working row on side B.

A similar connection at the central points of the “shells” of opposite parts is performed when knitting a “wide” openwork strip, taking into account the pattern that is made before the connection, i.e., as a rule, there are additional connection points in other elements of the pattern.

More details about the model with a “wide” openwork stripe along the back
Option 2. Pattern on a product with open loops with a connection at three points.
Using an example of a product made with knitting needles.
The method is also suitable for products made with crochet and knitting on the side with closed loops - in fact, option 1 is used.
There is a side of the product of part A with open hinges.

We close the loops and simultaneously knit the connection pattern as follows:
1st row (in finished form corresponds to the completed 1st row of pattern No. 1): using a working thread, insert a hook under two open loops of the fabric, knit RLS (= edge stitch), 3 VP, insert the hook simultaneously into 3 open loops of the main fabric, through knit all 4 loops with a connecting stitch, cast on 5 VP

Knit the connector. through the next 3 open loops of the fabric + working stitch on the hook.
Thus, the entire row is knitted by alternating a “small” arch of 3 VP and a “large” arch of 5 VP through a connecting stitch, knitted through 3 open loops of the main fabric.
Finish the row after the “small” arch of 3 VPs with an edge RLS.
2nd row (in finished form corresponds to the completed 2nd row according to scheme No. 1): 1 VP lifting,


Then, after completing 2 rows on the side of part A and the 1st row on the side of part B, in the working 2nd row of part B for the connection, knit as follows:
3 VP lifting, remove the working stitch from the hook, insert it without a loop along the outside of part A into the 3rd “shell” loop,

Take a working loop out of it, knit 1 VP, sc under the “small” arch from 3 VP on part B, continue 3 Dc under the next “large” arch, 1 VP, insert a hook WITHOUT a loop from the outside of the product under the 4th central loop “shells” on part A, bring the working loop through it, perform 1 VP,

Knit 1 Dc under the same “large” arch on part B, 1 VP, insert a hook without a loop from the outside of the product into the 5th p. “shell” of part A, 1 VP, continue and knit 2 more Dcs under the same “ large" arch on part B. The "shell" on working part B is ready.
Knit sc under the “small” arch.
Next, knit “shells” in the working row on part B in a similar way with a connection at three points - 3, 4 and 5 points. “shells” on the opposite part A.
At the end of the row, after completing the sc under the last “small” arch, knit a dc into the edge loop, insert a hook without a loop into the edge stitch of the other part and knit 2 stitches. connecting art.

The finished connection looks like this


Try it - such a decorative combination will definitely add zest to any product and make the simplest and most discreet style spectacular! Knit with pleasure!

Connecting the parts is the most crucial moment in completing knitting. The right choice seam can improve appearance knitted product and increase its service life many times over. In our master class we will tell you in detail and show you how to sew parts, knitted . When joining products, it is customary to use a knitting needle or crochet hook.
How to sew knitted items with a needle
Closed loop seams
Horizontal seam
Performed with a needle from the front side of the knitting. The needle is threaded alternately into the lower fabric, then into the upper one, grabbing the topmost facial loops from right to left. The parts are placed symmetrically one above the other on a flat surface. 


Seam from the wrong side.

Vertical seam along the reverse surface
Used to create a continuous pattern. To connect the elements, we skip the edge loop and insert the needle into the broach.  They are located vertically above each other.
  The seam is made from bottom to top.
This connection looks neat on the front side of the product. 
The connection of fabric from purl loops is used when knitting sweaters with braids, which are knitted against the background of purl loops.
Mattress seam
The mattress or vertical knitted seam is made from the bottom up. The canvases are placed side by side, the edge loops must match. Sew the fabric on the front side. The seam is tightly fixed until the thread completely disappears in the knitting. This seam is used to connect parts knitted with stockinette stitch. Use a needle to grab the side thread located perpendicular to edge loop.  We grab the same loop of another fabric.
  To sew parts together, it is better to use the thread of the part itself so that the bottom edge of the knitting is neat. When stitching, only the loops following the edge are captured.
  The connection is hidden from the outside.
  There is a seam on the wrong side.
  The connection is suitable for thick yarn, voluminous and dense knitting. When joining items made from fine yarn, an invisible seam is often used.
Open loop seams
Loop-to-loop seam
An invisible or hidden horizontal seam is suitable for fabrics with open loops. The knitted seam is used to sew together the front surface. The density of the seam should match the density of the main knit. The seam is made on the front side. Use a needle to grab the bottom loop, from the inside up, grab the two top loops. 
 Return the needle to the first bottom loop and immediately grab the second bottom loop.
 We pull the needle into the second upper loop, pulling the thread through the third, and return the needle to the second lower loop.

 Sew from right to left. On the wrong side of the product, the seam is also invisible, so it can also be used to connect purl loops.
  The seam is made with matching thread.

Kettel seam
Most often used for stitching the neckline. A seam is used to connect two fabrics, one with open loops and the other with closed ones. Factory knitted items are connected using a kettel stitch. For stitching, place the fabric with open loops on top.  From the bottom up, using a needle from the edge loop, we grab the first loop from the wrong side, bring the needle into the second loop, and insert it into the first.

Next, we bring the needle into the third, insert it into the second, and bring it out into the fourth. 

Pull the needle out through one loop.  We count only open loops.
 The kettel stitch is made with matching thread.
How to sew crochet details
Half double crochet connection
Dense knitted parts are connected. The seam is simple: the parts are folded with their front sides facing each other and tied with half-crochet stitches. 

 The working thread passes through the edge loops.

Single crochet connection
Suitable for elastic and openwork knitting. The edge loops of the parts are tied with single crochets. 
 The seam is made with thread to match the knitting.
Single crochet connection with an air loop
This seam is used to combine openwork and elastic fabrics and elastic bands. 
 The seam is made with a thread of the main color.
Zigzag connection
Often used to connect motifs. The seam is made on the front side, the canvases are placed side by side, and the hook alternately grabs the edge loops of one fabric or the other. 


 With this type of connection, the seam is not tight, it looks interesting both on one side and on the back.
  It is performed both with a thread of the main color and a contrasting one.
We hope everything worked out for you.
Share your result with us and leave comments.


