Deposits of old, read and no longer needed newspapers can be useful not only for cleaning or lighting a fire. If you wish, you can combine two useful activities at once: get rid of stacks of waste paper that collects dust, and acquire new decorative elements or even furniture.
To understand how one is connected to the other, just look at the photo of weaving from newspaper tubes online.


The principle of weaving using newspapers
To turn old newspapers into a coaster, basket, or even a box, you need to turn newspaper sheets into narrow tubes that look like the vine from which wickerwork is made.

Due to its softness and plasticity, even a beginner can master the technique of weaving with newspaper tubes. And taking into account the strength of the material, especially if it is treated with special compounds, the result of the work will last a long time and of high quality.

Before you start weaving, you will need to prepare the materials necessary for the work and make blanks.


The list of all components will include:
- a stack of newspapers (the volume of material depends on the size of the planned product);
- paper glue;
- scissors;
- ruler;
- knitting needle, about 2 mm thick;
- sheet of cardboard;
- acrylic paint of the selected shade.

The production of blanks refers to the transformation of newspaper sheets into tubes. Step by step instructions Such production includes several stages.

First, you need to cut the existing sheets lengthwise into strips 10 cm wide (using a ruler and scissors).


Secondly, the resulting strips are wound on a knitting needle one by one, and the process begins from one corner of the paper to the other diagonally. The extreme corner of the sheet is smeared with glue and secured to the resulting tube.

DIY tube weaving
Ideas for weaving from newspaper tubes can affect any area of life. In this manner, you can make an office organizer, a jewelry box, a candy vase, or a linen drawer.

The only thing you should avoid when using this material is weaving massive furniture. A light shelf with a durable frame can still withstand light weight, but weaving, for example, a chair from newspaper tubes is an impractical process.

If we talk about the first product with our own hands, then it is better to focus on simple decorative items, which, in case of an error, can be easily corrected. Moreover, find and view detailed master class it is much easier to weave a vase or basket.

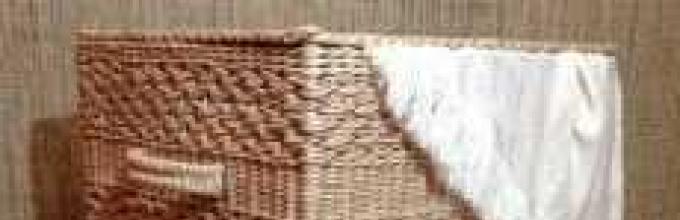
Basket made of newspaper tubes
Weaving a basket from newspaper tubes for beginners is one of the simple but interesting activities. The main thing here is to adhere to the system and monitor the correct sequence of actions.

The start of work fully corresponds to the described process of procurement of materials. the further algorithm of actions looks like:
On a sheet of cardboard, using a compass or a suitable sized utensil (jar, bowl, etc.), mark the diameter of the base of the basket.

Two identical base circles are cut out of cardboard. On one of the cut out circles, along the edge of the circle, marks are made with a pencil in increments of 1-2 cm.

The prepared tubes need to be flattened on one edge to a distance of 3-3.5 cm. Each tube with its flattened side is secured with glue to a cardboard circle with marks (one tube per mark).


A second cardboard circle, greased with glue, is placed on top of the glued “sun” of tubes and pressed tightly. When the glue has firmly set, each newspaper “vine” needs to be bent upward at a right angle - you will get a frame for the basket.

To prevent the tubes from falling apart, the frame can be secured with an elastic band. The tube of the first layer is glued with its flattened end to the cardboard base inside the frame and is wound behind the nearest twig on the right so as to go around it from the outside.

The next twig of the frame must be circled with a strip from the inside. Alternating in this way, the strip is continued until the strip is completed. When one strip ends, the next tube is screwed into its end so that there are no breaks in the material.

To ensure that the product has smooth sides, after completing the first row, it is better to place a jar or glass of the appropriate size inside the frame.

When the product reaches the planned height, the edge of the tube is cut with a small margin, and the remaining tip is bent inward and glued. The protruding rods of the frame are also cut to the level of the edge.


The first and second tubes of the frame, to the right of the tip of the last strip, need to be cut with a margin, bent inward and secured with glue.

The product is ready, all that remains is to coat it acrylic paint. Moreover, it is important to pay attention to the basis more attention, covering it with three layers, and the sides of the basket can be painted with one or two layers.

Photo of weaving from newspaper tubes


Surely the housewife has a stack of unnecessary newspapers at home that it would be a pity to throw away. A DIY newspaper basket will give them a second life. The product, depending on its size, can be multifunctional: it is a box for small items, a box for papers, and a basket for things. With the help of such a unique detail you can decorate your interior. Also, a homemade basket will appeal to needlewomen, as they can experiment with its design, relying on their limitless imagination.
Flower basket
A bouquet in a basket made from newspaper tubes will look great. Of course, you can store not only flowers in it, but also other things. Making this basket is not difficult even for beginners.

This master class will help you easily create a beautiful thing that will become a decoration in any interior. So, you will need:
- a stack of newspapers;
- an object that will be braided;
- ruler;
- scissors;
- pencil;
- thin knitting needle;
- PVA glue.
Preparing the “vine”
First, let's prepare the parts for the future product - newspaper tubes.

To make them, you will need to divide the newspapers into double sheets and line them into strips, and then line them into strips about 10 cm wide.


When the strips are cut, you should wind them one by one onto the knitting needle, starting from the corner.


When winding the strip, you need to make sure that the newspaper is pressed tightly to the knitting needle and glue the joints from time to time.

When the strip is wound, glue the edges and remove the knitting needle. The process is shown in more detail in the photo.

Creating an organizer
When the newspaper tubes are ready, it’s time for the main process - weaving the basket. The master class will help you understand this difficult matter. There are two ways to make braid.
Having decided on the size of the finished product, you need to cut out the bottom from cardboard and glue the ends of the tubes to it so that there is approximately the same amount on each side. Then, when the glue dries, cut out the second bottom using the same measurements and glue it to the base, thus covering the junction of the tubes. When the bottom of the basket dries, you need to bend the tubes up and place an object inside the future basket, the shape of which the product will take. Next, take the tubes and intertwine them perpendicular to the existing ones in a checkerboard pattern. Glue the places where the tubes connect to each other. When the product reaches the desired height, carefully tuck in the vertical parts and coat the top row with glue. After the glue has dried, cover the basket with paint and varnish. The photo shows the manufacturing process.

The second method is more labor-intensive; it involves weaving the bottom of the basket. In order to weave the base of 4 tubes, place two at a distance of 1-2 cm. This is the first row.
Second row: place 6 tubes in pairs and perpendicular to the first row in the following order: the first 2 tubes are under the first pair and above the second pair of the first row. The other 2 tubes are nearby, but mirrored (above the first pair and under the second pair of the first row). Place the remaining 2 tubes in the same way as the first two.

Next you need to take a new tube, fold it in the middle and put a braid on some pair of rays. Cross the working tube once and continue braiding other pairs of tubes. After each pair, cross the working parts of the tube.


The third and fourth rows are made with a single working tube. To make an edging at the bottom of the basket, the ray where the row ended should be folded over the next one, and repeat the same with the remaining rays to the end. Insert the last tube into the loop formed from the first ray.
The next rows are woven according to the pattern of the third row of the bottom. You can decorate the basket with beads; to do this, when weaving some rows, you need to put beads on the working tube.
When the basket reaches the desired height, cut off the remaining tubes and secure them between the rows.
Weaving a basket handle
The handle must be strong enough so that after the basket has reached required size, you should leave 3 tubes on each side and fasten them with clothespins. When the edge of the basket is glued, you can start weaving the handle.
The three tubes that remain on the sides need to be connected. Then glue a working tube to their base and braid the remaining three with it. Glue the end of the working tube to the opposite side of the basket at the base of the handle. The weaving of the handles is shown in more detail in the video.
Glue the finished product with glue, cover it with paint and varnish.

Video on the topic of the article
Even more ideas can be found in the video.
Master class on weaving baskets from paper straws
Teacher of the Omsk region educational institution “Krasnoyarsk adaptive boarding school” Shaldina Anna Viktorovna
Description: This master class is intended for middle and high school students, teachers additional education, educators. The basket can be a wonderful gift or interior decoration.
Target: introduce students to the technique of weaving paper tubes
Tasks:
1. Introduce and teach the technique of making paper straws simple techniques weaving - straight weaving, rope weaving.
2. Develop fine motor skills, improve mental operations.
3. Cultivate aesthetic taste.
Tools and materials:
- paper (A4 format)
- knitting needle (diameter 0.5)
- scissors
- glue stick
- color (brown)
- acrylic varnish
- brush
(photo 1)

The process of making baskets is long and labor-intensive. Initially, children learn to roll paper tubes. This sometimes takes a lot of time (1-2 lessons). And only after they have mastered this technique can they move on to weaving baskets.
Work sequence
1. Make about 30 paper straws. To do this, divide the A4 sheets into 4 equal parts. Place the knitting needle horizontally in front of you, a piece of paper at an angle of 20-30 degrees above the knitting needle (photo 2)

2. Start winding the right end of the piece of paper onto the knitting needle ( right hand twist the knitting needle and support the paper with the left (photo 3)

3. Having twisted 1/3 of the paper piece, you can take the knitting needle in your hands and continue twisting (photo 4)

4. When a small tip of the paper piece remains, grease it with glue and tighten the tube (photo 5)

5. Remove the tube from the knitting needle (photo 6).

Make about 29 more of the same tubes. (photo 7)

6. Roll out the tubes using a rolling pin (photo 8). Flat tubes are easier to work with.

7. Let's start weaving the basket. To do this, take 9 paper tubes - 4 of which we place horizontally, 5 on top vertically, fix with glue, let the glue dry and fasten the tubes (photo 9)

8. We got the base of the bottom of the basket with 14 rays. To get started circular weaving necessary odd number of rays . To do this, with the end of one ray (vertically) we begin to weave other rays - simple straight weaving with one paper tube (photo 10, 11, 12)


9. When a few centimeters remain of the tube, it is necessary to increase it. To do this, bend the thin end of the tube horizontally in half, coat it with glue and insert it into the wide end of the tube (when making tubes, one end is always narrower, the other wider) (photo 13, 14)


10. We weave further, constantly increasing the tubes (photo 15).

When the bottom of the basket is the required diameter (in our case it is 4-5 cm, since the basket will be small), we put the bottom on a suitable shape (for us it is a tea mug with a diameter of 9 cm, a height of 6 cm, cone-shaped) For ease of weaving We place the cup on some elevation (bottle, jar) so that the rays do not touch the working surface, but hang in the air (photo 16)

11. Bend the rays of the basket down and continue weaving (photo 17, 18)


12. When we have completed the weaving of the desired height, remove the basket from the mold (photo 19),

add one more tube and make the edge of the basket with two tubes at the same time - “rope” weaving (Figure 1)

(photo 20)

13. We make one circle and hide the ends of the working tubes behind the rows of weaving; you can grease them with glue for a more reliable fixation (photo 21)

14. Let's start forming the handle of the basket. To do this, leave three rays on both sides of the basket (choose those with more equal distances between them) (photo 22)

15. We hide the remaining rays between the rows of weaving. To do this, we bend several rows using a knitting needle and stretch a ray through them, cutting off the end (photo 23, 24)


16. We extend the remaining tube handles for weaving on one side (photo 25)

17. At a distance of 2-3 cm from the beginning of the handle, we braid a pigtail from three tubes (photo 26)

18. Glue the end of the pigtail to the remaining rays on the opposite side, fix it with a clothespin (photo 27)

19. We mask the place of gluing - we braid it several times with a paper tube. We do the same on the opposite side (photo 28, 29)


20. Let's start painting the basket. Pour a small amount of acrylic varnish into a container, add color (in our case brown, but it may be a different color) Be sure to wear rubber gloves! You can start painting (photo 30, 31).
Reading time: 8 minutes
Do you want to do some handmade art? Do you want to make useful things that will have a special, fresh beauty? Don't know what to give your friends for the holidays? Pay attention to this type of needlework, such as weaving baskets from newspaper tubes. By creating such a basket yourself, you will end up with a product that is visually no different from a basket made of wicker, and for home use They are quite suitable because they have the necessary strength.
Today, when weaving baskets, various varnishes, paints and impregnations are used, which make it possible to obtain a surface of any color. And decorating such baskets offers as many options as your imagination tells you - appliqués, decoupage, flowers, ribbons, beads.
Weaving baskets from newspaper tubes: what do we need?
To create one of these we will need:
Lots and lots of newspaper sheets;
PVA glue;
knitting needle;
stationery knife and scissors;
acrylic paint, finishing varnish, alcohol stain (larch, origon, lemon or any other to your taste);
basket base;
brushes for paint and glue.
Basket weaving: work order
The first step is to determine the direction of the paper fiber - it should be longitudinal. Determining the direction of the fiber is simple - there are several ways to do this. For example, take a sheet of newspaper and stretch its edges between the nails of two fingers. If the sheet has a transverse grain direction, the edge of the newspaper sheet will become wavy. If it is longitudinal, there will be no folds.
At the very initial stages, it will also be necessary to cut all the newspaper sheets into strips, the width of which we determine ourselves. However, you should not make them too wide, then you will get thin and elegant tubes that will be easy to work with a knitting needle. If you like thick tubes, simply increase the diameter of the selected knitting needle.
Ready-made tubes should be painted on oilcloth prepared in advance. Only alcohol stain should be used. If you use a regular water stain, the finished tubes may come unstuck upon contact with water.
Weaving baskets from newspaper tubes: stage 1 - preparation


We cut the prepared newspaper sheets into strips 7 cm wide. This can be done with scissors, but this is too tedious. It is best to use a utility knife to cut the sheets on the backing board.
Next, take the prepared strips and wrap the strips onto the knitting needle at an angle of about 10-15 degrees. We begin to wind the strip onto the knitting needle very tightly. If you leave the margin of the newspaper page on the right, then you will get the tubes themselves white.
Once you have screwed the entire tube onto a knitting needle, fasten the very edge of the newspaper with glue and let it dry thoroughly.

Already at this stage, you can start painting the newspaper tubes in the desired color and give them time to dry thoroughly.
But if you don’t have time for this or you want to finish with the basket as quickly as possible, you can paint it already finished product, and then varnish. Believe me, it will never occur to anyone that the basket you made with your own hands was made from an ordinary old newspaper.
Weaving baskets from newspaper tubes: stage 2 - weaving
We start the weaving process from the bottom. You need to decide on the size of your basket from the very beginning. If you're doing this for the first time and don't know what size basket you'll like, we suggest you stick to our standards.
 i
i
mg.vrukodelii.com
So, prepare 30 newspaper tubes, each 50 cm long. We take 10 tubes, each 45-50 cm long. We lay them out in pairs. Select the main tube and fold it in half. We wrap the resulting tube around the first pair of tubes. On the edge of the tube we mark the beginning of work with a marker.

img.vrukodelii.com
We braid each pair of tubes with rope. We cross the working tubes, after which we cover a pair of tubes with one working tube, and place the other below. When the working tube ends in length, it is necessary to extend it - to the end new straw insert the hole ending.
Thus, we weave 2 rows to the place marked with markers, to the marked pair of tubes.
We weave the 3rd and 4th rows into one tube. In this case, the working tubes should be directed to the center of the bottom.
Now we begin to form the bottom edge. We take the first tube, which is marked with a marker, and bend it around the next one, bending it in a circle towards the center of the bottom.

We braid the last tube from below into the loop of the first tube.
We braid each tube from the first to the fourth row with a rope, while the tubes must be slightly bent in the direction from the middle.
If you wish, you can decorate the fifth row with beads - 6 beads will be enough. Next, we also tie the sixth and seventh rows with a rope.
The excess length of the working tubes must be cut off and the edges tucked between the rows - this is easily done using a knitting needle.
Simply cut off the exposed ends of the tubes with scissors.

www.liveinternet.ru
That's all - all that's left to do is make the handle of the basket!
We leave 3 tubes on each side, connecting them together with clothespins. Drop a little glue onto the base of each tube and cut off the ends.
We connect the ends of the tubes - this is how we get the handle of the basket.
In order for the handle to be firmly attached, it is necessary to fix the place where the tubes are glued with the same clothespin. The entire length of the handle can be covered with one tube or left as is.

www.liveinternet.ru
Weaving baskets from newspaper tubes: stage 3 - dyeing
In order for the basket to have maximum strength, it must be impregnated with PVA glue. This will also help us give it the necessary shape. After this, you need to give the basket time to dry completely.
Want to make your shopping cart even more memorable? Decorate it with technology decoupage! Cut out attractive patterns and motifs from napkins and attach them to the basket, after which you can coat the finished product with finishing varnish. The finished work must be dried for a long time.

vrukodelii.com
Weaving baskets from newspaper tubes: video
What is stain and where to find it?
For a huge number of handmade projects, it is necessary to use stain.

Stain is a substance for surface coloring wood that easily dissolves in water. It is often used when they want to get a certain shade of wood. Unlike paint, this material does not completely color the wood, as paint does, but only gives it the necessary shade, emphasizes natural beauty wood and its structure, penetrating into the very depths of the fiber.
Here we go hand craftsmen discovered the interesting properties of this material and began to successfully use it in their techniques, including for weaving baskets from newspaper tubes. As a result, we get a product that seems to be made from real vine.
The most beautiful and popular material for painting such baskets is considered to be brown stain, which is made from coal and oil.

img.superstroy.ru
Depending on the purpose of use, stain can be used for both external and internal painting. This substance contains a special pigment that is highly resistant to color loss due to exposure to sunlight.
Types of stains
Today there is a wide variety of stains, not only in color, but also in type. Let's consider the main ones:
- Water stain
Water stain gives finished products greater resistance to abrasion. However, the colors you can get with it will not be as rich. If you want to give a special tone to products that will subsequently come into contact with food products or that will be used by children, try to choose a stain that contains as few chemical additives and various “volatile” substances as possible. Water stain is just that - as safe as possible for health.
If the surface to be treated with stain is slightly wetted before painting, a more even shade will be obtained.

1.bp.blogspot.com
- Alcohol stain
This substance is a common alcohol solution of aniline dyes. This type of stain is considered more resistant to moisture and ultraviolet rays (compared to water stain) and has a very high drying speed. If you cover the finished product with this type of stain, you will definitely have to apply a finishing coat of varnish. Don’t be alarmed when you smell the sharp, unpleasant chemical smell of this stain—manufacturers do this on purpose to discourage hunters from trying this “miracle.” - Acrylic stain
This type of stain is considered innovative and belongs to the latest generation of stains. Acrylic stain is an emulsion based on acrylic resin. This type of dye is less susceptible to fading in the sun; it is most resistant to moisture, so it does not experience discomfort when in a humid environment. In addition, acrylic stains are available in a huge variety of colors. However, a significant disadvantage when using them is the high cost of the material.


- Oil stain
As you can already guess from the name, the main component of these stains is oil or drying oil, which does an excellent job of protecting wood, and also has a huge selection color palette. Can be combined with a solvent - in combination with oil stain, a solvent such as white spirit is most often used. However, this type of stain is not recommended for painting products made from newspaper tubes - it is better to leave it for working with wood. - Chemical stain
Chemical stain does not contain coloring substances. They are replaced by the soluble metal salts included in the composition, which, upon contact with the tannins of wood, color it in different shades. However, we won’t dwell on them in too much detail - like oil stain, this type of dye is not at all suitable for working with baskets made from newspaper tubes. - Gel stain
This type of stain is especially popular among perfectionists who strive for a uniform color throughout the entire perimeter. This stain does not leave stains on the product and distributes the dye evenly.
In addition to these main types of stain, you need to decide on the type in which you can purchase the stain you like. The modern market offers ready-to-use stain in diluted form or powdered form, which is much less common. As a rule, to work with powdered stain, you just need to dilute it with a certain amount of warm water.
It is recommended to buy stain in large construction stores and hypermarkets. Consultants of such establishments will always help you decide on the choice of a particular material for work, as they should know about all the properties of the product.
Painting tubes with stain

img-fotki.yandex.ru
Painting newspaper tubes will be most effective and easy if you have previously rolled them so that the tubes are white (we have already mentioned that this can be achieved by rolling the tubes along the very edge of the newspaper). In this case you will get the most even color, which lays easily and evenly on a white base.
When painting with stain, prepare plastic bottle with a wide neck. If you like jewelry work and have a lot of free time, you can paint each individual tube with a brush. If you value your time, simply dip the finished tube in a bottle with diluted stain - this is the maximum quick way dyeing newspaper tubes.

i.ytimg.com
In the line of each manufacturer of the types of stain presented, there is a wide selection of colors. What color you want your finished basket of ready-made straws to be is up to you to decide. So, just go to a large construction hypermarket, look for stands with stains there, choose the color that suits you.
Don’t rush to throw out the remaining color – sometimes situations happen when, when making exactly the same basket, you didn’t have enough paint of a given color. Then your leftovers from previous jobs will become a real lifesaver. Or the paint has come off in the finished basket and the resulting stain hurts your eyes. Just take out the rest of the paint and touch up the desired area of the finished product!
Often, hand craftswomen use ordinary gouache instead of color. However, the total cost of preparing such paint will be much more expensive.

sdelaisam.mirtesen.ru
To give the desired shade, you can use food coloring(for example, in egg paint). It turns out to be a very safe dye for the product!
You can also use regular water-based paint along with color. To do this, you will have to thoroughly prime the finished product (prepare the primer yourself or buy it ready-made).
You can also combine the various listed dyeing methods with PVA glue - this will make not only the color of the basket more durable, but also its components. For example, water-based paint with water, water-based paint with PVA glue, acrylic enamel with water and PVA glue, and many other methods are often combined.

After painting, the product must be allowed to dry completely and, if necessary, varnished.
Do you believe that you managed to create this beauty? with my own hands? And we didn’t even doubt your talent! Whether there will be more - on our pages we will collect for you only the most best selections and master classes that will help you realize your potential and show your creativity!
I came across such creativity online as weaving from newspaper tubes. I was interested and decided to try it. I have reviewed more than a dozen master classes. Externally, the products are in no way inferior to wicker braids. And for home use they are quite durable and for a gift - nice!
Using various varnishes, paints and coating impregnations when weaving, you can create braids of all the colors of the rainbow.
And by decorating the baskets with beads, flowers, ribbons or appliqués using the deco page technique, you can turn them into works of art.
Here's what I got.
You will need:
1. Newspaper sheets
2. PVA glue
3. Knitting needle
4. Scissors, stationery knife
5. Paint (acrylic), varnish (Finish varnish), alcohol-based stain (origon, larch, lemon...)
6. Brushes for glue and paint.
7. Basis for weaving
Operating procedure:
First, you need to determine the direction of the paper grain. The direction must be longitudinal. There are several ways to determine direction. Here's one: stretch the edges of a piece of paper between the nails of two fingers. In the transverse direction of the fibers, the edge will become wavy; in the longitudinal direction, folds will not form. Strips of this size will make thin tubes for an elegant product. If you need thicker tubes, then the width of the strips and the diameter of the knitting needles need to be increased.
I paint the tubes with a brush on regular oilcloth. I only use alcohol-based stains. On the recommendation of one master class, I tried to paint the tubes with stain on water based- ruined everything. When wet, the gluing area separates and the tubes unfold. Don't repeat the same mistakes.
Stage 1: Preparation
We mark the newspaper into strips of 7 cm. 
On a backing board, cut the newspaper into strips with a utility knife. 
The angle of the knitting needle on the newspaper strip is 10°-15°. 
You need to start winding the strip very tightly, wrapping the edge of the newspaper around the knitting needle. The tubes turn out white if the white margin of the newspaper strip is left on the right. 
Secure the edge of the newspaper with glue.


At this stage, the finished tubes can be painted in the desired color if desired and allowed to dry thoroughly. You can paint the finished product afterwards. And if you cover it with paint and varnish on top, then no one will guess that this basket is made from an ordinary old magazine (newspaper).

Stage 2: Weaving
Let's start the work by weaving the bottom. It all depends on the size of your product. To weave the basket presented to your attention, you will need 30 (thirty) tubes 50 cm long.
We take 10 tubes (hereinafter: faces) 45-50 cm long. Lay them out in pairs.

We fold the working tube in half and wrap it around the first pair of rays.

The start of work can be marked with a marker on the edge of the beam.

We braid each pair of rays with a rope. The working tubes intersect, then one working tube goes on top of the pair of rays, the other below. As soon as the length of the working tube ends, we extend it (insert the end of the next tube into the hole of the previous one).


We weave two rows until the pair of rays marked with a marker.

We weave the third and fourth row into one ray.

We direct the working tubes to the middle of the bottom.

We form the edging of the bottom. With the first ray (marked with a marker), we go around the next one, directing it to the center of the bottom and so on in a circle.

We insert the last ray from below into the loop of the first ray.


We decorate the 5th (fifth) row with wooden beads with a diameter of 16 cm. You will need 6 pieces. beads


6 (sixth) and 7 (seventh) rows, knit with a rope. The work is almost finished! All that remains is to trim the excess length of the working tubes and tuck them between the rows using a knitting needle.

We cut off the extended ends of the working tubes with scissors.

To make the handle of the basket, leave 3 (three) rays on each side, separating them with clothespins. Place a drop of glue at the base of the remaining rays and cut them off with scissors.


We connect the ends of the basket handle tubes.

Before weaving the handle, drop a drop of glue onto the edge of the tube and secure it with a clothespin. We braid the handle with a tube along the entire length.


At the end of weaving the handle, drop a drop of glue onto the end of the tube and secure it with a clothespin. The main work is finished.

Stage 3: Coloring
For strength, saturate the basket with PVA glue and give it the desired shape. Let the glue dry completely.

Paint the basket with white acrylic paint. (you can add color paste, different dyes or paint with stain).

We cut out the motifs from a napkin and make a page deck. Cover the basket with Finish varnish and dry the finished work.


There is nothing better than something made with your own hands. Admire, rejoice, give as a gift!!!


