Master class on making a theatrical costume "Chicken" for a spring matinee.
Pukanova Natalya Nikolaevna, teacher, Listvyansky MBDOU kindergarten", Ryazan region, Ryazan districtThis master class may be interesting preschool teachers, teachers, teachers of additional education.
Target: Making a chicken costume using improvised materials and waste material for the spring holiday at the preschool educational institution.
Tasks: Select available materials for making a costume, develop imagination, create a festive, fabulous atmosphere.
"Chick-chick-chick! Cluck-clack!" -
We hear it on the street.
Calls all the chickens
Ryabenkaya...(Chicken)
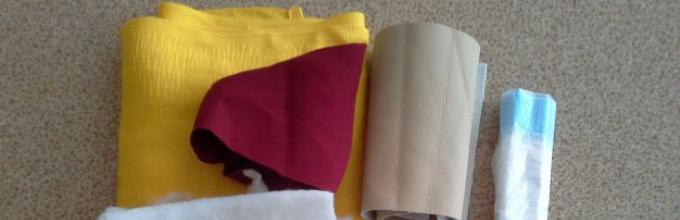
Materials used:

Textile yellow, sewing and knitting threads, needle, hook, scissors, elastic band, white and gray trash bags, skin-colored leatherette remnants, padding polyester, red fabric remnants, 2 plastic round furniture handles, tape or superglue, ruler or measuring tape for measurements, chalk for drawing patterns.

The basis of the suit is sewn according to this drawing. The main measurements are the distance from the hand of one hand to the hand of the other, the length along the back, the length of the skirt. We cut it out, but before sewing everything, we sew the fringe onto a base made of garbage bags.


We cut the bags, both white and gray, into ribbons 15-17 cm wide, fold them into a stack for convenience and speed of cutting the fringe, and make cuts on both sides.
We arrange the fringe stripes approximately like this:

We sew the fringe in the center, and in the finished suit it will bend to one side and the “feathers” will be quite fluffy. I marked on the fabric where the sewing lines of the “feathers” will go and how they will alternate. And here you can also clearly see how it is made tail.
We sew the parts together only after all the “feathers” are in place.
Sew the skirt to the top.
The chicken's head will be the hood, crocheted from double crochets and chain loops (mesh) We attach to a mesh base for each wall simple knot package strips white size 12*3 cm. First we knit the hood, then we decorate it with stripes and only then sew it to the base. (Don’t forget to make the ties) I was inspired by Alla Ivanovna Efimova’s master class for this option for making a hood /blogs/ala-ivanovna-efimova/kostyum -snezhinki-svoimi-rukami.html


Pattern of comb and beard. We turn the sewn parts through the edge left unsewn and fill them with padding polyester, sew them to the head.


Furniture round handles were used for the eyes. They can either be glued to the walls of the hood mesh (threaded into the “cell”), or secured by wrapping a roll of tape around the tip of the handle from the inside of the hood.

The beak is made of a square-shaped piece of leatherette. Having folded it diagonally, we pull part inward and rounded the corners, sewing it to the head. The lower part of the beak hangs down without being sewn and covers part of the face, which is very convenient. And the view of those who are wearing a suit is not blocked , and at the same time hides his face

Our costume is ready, now we can hurry to the matinee...

Pied Hen, kind plump one,
He walks around the yard and calls the children:
- Ko-ko-ko, guys, where are you chickens?
Yellow lumps, daughters and sons?
Hurry to mom: we’ll eat with you
Seeds and crumbs, get out the spoons.
Mother chicken is watching
He squints at the chickens.
Even though they sit in the shade,
They are like suns.
Which you can easily do with your own hands! An ideal New Year's outfit for the little ones and for children who are already going to kindergarten.
Just look how cute the fluffy chicks are! It seems like a lot of hassle with such a suit, but in reality it is not. I'm revealing a secret:
- take knitted T-shirt or a turtleneck in a neutral color (preferably yellow or white);
- buy a boa or ribbon with artificial feathers;
- sew a boa onto a T-shirt;
- ...and we get such a cute little bundle of happiness!
Or you can also take a yellow hat and sew a red felt comb onto it!
If you don’t have a hat, but have a lot of felt, here’s an image that clearly shows how to make a bright one:

But when there is not just a lot of felt, but a lot, you can cut feathers out of it...

...take a children's T-shirt or bodysuit and sew them there:

And it will turn out to be such a beauty!

Or maybe you have a yellow vest with a hood? Then all that remains is to sew on the eyes, comb and beak - and the costume is ready!

Something similar can also be made from an old fluffy blanket or bathrobe:

Very cute New Year's costumes for little boys, aren't they? ;)
DIY cockerel costume will be especially relevant in 2017. The rooster will be the master of this year. Even not very experienced needlewomen can create it. And our master classes will help them with this.
DIY cockerel costume for the New Year
Top. On top you can wear a T-shirt or turtleneck with long sleeve. You can throw an orange, yellow or green vest on top. Make the breast out of colored faux fur. If you don’t have fur on hand, you can take any thick fabric. At the bottom, sew multi-colored patches over the breast. Each subsequent row should partially cover the previous one. The flaps should be long. Discrepancies in size and shape are allowed. Sew wings in the center of the T-shirt and along the outside of the sleeves. Sew multi-colored feathers along the edges, making teeth on the outer edge. They should be contrasting in color to the wings.Sew scalloped cuffs along the edges of the sleeves, matching the color of the T-shirt. It is better to make them from thick fabric. If you don’t have one at hand, take a regular cloth and starch it well. Make a beard from red satin fabric and tie it in the form of a bow around your neck.
Pants. The color of the bottom of the suit should match the color of the top. Sew scalloped cuffs along the edge of the legs.

Wear black or red shoes, boots or slippers on your feet. Tights or knee socks – ocher, yellow or yellow with a contrasting stripe.
Put a hood on your head, sew a red comb and beak to it. It is better to make these parts from thick fabric or cardboard. To make the eyes, cut out a circle from white fabric, and then a smaller circle from black fabric. Sew onto the hood. Sew a bead in the center.
DIY cockerel costume for a boy
It consists of the following parts:Tail
- blouses
- hats with a beard and comb
- pants
How to do:
The simplest part is the hat. To create it, take any hat that your child wears and take measurements from it. The rooster cap consists of two parts. A comb is inserted in the center. It is better to fill it with padding polyester or any filler so that it holds its shape well. Sew beards on the sides, also filled with padding polyester. At the end, sew on the beak and stuff it with filler. For the eyes, cut out 2 circles: white and black. White should be a little larger in size. Sew the eyes on top of the hat.

Sew also.
Pants. For convenience, take measurements of any baby pants your boy wears. Make neat seams and sew in elastic. It is not necessary to make a pattern; approximate measurements are sufficient.
Blouse. The blouse can be made in the form of a raincoat, but you can also opt for a regular cut. Sew a red collar at the top, and Velcro instead of buttons in the center. You can use simple buttons, but only if the child can fasten them himself.
Feathers. Make a template from cardboard, turn it over onto fabric and cut it out. Feathers need to be cut from fabric of different colors. Sew them in a checkerboard pattern, starting from the shoulder. There is no need to sew feathers on the inside of the shoulder.

Tail. It is better to sew a tail from soft fabric so that the child can sit comfortably. Cut several multi-colored strips, sew them, collect them in a bun and sew them at the very top of the panties.
In addition, buy your child multi-colored knee socks and put red shoes or slippers on his feet.
How to sew a cockerel costume with your own hands
You will need:Paper
- PVA glue
- gouache
- sculpture plasticine
- wire
- padding polyester
- wool threads
- felt
- cardboard
- thread with a needle
- white T-shirt

How to do:
1. Base. As a base, you need to take a white T-shirt. Sew a hood with a comb to it. To create the hood, cut a piece of rectangular fabric. Its size is easy to determine. Just measure the distance from the shoulders to the top of the child's head and add 10 cm.
2. Scallop. The height of the cut should be 7 cm. The length should match the length of the upper part of the hood. Divide the total length of the scallop into 3-centimeter segments and draw waves. To stiffen the comb, insert thick cardboard into it. Sew the comb to the top of the headdress.
3. Wings. They need to be made from white fabric. Draw a pattern: draw a line equal in length from your fingertips to your shoulder. Draw another line, but this time perpendicular. Its length should be from the waist to the shoulder. From the opposite edge, lay another perpendicular line equal to the width of the brush. You will need 4 of these patterns. Connect 2 patterns together, insert cardboard inside. Sew a finger loop onto each wing. Felt fabric cut into small oval pieces, stitch to the finished wings. These will be feathers.
4. The tail is sewn according to the same principle as the wings. The feathers for it are sewn from multi-colored felt. Insert a wire frame into the inside of the tail and fill it with synthetic polyester.
5. Beak. Fashion it from sculptural plasticine, cover it with paper pieces soaked in glue. After a day, paint the beak with gouache.

What do you think?
How to make a cockerel costume with your own hands
The suit consists of:Sash
- shirts
- bloomers
- vest
- tail
- scalloped hats
Work process:
To create a suit you need to choose bright synthetic fabrics: crepe-satin or satin, lining fabric, as well as velvet to create a vest. To sew a shirt, choose striped fabric with stripes of different lengths. Cut feathers from the remains of any material.
1. The vest is sewn according to the basic pattern. The trouser pattern needs to be shortened and slightly widened.
2. The pattern should consist of the following parts:
DIY cockerel costume photo:

Back – 1 piece
- shelf – 1 d.
- front half of trousers – 2 in.
- sleeve – 2 d.
- back half of trousers – 2 in.
- belt-sash
- cuff – 2 d.
- vest back – 1 in.
- vest shelf – 2 in.
- stand-up collar – 1 d.
3. Kosovorotka. To create, select striped fabric. If you don’t have it at hand, choose a plain red fabric.
4. Cut large “feathers” from green fabric, and small ones from yellow and blue fabric. It is better to carefully trim the edges of the elements with scissors so that they become jagged.
5. To decorate the collar, take a bright braid. Cut out the part with a fold. Make a cut starting from the neckline to the cross mark. Finish the right and left cuts with a plank. Sew shoulder and side seams. Fold the collar in half lengthwise and sew short seams. Turn out the part. Sew the collar into the neckline. Sew on a hidden button and make a loop. Decorate the placket and collar with braid and do machine embroidery. Tuck the bottom of the product and hem it.
6. Sleeves. Stitch the feathers in place before sewing the seams. Place small feathers on the front part and stitch. Place the next row in a checkerboard pattern and stitch. You should have 4 rows in total. Complete the 5th row with long feathers. There is no need to iron them. Sew the seams, catching the feathers, sew in the sleeves, and hem the bottom.
7. Make the tail from flaps of different lengths. Back them with lining fabric to make them stronger. Sew each part of the tail separately to the pants.
8. Cut out a hat from satin and duplicate it with lining fabric. Leave the middle seam open and sew in the comb. Make a beard using the same fabric.
9. Bloomers. Fold the 2 parts together, stitch them together, and stitch the lining fabric. Sew a drawstring along the top edge and insert an elastic band.
10. Sash. Cut and sew a sash from red satin. The width should be 8 cm and the length should be 120 cm. Sew on the tassels.
11. Vest. Sew both parts together and sew on the lining fabric. Turn it inside out and iron it. Overcast the loops and sew on the buttons.
DIY cockerel costume pattern:


You can also try sewing New Year's suit DIY cockerel for a girl. In this case, instead of pants, you need to sew a skirt.
Carnival costumes are worn by both children and adults, but the chicken costume is useful only to children. Now there are many organizations that offer their services for renting carnival costumes.
But you can make it yourself. There are several methods and materials that can be used to make a chicken costume.
What material is better to make “Chicken” from?
Most often this is sewing a suit from inexpensive fabric. On one side, it resembles satin, so it shimmers in the rays of the sun or the light of lighting fixtures. This is a significant advantage for the suit.
The costume can be knitted using a hook or knitting needles, whatever you like. For knitted suit For chicken, it is worth purchasing a thread that forms a long pile when knitting. The chicken should be soft and fluffy. The suit is made mainly in two ways.

Separate upper and lower parts, or overalls. Upper part or a T-shirt, a T-shirt can be the most ordinary one or with sleeves - lanterns. The bottom can be a skirt or shorts. For fullness, it is better to attach elastic bands to the shorts, in the pant leg area.
Don't neglect decorations; lace in the area of the holes will look wonderful. An integral part of the costume is the hat. You need to attach a scallop, eyes and beak to it.
The chicken costume should be made of yellow threads and fabric; for an accent, you can add red for the collar and scallop.
D For a chicken costume, which is designed in the form of overalls, it is better to take faux fur yellow color.

There is no particular difficulty here, since there is no need to make undercuts. In order to put on a suit, it is important to sew in a long zipper. Instead of a hat, you can sew a hood. Additionally, you can sew “boots” and wings.
In general, you need to show your imagination and enjoy creating an unforgettable image.
When unexpectedly the methodologists kindergarten they inform you that tomorrow or the day after tomorrow they have an event and your child needs a chicken costume, don’t despair. This costume can be made very, very quickly.
- take a knitted T-shirt or turtleneck in a neutral color (preferably yellow or white);
- we buy a boa or ribbon with artificial feathers on the way home;
- sew a boa onto a T-shirt;
- ...and we get such a cute little bundle of happiness!
Or you can also take a yellow hat and sew a red felt comb onto it! And your child will be the most adorable chick at the party!
Video on how to make children's carnival costumes with your own hands
Check out this video of a girl wearing a chicken costume.
What other costumes can you make quickly with your own hands:
Hedgehog costume:
If your child urgently needs a costume for a performance in the garden, but you don’t have anything like it, don’t despair, take apart your “handmade chests”, there will probably be some suitable fabric there and buy what you need at your local sewing store. I assure you that, if desired, even the most inexperienced needlewoman can create a miracle.
Here I make a small amendment - my master class is dedicated to such novice craftswomen. I myself have very limited experience in sewing, so when faced with the task of sewing a chicken costume for a child for a matinee, I settled on the simplest and therefore accessible option for me. However, it turned out quite nice.
Our suit will consist of pants and a hat with a comb, which we can complement with a regular yellow T-shirt. So, for sewing we will need:
Fabric for pants (I used orange fleece - soft, pliable, beautiful fleece is very convenient for sewing such carnival costumes);
Fabric for a hat (in my “chests” I found yellow velor - the fabric is very impressive and soft, but a little “capricious”);
Threads of suitable colors;
Elastic band for pants;
Ruler, pencil, scissors.

I sewed pants without a pattern. To do this, I took old trousers that we no longer wear, but they were still just the right size, ripped the legs apart and traced two identical parts on the orange fabric. If you are making pants with an elastic band, add a little on the bend of the waistband. When cutting out parts, do not forget to leave a little fabric (one centimeter is enough) for allowances.

We sew each of the cut out parts to the protruding tip of the triangle.

This way. You get two trousers.

Now we chop the parts together. You can sweep it if you wish. And we stitch it on a typewriter.

These are our pants.

Fleece is also good because its edges do not fray, so it is not necessary to process the seams in the product. If you are sewing a suit from a different fabric, pay attention to the cuts; if the edges need processing, do not forget to overcast them by hand or by machine.
We make a belt. The simplest option is to fold the fabric inward and stitch it, leaving a small hole for threading the elastic.

We process the edge of the trouser legs in a similar way.

Turn the pants inside out.

We thread the elastic in the classic way - using a pin. Attach a pin to one end of the elastic and push it into the waistband of the panties until the pin comes out into the hole left, making a complete circle inside the waistband.

We tighten the elastic band until we obtain the desired size of the belt, tie the ends with a knot, and cut off the excess.

To make your pants look neater, hide the knot inside the waistband.

Here are our panties ready!

You can make a belt in another, more complex way. Cut out a rectangle from fabric with a width equal to the child’s waist plus 0.5 - 1 cm, and a height equal to twice the desired height of the belt. We sew the top of our panties in a circle and gather them a little. We grind the ends of the belt, fold it in half lengthwise and sew it to the panties, hiding the gathered top of the panties inside the belt. Due to the fact that fleece stretches well, this sewn-on belt itself will act as an elastic band.

Now, before we change the threads in the machine, let’s sew a comb. We sew the two parts together, leaving the bottom unstitched.

And turn it inside out, carefully straightening out all the bends. If necessary, make small cuts so that the fabric will not pull or wrinkle.

Let's move on to the hat. From the fabric we cut out a rectangle measuring 21 (head volume) by 18 (height of the cap) centimeters, plus allowances of a centimeter on each side.

We retreat six centimeters from above and draw a line. From the edges we retreat by a centimeter to allowances. And then we draw six identical triangles with a base of seven centimeters (for the head volume I indicated).

Trim off excess fabric.

And we sew two seams on the machine along the lines of the intended triangles.

On the other side of the part we do the same. The central triangles remain unstitched.

We fold the cap along the line of the triangles that have not yet been sewn and tuck the comb inside as shown in the photo.

To prevent the parts from moving, we pin them together with a pin. Then we stitch it all on a machine, starting with side seam and ending with the central triangles.

They turned the cap inside out. This is what we should get:

We turn the bottom edge of the cap and hem it.

Here's how it worked out for me:

That's it! The chicken costume is ready.


