
Some experts condescendingly claim that handicrafts are something bordering on art. Looking at the masterpieces of our craftswomen, we can say with confidence that such things have a place in an art gallery and this is precisely true creativity. Here there is a flight of fancy, exquisite taste and the most complex technique of execution. Today we will look at weaving from newspaper tubes step by step. New ideas for beginning needlewomen, basic techniques and useful tips- in this material.

In the finished work it will be difficult to paint all the weaves with high quality.
You should not use watercolors for painting. It gives a dull color. Gouache or acrylic paint is more suitable. It is worth considering that acrylic cracks after drying, so if you decide to paint with acrylic, treat the finished product. To add color to the work, some craftsmen use spray paint, water-based composition and food coloring.
For shine, finished works are coated with several layers of varnish. In addition to its decorative purpose, varnish also serves as a hardener.

Weaving methods
It is enough for a novice craftsman to master several basic weaving methods. All other options are based on them and will not be difficult to deal with.
- Spiral weaving. A simple option that even a child can master. The tubes are successively built up and threaded through the base in a continuous manner.
- Layer weaving. Two tubes sequentially go around the posts so that one passes in front of it, and the other behind it. This principle is used on cotton fabrics.
- Rope technique. The strips are intertwined with the posts on the product and with each other.
Mastering these basic techniques will lay the foundation for further experiments.
For more information about weaving techniques from newspaper tubes, see the video at the end of the article.
Related article:
In the article we will consider in detail the technology of making flowers from paper with a photograph of each step, as well as others original crafts that even a beginner can do.
Weaving from newspaper tubes for beginners step by step: different products
After mastering the basic techniques, you can begin your first job. It's better if it's a basket. This simple option will help you master the technology, and the finished product will certainly be useful in the household.
How to make a basket from newspaper tubes step by step
To make a basket you will need:
- newspaper tubes;
- base - pot or jar;
- for the bottom;
- acrylic paint;
Sequence of weaving a basket from newspaper tubes photo:


- Two circles are cut out of cardboard. Newspaper tubes for the stands are glued to one of them at equal distances. The structure is closed from above with a second circle. The tubes - racks are bent upward. A form is inserted inside the frame. The top of the posts can be secured with a wide elastic band. The frame is ready.
- We weave the walls. To do this, we take a tube, fix its edge at the base of one of the racks and begin to weave it around the racks. When the length of the tube does not allow you to continue weaving, you need to increase the newspaper vine. To do this, the ends need to be inserted into each other, after dropping glue at the junction.
Important! When you twist the tubes, one end is narrower than the other. Accordingly, when connecting, the narrow tip is inserted into a wide hole.
- To decorate the edges of the basket, the posts are sequentially intertwined with the main vine and secured on the inside with glue.
- The last stage of work is decorating the product. To do this, the basket is completely covered acrylic paint and two layers of acrylic varnish. Afterwards, you can decorate the basket with ribbons, beads, braid and other accessories.
Advice! The base of the basket can be made not from cardboard, but from tubes. To do this, a flat base is woven, the axes of which become racks.
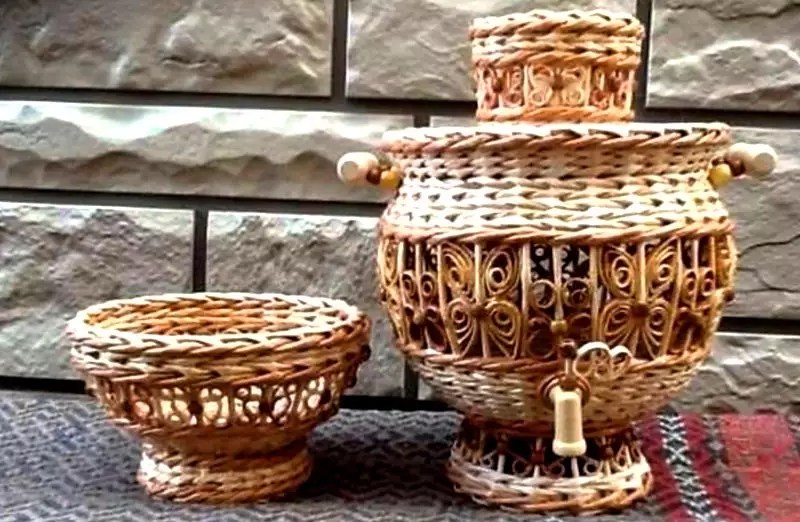
In the same sequence, you can make a vase from newspaper tubes:
Secrets of weaving a rooster from newspaper tubes
The rooster is not only a symbol of the year, but also a talisman for the home. In Russian culture, the symbol of the rooster signifies wealth and prosperity in the family.
To weave a talisman you will only need newspaper tubes painted in bright colors.
- It is necessary to create a basis. For strength, you can thread a wire inside the newspaper tube.
- The cockerel's body, head, beak and beard are successively entwined with colored tubes.
- The tail and paws are done last. If the weave is tight enough, the cockerel can be placed on its feet. For additional strength, it is better to coat the product with varnish.
Photo of a cockerel step by step (crafts from newspaper tubes for beginners).
Surely you have old newspapers in your arsenal that have already been read and are lying idle. They can be used to create an unusual and original souvenir in the form of a basket or vase.
If you are not yet familiar with the technique of weaving such a product from newspaper tubes, then you should familiarize yourself with the step-by-step instructions.
To make a vase or basket from newspapers, prepare:
Old newspapers;
jar or bottle;
brush with PVA glue;
knitting needle with scissors;
cardboard with a ruler;
white acrylic paint with a hot gun (you don't have to use it).
Let's start weaving from newspapers


Useful video: How to twist newspaper tubes
About 30 pieces of such blanks are needed.
When the tubes are formed, you should take a jar or bottle and place it on a sheet of cardboard, circle the base and cut out circles (2 pieces).
Watch the video tutorial which contains detailed process weaving.
Related video: A simple newspaper basket for beginners
Let's start preparing the frame tubes. We flatten one edge of the tube (by 3 cm).
Apply glue to one circle and glue the blank tubes onto it with flattened ends. The result is a vine made of newspapers, located at an equal distance from each other. Initially, before gluing, measure the pieces on the cardboard. Apply glue to the cardboard with a hot gun or use a press.

We lift the tubes up and fasten them with an elastic band. The frame for weaving is ready.
We take one tube with a flattened edge, glue it to the base and wrap it behind the nearest tube on the right so that it wraps around the frame from the outside.

We alternate the blanks until the bottom row is completed.

We weave the vase to the required level.
We cut off the end of the last tube and place it in the middle of the vase, fixing it with glue.
The first frame tube on the right should be cut, but bring its end inward and glue it.
We also cut off the second frame tube, coat it with glue and place it inside.
Now we are decorating the basket. We paint the craft inside and out with one layer of acrylic paint, let the paint dry, then apply a second layer.

We taught you how to weave a basket from newspapers, now you can safely move on to more complex techniques weaving that decorates the interior.
If you have ever dreamed of trying the technique of wicker weaving, but were stopped by difficulties in obtaining material, then you can rejoice, because weaving from newspaper tubes will allow you to realize all your dreams. Be sure to master this exciting creativity, and you will be able to make many practical and decorative things! By the way, recycling newspapers will help you get not only a beautiful picture frame or pencil holder, a container for bulk goods or a stand for hot items, you can also weave bags and even clothes.
Weaving from newspaper tubes for beginners
Have you decided to master this type of handmade? Then the first thing you should start with is the manufacture of those elements from which any craft will be made - these are paper tubes.It should be noted that not only newspaper pages, but also glossy magazine pages can serve as material for them, office paper A4 format and even old wallpaper. It all depends on how tough and durable your “homemade” product should be.
First of all, using a knife (it must be well sharpened), cut a newspaper page into strips, the optimal width of each is considered to be 7-12 cm. The longer the strip, the longer, respectively, you will get a tube, which means that it less often it will be necessary to build up. However, it is better not to overdo it with the length - it may be inconvenient for you to twist it.
Take the knitting needle, attach it to the lower left corner and begin to twist; the strip must be wound tightly and neatly. Coat the remaining small corner with glue and glue it to the tube (for this purpose you can use office glue or a glue stick). Remove the knitting needle from the paper element. Congratulations - you have taken the first step towards tube weaving for beginners!
New weaving from tubes – Easter
Bright holiday We associate Easter with such attributes as multi-colored eggs, wicker baskets, and various products with images of chickens. All this can be done using newspaper weave.If you are just taking your first steps in this technique, then practice making multi-colored easter eggs. We bring to your attention an elementary master class on spiral weaving. Woven eggs can be painted in all the colors of the rainbow and placed in a wicker basket - it will turn out extraordinarily beautiful. And if your soul craves something more original Easter decoration, then you can attach pendants to the eggs, decorate the place of attachment and hang such a composition on the wall.

Very interesting newspaper craft you can call it a tray. The photographs below illustrate the creation process step by step. It is noteworthy that in this master class, newspaper tubes of two colors are used: “wood-like” and reddish-orange. The combination of such shades will allow you to get a very attractive appearance a tray on which you can place colored eggs on a holiday.

Well, if you have already become proficient in this type of handmade, you have mastered tube basket weaving, then quickly get to work creating a very practical Easter basket. The master class offered on our website describes step by step all the stages of weaving such a product. An ordinary egg tray will act as the bottom, and as a result of your labors you will get an excellent craft with a reliable handle in which Easter eggs will definitely not be damaged.

And, of course, you cannot pass by such a luxurious craft as a basket made in the shape of a chicken. Such a wicker craft will surely attract many admiring glances; no one else will have one like it.
We suggest starting work with the “Chicken” master class. Of course, you will have to work hard, but the result is worth it. At the end of the work, you will have an interesting container with a lid, which, when closed, will look like a chicken. Such an interesting “tinkerer” can even be placed on festive table by placing eggs or sweets inside. We are sure that such a handmade product will delight both children and adults.

And below is another version of the Easter chicken basket. This is already a vessel more traditional form, which will also fit perfectly into the Easter interior. By the way, making it will be quite easy if you are already skilled in weaving baskets, you just need to follow all the instructions from the photo and you will get a delightful craft! However, you can always look tube weaving video, if any stage causes you difficulties.

Consider others can be done very quickly.
Weaving from tubes – master classes “Flowers”
PoinsettiaWe invite you to adequately prepare for such a holiday as Christmas, and indeed for all winter holidays. Let your home be decorated with an unusually attractive Poinsettia craft. This flower is also known as the “Christmas Star” and it is the star-shaped shape that the man-made flower will have.
The collage below shows the stages of creating a craft. The first step is to collect the required number of petals and leaves from the tubes, then paint them with acrylic paint, respectively, red and green. Yellow corrugated paper will be needed to create round stamens. Now all that remains is to assemble the “layer cake” of parts.

The next “craft” will be of equal complexity, however, more parts will be needed for the flower. It will be made according to the same principle: first of all, braiding the frame, make yellow petals and green leaves.
Using all the parts, assemble the sunflower flower. Make the middle from coffee beans planted on glue (you can use any other suitable material).
Be sure to use all the tips in the photo collage below.

This sunflower craft can serve not only as a decoration, but also as a stand for hot food.
Weaving from newspaper tubes - hat making master class
Newspaper strips are also useful for making a headdress - a cute wide-brimmed summer hat.Use the tips from the master class below - first you need to start weaving the crown in the same way as you weave the most ordinary vases. Use a mold of a suitable diameter so that the weaving takes on the desired shape.
Then, having straightened the paper sticks, you should proceed to making the fields. When the required width is reached, complete the weaving in the usual way.

The resulting summer hat decorate with artificial flowers and satin ribbons.
Original weaving from newspaper tubes step by step
It must be quite boring to weave useful and practical things all the time - that’s why we invite you to have fun and make exclusive and interesting “homemade products” from “paper vine”.
To decorate your home, you can weave a funny mushroom. Our photo collage will tell you exactly what sequence of actions you should follow. As for the features of the process, it can be noted that the stem of the mushroom is woven like a vase. You can check out our website to learn some of the subtleties of needlework. The mushroom cap is made similar to the brim of the hat in the master class discussed above. In general, it should be noted that the level of complexity of this craft will not be high and you will be able to please yourself with such creativity.
A newspaper piano? It sounds unrealistic, but the master class described below will prove to you that anything is possible! Of course, this will be a very small copy musical instrument, which, nevertheless, will become a real highlight of your home and will cause genuine delight among guests. In addition, it can be used as a flower pot.

Follow all the steps that are illustrated in the photographs and then you will certainly succeed funny craft. At the end of the work, be sure to paint the piano in a suitable color.
And here's another one original version For home decor – .
The original tree with curlicue branches will become your favorite home decor, it looks so attractive and cozy.
First of all, guided by the following photo instructions, you need to make a barrel by connecting several newspaper tubes into one. Then divide the trunk into its components at the top - these will be the branches. Each of them should be braided with “paper vine” and given a curved shape. To make the craft look even more attractive, you need to cover it with several layers of brown paint, waiting for each layer to dry.

Newspaper weaving is a fascinating hobby that will give you worthy products at minimal cost.
Looking at these works, you would never think that they were made not from natural wicker, but from old unnecessary newspapers and magazines.
Wicker items were created in ancient times. Nowadays, wickerwork has gained new relevance.


Wicker furniture, dishes, and various trinkets give the house an extraordinary atmosphere of warmth and comfort.

Such products are back in trend and are quite expensive. Not everyone can afford them. What if you try to make such things with your own hands?

Even if you don’t have a natural vine at hand, there is an excellent alternative - paper weaving. This is a relatively young type of handmade, which has already gained great popularity among handicraft lovers.
It's quite budget-friendly, but the result will exceed all expectations. You will decorate your home with an original, exclusive item, and by learning how to create such products, you may receive an additional source of income.

Material for work - old newspapers and magazines, outdated product catalogs, will probably be found in every home. Often we don’t know what to do with them, but they can make amazing crafts. It is only important that the sheets are intact and not wrinkled.

Materials for work
- old newspapers or magazines;
- PVA glue;
- scissors;
- stationery knife;
- metal knitting needle for twisting tubes;
- shape - any household utensil of the shape you want to give to the craft will do. For square and rectangular shapes various boxes will be used (shoe boxes, etc.) The necessary requirement for the mold is a smooth surface, so that after finishing the work it can be easily taken out;
- paint (preferably acrylic or gouache);
- varnish (can be acrylic);
- material for trim - lace, felt, pieces of fabric, beads, beads, ribbons, lace, etc.
How to make tubes for weaving
Let's cut a strip 5-10 cm wide from the newspaper. Twist this strip using a knitting needle, which we hold at an angle of 45 degrees. Fix the finished tube at the end with glue and remove the knitting needle.

How to grow newspaper tubes - video master class
If you decide to add color to your craft, it is recommended to paint the strips in advance, before weaving, since then it will be difficult to paint everything well. The only exception is acrylic paint - when drying, acrylic can become cracked. So, if you decide to paint with acrylic, process the finished product.

What else can I use to paint the tubes?
You can use regular water-based paint, adding the color you want to it,
food coloring or spray paint.
Finished works are coated with several layers of varnish; in addition to the spectacular shine, the varnish functions as a fixative. Products treated with varnish are quite durable.
To prevent the wicker structure from being flimsy, it is advisable to make the space between the base posts the same and not too large (about 2 cm)
Too dense tubes can be slightly wetted from a spray bottle and placed in a plastic bag. Once wet, they can be easily woven, and when dry, they will harden again.
Vase made of newspaper tubes
Cut out two identical cardboard circles.
To one of them, in a circle at approximately equal intervals, we glue 13 tubes and another tube for weaving. We will get something like this “sun”.


Glue another circle on top and let the craft dry (it’s better to put it under a press).
We edge the bottom with the tube that we glued for weaving.


For the shape, take a regular glass (let's make a small vase). We weave the first row, passing the tube from above, then from the bottom of the transverse tubes, up and down.


We lift the transverse tubes at the top and press them with clothespins.

We weave, over and over again, extending the tubes onto the shape.

As a result, we will have a completely braided glass. We intertwine the remaining ends with the base with vines and seal them on the inside.
Wicker vase made of paper tubes - detailed video master class for beginners
A vase made of paper tubes without weaving is a very simple way
Basket made of newspaper tubes - step-by-step instructions

To make a basket you will need:
- newspaper tubes;
- base - pot or jar;
- cardboard for the bottom;
- acrylic paint;
- glue.
1. Cut out two circles from cardboard.
2. On one of them we will glue newspaper tubes for the stands in a “sun” pattern.
3. Close the first circle on top with the second circle.
4. Tubes – the racks are bent upward.
5. A form is inserted inside the frame, on which the size and shape of your craft will depend.
So, there is a frame. Now we begin to weave the sides of the basket.
It is more convenient to start weaving from the bottom.
Let's take a tube and attach it to the edge of the base of one of the racks and trace it around the racks. To increase the length of the tubes, we extend them by inserting them into each other. We insert the narrower end into the wider end and lubricate the extension areas with glue. To make the edges of the basket, we sequentially intertwine the posts with the main vine and, using glue, secure them on the inside.
By covering the finished product with acrylic paint and two layers of acrylic varnish, we get a spectacular and quite durable product.


The bottom of the basket can be round, square or rectangular.
Video master class on weaving a basket
Box made of paper tubes


Round box made of paper tubes - video master class
Box made of paper tubes in the shape of a heart


Let's prepare a sufficient number of newspaper tubes in advance.
Let's take thick cardboard and make two hearts out of it.
Glue the tubes at equal distances from each other using the “sun” method around the entire circumference of the heart.

Secure with clothespins and wait for the glue to dry. Then we will remove them.
We will either cover the other heart with colored paper or cover it (cover it) with fabric and set it aside for now.
Place the base mold in the middle of the first heart (to which the tubes are glued). Attach the ends to the edge of the form and begin weaving.
When the whole shape is braided, take the heart, covered with fabric and glue it to the bottom of the craft.
As a basis for weaving the box, you can take a heart-shaped box of sweets or cookies.

Dog made from newspaper tubes - step-by-step instructions

How to make a dog from newspaper tubes
There are quite a few options for making dogs using this technique. First, let's take a simple option - a dachshund.

Besides paper straws and glue we will need a pencil, wire and a raw egg from which we need to blow out its contents.
1. We make all the parts of the dachshund, which will then need to be fastened together.
2. Take 4 tubes and start weaving in a spiral. Having reached the diameter of the egg, place it in the middle and braid it to the end.
3. Weave the nose (Fig. 2-6).
4. Make the tail and paws. We take two tubes and place them crosswise and glue another tube at an angle of 90 degrees.
5. We will also braid the pencil in a spiral (Fig. 7 and 8).
6. To make the body, take 3 tubes and place them so that they intersect in the middle. We do the weaving again in a spiral. You can use a small round object as a form (Fig. 9 and 10).
7. We make the collar using a pencil as a form. We make the ears as in Fig. 11.
8. As a result, we got these parts (Fig. 12).

9. Now we assemble and glue the dachshund.
10. For elasticity, insert a wire.
This is such a cute little dog.

Here are examples of other doggies.


Christmas tree made from newspaper tubes

1. Make the base of the Christmas tree - a cone. A thick sheet of cardboard will do. The size of the sheet depends on how big we will make the Christmas tree.

2. Take 6 tubes, fold them like a sun and secure them with a paper clip. Place a cone in the middle.

3. Take the 7th working tube and start weaving.
4. Take the seventh tube and begin weaving counterclockwise.
5. We thread the tubes one by one and fix one with the other.
In this way we weave to the top of the cone.

All that remains is to paint our Christmas tree and decorate it with toys, glitter, tinsel, light bulbs, in a word, everything that your imagination tells you.

Every housewife wants an atmosphere of comfort and coziness to reign in her home, and the interior to be individual and unique. Crafts made from newspaper tubes will help add charm to the atmosphere of your home and give it your own, special “zest”.
A popular way to decorate the interior is to weave baskets from newspaper tubes: a simple task will allow you to create real works of art.
Basket weaving involves the use of rope techniques, which can be used to create beautiful products for home decor. These baskets are convenient for storing knitting threads, handicrafts and other accessories. The finished basket is not particularly strong, so you should not place heavy objects in it.
Advice
A newspaper basket is well suited for storing decorative fruits in the kitchen: it serves more as an interior item than as a means of carrying things.
To make your own basket with your own hands at home, you can take advantage of the master class for beginner needlewomen. All you need to do is prepare necessary materials and follow the suggested step-by-step instructions with photos. The process is so exciting that it will allow even children aged 7 years and older to participate.
To work you will need:
Let's start weaving the handle.
- To do this, you need to leave 3 tubes on opposite sides of the basket and braid them.
- Weaving must be done on both sides of the product at once, gradually narrowing it towards the center of the basket.
- At the top, the ends are connected with tape and disguised as the base of the handle.
- The final stage is finishing the product: mix a little white acrylic paint, water and glue and brush this mixture around the perimeter of the walls.
- It is also necessary to paint the bottom of the product. To dry the basket, turn it upside down and leave it for several hours.
Final decoration finished product happens according to the wishes of the imagination. Do not forget to open the workpiece with varnish to ensure reliable connections. Decorate the basket with ribbons, decorative flowers, rhinestones or using the decoupage technique: a masterpiece will delight the eye and give a great mood.
Handle weaving
One of the main parts of the basket is a high-quality handle, because it is useful for moving items from place to place. The handle should be dense and durable, it can be decorated as desired: braid it with ribbon, stick it artificial stones and rhinestones, or simply decorate with colored acrylic. You can make a handle in several ways:
- openwork weaving;
- braid;
- rope way.
This master class will discuss the manufacture of reliable and beautiful pen for a basket using the braiding technique. At first glance, it seems that the technique is complex and defies explanation, but after completing step by step actions After just 1 hour you can enjoy the finished braided handle.
Weaving a strong handle
Detailed master class
To work, you will need 6 long newspaper tubes along the length of the handle, colored blanks for braiding the frame, as well as twists for weaving the braid itself.
Let's get started step by step:
- We put 6 newspaper bundles next to each other and wrap them with colored tube blanks. This is easy to do: just start from the edge of the blanks, gradually wrapping them around the entire perimeter into one tight bundle.
- When the base of the handle is ready, we proceed to attaching additional 4 tubes to decorate the braid. To do this, at the very base of the handle we place 4 tubes of different or the same color and wrap them a little to the workpiece using a roll.
- We begin to weave a pigtail: first we bend the two side sticks to the sides, and bend the two middle sticks towards ourselves. After this, we carry out weaving according to the figure in the photo below.
- When the tube runs out, insert a new one into it, wetting the connection with glue. We continue weaving until the braid covers the entire base of the handle. The finished handle can be attached to the basket in any way: it is best to do this using a rope technique.
How to make a lid?
If the basket is woven open, then it is enough to make handles for it, and it will be ready. When it is intended to manufacture a structure with a lid, then top part products are woven separately. To make your own lid, you can use a simple master class for beginners.
Advice
If you want to get a more patterned lid, you should choose those workshops that are based on openwork or checkerboard weaving - then the pattern will be clearly visible on the surface.
For work, prepare 2 circles of cardboard, the diameter corresponding to the finished basket. The circle can be immediately decorated: decoupaged, decorated with acrylic or covered with fabric. You will also need PVA glue, a lot of newspaper tubes of one or more colors and varnish.
Let's begin the process of creating a simple but beautiful lid:
- Two circles of cardboard must be glued together, after placing rays of rolled newspapers around the circumference.
- Weaving is done using rope technique or layering. The four main twigs are inserted through one radial twist and the braiding of the cardboard circle begins.
- All 4 twigs are used at once: first they are placed over a newspaper tube, then passed behind the next tube. In the end it turns out beautiful border along the contour of the cardboard. This way the entire circle is woven around the diameter of the basket.
- To make the sides of the lid, the workpiece is placed on the basket and the rays of the twists are folded down by bending the rack behind the rack. Weaving continues in the above technique. The ends are cut off and bent inward, gluing.
The finished lid should dry, then you can decorate it in your own way.
Basket weaving methods
The widespread popularity of making beautiful baskets from newspaper tubes has provoked the development of new techniques. If previously it was possible to weave a basket only using the method indicated above, then modern craftswomen do not sit still.
They come up with new ways to weave blanks, as well as various schematic patterns. To learn more about each type of weaving, we suggest looking at a summary table describing the methods.
| Technique | Description | Where is it used? |
|---|---|---|
| Spiral twisting | The technique is considered one of the simplest; judging by the reviews of needlewomen, even a schoolchild can cope with it. The essence of the method is to gradually increase the height of the product due to the circular interweaving of the tubes. Each new workpiece is superimposed on the previous one in a spiral. | Used to create tall baskets for decorative purposes, as well as attractive vases unusual shape. Using this technique it is easy to do stylish item interior decor. |
| Layer-by-layer | The technique involves making a basket from several tubes at once. To make weaving easier, first perform several rows using the rope technique, insert additional tubes into the support holes and begin to braid the walls in a circle with each tube at the same time. | It is used to create baskets of various shapes, as well as to design patterns on the surface of products. It is worth noting that the racks should be an order of magnitude stronger than the braiding blanks themselves. |
| Rope | This weaving method was discussed in the master class above, where a step-by-step guide to creating an original but simple basket for beginners was discussed. | The weaving technique is used to create simple round and square products. This method is suitable for training beginning craftswomen. |
| Spiral weaving | The technique should not be confused with spiral twisting - they are fundamentally different. This method involves weaving at an angle | Spiral weaving is suitable for making small and tall items, such as narrow baskets, glasses, vases. |
| Pigtail | There are 2 types this method– edging and overhead. The first option is used to weave the stand counterclockwise, with the tubes leading outwards and inwards. The overhead technique involves the use of several twists at once, braided with the edge. | Baskets made with this weaving look more elegant. The texture of the pattern resembles a real willow basket. |
| Openwork | It is not difficult to recognize this weaving - it looks like lace. It consists of holes and patterns. The technique is a synthesis of simple and complex techniques. | Original baskets made of openwork weaving can be open or closed. They are well suited for presenting a birthday gift as a packaging box. |
The weaving methods discussed will help you better understand how to properly make a basket with your own hands. For beginners, it is better to use the rope technique or spiral twisting, more detailed descriptions These techniques will be presented as the material progresses.
Laundry baskets
The main advantage of working with this technique is its practical side: having learned to weave baskets from scrap materials, you can easily create household items.
One of these useful devices is a laundry basket - the work is done simply, the difficulties lie only in the size of the product itself. To weave a laundry basket from rolled newspapers yourself, be patient and have the necessary materials.
Prepare the following materials and tools:
- thick cardboard, some needlewomen use corrugated cardboard;
- wallpaper or colored paper for gluing the bottom;
- paper tubes, pre-painted in the required color and covered with stain;
- clear varnish;
- PVA glue;
- fabric for the liner on the base.
You will also need clothespins to secure the bottom while it dries and heavy objects such as a weight or a stack of books. A box, the size of which the basket will be woven, will not be superfluous. It will add stability to the bottom and make the basket the correct shape.
To make a beautiful fruit basket yourself, prepare 310 pieces of newspaper tubes - their length is 27 cm. It is recommended to pre-paint the tubes with the following composition: take 2 tbsp for half a liter of water. l. acrylic varnish and mix with the shade color. Process all the tubes and begin step-by-step work.
| Stage | Description |
|---|---|
| Bottom formation | The bottom is made using rope technique using a cross for the base. Take 12 tubes, divide them into groups of 3 each and glue the cross. |
| Weaving bottom | Weave 6 rows using this technique, braiding 3 tubes at once, and then begin braiding 1 bundle at a time. So it is necessary to weave until the bottom of the desired diameter is obtained. |
| Forming the sides | To make rises for weaving the sides of the structure, you need to insert 3 more tubes into each hole with a stick. |
| Weaving of sides | By placing the bottom on a round object, such as a wooden bowl, you can continue working. Here you can already weave boards using the layer-by-layer technique: it is done in 2-4 rods and will be much more reliable than the rope method. |
| Creating openwork | To make the basket elegant, you can create a pattern: in the center of the weaving, simply cross the adjacent rods, imitating rhombuses. Press each connection with a clothespin and weave in new rods for further work. |
| Handle Formation | When the main work is ready, we begin to create a handle: we insert additional rods from the sides of the product and create a handle, according to the master class indicated above. |
| Decor | We finish the structure as we wish: we paint it with multi-colored pigments and make fabric inserts. |
Fruit basket
Detailed master class
This basket does not need a lid, because it is intended for storing fruit. The handle of the product can be effectively decorated with a rose made of foamiran.
Weaving a square basket
Detailed master class
To make such an auxiliary device, just take a sheet of cardboard, bend it in half lengthwise and use a hole punch to make holes for the tubes 2 cm from the fold. You also need to prepare large number paper or newspaper bundles.
- We insert the sticks for the base into the holes of the cardboard so that most of them are closer to the work.
- We begin to braid the bottom: take a long tube and insert it next to the cardboard, then we work using the rope weaving technique. When we reach the desired perimeter of the square, we finish the bottom.
- To form and lift the walls, we insert new splinters around the perimeter of the square: bend the twist in half and thread it into the hole, grabbing the nearest tube. We fix the fastening points with tape and clothespins.
- We begin to braid the walls until we get the height. For ease of work, we put the structure on a square box.
When the work is finished, you can attach a handle to it or weave an additional cover. Such a basket will not only serve as a bread bin, but will become good option packing box.


