To make driving comfortably, many drivers buy special steering wheel covers. Such refinement creates convenience, hands get tired less. Plus, the interior of the cabin is changing for the better. There are many different offers on the market today. However, you can pull the steering wheel yourself. The most practical and convenient material for steering wheel tuning is Genuine Leather... The use of artificial substitutes is not recommended. Since they do not have the proper elasticity and wear out quickly.
Tools and materials for constriction
Do-it-yourself steering wheel covering involves the use of following materials and tools:
To make a pattern (pattern), it is best to use cling film and wide masking tape.
Thick paper or cardboard.
A clerical or other sharp knife, marker or pencil.
Strong and high quality thread, preferably nylon.
For safe and comfortable sewing, you need two middle finger thimbles.
Sturdy hardened steel sewing needles.
High quality soft genuine leather.
Screwdriver and wrench to remove and then install the steering wheel.

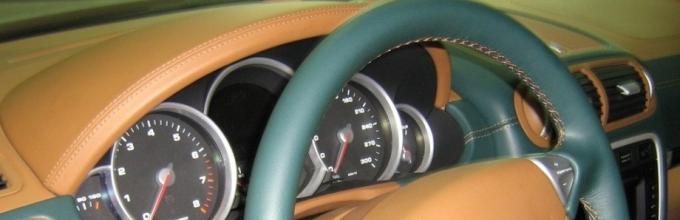
To cover the steering wheel with leather with your own hands, it is advisable to use two types of material, perforated and smooth skin... The combination of two different textures will not only create an original and pleasant aesthetic look, but also provide comfort for working with the steering wheel.
Perforated leather is highly elastic. It is soft and comfortable to work with. Smoother leather, in turn, is more resistant to wear and tear. Therefore, if you put them together, you get a durable, soft and fairly resistant to abrasion material. Experts believe that leather with a thickness of 1.2-1.4 mm is optimal for steering wheel covers. You can choose any skin color, it all depends on your taste. As a rule, the most popular are leather cases in dark shades. The most commonly used material is black.
Steering wheel leather template

In order for the steering wheel to be made of quality with your own hands, you must first make a pattern. To do this, first we make a template from film and tape. First of all, we remove the steering wheel, having previously dismantled the signal cover. Then we unscrew the nut securing the steering wheel on the shaft and remove the steering wheel from the splines, swinging it in different directions.
After that, using cling film and masking tape, we make a steering wheel layout, a template for a pattern. Wrap the steering wheel with foil. On top we glue masking tape on a paper basis. The places where it is planned to make seams are marked with a marker or pencil. Then carefully cut the tape along these lines. As a result, you should get four elements, one rectangular and three cruciform. We expand and number all the details for the template. After that, we lay them on cardboard or thick paper and make patterns of the same shape for a pattern.
Leather pattern
To make an original case, you first need to look through various sketches and choose the most suitable one. Of course, there are not so many solutions out of four parts. However, you can make each sector from two or more elements, composing a different texture or skin tones. Naturally, this will take more time and effort, but the end result is worth it. You can search the Internet for various options and choose the most convenient and practical. After you have decided on the design of the cover, we lay the pieces of leather on the table and make patterns using a clerical knife.

When making patterns, it is very important not to miss the next essential moment. Each sector of the template is transferred to the skin not strictly according to its shape, but with a small margin. That is, after you have laid the template on the skin, you need to cut it out, stepping back from the edge of the sector by 1.0-1.5 cm.This margin will be needed to ensure the necessary strength of the seams. Otherwise, after a short use, the seams will disperse, you just have to throw the cover away. As a result, you will need another do-it-yourself steering wheel hauling.
Once the leather pieces have been cut, place them against the steering wheel and check that all sectors are cut correctly and are the same size, taking into account the seam allowance. If necessary, all surplus can be cut off, because all the patterns are made with a sufficient margin. After you have made sure that all the elements are prepared and correspond to the design intent, you can start sewing.
Cooking a leather case

First, we lay out all the parts on the table in accordance with how they will be located in the case and begin to sew in a given order. The edges of the sectors must be swept over to avoid skin tightening during operation. The parts need to be sewn with strong nylon threads, retreating from the edge at least 3 mm. All parts are sewn completely in the form of a ring, with the exception of those seams that you previously marked with a marker.
After the workpiece is completely sewn and all edges are overcast, carefully pull the cover over the steering wheel so that the joints of the seams are in the places of the cuts. We smooth the material and eliminate sagging. Some experts advise to "plant" the leather on glue or epoxy. However, the edges must be stitched in any case.
Video - Leather steering wheel

So, now it remains to do the most important thing - to pull off the edges of the cover so that it is securely fixed on the steering wheel. This procedure is very troublesome, time consuming and requires a lot of time. First of all, you should decide on the place where the seam will begin. Here, you first need to secure the thread, and then you can carefully sew. When tightening the edges of the cover in the area of the signal cover, it is recommended to coat the edges of the leather with rubber glue.
There are many types of seams. However, the most popular are pigtail, sporty and macrame. They look beautiful and form the strongest bond.
After the cover is completely ready, you can put the steering wheel on the car. There may be slight creases on the case. You should not worry about this. If you used natural leather, then due to the increased elasticity of the material, all these imperfections will completely disappear over time.
For a long time, I wanted to change the steering wheel trim as I enjoy driving and I wanted more grip. Unfortunately, I could not find a suitable casing for sale in the form ready set because the steering wheel of my car is not standard size... I tried a couple of them, but I couldn't find one that worked for me.
A few days ago I was looking for trim on aliexpress, and then it occurred to me interesting idea- why not make the steering wheel trim yourself? Then I started researching this website looking for ready-made instructions, but didn't find anything, but I read a lot of master classes in which people, even beginners in leathercraft, do amazing things. This gave me confidence that I could do everything myself, too.
To begin with, I took the remaining piece of fabric that was lying in my house and began to work.
Step 1. Materials and their cost.
- A piece of plank cloth along the circumference of the steering wheel - free of charge. It was a piece left over from some project of my wife.
- A strip of leather, about a quarter square meter in area (this size is more than enough to make 2 normal-size skins, but my steering wheel is thick, so I left that size for one skin). About 500 rubles
- Thread - 50 rubles
- Glue - 20 rubles
- Measuring tape, ruler, pencils, scissors, etc.
- Time - from 4 to 5 hours.
I started by cutting fabric with a steering wheel circumference and a width of 11 cm.First I asked to sew a piece of my friend's fabric, but the resulting bagel turned out to be too large and I had to alter and cut off the excess at home myself. Now everything has fit. The photo above shows where I put marks on the fabric in order to cut the skin later.
Step 2. I cut the skin.


Once the fabric pattern was ready, I took out a piece of leather and cut it out from the pattern. Then I made some temporary stitches to try on the trim on the handlebars. The original dimensions came up and I began to mark the places to be cut off. Once that was done, it was time to fold the sides of the pattern to make the side stitches to sew the cap onto the wheel.
Once the places were marked, I began to cut the leather and tuck the edges to sew them on the sides. As a result, together with the folded edges, the width of the sheathing turned out to be 11 cm. I applied glue to the leather to make it easier to sew the sides of the trim together.
After this step, it's time to sew the ends and put the trim on the steering. I stitched around the perimeter on sewing machine... The leather is not thick, so it can be sewn even on an ordinary household machine. Then I tried on the steering wheel trim again
The dimensions were perfect and the trim was tight to the steering wheel. Now it's time to stitch everything together on the steering wheel.
Step 3. Sew the trim on the steering wheel


I took a long needle and bought nylon thread, which is stronger than cotton.
Generally, the stitches on ready-made covers available in stores are slightly longer, which reduces the number of seams when sewing, but since I made this side seam myself, the stitches were shorter and therefore took longer to sew. Pay attention to the close-up image and you will see what I mean.
It took about 2 hours to sew, but I really enjoyed doing something with my own hands. Also the pre-made skins available on the market do not cover the underside of the handlebars as this is the thickest part, close to 13 cm in girth, and no padding will fit. My special skin was made with this width in mind and therefore covers the entire handlebar. take a look at the last image.
It turned out a little crooked, but since I did it for the first time, I am very pleased with the result and myself. For beginners, I can advise you to make the casing for the first time not from leather, but to buy a piece of leatherette or use an old jacket or coat.
Next time I will make a different skin to fit the steering wheel more closely and match the color of the skin of the car itself.
The steering wheel is the element of the car with which the driver comes into contact most often. This leads to wear of the steering wheel cover and the appearance of abrasions that not only spoil appearance but also make driving less comfortable and convenient. In order to restore the coating, many drivers buy from car stores. The disadvantage of a foreign object on the steering wheel is the inconvenience of driving.
In order to give the steering wheel of the car a stylish appearance, as well as to replace the often low-quality factory coating with a more comfortable one, it is recommended to drag the steering wheel with leather. The best option will do it manually - this way you can not only save on the finished leather cover, but also drag the steering wheel according to your preferences for convenience and beauty. The leather covering not only looks better and lasts longer, but also improves the car's handling.
The choice of material for the hauling of the steering wheel
Nowadays, many types of ready-made steering wheel products are available in stores. Nevertheless, the most profitable option would be to create a leather cover yourself. The advantages lie not only in cost savings, but also in the ability to create a unique skin for the steering wheel of a particular car.
The best material for creating a coating is genuine leather. The optimal thickness is 1.3 millimeters, since the thinner one will wear out quickly, and the thicker one has low plasticity during processing. In addition, it is desirable that the skin be taken from the sides or back of the animal - this material has the best degree of stretching.
An excellent option car steering wheel is perforated leather. It has a more stylish look, as well as more convenience when driving the machine due to better friction. At the same time, it differs from the smooth one in less resistance to damage.

Before buying leather for a steering wheel covering, it is necessary to inspect the material for cracks, tears and other defects, as they will manifest themselves when creating a covering or already in operation. It is necessary to choose the color and texture of the leather so that it matches the style of the salon. In addition, it is recommended to buy leather with a stock or to make sure that the seller has more material, since mistakes can be made in the process of creating a covering.
The least suitable materials for a wear-resistant coating are leatherette and other artificial species materials. They quickly deteriorate and have little elasticity. That is why leather, despite the relative high cost, is the most demanded option.
Materials and tools needed to create a leather steering wheel cover
In order to make a high-quality steering wheel coating, you need to use several simple and affordable tools and materials:
- high quality upholstery material;
- a bobbin of strong synthetic thread in the color of the covering material;
- hardened steel needles for working with leather;
- 2 thimbles for pushing the needle;
- a roll of assembly tape;
- A3 sheet of cardboard paper;
- a roll of cling film;
- a marker giving a thick line;
- small scissors;
- two-component strong adhesive or epoxy for working with leather;
- industrial or powerful household hair dryer for drying glue.

Creating a steering wheel wrap template
In order for the steering wheel hauling with leather to be accurate and of high quality, a pattern is required. This, in turn, requires the right template to bring the shape of the steering wheel to the plane - a pattern for carving leather.
The first step in creating a rudder template is to remove it. It is necessary to remove the signal cover, and then unscrew the nut holding it on the shaft. Further, it must be rocked to the sides.
The steering wheel is wrapped with cling film, and masking tape is glued to it in several layers (thus, the adhesive tape will only stick to the film). The steering wheel must be divided into several conventional parts - according to the joints of the existing coating. As a rule, there are four of them - one central and three with rounded sides. It is important to number or label each element as they differ from each other. To create a pattern, a layer of adhesive tape must be pressed against a thin cardboard. It is desirable for the night.
Creating a pattern for leather steering wheel cover
The next step after the template is the drawing of the pattern. Scotch tape mock-up pressed against thick paper may end up being slightly larger than the coverage required for the handlebar. However, during use, the skin will first be covered with folds and then smoothed out. In addition, the overlap of the material is necessary in order to sew the parts - it should be 2 millimeters from the edge. Next, you need to circle the template unfolded on the plane of the cardboard, and then circle it, leaving an overlap.
Sewing a leather cover for a car steering wheel
To create a finished steering wheel cover, it is necessary to lay out all the parts on the table as they will touch during operation. Next, you need to firmly sew the parts with strong threads that will withstand a long period of use without wearing out. That is why it is important that the leather, threads and glue are of high quality - ideally, such a covering is done for years of operation.
After the cover has taken shape and volume, you need to try it on the steering wheel. It is important that when you put it on the handlebars, the folds are not too large, since they will not be able to stretch during operation and can greatly deform the entire coating under direct exposure to the sun.
To smooth the seams of the covering against the general background of the coating, it is recommended to cut grooves on the steering wheel. You can do the same with the edges of parts of the material.
Leather steering wheel padding
At the stage of fixing the cover on the steering wheel, it is important to give the cover the maximum adhesion to the surface and the best connection between them. You need to stitch the material crosswise. In this case, the threads at the junction of the steering wheel spokes are skipped and go from the back. You can fasten the stitches with a double knot at the beginning of the waist.
For motorists who do this for the first time and do not have experience in hauling, it is recommended to use glue or epoxy resin. This will make the fit more reliable and durable, as well as correct certain errors. The glue must be dried with a hair dryer and allowed to dry. Car owners who have previously been involved in stretching prefer to soak the leather in water - as it dries, the coating adheres better by reducing the size.
After the glue or the coating itself has dried, you can put the steering wheel in place. The same applies to all parts - alarm covers, buttons, airbags and other devices.
Outcome
Self-hauling is a painstaking and monotonous task. Nevertheless, it allows a stylish and practical steering wheel cover in a simple and affordable way.
The most heavily used interior elements are the steering wheel and pedals. The state of the latter is not so noticeable for the driver and passengers, but the steering wheel should always cause pleasant tactile sensations. Do-it-yourself leather steering wheel will help to give it individuality and stylish appearance.
In addition to the aesthetic perception, the steering wheel must be securely fixed in the hand so that the driver can react to traffic surprises in time. Therefore, it is necessary to choose a high-quality, tight-fitting material that eliminates slippage or other troubles.
It is desirable to use soft perforated leather as a material. It is better fixed by hand and has a good coefficient of friction. Before sheathe the steering wheel with leather with your own hands, you need to choose the color and texture of the material. The cost of the material and its compatibility with the rest of the decor in the car depends on this. It is unlikely that a black steering wheel would be appropriate in a chic beige interior.
Leather braid on the steering wheel
When purchasing an upholstery fabric, you need to choose it with the ability to buy another piece if necessary. When sewing, different situations can occur, as well as when cutting the canvas. It is advisable to stock up on the possibility of adjustments so that you can correctly restore the leather on the steering wheel or create a new pattern.
Required materials and tools
Ensuring a high-quality result can be achieved with the following components:
- High quality upholstery material;
- Babin of synthetic strong thread of the desired color;
- Tempered steel needles for leather, with material hardness up to 45-50 HRC;
- A pair of thimbles for pushing the needle;
- Roll of construction tape;
- A3 format cardboard for making patterns;
- Roll of 10 m of cling film;
- Thick refill marker;
- Manicure scissors or a sharpened knife;
- Two-component leather glue or epoxy resin;
- Powerful home or industrial hair dryer.
DIY leather steering wheel
It is possible to determine the number and shape of blanks for the material only by experience. To do this, you need to form a pattern. Automotive enterprises that produce mass-produced products receive ready-made pattern from engineers and designers. For self-repair, we will use workarounds.
Initially, you need to make an impression from the surface of the "donut", and then, dividing it into separate components, form patterns for the finished product.
The cling film will serve as the basis for the frame. We wrap it around all surfaces where the steering wheel will be covered with leather. The next layer is formed with molar tape. It should wrap very tightly over all the required areas. No bulging or sagging should be allowed. All indulgences will negatively affect the fixation of the upholstery.
Marker markup for separation the resulting workpiece. Connecting seams will run along the marked stripes. It is advisable to cut them out so that they are out of sight. Each part is numbered in a certain order and draw up a diagram of the future assembly. Cut the pattern with scissors or a knife along the established lines.
Having removed all parts of the workpiece from the wheel, they need to be straightened using a weakly heated iron (do not forget to protect the tape and film) or put something heavy underneath (weights, a bucket of water, a cabinet). The straightened elements are transferred to cardboard, remembering to add a 4-5 mm allowance for the seam, and also remove 2-3 mm at the joint around the rim, given that the measurement was carried out on a larger diameter.

Sewing upholstery on the steering wheel
Experienced specialists, who have done such an operation not for the first time, can cover the steering wheel with leather with their own hands without gluing the parts, but for beginners it is preferable use epoxy resins or glue. In this way, measurement and manufacturing errors are concealed a little.
When covering a car with an airbag, you must be careful not to unauthorized deployment. For the convenience of work, you can completely dismantle the wheel and do the firmware from any side in a comfortable environment.
The new upholstery is practically laced along the holes that have been stitched in advance on the edge by a machine. You can pierce them with an awl yourself, but it is better to entrust this painstaking work to the sewing needle of the machine.
Experienced craftsmen pre-moisten the skin in warm water. So it becomes more elastic. After drying, the material adheres more tightly to the surface due to its size reduction.
After completing the firmware from all sides, and after drying the surface with a hairdryer, you need to allow the glue to dry, and only then return the steering wheel to its place. After that, you can put buttons, decor, pillow in place. Lovers of self-tuning often mount a steering wheel heating with such an operation.
Hello dear friends! Hope you are in good mood and are ready to receive a portion of new useful observations from your humble servant. After all, today we are discussing such an issue as steering wheel hauling.
Agree that the standard steering wheels on many cars cannot be called anything other than squalor. Or they were normal, but time left marks on them in the form of scratches, cuts, torn seams, and so on.
Skin tightening is a fairly common service. In cities such as Moscow, St. Petersburg, Yekaterinburg, Krasnodar or Belarusian Minsk, for example, there are a number of ateliers where you can alter the steering wheel in just a couple of days, breathe new life into it.
Yes, of course, Volgograd, Nizhny Novgorod, Belgorod and any other, even a small town in Russia and the CIS, will offer at least one master who can do this kind of work for you.
But ordering the service is too easy. And you need to pay more. Therefore, I propose to talk about how the covering is done with your own hands.
Choosing a material
Of course, leather for the steering wheel will be preferred. Such material is natural, strong and durable, plus it fits well in the hand. An alternative would be alcantara.
But start with the skin. Its price is not that high, plus there are many options for execution. To choose the leather from which the headband will be made, follow a few rules.
- Naturalness. Artificial leather will not work, the properties are wrong. And in general, since they started to work, do everything efficiently.
- Thickness. We don't need thick skin. Otherwise, you will be tortured to pierce. Thin wears out quickly. The optimal size is 1.3 mm.
- Extensibility. Strictly average. The elasticity should ensure a snug fit to the wheel.
- Perforation. It is not necessary, although it is more pleasant to work with perforated leather. At the same time, the wear is higher than that of ordinary leather. Decide for yourself. I opted for smooth leather when wrapped around the steering wheel.
In addition to the leather for the steering wheel of the car, you will need a row supporting materials and tools.

Tools and materials
The steering wheel cover kit for Mazda, Nissan, BMW and any other cars, even a Ford Focus, will always be the same.
You need to collect in a heap:
- skin;
- a strong needle with which you will sew the material;
- strong nylon thread;
- a couple of thimbles to protect your fingers;
- masking tape;
- cardboard of normal density;
- cling film;
- marker or pencil;
- a sharp knife (buy from a building materials store).

All is ready. Now your car can be transformed. Start small - steering. Covering it with leather is not an easy task for a beginner, but it can be done. I myself once decided to suddenly do something like this. The result exceeded my expectations, so you will definitely do just as well. I'm still a jack of all trades.
The whole process can be divided into two stages:
- making patterns;
- close-fitting.
If you do everything right in the first step, it will be much easier with the constriction.
Pattern
I will give you a sequential instruction to put everything on the shelves and convey the main idea to you.
- Remove the steering wheel. I don’t know what kind of car you have, so I cannot give specific instructions for dismantling the steering wheel. Take a look at the repair manual, if you don't know, watch a video or just act instinctively. No, I was joking. We work only strictly according to the instructions;
- Get rid of the old braid. This is not difficult. You can simply cut the seams and remove the worn out material;
- Wrap the steering wheel with plastic wrap. Do not feel sorry for the material, but wrap it up carefully so that there are no differences in height and irregularities;

- Masking tape is wound on top. Be sure to mark the places along which the seam will pass with a marker;
- Cut the previously wound tape along the marked lines. Basically, you will end up with a few elements for your layout. Since they are curled up, flatten the tape and place something heavy on top of it. Leave it overnight. The next day, the layout will be smooth and neat;
- Scotch tape components can serve as a model for making a more durable cardboard base. That is, attach the tape to a sheet of cardboard, circle it strictly to size and cut it out. Although this is not necessary;
- Now, according to the sample of 4 elements of the layout (usually 4 of them are obtained), the skin is cut required sizes... Here, try to cut neatly, without breaking the dimension. Otherwise, then you will have to trim, level, and so on. Why do you need extra trouble;
- Number the elements of the pattern in order to understand which piece of leather will be located where.
Basically, the base is ready. Not as difficult as it seems at first glance. But then an equally important stage awaits you - sewing. If you have ever sewed, then you roughly understand what this is about. Those who have never even darned their own socks in their life, do not approach the tight fit. I'm serious! Otherwise, the result can be very disappointing. Basic skills are a must.

Wrapping procedure
If you are neat and consistent in your actions, you will succeed and the car will acquire a really beautiful hand-made steering wheel.
- Take a strong thread, insert it into an equally strong needle;
- From the edge of the skin, you need to retreat about 2-3 mm. If you sew too close to the edge, it will simply tear when pulled;
- All blanks need to be connected, resulting in a ring. That is why it is important to mark the patterns with a marker;
- The inner seam will be inside, so don't worry about it;
- When the ring is ready, attach it to the steering wheel, align on all edges so that everything matches;
- The leather will “walk” on the wheel if it is not fixed. Here I solved the question like this - I treated the steering wheel with epoxy resin. She firmly held the skin, but at the same time allowed to slightly displace the material until it dries;
- Sew all edges neatly. If you are good at thread and needle, you can get a beautiful decorative stitch;
- Stretch the leather evenly so that the tension is approximately the same everywhere.

You shouldn't be intimidated by the formation of small wrinkles on your new case. This is normal for the skin. After a few days, everything will be smoothed out and look perfect. Be patient.
I told how the process of steering wheel trim looks roughly. Yes, the task is not the easiest, but doable. If you are not ready for it, give the steering wheel in the atelier. There they will do everything for you. in the best possible way, albeit for a decent amount of money.
Share your stories on self-hauling steering wheel or bad experience in the studio, if any. To do this, write in the comments.
Do not forget to subscribe and tell your friends about the existence of our site! We will be very grateful to you for this!