Knitting house shoes is a good old tradition for all knitters. Many continue to support it, annually creating cozy and warm slippers, boots, slates and even high boots for themselves and their loved ones.
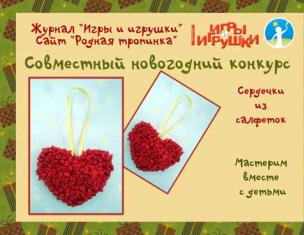
There are several popular ways of making such shoes, which have almost become classics of the genre, but restless designers and craftsmen continue to delight knitters with new developments. One of them is crocheted hexagon slippers. A scheme for creating motifs and assembling them is proposed in this article. Examples of color yarn distribution and model modification are also given.
Materials for knitting slippers
In addition to the obvious advantages (originality finished products, saving money, realizing creative potential), making shoes for the home is also useful because it allows you to recycle the remains of multi-colored and assorted yarn. As a rule, most craftswomen sooner or later discover that they have accumulated a huge number of skeins, balls and spools. Typically, such yarn has not only a different color, but also composition, and even thickness. The hexagon crochet pattern is great for tying up all those threads.
You can change the color in almost every row or come up with a different system. If there are many small colored balls and one unnecessary skein, then the centers of the hexagons are made variegated, and the last two rows of each motif and the binding of the slippers are knitted with the main color. By the way, in the case when it is not possible to clearly distribute the remaining yarn to knit the required number of identical fragments, you can make completely different hexagons. The main thing is that the colors are combined with each other, and the binding is made with a thread of the darkest color.
Adherents classic style and calm shades, you will like plain crocheted boots made of hexagons (the pattern of the motif can be almost any).
What to use to make soles
They serve well as a base for indoor shoes. various types dense fabrics. However, natural and faux leather. These materials have elasticity, so the sole will be comfortable and not “wooden.” As a rule, leather elements do not wear out for several years, however, you will need to take care to sew them tightly top part products to the bottom. On the inside of the slippers, you should stitch or glue a layer of some natural and warm fabric: fleece, flannel or lining with batting.

Why felt
As an alternative, felt insoles are often used; they also last a long time and are significantly cheaper than leather ones. Among their advantages are the following:
- They are easy to find and buy.
- Felt is easy to pierce with any needle, making it easier to work with.
- It does not require placing a lining inside the product, since it is warm enough in itself.
If the craftswoman has stored scraps of tarpaulin or furniture fabric, she may well use them too. Some publications offer patterns for knitting yarn soles. However, it should be borne in mind that the life of such slippers will be short-lived: they will wear out in just a few weeks.
Simple crochet hexagons: diagrams and descriptions
Let's consider the principle of making a dense hexagonal motif. You need to start with a chain of 3-4 air loops (VP), like any circular knitting. Some craftswomen find it more convenient to make a loop of thread as an initial step. Essentially no big difference in how the middle will look, the main thing is that it is neat.

1st row: 3 VP (this is the beginning of each row), 1 double crochet (Dc), * 1 VP, 2 Dc * (repeat 5 times), 1 VP.
2nd row: 3 VP, 1 Dc, 1 Dc under the arch from the VP of the previous row, * 1 VP, 1 Dc in the arch, 2 Dc, 1 Dc in the arch * (repeat 4 times), 1 VP, 1 Dc in the arch .
This is the entire description of knitting a hexagon, since then you just need to continue expanding the motif. An attentive knitter will notice that the formation of new CCHs occurs when 1 CCH, 1 VP and another 1 CCH are knitted into one arch (from 1 VP).
The corners of the motif are formed in these same places. When changing colors, the stripes will follow the contour of the figure. The hexagon crochet pattern can be openwork.

Here, a slightly different principle of expanding the fabric is used: first, a round element is knitted, and six corners are formed in the last row.
Crochet hexagon pattern: knitting and connecting motifs
The following figure shows openwork hexagons, the shape of which is formed from the second row.

This happens due to the fact that at six points between the “bushes” (the main element of the motif, connected by the CCH), not one, but three air loops. In the next row, not one, but two “bushes” are knitted into this arch. The described algorithm is repeated until the fragment reaches the desired size. This hexagon crochet pattern is best suited for working with colored threads.
To connect individual elements into a single piece, you can use several methods:
- Sew with a needle.
- Knit one row of sc, grabbing the edges of the two parts (the seam will be voluminous and rigid).
- Knit an additional row of VP and RLS, picking up the loops of two hexagons.
The first two methods are quite simple, but the third will be more clear after studying the instructions. They start with 1 RLS, which is knitted in the last row of one of the elements (in the corner), then, without tearing off the thread, they move to the corner of the second part and also perform RLS. After 3 VPs, insert a hook under the VPs of one and the second part and knit 1 RLS. This is followed by 3 VPs, the algorithm is repeated.
The resulting seam comes out smooth, completely loose and flat. Often it is made with a thread of a background color, so a kind of frame is formed between the motifs.
How many hexagons are needed for slippers and boots?
The photo shows that ordinary slippers consist of three motifs: one serves as the toe of the product, and the other two form the heel.

To assemble short boots, you will need more parts. In addition to the main three hexagons, you will need to knit two more for the boot. If desired, you can raise the boots to any height: each level will consist of two new parts.
Before you start crocheting a hexagon (patterns may vary), it is worth considering the thickness of the yarn. If it is small, then the number of motives will increase.
Competition work No. 19 - Slippers made of hexagons (
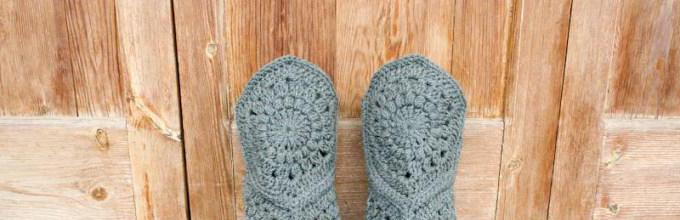
Hello, my name is Ekaterina, these are the hexagon slippers I made:

I saw all sorts of options. But I liked the hexagon slippers because they are not very low and not too high, like socks. Because good description I couldn’t find them in Russian, so I had to translate them. I really wanted to knit them. I haven’t started working on my version yet, but I’ve finally done the translation.
You will need:
Medium weight acrylic yarn in three colors
Color A - 120 g.
Color B – 60 g.
Color C – 30 g.
The choice of hook will depend slippers size:
No. 3.5 - for small ones (S) approximately 23 cm,
No. 4 - for medium size (M) approximately 24 cm,
No. 5 - for large ones (L) approximately 25 cm,
No. 5.5 - for very large (XL) approximately 26 cm.
For two slippers you need to knit six hexagons.
Hexagon.
Abbreviations used:
v.p. - air loop
RLS - single crochet
CH – double crochet
С2Н - double crochet stitch
СС – connecting post
With a thread in color B, cast on 5 chs, join into a ring using a sl st in the first ch.
1st row: 4 ch, 17 C2H in the ring, SS in the top ch. from lifting loops. (a total of 18 columns in a row.)
2nd row: Using a SS, attach a thread of color A to any of the posts. To knit the first lush column, cast on 2 ch, (yarn over, insert the hook into the same loop and pull the thread) - 2 times, grab the thread and pull it through all 5 loops on the hook, 1 ch; for knitting the next lush columns *yo, insert the hook into the next loop, pull the thread, (yo, insert the hook into the same loop, pull the thread) 2 times, grab the thread and pull through all 7 loops on the hook, ch 1* Repeat from * to * 16 more times; SS in first lush column(18 lush columns in total).
3rd row: Using a SS, attach a thread with color C to any arch of 1 ch. For the first group of loops, cast on 2 ch, (yarn over, insert the hook into the same arch, pull the thread, grab the thread and pull it through two loops on the hook) 2 times, grab the thread and pull it through all 3 loops on the hook, 2 ch; for the next groups of loops * yo, insert the hook into the arch of 1 ch, pull the thread, grab the thread and pull it through two loops on the hook, (yo, insert the hook into the same loop, pull the thread, grab the thread and pull it through two loops on the hook) 2 times, grab the thread and pull it through all 4 loops on the hook, ch 2* Repeat from * to * 16 more times; SS in first group of stitches (total of 18 groups per row). Tighten and cut the thread.
4th row: Using a SS, attach a thread in color B to any arch of 2 ch, 3 ch. (counts as the first dc), 2 dc in the same arch; *(3 dc in next ch 2 arch) 2 times, 5 dc in next ch 2 arch* Repeat from * to * 4 more times, (3 dc in next ch 2 arch ) 2 times, 2 dc in the same arch as at the beginning of the row; SS in top ch. from lifting loops. (Total 66 dc.) Tighten and cut the thread.
5 row: Using a sl st, attach a thread in color A to the end of the 4th row, ch 1, 3 sc in the same loop, 10 sc, (3 sc from one loop, 10 sc) 3 times, sl st in the first sc. (Total 78 sc.) Tighten and cut the thread.
Hide the ends.

Sole.
Knit 2 pieces.
1st row: Sc in the 2nd loop from the hook and in each loop to the end of the row, ch 1, turn (10 sc).
2nd row: knit sc into all loops, inserting the hook behind the back wall of the loop; finish sc in lifting loop, ch 1, turn (10 sc).
Knit all the following rows as the 2nd row until the length is reached:
23 cm - for small ones (S),
24 cm - for medium size (M),
25 cm - for large ones (L),
26 cm - for extra large (XL).
Last row: Knit sc, inserting the hook under both walls of the loop.
Ending: Work the entire piece into a sc, sl st into the first sc. Tighten and cut the thread. Hide the end.
Compound.
Sew or crochet three hexagons together as shown in the figure below.

Then sew or knit together the two sides of the hexagons marked “X” in the picture to form the back of the slipper.
(You can join with a crochet using a SC or SS. The disadvantage of this method is that the seam turns out in the form of a protruding braid. But sewing this way is faster than with a needle. If slippers are knitted for the home, then the disadvantage becomes insignificant.)
Pin the hexagon sock to the center of the short side of the sole, and the center of the back of the slipper to the other short side. Sew or crochet the sole and hexagons together around the perimeter of the sole. Tighten and cut the thread. Hide the ends.
The color combination of such slippers can be very diverse. From bright, flashy colors to calm tones selected in the same range.
Support our participants, leave your votes using the social network buttons!!!
To correct my posture and treat back pain that appeared after dragging my little daughter around for a year and a half, I started doing yoga at a sports club.
Some people go to yoga in beach slippers, others wear sports shoes, and someone is just in wool socks. So I thought about crocheting slippers for myself for this project.
Here is one of the options for their execution.
There is a real benefit: you don’t have to carry shoes, and you can wear these slippers instead of regular socks. The fact is that yoga classes are done barefoot. And at the end of the lesson, we put on warm socks and sweaters, and lie on the mat for about 10 minutes, listening to music, relaxing, and some meditating... This pose is called “corpse”. If you don't get dressed, it really looks like it.
I saw all sorts of options. But I liked the hexagon slippers because they are not very low and not too high, like socks. Since I couldn’t find a good description of them in Russian, I had to translate them. I really wanted to knit them. I haven’t started working on my version yet, but I’ve finally done the translation.
Will be needed.
Medium weight acrylic yarn in three colors
Color A - 120 g.
Color B – 60 g.
Color C – 30 g.
The size of the slippers will depend on the choice of hook:
No. 3.5 - for small ones (S) approximately 23 cm,
No. 4 - for medium size (M) approximately 24 cm,
No. 5 - for large ones (L) approximately 25 cm,
No. 5.5 - for very large (XL) approximately 26 cm.
For two slippers you need to knit six hexagons.
Hexagon.
The color combination of such slippers can be very diverse. From bright, flashy colors to calm tones selected in the same range.
Fresh, smelling of forest and grass, variant.

Girly, chocolate pink with a blue circle.

Juicy with a striped sole.

Slippers turn...
Slippers turn into elegant socks.
You just need to knit 2 pairs of hexagons.

And slippers can turn into sneakers. Yeah, I wish we could have a little more dry weather...

But with such a copy you can amuse your guests and leave everyone with their noses.

Well, in conclusion, food for thought. After all, such slippers can be knitted from almost any hexagon. And how many different ones there are!

18 comments
- Svetlana writes:
The slippers are very cool! I just had a question: the sole wears out quickly! Maybe this yarn is not suitable?
- elenv writes:
Yes, knitted slippers unfortunately they are short-lived. If you use them instead of ordinary slippers, it is better to reinforce the sole with some material: leather, thick fabric, felt, etc. Wear resistance also depends on the choice of yarn. Coarse wool and cotton will rub less quickly than, for example, wool for knitting sweaters. It is often practiced to knit a sole from two threads folded together: cotton and wool.
- Svetlana writes:
Thank you very much for the advice!
- Catherine writes:
THANK YOU SO MUCH FOR THE TRANSLATION!!! VERY COOL SLIPPERS! And what about the soles, these slippers can be re-tied at least a thousand times!
- Gulnara writes:
thank you very much, now I know exactly what to give for New Year girlfriends
Today's master class will tell you how to correctly crochet hexagonal motifs with patterns that are more suitable than ever for creating blankets, pillows, napkins, openwork tops and dresses... Arm yourself with yarn and hooks, it will be interesting!
Classic hexagonal crochet motifs
We adhere to this scheme:
Description
1st round: (yellow) dial 6 v. p., connect into a ring, 3 v. p.p., 11 p. s n. into the ring.
2 p.: (red) knit 4 sts. p., from the first p. make a cone out of 2 s. with two n., 2 v. p., then from each s. knitting lump of 3 s. with two n. after 2 c. p., ss..
3 p.: (blue) row of 47 p. s n., ss. in the 3rd paragraph..
4 p.: (brown) knit. With. without n., above each bump of the 2nd r. we make a relief s. with two n., inserting the hook behind the leg of the middle s. lumps.
5 r.: (white) knitting. 1st century p.p., in this r. we form 6 corners of the future star and motif - after 8 s. without n. And from 2nd century. p..
6 p.: (yellow) row p. without n., from A with 2 v. n. do s. without n., 5th century. p., s. without n..
7 red on the side of the tune 2 p. s n., p/s, s. without n., 2 ss., s. without n., p/s., 2 p. s n., from A 2 s. from N., 3rd century. p., 2 p. with n..
8 rubles: (red) cr. r. With. without n., at the vertices of the corners from A knitting. With. without n., 2nd century. p., s. without n..
9 p.: (white) align the sides of the motif, changing the height of the columns. On the side of the corner 3 s. without n., 2 p/s, 2 s. sn., 2 s. s n. on v. p., 2 p. s n., 2 p/s, 3 s. without n.. At corners A from 2 c. p..
10 r.: p. from n.. At the beginning of the 3rd century. p.p., on the sides from each p. we make s., in the corners from A s. from N., 2nd century. p., s. s n, ss. in the 3rd paragraph..
6-coal motif: video master class
Hex star crochet
We adhere to this scheme:
Description
We collect a chain of 4 v. p., in a circle using a connecting loop.
1 r.: (red) 3 c. p.p., then alternate 2 s. s n. vm. and A from 3rd century. p., ss. in 3 p.p..
2 r.: (white, do not break off the red one) 3 c. p.p., p. from n., to 6 s. s n. from each A pr. r., ss. in the 3rd paragraph..
3 rows: (red, stretch it through the 2nd row) p. without n., *6 v. p., s. without n. in the 2nd paragraph from the cr., p/s in the next. p., s. s n., s. with two n., s. with three n., fasten in the 4th st. from the beginning of the chain, And from the 3rd st. p., s. without n. after 1 p.*, from * to * x 6, last. fasten the ss., cut both threads.
4 r.: (white) with top. join thread, *5 in. p., 3 p. s n. from A pr. r., 5th century. p. and s. without n. in top Sl. ray*, from * to *, ss..
5 p.: 3 v. p.p., *5 s. s n. from A from 5 in. p. pr. r., 3 p. s n. from 2nd p. s n. Ave. R., 5 p. s n. from A, to top. angle 3 in. p.*, from * to *. After last And from the 3rd century. n. above the connecting corner. p. in the 3rd p. p., cut the yarn.
We connect the patterns during the knitting process. r. at the vertices, A: c. p., ss. to center A of another pattern, 1st century. p.. then in the middle of the side we knit ss..
Volumetric motif: video master class
Hexagonal African Flower Motif
We adhere to this scheme:
Description
Ring from the 6th century. p., ss. yellow thread.
1 p.: 3 v. p.p., 1 p. s n. in a circle, * 1 in. p., 2 p. with n.*. from * to * more x 4, ss. in the 3rd century. p.p..
2 rubles: add. white yarn ss., 3 in. p.p., from A 1 c. p.p.r. 6 times for 2 s. from N., 1st century. p., 2 p. s n., ss. in the 3rd century. p.p..
3 p.: using ss. go to the nearest A from 1st century. p., instead of 1st s. – 3rd century p.p., from each A we knit 7 s. s n., ss. in the 3rd century. p.p..
4 p.: green thread 1 st. p.p., p. s n. in each st., between fans cr. goes under the 2nd river, we capture the slave. n., pull out a long loop and knit it with. without n., complete p. ss. in the 1st century p.p..
5 p.: dark green thread c. p.p., p. s n. in each p., at the top of the fans from 1 p. do s.. s n. - this is how we form the corners of the motif.
6 rubles: similar to the 5th.
To combine the patterns, you need to fold the two sides and, crocheting one stitch at a time, ss. along the edge.
Sunflower motif: video mk
Volumetric water lily
Description
Central part
We make a chain of 4 v. p., connect it into a ring with a blind loop, 3 in. p.p., 11 p. s n. in a circle We connect with a blind loop to the top of the 3rd sts. p.p..
Enter cr. in the back half-loop of any of the stitches, beige, 3 in. lifting point,
1 p. s n. in the same point of the base as the chain of 3 v. p.,
*2 s. s n. in the next n.*, from * to * x 10 times, ss. in the 3rd century p.p. = 24 s. with n..
Outer circle of petals
Front half-loop only!
4th century p., 4 p. from 2 n., enter cr. in the same point of the base as the chain of 4 v. p., take out the cr. and enter it again in the 1st s. from 2 n. in front, take it out and go back to the 1st s. from 2 n. front. Holding the yarn, we stretch the grip. p. through work and the first leaf is ready.
Again 4th century. p., blind p. to the front half-loop of the next. p., 4th century p.p., prov. leaf in the front half-loop next. etc. until you get 12 leaves. Chain of 4 c. item of the last sheet of connection. blind stitch with the base of the very first chain of the 4th century. p..
Inner circle of petals
Chain of 4 c. p. for lifting, 4 s. from 2 n. at the basis of this chain, we introduce cr. in the front half loop of beige color..
We take out the cr. from p. and tighten the top, pulling it into the top of the 1st wire. With..
*Chain of 4 v. p., blind p. to the front half-loop of the next. beige. p.*, from * to * 5 more times. We don’t cut the thread, we pull it into the point on the edge. and tighten it.
Turning the work around wrong side up, attach the light green yarn under the leaves to the white half-loops, 3 in. p., 1 p. s n. in the same paragraph of the base,
*2 s. s n. in the next basics, 1 p. s n.*, from * to * x 10 times, blind loop.
Now we insert the tool immediately under both half-loops: 3 in. p., 4 p. s n., *s. from N., 2nd century. p., s. s n. in the same basis as etc., 5 pp. s n. (each - in the next paragraph of the base)*, from * to *x 4, p. from N., 2nd century. p., s. s n. in the same base, blind st. to the top of the chain from 3 in. n. beginning of the circle.
Hexagonal Snowflake motif for slippers-boots: video master class
A simple motif for beginners
We adhere to the knitting pattern and connection pattern:
Description
We dial a chain of 10 v. p., in a circle ss..
1 p.: 3 v. p.p., 17 p. s n. in a circle.
2 p.: 3 v. p.p., *2 v. p., s. with n.*. from * to * x 17, 2 in. n., connecting n..
3 p.: 4 v. p.p., 3 p. from 2 n. vm., *4 b. p.. 4 s. from 2 n. vm.*, from * to * to the end of the river, 2nd century. p., s. s n. at the top of the 1st petal.
4 p.: *3 v. p., to 1st A from c. n. pr. r., 3rd century. p., s. without n. to 2nd A from c. n. pr. r., 5th century p., s. without n. to 3rd A from c. p. pr. r.*, from * to * another x 5, 3 c. p., s. without n., 3rd cent. p., s. s n. to the beginning of this cr. r..
Motive African flower: video mk
Three-color raised motif
We adhere to this scheme:
Description
5th century p. in the ring, 3 in. p. for lifting.
In the ring 11 s. with n., typing between s. 1 century each p..
Attach a thread of a different color between the posts. Pull out the stitch to a height of 1 cm and knit a cone (lush stitch): [yarn over, pull out the stitch] x 3 times, grab the working thread and pull it through all the stitches on the edge, holding the working thread. Now we enter cr. Under the thread that you were holding, grab the working thread and pull out the loop. Having captured a slave. n., we knit all the stitches on the edge. – the first cone is ready.
We dial 2 v. p. and between the words. With. we knit the second cone: cone, 2 in. p., bump, 2nd century. p. to the end of the river, conn. p..
A light thread attached to the top of any bump, between them we make 3 s. sn., 1 s. s n. in top sl. cones, between the following sh. With. from N., 2nd century. p., s. s n.. 1 s. s n. in top sl. sh., 3 s. s n. between the highway and so on until the end of the p.: 1 s. s n., (s. s n., 2 v. p., s. s n.), 1 s. sn., 3 s. with n., close the connection. n. in 3rd century. p.p..
Simple hexagon: video mk
Openwork motif
We adhere to this scheme:
Description
5th century We close the item into a ring with a connecting loop.
1 p.: 3 v. p.p., in the ring 11 s. with n., connect. n. in 3rd century. p.p.
2 p.: Another 5 c. n., in the same village. 1 p. from n, 2nd century. p., skip 1 s., in the next. (s. with n., 2 v. p., d. with n.), * 2 v. p., (d. with n., 2 v. p., d. with n.) in every 2nd With. to the end of the river, connecting n. in 3rd century. p.p..
3 rows: Row from A from 5th century. p., doing s. without n. in the village s n. previous p.. Last A: 2 c. p., s. s n. to the beginning of the river..
4 p.: 3 v. p., in the same A 1 s. s n. and 1 p/s. Then in each A we knit: p/s, 3 s. s n., p/s. Under the first A we add the missing 1 p/s and 1 s. s n, close the r..
5 p.: 5 v. p., 1 p. s n. in the same village, 4th century. p., s. from N., 2nd century. p., s. s n. in the middle village on the next fan and so on until the end of the row: 4 in. p., (s. with n., 2 v. p., s. with n.) in the middle column. At the end of the river emb. 2nd century p. and knit p/s in the third p. rise.
6 p.: row A from 5 v. p., doing s. under the chains in. p.. Last A: 2nd c. p., s. s n. to the beginning of the river.. Emb. 1 vp, under the next line. And knitting. 5 s. from N., 3rd century. p., 5 s. s n. in the same A, p. without n. in the next A, 5th century. p., s. without n. in the next A, 5th century. p., s. without n. in the next A. In the words A 5 s. from N., 2nd century. p., 5 s. s n.. Then we repeat: s. without n., A, s. without n., A, s. without n...
We do not knit the corner completely. From this point, if desired, you can move on to the next pattern according to the diagram below:
Video mk
Motivchik Zvezdochka: video mk
Hexagonal Snowflake: video mk
Slippers made from hexagonal motifs: video master class
Selection of schemes

Instead of ordinary house slippers, you can use homemade boots from motifs. Such house shoes Both adults and children will like it, it is quite easy to make and will last a long time. Multi-colored and plain, openwork and dense, high and low. We'll look at how to crochet boots from hexagons in this article.
Basics of knitting motif
Motifs are knitted according to patterns. To begin with, crochet a chain of 3-6 chain stitches, connect them into a ring and knit according to the pattern. The yarn can be one color, but more often several colors of thread are used in one motif.
The size of the motif is calculated in advance and depends on the size of the leg and the number of motifs required for this model. If the motifs are large and only 6 of them are needed for one boot, then the size is calculated as follows. Place your foot on a piece of paper and trace the outline of your foot. Measure the length from the tip thumb to the heel. The diagonal of the motif (hexagon) will be equal to the length of the foot divided by 2, plus 1 cm. If the length of the foot is 24 cm, then the diagonal of the hexagon will be 24/2+1=13 cm.
If according to the chosen pattern the motif turns out to be smaller than required, then it can be knitted in a circle with the same pattern or any other one desired. Having knitted 12 motifs, all that remains is to assemble them into the finished product.
The motifs can be small, but then to create boots you will need more of them. The height of the shin can be adjusted by adding new motifs as desired.
Schemes of hexagon motifs in the photo:


Making the sole
The sole can be knitted from the same yarn as the motifs. In this case, connect it according to any scheme, for example:


Even if the base of the sole is made of a different material, a fabric sole is knitted on top of it in any case.
Leather is also often used. The sole is comfortable, does not hinder movement, and is more durable than just a knitted one. The only drawback is that it is thin. Then between the knitted and leather layers you can lay felt or other dense fabric, padding polyester.
Felt is no less often used. You can buy ready-made insoles a size larger than needed and simply tie them around. To do this, punctures are made in the insole at a distance of 0.5 cm from the edge and between each other. Along these holes, you should tie the sole with single crochets, 2 in one hole. The sole is light and quite dense.
If the boots are knitted not only for the house, but also for the street, then you can use rubber soles from sneakers or house slippers. In this case, the slippers can not be cut, but simply crocheted in a circle, and only the upper part of the boots can be made from the motifs.
Product assembly
When all the motifs are connected, the sole is ready, you should start assembling. The motifs can be attached to each other simply by stitching with thread and a needle. Often, a connecting stitch made from single crochets is used for these purposes. In this case, the seam turns out to be rigid and convex, but in some models this does not interfere at all, but on the contrary, decorates the product.

Another way is to knit an additional row of chain stitches and single crochets. To do this, knit 1 single crochet in the corner of one fragment, then knit a single crochet in the corner of the other fragment. After 3 chain stitches, place the hook under the chain stitches of both hexagons and work a single crochet stitch. The seam knitted in this way is flat and not rigid. For this method of stitching motifs, you can use a thread of a different color. This will highlight the fragments against the general background, like a frame.


Green boots
Master class on knitting boots from hexagonal motifs in the photo:

Scheme and description of the motive:

Outsole diagram and description:

Assembly description and top bar diagram:

This model is also notable for the fact that it can be of any desired height. Depending on the number of motifs, footprints or boots are obtained.
White shoes
This model can also be used as slippers or boots. For slippers, 6 motifs will be enough, and for boots - 10.

The sole is a regular ready-made insole for 1 size. larger size legs. Any material - felt or leather. Stepping back 0.5 cm from the edge, make holes with an awl at the same distance from each other. Tie the insole through them with single crochet stitches, making 2 stitches in each hole.

Measure the length of the resulting insole. The length of one side of the finished motif should be 8 times less than the insole.
For each boot, knit 5 motifs according to the pattern:

If necessary, add or remove rows so that the length of the side of the fragment corresponds to the calculations.
Sew motifs according to the pattern:

- 1 - sew together;
- 2 - seam on the heel;
- 3 - sewn to the insole;
- 4 - leave as is.
When sewing the motif to the insole, the corner on the toe should be moved slightly to the side to create a left or right boot. Sew 2 more motifs onto the shin. The boots are ready!