Many of us love to crochet. But often not everyone realizes what magnificent toys can be made using threads and an ordinary crochet hook. In this article we will look at one of the fascinating master classes: we will talk about how to make a toy Winnie the Pooh from a Disney cartoon (there is also our domestic cartoon about Winnie the Pooh, but there the bear is brown, and in ours it will be yellow with a red blouse ).
So, for work you need to prepare:
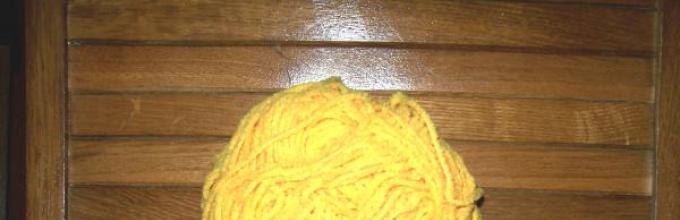
- a skein of yellow fancy thread;
- a hook of a suitable size;
- filler;
- beads needed for the eyes and glue;
- red threads.
This is what our toy will look like at the very end of the work.
Stages of work:
Stage one. The head part of the toy.
Take the threads yellow and start knitting in the round.

When the diameter of the circle reaches 4 cm, you can stop adding loops and knitting the sides of the head, finishing at a height of 6 cm.

Next we start knitting the ears. To do this, take yellow threads and knit a circle with a diameter of 4 cm, specially bending the edges of the ears (for this you need to decrease the loops).

The result is a head and 2 ears.

Stage two. Torso.
Now we start knitting the body, we begin to make a circle with a diameter of 5 cm (if you want Vini to be thicker, the diameter of the circle needs to be increased to 7-9 cm).

We knit top part torso.

Then we change the color of the threads and finish knitting with red threads at a height of about 7.5 cm.
Stage three. Limbs
When the head and torso are ready, all that remains is to knit the arms and legs of the toy.
We start from the upper limbs, first knit the yellow part of the foot, and then switch to the red color of the thread, at a height of 7 cm we close the knitting.

Let's do the same for the legs. Don’t forget to make the toy’s foot more convex; to do this, first knit a circle, and then begin to decrease the loops, rising to the height of the product.

Now we sew Vini’s head and body together.

We insert wires into the places of future arms and legs, which will allow our young and cute little bear to bend his front and lower limbs.

Well, now we sew on the upper legs.
Cute Teddy and Winnie bears in the amigurumi style have now become incredibly popular. Their crochet patterns are not much different from each other, it’s all about a few details, the appropriate yarn and the correct design of the toy bear. Our master class on crocheting Winnie the Pooh and several ideas for creating Teddy bears will help you replenish yours.
MK from Vera Izgrebina
Legend:
- KA - amigurumi ring
- VP - air loop
- pr – increase
- dec – decrease
- sc - single crochet
Paws-handles (do not stuff too much):
We knit with yarn of the main color.
1) 6 sc in the ring
2) (1, inc)*3 (9) change the thread to the color of the jacket
3-12) 9 sc
13) fold in half and knit 4 sc.
Legs and body (stuff as you knit):
1) 6 sc in the ring
2) 6 pr (12)
3-8) 12 sc
On the second leg we do not break the thread - we connect it to the first leg.
9) 6, 12 ch, 12 on the first leg, 12 on air loops, 6 on the second leg (48)
10-14) 48 sc change the thread to the color of the jacket
15) (6, dec)* (42)
16-18) 42 sc
19) (5, dec)*6 (36)
20-22) 36 sc
23) (4, dec)*6 (30)
24-26) 30 sc
27) (3, dec)*6 (24)
28) 13, 4 with arm loops, 7 (24) 29) 1, 4 with arm loops, 19 (24)
30-31) 24 sc.
We finish knitting and leave the thread for sewing.
Head (knit with main color):
1) 21 ch-with 2 loops we start-19, 3 in1, 18, inc (42)
2) pr, 18, 3 pr, 18, 2 pr (48)
3) 48
4) 1, pr, 18, (1, pr)*3, 18, (1, pr)*2 (54)
5-19) 54 sc
20) (1, dec)*2, 18, (1, dec)*3, 18, 1, dec (48)
21) (1, dec)*2, 15, (1, dec)*3, 15, 1, dec (42)
22) (1, dec)*2, 12, (1, dec)*3, 12, 1, dec (36)
23) (dec, 1)*2, 9, (dec, 1)*3, 9, dec, 1 (30)
This completes the knitting, leave the thread and sew the remaining hole at both edges.
Muzzle (knit with main color)
1) 6 sc in KA
2) 6 pr (12)
3) (1, inc)*6 (18)
4) (2, inc)*6 (24), leave the thread for sewing.
Ears (knit with main color)
1) 6 sc in KA
2) 6 pr (12)
3) (1, inc)*6 (18)
4-6) 18 sc
7) (1, dec)*6 leave thread for sewing.
Sew on the eyes, muzzle, ears. We design the face to your taste.
MK from Elena Varygina
Before you begin, prepare the following:
- yellow and red yarn;
- black thread for embroidering elements of the muzzle;
- hook;
- padding polyester;
- scissors, needle.

Designations according to diagrams
In the pattern we will insert only the quantitative designation of single crochets, since almost all rows are knitted only with them.
- CH – double crochet;
- VP – air loop;
- P – increase (2 single crochets are knitted from one loop of the previous row);
- U - decrease (two loops of the previous row are knitted with one single crochet).
- R - we knit exactly a loop into a loop without increases or decreases;
- * * – repeat further down the row only this pattern.
Vinnie's head
We start knitting Winnie the Pooh's head from the elongated muzzle, ending with the back of the head.
| Circular row | Total stitches in a row | |
| 1 | 6 loops in an amigurumi ring | 6 |
| 2 | 1 P | 12 |
| 3 | 2, 1 P | 18 |
| 4 | R | 18 |
| 5 | 1 P | 36 |
| 6 | 9 CH, *3, 1 P* | 45 |
| 7 | 3, 1 P | 58 |
| 8-13 | R | 58 |
| 14 | 4, 1 U | 43 |
| 15-16 | 3, 1 U | 18 |
| 17 | 2, 1 U | 12 |
| 18 | 1, 1U | 6 |
We stuff the bear's head with padding polyester and tighten the remaining loops with thread.
Advice! When you finish knitting the next part of the toy, pull the thread out of the loop and cut it at least at a distance of 15 - 20 cm. This thread will be useful to you for further sewing the parts together.


Torso
We stuff the body with padding polyester, leaving the loops open.


Upper legs
We tighten the thread with a crochet hook, pull it through the loop and cut it.


Lower legs
| Circular row | Knitting progress (repeating pattern) | Total stitches in a row |
| 5 VP | ||
| 1 | 3 in the 2nd VP, 2 in each VP, 3 in the 5th VP, 2 in each VP of the reverse side of the chain | |
| 2 | 1 P 3 times, 2 | 16 |
| 3 | 1 P, 5, 1 P, 5 | 22 |
| 4-5 | R | 22 |
| 6 | 1 U 3 times, 8, 1 U, 8 | 18 |
| 7 | 1 U 3 times, 6, 1 U, 6 | 12 |
| 8-12 | R | 12 |
| 13 | 1 U, 10 | 11 |
| 14 | R | 11 |
| 15 | 1 U, 9 | 10 |
| 16 | 1 U | 5 |
We stuff the paws with padding polyester and tie the thread with a crochet hook.


Ears
We knit 3 rows of teddy bear ears according to the head pattern and finish knitting.

Assembly
We embroider the eyes, nose, eyebrows and mouth with black thread. We sew all the details to the body.
After sewing the part, we fasten the thread and pull it with a needle through the body and, pulling it a little, cut it.

Our master class is over. Cute and funny amigurumi bear Winnie the Pooh is ready!


Winnie from the cartoon, so beloved by many kids, can be crocheted in another way. The legs are knitted together with half of the body, the blouse is separate, and then these two parts are joined together. The muzzle is also performed separate part and sewn to the head.


Teddy bear - crochet

We will need: gray and white yarn, blue and black floss threads, hook No. 2.5, black beads for the eyes, padding polyester, gray fabric for the patch.
Step one: we knit the details of the bear according to the patterns (head, body, ears, nose, paws and legs).
Torso
 Using gray yarn we knit 2 air. loops, in 2nd air. We knit a loop with 6 sc. Without connecting the rows, we knit in a spiral.
We do not close the back loops yet, leaving a thread 50 cm long for 1 row of decreases. We begin to design the bear's face. Sew on the eyes in the form of two black beads with black thread. It is advisable to sew beads closer friend to a friend to make the bear look more touching. Then we embroider the eyebrows and “scars” with black threads, and the nose with blue threads. After decorating the muzzle, close off the last loops.
Ears
With gray yarn we knit 2 air. loops, in the second air. We knit a loop with 6 sc. First row - knit 1 sc in each loop to make 6 loops. We secure the thread with a connecting post, leaving 15 cm for sewing. Then we sew the ears to the head.
Paws

 Legs
Legs


Step two: sew all the finished parts together with gray yarn. Teddy bear is ready!
Knitted Teddy bear

We will need: wool blend or acrylic yarn, some white yarn for the muzzle, blue thread for the nose, padding poly or holofiber for filling, beads for the eyes, black thread for patches.
Work order: we knit the parts of the bear according to the given pattern, sew them together, sew on the eyes, embroider the nose and patches.

Teddy bear with bow

We will need: wool or cotton gray yarn, hook No. 2 or No. 3, ribbon, beads for the eyes, black threads for the nose and eyebrows.
Work order: we knit the parts of the toy according to the pattern, fill them with padding polyester and sew them together.

Teddy with scarf

We will need: 60 g of Soufflé yarn brown, 30 g yarn beige color, some lilac yarn for a scarf, hook No. 2, 2 beads, black threads for the nose, padding polyester.
Work order: we knit the parts of the bear (we knit the body and head together). Related parts sew together. We start knitting from the head in a circle st. without a crochet.
Head with body:
- We knit 6 rows, increasing to 40 loops, then we knit exactly 11 rows.
- We reduce the number of loops to the volume of the neck (you should get 18 loops), then knit exactly 2 circles, adding loops for the volume of the body. To do this, first double every second loop, and in the next rows - at the beginning every 4th, then every 6th loop.
- We knit two rows evenly, then we double every 3rd loop until the body is slightly larger than the head (you should get 55 loops), then we knit 8 cm evenly.
- We begin to decrease the loops by skipping every 3rd loop.
- As we knit, we fill the parts with padding polyester.
Paws:
- Using beige thread we knit a chain of 3 air. loops and close into a ring.
- We knit 3 rows, increasing to 25 loops.
- We switch to brown yarn and knit exactly 5 rows.
- Then we decrease 4 loops, knit exactly 9 rows and decrease the remaining loops.
Legs:
- Using beige yarn we knit a chain of 8 chains. loops
- We knit around the chain, adding loops at the turns. In total you need to knit 4 rows, then knit exactly 5 rows.
- On one side we decrease 7 loops, then decrease 2 more times by 3 loops.
- We knit exactly 7 rows, evenly decreasing the remaining loops.
Muzzle: We knit a chain of 3 chains with beige yarn. loops, closing into a ring. We knit 3 rows, increasing to 20 stitches, then we knit 3 rows evenly.
Ears: Using brown yarn we knit a chain of 6 chains. loops, close the circle and knit 9 tbsp. with a double crochet in the center. You need to knit 2 pieces from brown yarn and 2 pieces from beige yarn.
Scarf: we knit a chain of air with lilac yarn. loops of the required length and tie it st. double crochet
Photo and video
If you were able to knit a charming cartoon bear cub, then it will not be difficult for you to make another fabulous club-footed hero - Teddy. The crochet pattern is almost the same; all that remains is to choose the color of the fur and embroider patches on it.


Teddy bears can be performed in traditional gray color or in any other. If you use grass yarn, the bear will turn out a little shaggy and soft to the touch. By adding the number of circular rows and the number of loops in it, you can achieve any proportions and sizes of the toy. These can be tiny little ones for keychains and brooches or voluminous strong ones. In addition, you can knit additional clothes for the cute animal.


Teddy bears, decorated with various themed accessories, will become a great gift. So, for Christmas and New Year the bear cub can be dressed in a Santa Claus cap, for a wedding - in a wedding suit or dress, for Valentine's Day, hold a bright heart in his hands. Our lesson and your imagination will help you make a unique and charming toy for any holiday!
Step-by-step lesson in photos


Winnie the Pooh and his friends- cult heroes of more than one generation of children. Countless years have passed since Alexander Milne wrote his masterpiece, “If ever the day comes when we can't be together, keep me in your heart and I'll be there forever,” but children still fall in love with characters of this wonderful book, watch the cartoons again and again and again and again adore the toys created based on this work. Why don’t you read a story about Winnie the Pooh to your children before bed today, and then, when everyone has gone to bed, sit in your favorite chair and start crocheting toys in the shape of the characters from Alexander Milne’s book? Knitted Winnie the Pooh, soft Eeyore, pink Piglet, wise owl, funny Tiger - children will be grateful for such a gift, and you will be happy that you were able to give them a piece of fairy tale and magic...
Winnie the Pooh and his friends - 5 crocheted toys:

1. Winnie the Pooh and the Honey Pot
Pooh, what do you love to do more than anything in the world?
Well,” answered Pooh, “what I love most is...
And then he had to stop and think, because although eating honey is a very pleasant experience, there is a moment, just before you start eating honey, when it is even more pleasant than later, when you are already eating, but Pooh didn’t know , what is this minute called?

2. Crochet patch
“Be healthy,” said Pooh, raising his paw. - So what should we do about this... like you said? You sneezed as you were about to speak.
I didn't sneeze.
No, Owl, you sneezed.
Please forgive me, Pooh, but I didn't sneeze. You can't sneeze and not know that you sneezed.
Well, you can’t know that someone sneezed when no one sneezed.
Alan Alexander Milne, "Winnie the Pooh and Everything"

3. Crochet Eeyore
“I don’t see much point in this,” said Rabbit.
No,” said Pooh modestly, “he’s not here.” But he was going to be here when I started talking. Obviously something happened to him along the way.
Alan Alexander Milne, "Winnie the Pooh and Everything"

4. Another funny Winnie the Pooh
If bears were bees,
Then they wouldn't care
Never thought
Build a house so high.
Alan Alexander Milne, "Winnie the Pooh and Everything"
Nowadays people have become interested in handicrafts. Many have forgotten what crochet and weaving are satin ribbons, embroidery. Anyone can try themselves creative activity. In today's master class we will try to make the well-known Winnie the Pooh with crochet. The character is known and loved by everyone - from small to great. This is interesting not only to parents, but also to children, who remember the cartoon character with his image, funny expressions that have become catchphrases.
If you are new to knitting, we offer you the following training lessons:
Teddy bear
So let's get started. The result that will look like this:
Winnie the Pooh is a solid figure in its shape. Everything moves smoothly from one part of the body to another, there is a disconnection in the neck area. So it doesn’t matter which part to start knitting from. The only thing to remember is that Winnie the Pooh's head is slightly smaller than his body. The paws will also be sewn to the body. In addition to the above, let's not forget about small details: eyes, ears, nose and a spot on the face.
To knit a bear, choose Babmino yarn different shades: terracotta (we use it for the body), dark and light chocolate.
Before we begin, let's use some notation.
- Sc - single crochet. It is considered a basic element in crochet. You can learn more about this in the video tutorial:
- Ex: 2 sc in one loop;
- Dec: 2 sc together;


- CC - connecting posts.
The cartoon Winnie the Pooh consists of 60 rows. First, we begin to knit the lower body, following the following algorithm.
Row 1 is 6 sc in an amigurumi ring. If difficulties arise, please refer to the following source. Here is a detailed description of how to do everything correctly:
2nd row - 6 inc (12). 3rd row - 1 sbn prX6 (18). 4th row - 2 sbn prX6 (24). 5th row - 3 sbn prX6 (30). 6th row - 4 sbn prX6 (36). 7th row - 5 sc PRX6 (42). 8th row - 6 sbn prX6 (48). 9th row - 7 sbn prX6 (54). 10th row - 8 sc PRX6 (60). 11th row - 9 sc PRX6 (66). 12th row - 10 sc PRX6 (72). 13th row - 11 sc PRX6 (78). From 14 to 28 rows - 78 sc.
29 row - 11 sc UBX6 (72). 30th row - 10 sc ubX6 (66). 31 row - 9 sc UBX6 (60). 32nd row - 8 sc UBX6 (54). 33rd row - 8 sc PRX6 (60). 34th row - 9 sc PRX6 (66). Row 35 - 10 sc PRX6 (72). From 36 to 49 rows - 72 sc. 50 row - 10 sc UBX6 (66). 51 row - 9 sc UBX6 (60). 52 row - 8 sc UBX6 (54). 53rd row - 7 sbn x6 (48). 54 row - 6 sc UBX6 (42). 55 row - 5 sc UBX6 (36). 56 row - 4 sc UBX6 (30). Row 57 - 3 sc UBX6 (24). 58 row - 2 sc UBX6 (18). 59 row - 1 sc UBX6 (12).
Row 60 - 6 decreases. Knitting must be closed.
If you want the muzzle to be voluminous, then we make several weights where the eyes will later be located. Because of this, the nose will become more prominent. Let's move on to the spot. Remember to choose yarn darker than the body color, but lighter than the paws.

First, let's cast on loops, namely 11 air ones. After that we stick to the following:
- 1st row - 9 sc. We start with the loop, which is the second from the hook. 3 sc goes into the outer loop, then 10 sc;
- 2nd row - inc, then 8 sbn, again inc, 1 sbn, inc, 9 sbn, inc, 1 sbn.
There is no specific scheme below. Feel free to experiment here. It is important to know that to a knitted oval you need to add two protrusions at the edges, then tie the protrusions with so-called “connecting posts”, and tie the oval itself with double crochets. Of course, you don't have to bother with the stain. Just use paint or a felt-tip pen and draw dark circles. Calculate where the toy's eyes will be.
It's time to move on to the eyes. Dark yarn will be used at the beginning. 1st row - 6 sc in amigurumi ring. Afterwards, replace the yarn with white. 2nd row - connecting post, increase, two connecting posts, increase, connecting post. Using an algorithm, we knit two eyes.

There is very little left: the nose, ears, legs and arms. Let's move on to the nose. Let's make 5 air loops:
- 1st row - 3 sc. Let's count and take the second loop located from the hook. Next, 3 sc in the last loop, 3 sc and at the end of the row, etc.
- 2nd row - inc, 2 sc, inc, 1 sc, inc, 3 sc, connecting posts.
For convenience, fill your nose with padding polyester.
We continue to knit. The ears come next. We start row 1 with 6 sc. Forming an amigurumi ring:
- 2nd row - 6 inc (12);
- 3rd row - 1 sc inc 6 times (18);
- 4th row - 2 sc inc 6 times (24);
- From 5 to 7 rows - 24 sc in each.
We repeat the algorithm twice, since the bear has 2 ears. Fold in half and sew. Try to keep a semi-circular appearance for the ears as you sew them on. You can sew the left ear in a bent shape, which will make the character more realistic. If you strain your memory, you will remember his left ear. It's flattened. We embroider the mouth and eyebrows of the bear using several stitches. For this we use dark yarn.

Only a little remained - legs, arms. Let's start with the bear's hands:
- Row 1 - 6 sc in amigurumi ring;
- 2nd row - 6 inc (12);
- 3rd row - 1 sbn prX6 (18);
- 4th row - 2 sbn prX6 (24);
- From 5 to 14 rows - 24 sc in each;
- 15 row - 2 sc UBX6 (18);
- 16th row - 1 sc UBX6 (12);
- 17th row - 6 kills. We close the knitting.
We repeat the instructions twice and sew the hands to the toy.
We are already at the finish line. Let's move on to the legs:
- 1st row - 6 sc in amigurumi ring;
- 2nd row - 6 inc (12);
- 3rd row - 1 sbn prX6 (18);
- 4th row - 2 sbn prX6 (24);
- 5 row - 3 sbn prX6 (30);
- From 6 to 11 rows - 30 sc in each.
We do the algorithm twice. Don't forget to add padding polyester inside. We can sew it on.
So what did we get? Piglet's faithful and devoted friend. It can also be connected using a similar scheme.


Winnie the Pooh is very easy to knit. Basically, there are no small details. The main thing you get is a chance to experiment, the pleasure of creating a bear that can become a fruit of inspiration. And, of course, the toy will delight the kids.
Video on the topic of the article
Nowadays people have become interested in handicrafts. Many have forgotten what crochet, weaving with satin ribbons, and embroidery are. Anyone can try themselves in creative activities. In today's master class we will try to make the well-known Winnie the Pooh with crochet. The character is known and loved by everyone - from small to great. This is interesting not only to parents, but also to children, who remember the cartoon character with his image, funny expressions that have become catchphrases.
If you are new to knitting, we offer you the following training lessons:
Teddy bear
So let's get started. The result that will look like this:
Winnie the Pooh is a solid figure in its shape. Everything moves smoothly from one part of the body to another, there is a disconnection in the neck area. So it doesn’t matter which part to start knitting from. The only thing to remember is that Winnie the Pooh's head is slightly smaller than his body. The paws will also be sewn to the body. In addition to the above, let's not forget about small details: eyes, ears, nose and a spot on the face.
To knit a bear, we choose Babmino yarn in different shades: terracotta (we use it for the body), dark and light chocolate.
Before we begin, let's use some notation.
- Sc - single crochet. It is considered a basic element in crochet. You can learn more about this in the video tutorial:
- Ex: 2 sc in one loop;
- Dec: 2 sc together;


- CC - connecting posts.
The cartoon Winnie the Pooh consists of 60 rows. First, we begin to knit the lower body, following the following algorithm.
Row 1 is 6 sc in an amigurumi ring. If difficulties arise, please refer to the following source. Here is a detailed description of how to do everything correctly:
2nd row - 6 inc (12). 3rd row - 1 sbn prX6 (18). 4th row - 2 sbn prX6 (24). 5th row - 3 sbn prX6 (30). 6th row - 4 sbn prX6 (36). 7th row - 5 sc PRX6 (42). 8th row - 6 sbn prX6 (48). 9th row - 7 sbn prX6 (54). 10th row - 8 sc PRX6 (60). 11th row - 9 sc PRX6 (66). 12th row - 10 sc PRX6 (72). 13th row - 11 sc PRX6 (78). From 14 to 28 rows - 78 sc.
29 row - 11 sc UBX6 (72). 30th row - 10 sc ubX6 (66). 31 row - 9 sc UBX6 (60). 32nd row - 8 sc UBX6 (54). 33rd row - 8 sc PRX6 (60). 34th row - 9 sc PRX6 (66). Row 35 - 10 sc PRX6 (72). From 36 to 49 rows - 72 sc. 50 row - 10 sc UBX6 (66). 51 row - 9 sc UBX6 (60). 52 row - 8 sc UBX6 (54). 53rd row - 7 sbn x6 (48). 54 row - 6 sc UBX6 (42). 55 row - 5 sc UBX6 (36). 56 row - 4 sc UBX6 (30). Row 57 - 3 sc UBX6 (24). 58 row - 2 sc UBX6 (18). 59 row - 1 sc UBX6 (12).
Row 60 - 6 decreases. Knitting must be closed.
If you want the muzzle to be voluminous, then we make several weights where the eyes will later be located. Because of this, the nose will become more prominent. Let's move on to the spot. Remember to choose yarn darker than the body color, but lighter than the paws.

First, let's cast on loops, namely 11 air ones. After that we stick to the following:
- 1st row - 9 sc. We start with the loop, which is the second from the hook. 3 sc goes into the outer loop, then 10 sc;
- 2nd row - inc, then 8 sbn, again inc, 1 sbn, inc, 9 sbn, inc, 1 sbn.
There is no specific scheme below. Feel free to experiment here. It is important to know that to a knitted oval you need to add two protrusions at the edges, then tie the protrusions with so-called “connecting posts”, and tie the oval itself with double crochets. Of course, you don't have to bother with the stain. Just use paint or a felt-tip pen and draw dark circles. Calculate where the toy's eyes will be.
It's time to move on to the eyes. Dark yarn will be used at the beginning. 1st row - 6 sc in amigurumi ring. Afterwards, replace the yarn with white color. 2nd row - connecting post, increase, two connecting posts, increase, connecting post. Using an algorithm, we knit two eyes.

There is very little left: the nose, ears, legs and arms. Let's move on to the nose. Let's make 5 air loops:
- 1st row - 3 sc. Let's count and take the second loop located from the hook. Next, 3 sc in the last loop, 3 sc and at the end of the row, etc.
- 2nd row - inc, 2 sc, inc, 1 sc, inc, 3 sc, connecting posts.
For convenience, fill your nose with padding polyester.
We continue to knit. The ears come next. We start row 1 with 6 sc. Forming an amigurumi ring:
- 2nd row - 6 inc (12);
- 3rd row - 1 sc inc 6 times (18);
- 4th row - 2 sc inc 6 times (24);
- From 5 to 7 rows - 24 sc in each.
We repeat the algorithm twice, since the bear has 2 ears. Fold in half and sew. Try to keep a semi-circular appearance for the ears as you sew them on. You can sew the left ear in a bent shape, which will make the character more realistic. If you strain your memory, you will remember his left ear. It's flattened. We embroider the mouth and eyebrows of the bear using several stitches. For this we use dark yarn.

Only a little remained - legs, arms. Let's start with the bear's hands:
- Row 1 - 6 sc in amigurumi ring;
- 2nd row - 6 inc (12);
- 3rd row - 1 sbn prX6 (18);
- 4th row - 2 sbn prX6 (24);
- From 5 to 14 rows - 24 sc in each;
- 15 row - 2 sc UBX6 (18);
- 16th row - 1 sc UBX6 (12);
- 17th row - 6 kills. We close the knitting.
We repeat the instructions twice and sew the hands to the toy.
We are already at the finish line. Let's move on to the legs:
- 1st row - 6 sc in amigurumi ring;
- 2nd row - 6 inc (12);
- 3rd row - 1 sbn prX6 (18);
- 4th row - 2 sbn prX6 (24);
- 5 row - 3 sbn prX6 (30);
- From 6 to 11 rows - 30 sc in each.
We do the algorithm twice. Don't forget to add padding polyester inside. We can sew it on.
So what did we get? Piglet's faithful and devoted friend. It can also be connected using a similar scheme.


Winnie the Pooh is very easy to knit. Basically, there are no small details. The main thing you get is a chance to experiment, the pleasure of creating a bear that can become a fruit of inspiration. And, of course, the toy will delight the kids.
Video on the topic of the article


