Hello friends! As you know, flowers come first, berries come later. We already had a lot of candy flowers, but the berry season was somehow delayed. And now, finally, the long-awaited moment has arrived. In the new master class you will learn how to make strawberries from candy with your own hands, which means, on occasion, you can please your family and friends with a wonderful summer surprise gift.
Master class: candy strawberries
To work you need to prepare following materials and tools:
- candies (small and round);
— penoplex;
- colored corrugated paper;
- wire (or a twig from artificial flower) and a piece of corrugated cardboard;
— polysilk (thin colored film, similar to thin foil, widely used for decorating gifts);
- organza;
- scissors;
- stapler;
- transparent tape and double-sided tape;
Well, let's go!
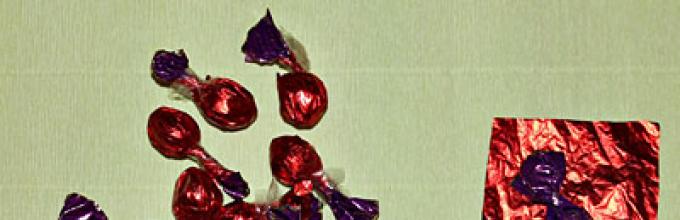
First, we wrap each candy with pieces of polysilic so that only one tail remains, which we fix with tape.
I needed 80 of these sweets for all the strawberries.

To make the base of the berry we use penoplex. Let me remind you that this is a thermal insulation material used in construction and is also very popular in suite design.
From a piece of penoplex we cut out a blank of the appropriate shape (something like an ellipsoid, one end of which is narrower and the other wider).

And we start attaching candies to the base. To do this, glue double-sided tape to its surface (preferably on a fabric basis, it holds more tightly).

Now we take the candies and in rows, starting from the lower end of the base, glue them onto the tape in a checkerboard pattern.

We glue the candies over the entire surface of the foam core, but leave the very top empty.

After picking the berries, you need to fill the remaining small gaps between the candies. Let's do this using organza strings.
We cut the organza into small squares and form them into small pieces, which we fix with a stapler.

Using a wooden skewer we insert our pounds between candies (you can use glue for better fixation).

Well, the candy strawberries themselves are already ready. Now you need to make a “hat” and a tail with flowers for her.
For this purpose you will need wire and a piece of corrugated cardboard. Instead of wire, I used a fragment of a twig from artificial flowers.
In addition, from corrugated paper green need to cut: 1 circle slightly larger in diameter than the cardboard blank, and 5 petals.

We cut out a circle from cardboard according to the diameter of the top of our berry. We make a hole in the center of the workpiece, insert a twig (or wire) into it and glue it to fix the cardboard.
First, you need to glue a circle of green corrugated paper onto the top of the cardboard.


To make flowers that will additionally decorate our candy strawberries, we will prepare 2 strips of yellow and orange corrugated paper and white paper petals (5 pieces).

We cut the strips into fringes and twist them: first yellow, and orange on top. We secure the base of the roll with an elastic band.

We slightly stretch the cut out petals at the ends and wrap them around the fringed core. We fix the base of the flower again.

Having made 2 of these flowers (or another number as desired), we attach them to a branch, which we then decorate paper tape. Add leaves.

Finally, we attach the branch to the top of the berry.
The composition can also be decorated with a “dew drop” of hot-melt adhesive, decorative ladybugs, beads.
This is such a delicious strawberry made from candy!

Enjoy your viewing and have a good sunny mood!
* * *
I hope that Svetlana’s recipe for making berries from sweets with your own hands will be useful to you more than once. Moreover, what's ahead summer season, which will also give you many reasons for creativity.
You may also be interested in how to make an original cake from candies, a children's bouquet from kinder surprises, or a luxurious bridal bouquet with roses from candies. You can find all this and much more in our “Sweet Design” section.
And be sure to visit us for the next master classes on composing“delicious” bouquets andcompositions. And so as not to miss them, subscribe to site updates!
In today's master class we will tell you in detail about (corrugated) with your own hands. In the future, you can use the craft you have made as decoration and decorate the interior of your home or a formal table with it. You can also create an original composition from strawberry branches and a wicker basket and give it to your mother, grandmother, sister or friend for any holiday.
To make paper strawberries, we need to prepare the following materials:

- crepe or corrugated paper in red and white;
- two-way colored paper yellow tone;
- semolina;
- gouache, watercolor or yellow acrylic;
- glue gun;
- wire;
- brush;
- corrugated paper in green and light yellow shades.
How to make strawberries from corrugated paper?
Let's start the process of making a strawberry sprig by creating its flowers. Let's prepare several short pieces of wire. Apply a large drop of hot glue to the tip of the first piece.

We wait until the drop hardens a little and drop it into the semolina. Then use your fingers to roll the deformed drop into a ball.

We repeat the same steps with the remaining segments. Then we paint the centers of the buds in a bright yellow tone.

Leave them for 5-10 minutes until completely dry.

We wrap the middle of the buds with blanks.

We cut out mini petals from white corrugated paper. For one color, prepare four petals. We give everything a convex shape, stretching the middle.

Then we glue the petals to the stamens.

We wrap the receptacle and stem with a green strip of corrugated paper.

Now you can straighten the petals by bending them outward.

Now let's start creating the berries. From any type of paper, for example corrugated paper, we create a rounded blank, gradually giving it the shape of a berry. Her top part twist to make a ponytail.

Cut a square leaf from a roll of red crepe paper, glue a strawberry blank to its middle,

lift its edges and twist the berries onto the tail.

More beautiful DIY decor:

Then we attach a piece of wire to the base and fix it with a green strip of corrugated paper.

Use yellow paint to create dots on the surface of the strawberry and bend the stem.

Create a few more berries using the above method.

Now we form a twig from the created parts,

connecting them with a piece of green corrugated paper.

That's all, the strawberry sprig is ready!

We hope you liked our photo master class on How to make strawberries from paper! If so, share it with your friends by clicking on one of the social media buttons.
How to make a bouquet of candies: bouquet of candies "Strawberry"A sweet, aromatic, juicy berry... Probably few would refuse such a delicacy. But the start of the strawberry season is still far away. And you can please yourself with a little bit of summer by creating a bouquet of sweets in the form of a strawberry bush today. And such a candy bouquet can be beautiful, original and an unforgettable gift for any occasion. This master class will tell you how to make a bouquet of sweets.<<>>
In order to make a bouquet of sweets, stock up on the following materials:
floral corrugated paper in green and white,
a piece of green floral organza,
a piece of red polysilic (thin elastic shiny film), wire,
toothpicks,
nylon and satin ribbon bright green color,
acrylic paints white and brown.
You will also need a small box to assemble the composition, craft paper, polystyrene foam, sisal fibers, hot glue.
For this composition, it is advisable to choose two types of candies: some are large, truffle-shaped, others are smaller, round in shape. Such a difference in size and shape will provide a more natural look to the bouquet, because in nature there are no exactly identical berries on the same bush!
We begin the work by cutting the wire into equal pieces 20-25 cm long. We bend one end of each piece of wire into a loop. This is necessary to prevent the candies from being pierced during the fastening process. 
Truffle-shaped candies are usually packaged in such a way that the tails of the wrapper are located at the top of the candy. Therefore, the next step is to repackage each candy so that the ends of the wrapper meet in the center of the lower base of the truffle. 
After that, using hot glue, we attach each candy to a piece of wire. 
The glue has hardened - now we wrap the truffle with a piece of polysilic. We secure the polysilk with threads. 
If you don’t have such a film, just choose candies in a red wrapper for the composition.
Now you need to make a stalk with sepals for the berry. To do this, cut out a blank in the form of a “fence” from a square of green corrugation. 
and using threads we also attach it to the base of the candy. Bend the leaves slightly outward with your fingers. 
Then you need to decorate the wire leg. We cut out a strip of paper from the corrugation and simply wrap it around the stem, gluing the tip with tape or glue. Above acrylic paint draw a “strawberry” pattern on the polysilk. 
With smaller candies, the assembly process is similar. Only initially we give the candy a rounded shape by attaching one of the ends of its wrapper, as shown in the photo. 
Now it's time to start making flowers. To do this, cut out five round-shaped petals from white corrugation. For the center, cut out a strip of yellow paper and make a fringe on it (in this MK, a candy wrapper is used for the center). 
Using hot glue, we assemble all the parts on a wire. 
Next, the stem and sepals of the flower are decorated 
using the same technique as berries. 
What else do you need for a bush? Of course leaves. For them we use the same paper as for the berry legs. For each leaf, cut out 3 rounded leaves, one with a stem. 
Using nail scissors, we cut out “teeth” on them. Then we glue the leaves together. WITH wrong side We attach the wire to the leaf. 
To fill the space between the elements of the composition, we make fluffy “counters” from organza and toothpicks. 
You can see more details on how to make pound cakes in the previous master class, in which I also taught you how to make a bouquet of sweets http://dacha5.ru/blog/u-dachnye-podelki/591.html
Additionally, we make a few pounds from toothpicks and bright green ribbon. Such a drop bright color in foliage will add dynamics and richness to the bouquet. 
To assemble the composition you will need a small deep box. You can use an empty candy box (Raffaello, for example). Using a stapler, wrap the boxes with kraft paper (you can also use glue). Above thin brush and with acrylic we make an imitation of the “basket” pattern. 
We fill the inside of the box with polystyrene foam and lay sisal fibers on top (its protruding ends will give the bush a special piquancy and color). 
Now you can begin the assembly itself. First, around the perimeter of the box we place the largest elements - strawberries, then - smaller berries, and at the very end we stick flowers and leaves. At the same time, do not forget to evenly fill the empty space with pounds.
After assembling the composition, we decorate the box with a satin ribbon tied in a bow. Well, as a the final touch– wooden ladybug in the center! 
Hello friends! As you know, flowers come first, berries come later. We already had a lot of candy flowers, but the berry season was somehow delayed. And now, finally, the long-awaited moment has arrived. In the new master class you will learn how to make strawberries from candy with your own hands, which means, on occasion, you can please your family and friends with a wonderful summer surprise gift.
Master class: candy strawberries
To work, you need to prepare the following materials and tools:
- candies (small and round);
— penoplex;
- colored corrugated paper;
- wire (or a twig from an artificial flower) and a piece of corrugated cardboard;
— polysilk (thin colored film, similar to thin foil, widely used for decorating gifts);
- organza;
- scissors;
- stapler;
- transparent tape and double-sided tape;
Well, let's go!
First, we wrap each candy with pieces of polysilic so that only one tail remains, which we fix with tape.
I needed 80 of these sweets for all the strawberries.
To make the base of the berry we use penoplex. Let me remind you that this is a thermal insulation material used in construction and is also very popular in suite design.
From a piece of penoplex we cut out a blank of the appropriate shape (something like an ellipsoid, one end of which is narrower and the other wider).
And we start attaching candies to the base. To do this, glue double-sided tape to its surface (preferably on a fabric basis, it holds more tightly).
Now we take the candies and in rows, starting from the lower end of the base, glue them onto the tape in a checkerboard pattern.
We glue the candies over the entire surface of the foam core, but leave the very top empty.
After picking the berries, you need to fill the remaining small gaps between the candies. Let's do this using organza strings.
We cut the organza into small squares and form them into small pieces, which we fix with a stapler.
Using a wooden skewer we insert our pounds between candies (you can use glue for better fixation).
Well, the candy strawberries themselves are already ready. Now you need to make a “hat” and a tail with flowers for her.
For this purpose you will need wire and a piece of corrugated cardboard. Instead of wire, I used a fragment of a twig from artificial flowers.
In addition, from green corrugated paper you need to cut out: 1 circle slightly larger in diameter than the cardboard blank, and 5 petals.
We cut out a circle from cardboard according to the diameter of the top of our berry. We make a hole in the center of the workpiece, insert a twig (or wire) into it and glue it to fix the cardboard.
First, you need to glue a circle of green corrugated paper onto the top of the cardboard.
To make flowers that will additionally decorate our candy strawberries, we will prepare 2 strips of yellow and orange corrugated paper and white paper petals (5 pieces).
We cut the strips into fringes and twist them: first yellow, and orange on top. We secure the base of the roll with an elastic band.
We slightly stretch the cut out petals at the ends and wrap them around the fringed core. We fix the base of the flower again.
Having made 2 of these flowers (or another number as desired), we attach them to a branch, which we then decorate with paper tape. Add leaves.
Finally, we attach the branch to the top of the berry.
The composition can also be decorated with a “dew drop” made from hot-melt adhesive, decorative ladybugs, and beads.
This is such a delicious strawberry made from candy!
Enjoy your viewing and have a good sunny mood!
* * *
I hope that Svetlana’s recipe for making berries from sweets with your own hands will be useful to you more than once. Moreover, the summer season is ahead, which will also give many reasons for creativity.
You may also be interested in how to make an original cake from candies, a children's bouquet from kinder surprises, or a luxurious bridal bouquet with roses from candies. You can find all this and much more in our “Sweet Design” section.
And be sure to visit us for the next master classes on composing“delicious” bouquets andcompositions. And so as not to miss them, subscribe to site updates!
Hello friends! I offer a short photo master class on making strawberries for a candy bouquet.
For work we will need:
Candy, I took the Autumn Waltz, because... they are shaped like a berry,
Red polysilk,
Double sided tape,
Floral wire,
Corrugated paper of marsh or green color,
The tape is green, but you can do without it,
Threads for securing the candy to the wire,
Wire tools
First you need to secure the candy to the wire. To do this, cut the wire into pieces, the length is approximately 15 cm, depending on the height of your bouquet. On one side we bend the wire as in the photo,

Then we bend this hook at a right angle and make a stand for the candy.


Let's attach a wire to it,


And glue another piece of double-sided tape on top.

Cut out a square of approximately 12*12 cm from polysilk.

We put a candy in the middle,

And carefully wrap it in polysilk. The tape that secures the wire will help us fix the polysilk a little.
We secure everything with a thread under the candy.

Trim off the excess.


I cut it with a fence,

And attached it to the candy.


I tightened it with thread again.

All that remains is to tape the stem. This can be done with a narrow strip of corrugated paper or tape.

The final touch is to dot the strawberry with paint or a white marker.


