Before you learn how to tie a ribbon, you need to know where this accessory can be worn. So, the ribbon can be worn by attaching it to the chest on the left side (near the heart). It can also be tied on the wrist with a double knot or simply on the sleeve. It is strictly forbidden to tie a ribbon on a dog’s collar, weave it into the hair or use it instead of laces, or pin it below the waist (including on a belt).
There are many ways to tie a ribbon, but the most popular are the classic bow, the “M” shape and the loop.
The easiest way to attach a ribbon to clothing is to make a loop in which one end is longer than the other.
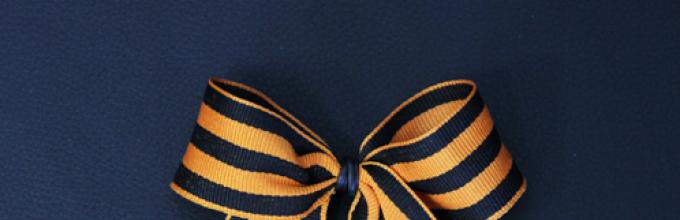
No less in a simple way tying a ribbon is an option in the form of a bow. To create it, first make a wide loop, then connect the place where the ribbons cross to the middle of the loop and tie it with a thin elastic band in the same color of the ribbon.

The third way is the letter "M". Take the ribbon, fold it in four, then stretch its ends in different directions to form the desired letter “M”.

Well, the last way is a tick. To create it, you need to bend the tape so that one end is one third longer than the other, and then stretch its ends to the sides.

It is worth noting that all those whose families were affected by the Great Patriotic War, those who understand and realize the cost of this victory, those who remember their history and are proud of their country can tie the knot.
Public action "St. George's Ribbon" in honor of the victory in the Great Patriotic War Patriotic War first held in 2005 on the initiative of the news agencyRIA Novosti . This symbol appeared in the era of Catherine II, who established the highest military award of the Russian Empire - the Order of St. George.
History of the St. George Ribbon
The St. George's ribbon appeared in 1769 by decree of Empress Catherine II, who introduced the soldier's Order of St. George the Victorious. This was a very honorable and prestigious award; it was received by military personnel for special bravery in battle. The colors of the stripes symbolized the battle: black - thick smoke, orange - bright flames. During the times of the Russian Empire, the ribbon was worn on the uniform, thrown over the right shoulder.
The film is named after St. George the Victorious, an important Christian saint who, according to legend, performed many miracles and defeated the terrible serpent that devastated the earth. His feat is depicted on Russian coins and on the coats of arms of Moscow and the Moscow region.
The St. George Ribbon was used to decorate Soviet awards, including the Order of Glory and the medal “For Victory over Germany in the Great Patriotic War of 1941-1945.” She had five longitudinal stripes- three black and two orange.
In 2005, the public action “St. George’s Ribbon” was held for the first time in the Moscow region, organized by the RIA Novosti news agency and the regional public organization “Student Community”. Since then, the event has been held annually not only in Russia, but also in other countries. St. George's ribbons have become a symbol of memory of the Great Patriotic War, the feat of veterans and Victory.
Where to get it St. George's ribbon
Volunteers and activists begin distributing ribbons a few days before the Victory Day celebrations. They can be found near metro stations, shopping centers, in squares and in crowded places. Anyone can receive the tape for free.
How to wear the St. George's ribbon
There are no official rules for wearing the St. George ribbon. However, it should be understood that this is not fashion accessory, but a sign of memory, respect, grief and gratitude to the participants of the Great Patriotic War. Therefore, you should treat the ribbon with care and respect.
Basic methods
It is customary to wear the St. George ribbon on the chest on the left as a sign that the feat of Soviet soldiers remains forever in the hearts of descendants. It can also be tied around the wrist; many people attach the ribbon to a mirror or car antenna.
Loop
A simple and common option is to attach a St. George ribbon in the form of a loop. To do this, you need to cut off 10-15 centimeters of the ribbon, cross the ends in the shape of the letter “X” and pin the middle with a brooch, pin or badge. Wear on the left side of the chest.
Bow
You can attach the St. George ribbon in the form of a simple bow. It can be tied in any usual way, the main thing is to straighten the knot, “ears” and ends of the ribbon. You can also not tie the ribbon, but simply form two loops out of it and secure them in the middle with a pin or badge.
Eight bow
Take about 30 centimeters of tape, fold it into a figure eight, and secure it in the middle. Take a shorter ribbon and also fold it into a figure eight and secure it. Next you need to take two more tapes, each smaller than the previous one. You will get four ribbons different lengths, folded in figures of eight. Stack them on top of each other and fasten them with another ribbon. You will get a large but discreet bow, which should be secured on the left side of the chest.
Zigzag
The St. George ribbon can be attached to clothing in the form of a zipper or a zigzag. To do this, fold the tape three times like an accordion and pull the ends a little to form the letter “N”. Secure with pins or sew. Attach to clothing with a pin, brooch or badge.
Tie
To tie a St. George's ribbon and tie, you will need a long ribbon. You can use any usual method of tying a tie. For example, wrap the ribbon in a circle so that the left end is longer. Place the right end over the left and pass crosswise under it. Then wrap the ends again, forming a loop, into which you thread the left edge from bottom to top and pull it out of the loop, thread it through the eyelet and tighten.
Star
A more complex method, but the result looks original and festive. You will need 5 pieces of tape 8 centimeters long. Fold each in half and cut at an angle, 2 centimeters from the edge. Place the cut sides facing each other, fasten with fire - matches or a lighter. Turn the pieces inside out so that the seam is in the middle. Fasten them together with fire or a soldering iron - you get a star with a hole on the back side. Next, fold a standard length ribbon in the shape of a checkmark and place a star on the fold, in the center of which attach a decorative element - for example, a badge. You can secure the decoration to your clothes with a safety pin.
Chrysanthemum
Prepare flower templates and trace them on a wide ribbon. Large and small blanks are best cut with curly scissors. To make a petal, you need to fold the cut out parts in the form of an accordion and steam them with an iron. Then drip glue onto the wire bent into a loop and put on the petals one by one, alternating large and small, as in a living flower. This chrysanthemum can be worn on clothes during Victory Day or used as decoration for a postcard for veterans.
With embroidery
In many schools, on the eve of May 9, schoolchildren embroider stars, flowers, dates, and inscriptions on St. George’s ribbons. Regular colored threads, floss, and special embroidery ribbons are suitable for this.
What not to do with the St. George ribbon
– attach the tape to hair, shoes, pants;
– tie a ribbon on bags, backpacks, wallets;
– attach the ribbon to jewelry, watches, use as a necklace and accessory;
– attaching too many ribbons to clothes;
– tie more than one ribbon on the machine;
– attach the tape to animals and their clothing, use it as a collar or leash;
– sell St. George ribbons.
When the celebration of Victory Day is over, do not throw away the St. George ribbon. Left on the streets, thrown into the mud, or thrown into trash bins, the ribbons leave a painful impression and upset the veterans, but the action is aimed at ensuring that their feat is not forgotten.
It is best to remove the St. George ribbon until next year or wear it on special dates - for example, on the day the Great Patriotic War began or on the day the Battle of Stalingrad ended.
Methods of tying the St. George's ribbon, diagrams and step-by-step instructions.
- Victory Day is an exciting holiday for veterans and their descendants. It evokes a sea of emotions in the heart - gratitude, reverence, respect, remembrance, admiration
- A special feeling of belonging to the Victory Day is given by the St. George Ribbon, which adorns our clothes or flies in the form of flags around the city.
- It has already become a good tradition to tie the St. George ribbon in the form of loops and bows, intricate stars, zigzags and flowers and proudly wear it on the left chest on Victory Day
- What are the most common options for tying the St. George ribbon and will be discussed in this article
How can you beautifully tie a St. George's ribbon?
options for beautifully tied St. George ribbons- The concept of beauty, applicable to tying the St. George ribbon, is relatively
- Since this ribbon is one of the main symbols of the Great Victory, the very fact of its presence on a jacket or blouse evokes emotions that are an order of magnitude higher than ordinary fashionable beauty
- Nevertheless, we, women, great needlewomen and sorceresses who transform the whole world around us, have come up with many variations of tying this sign of Victory
Conventionally, all methods can be divided into three groups:
- simple
- a little more complicated
- handmade masterpieces
- The first group includes a loop, a tick, a knot, a simple bow
- For the second - in the form of a zigzag, the letter “m”, a bow in 2 or more layers, a tie, a spiral
- Still others are roses, stars, leaves, compositions with stones and beads, brooches and in the form of a tree branch
Note that the second and third groups of methods for tying a ribbon have opponents. They consider them a mockery of the symbol of valor and courage.
Although they respond more radically to the manner of wearing the St. George Ribbon in hair, shoes, on pets, cars and motorcycles, belts, and pants.
How to tie a St. George's ribbon with a bow?

 beautiful bow from the St. George ribbon on a background of white pebbles
 The classic St. George ribbon bow is simple to make:
- put the tape, fix the middle with your finger
- alternately lay out the free ends of the tape so that loops are formed on both sides
- Secure the intersection of the loops and the free ends of the ribbon with a safety pin or a small appropriate brooch. A thread with beads or larger balls, which should be attached in the center of the product, will give the bow a special originality.
Make a strict bow from a ribbon longer than the standard one, which is distributed on Victory Day. To create such a bow you need:
- St. George ribbon on a roll
- glue gun or stapler
- lighter
- scissors
Fold a piece of tape 12-14 cm long in half so that its ends meet exactly in the middle of the tape and proceed as follows:
- secure them with a stapler or glue
- wrap the tape perpendicular to the joint, cut it off the roll and glue the ends of this piece of tape
- Fold a regular ribbon in half and push the tails apart to form the letter “l”
- Attach the check mark to the back of the bow with glue or a stapler
A multi-layer bow is suitable for fluffy blouses. To make it, prepare:
- solid tape in a reel
- scissors
- matches
- glue or stapler
- to decorate the middle of the bow - a brooch with a bead, stone or a beaded ring.
Your imagination may suggest other decor options.
- Lay out loops from the tape in the form of figure eights lying on top of each other, which become smaller from layer to layer. For example, the first is 15 cm long, the second is 12, the third is 9. Three layers are enough for this type of bow
- Cut the ribbon and burn the end with a match.
- In the middle, connect all the ribbons together with glue, a stapler, a brooch, beads or a small piece of ribbon from a spool. In the last version, glue its ends to the back of the bow
- You can leave the finished decoration unchanged or add a standard length St. George's ribbon, folded in the form of a check mark, so that the tails hang from the bow at the bottom
- Attach finished bows to clothes with safety pins
How to tie a St. George's ribbon with a tie?
 different ties on a clothesline
 An interesting option for those who want to attract more attention to your person.
In order to tie the symbol of the Victory Day in the form of a tie, you need a piece of ribbon equal in length to the tie if it will be worn by an adult.
The technique is similar to tying a tie:
- Throw the ribbon around the base or neck so that the right end for you is longer than the left
- wrap the long part of the ribbon around the short one from top to bottom and bring it out diagonally
- then insert the working right end of the tape from bottom to top into the ring on the neck/base and bring it out diagonally to the left
- wrap it around the stationary part of the tape again and guide it from bottom to top into the ring
- tuck the working end into the knot that you have already wound around your neck and pull it down
- tie ready
For clarity, here is a diagram of tying a classic tie.
 tie tying pattern
How to tie a St. George's ribbon with a star?


The star is another symbol of victory. And many awards have a similar form.
Remembering that even under Peter 1, the presence of a St. George ribbon on a uniform was equivalent to a medal, we can adopt this tradition of tying it in the form of a star and attaching it to a jacket instead of awards.
Let's consider several implementation techniques:
- simple
- handmade
To tie a St. George's ribbon in the shape of a star using a simple technique, you need a ribbon and dexterous hands.
- Fold it with a tick and unfold it on your palm as a “more” sign. In this case, the bottom of the tape should be in front of you
- Tuck it over the end of the ribbon, which is located behind the fold
- You now have a trapezoid with the longer side at the top, above which are the two ends of the tape.
- Secure the left and middle trapezoid with your thumb
- Thread the right one into the knot, which you hold with your finger.
- Straighten the pentagon and attach it to the clothes with a pin
To give the shape of the star of St. George's ribbon using a handmade method, you need:
- tape in reel
- scissors
- matches/lighter
- soldering iron/glue gun
- ruler
- decorative element to decorate the middle of the star
- Fold each in half and cut at an angle, departing 2 cm from one edge. The result is a trapezoid with dimensions of parallel sides of 4 and 8 cm
- Roll each trapezoid with the cut sides facing each other and secure with matches/lighters or a soldering iron.
- Turn all five pieces inside out so that the seam is in the middle and directed towards you
- Fasten each workpiece together with fire or a soldering iron.
- This way you will assemble a star, which will have a hole on the back side
- Lay out a standard length ribbon in the form of a checkmark and place a ribbon star on the fold, in the center of which attach a decorative element, for example, a badge with a star
- Place the jewelry on your clothes, securing it with a safety pin or a regular pin.
How to tie a St. George's ribbon with a rose?

 different variations St. George's ribbon tied in the form of roses
 An original and floral way of tying the St. George Ribbon is in the form of a rose.
It's quite simple to do. You need:
- tape in reel
- needle with black or brown thread
- scissors
- glue or matches/lighter
- for decoration of the rose core - bead, badge, pebble
Proceed like this:
- Cut a piece of tape 10 cm long
- On one side, string it along the entire length with a thread and pull it together to make a rose.
- The free edges of the tape can be carefully sewn or glued/cauterized
- Fold a standard length ribbon with a tick and secure it on the back of the rose with threads/pins
- Decorate the center of the flower if desired.
- Attach the finished ribbon in the shape of a rose to the clothing in the heart area with a pin.
How to tie a St. George's ribbon with a flower, diagram
 Scheme for tying a flower from a ribbon
 How to tie a St. George's ribbon step by step?

 tying the St. George ribbon with your hands
 Above was a detailed description of the step-by-step tying of the St. George ribbon in different ways.
Let's add a few more.
Quick bow.
- Gather the ends of the tape and fold it so that they are in the middle on the back side
- Take a loop with each hand and tie them together into one knot.
- Straighten the edges of the bow and attach it to your clothes.
The letter "m" means "May".
- Fold the ribbon in the form of two figure eights lying on top of each other, so that one end of the ribbon is under them and the other is on top
- Gently spread the fabric strips at the folds to form
Beautiful letter "m".
- Secure both folds with safety pins and attach to clothing.
- It is advisable to also secure the ends of the tape so that they do not blow in the wind
How to tie a St. George's ribbon on a car?

 A St. George's ribbon is tied to a rear view mirror in a car. A St. George's ribbon is tied to a man's bag.
 Although tying the St. George ribbon on bags has many opponents, on the streets on the holiday you will see many women and girls who practice it.
The most common methods are:
- loop
- nodule
- check mark
- bows of different types
- flowers
Since the female part of humanity loves to dress up and decorate the world around them, they come up with many variations of tying the St. George ribbon.
They are helped by various handicraft techniques, for example, kanzashi, beads, crocheting and knitting.
Video: 10 ways to beautifully tie the St. George Ribbon
The most grandiose holiday in May is Victory Day. Everyone is preparing for this celebration at different levels. In addition to the parade procession, laying flowers at monuments, and concerts, on May 9, all people put on St. George’s ribbons, which have remained one of the symbols of the Great Victory for many years in a row. And so that this symbol never loses its significance, every year we figure out how to design it in an original way, so that even modern youth would be interested in joining the May 9 holiday as a flash mob on a global scale. In our article you will find options on how to design the St. George ribbon, how to decorate it and attach it to clothes.
It is no coincidence that we associate the St. George's ribbon with Victory Day; this symbol has its own history. In the 18th century, as we all know from history, the Order of George was established, which was divided into 4 degrees:
- I degree - an order with a cross, a star and a ribbon on which orange and black stripes are located parallel to each other (2 orange and 3 black). This ribbon was worn on the right shoulder, and was necessarily worn not on the uniform, but under it.
Important fact! Why did the ribbon have exactly these color stripes? Orange and black are iconic colors because they symbolize military valor, the glory displayed on the battlefield.
- II degree is an order with a star and a large cross. It was worn around the neck, attached to a ribbon of the same color, but it was narrower in width.
- III degree is an order in the form of a cross, which was also worn around the neck.
- IV degree is an order in the form of a small cross placed in a buttonhole. This order is worn around the neck.
All the valiant warriors of Imperial Russia believed the highest award receive the Order of George for yourself. The same tradition was preserved during the Great Patriotic War and in our peacetime. It is impossible to imagine a distinguished Russian military man whose uniform is not decorated with award medals and badges suspended from orange and black ribbons.
Ordinary people who have nothing to do with military operations, but who honor the great exploits of the heroes of the Motherland, also attach a small badge made of ribbons of the same color as St. George’s to their clothes on the Great Victory Day. It became a kind of attribute of a military celebration. And, if you consider yourself one of the same people, then in our article you will learn how to make yourself beautiful decoration for Great Victory Day.
What does the St. George's ribbon symbolize?

As you have already understood, the St. George Ribbon is a very honorable order, and it should be treated accordingly. When you decide to wear this badge, you must understand that in this way you are simply paying tribute to people who know first-hand what it means. Therefore, attach the St. George ribbon to your chest, on the side where the heart is. And leave the desire to tie a ribbon on your bag, tie it on your head, or some other place that might simply offend a combat veteran.
Let us treat the honorary symbols of the Great Victory with love and respect, otherwise the meaning of the tradition will be lost, otherwise the next generations will forget and attach importance to the feat that was accomplished by our great-grandfathers.
What do the colors of the St. George's ribbon mean?

As we noted above, the colors of the St. George ribbon are a symbol of military courage and bravery. However, in the truest sense of the word:
- Orange color means flame, fire, which each of us associates with war and bloodshed.
- Black color is the smoke that always remains after a fire, enveloping the entire earth with its pungent aroma and leaving an aftertaste of death.
How to make a St. George ribbon, ideas with photos
The St. George ribbon can be very original if you decide not to buy it on sale, but make a decoration for yourself with your own hands.
We will present you with ideas on how you can create the Victory attribute for yourself:
Option 1: You can buy beads of the appropriate colors and weave a regular ribbon out of it, which can be rolled up in the traditional way, as shown in the photo below:

Option 2: The easiest way to make a St. George ribbon is to make it out of paper. But it is suitable only for kids who are kindergarten or at home with their grandmother and mother they will prepare for the rally on May 9:

Option 3: Those who know how to knit may like the idea of knitting a St. George's ribbon. You'll have a long-lasting badge that can be permanently sewn onto your jacket or blouse. Only you must understand that in May weather the icon from wool threads will look strange, choose brighter and simpler threads to knit your Victory attribute for the parade:

St. George's Ribbon of Kanzashi, step by step with photo

St. George's ribbons made using the kanzashi technique look very stylish. If you know firsthand what beautiful products are always made from ribbons, then you will definitely like this idea for making a Victory attribute:
- First, prepare everything necessary materials, which may be useful to you in your work. We will show you the entire list in the photo:

- We take the ribbons and cut out rectangles from them, the side length of which is 7 cm.

- Next, take one piece using tweezers and fold it like this:

- We fold the same blank again:

- You will end up with a small element that needs to be turned inside:

- Next, we bend the lower edge of the workpiece a little and work it with a lighter:

- We should get a neat petal like this:

- In total, you will need to make 5 identical petals using the technology described above:


- Next, we take a large ribbon, the length of which is 20 cm, and make these cutouts on each side to make teeth like a flag:

- We fold the long ribbon as shown in the photo:

- On the back of the workpiece you need to glue or sew a pin, with which you can attach your beautiful badge to your clothes:

- WITH front side we glue the petals that we already have ready. They should take on the appearance of a flower; it can be decorated with beads and various other decorative elements (see the very first photo of this section).
St. George ribbon template


Master class St. George's ribbon

At school, children can be asked to make a St. George ribbon like this. It will look good if students of the same educational institution everyone will come with the same icons:
- Cut several small pieces of ribbon and fold them as shown in the photo:

- Pinch the edges of the resulting workpiece using regular tweezers and bring it to the candle:

- Burn the edge of the ribbon so that it melts a little and can be attached to the other petals:

- You should end up with 5 of these blanks:

- Glue these petals together so that you get a flower or a star. Use a glue gun for reliability:


- Take some beautiful bead or brooch, glue it in the middle of the resulting star, thus hiding the seams and rough spots:

Using the same glue gun, glue a ribbon with cut edges to the back of the badge (they should look like flag teeth, as we mentioned above in our article):


There is nothing complicated about making such a badge for May 9th. Simply repeat the presented technology, and you will get a very beautiful decoration for a rally for the whole family.
On which side is the St. George ribbon worn?

As we already mentioned, the most correct solution is to put the badge on the left chest. This way you can show your honor and respect to the veterans who will be present at the Great Victory Day.
There are several more options that can be used if you are thinking about where to attach the St. George ribbon:
- tie it around your sleeve;
- tie it around your wrist, making a double knot.
All other options - tying them as a bow on your daughter’s head, tying them to a car or attaching them to a bag will be inappropriate and offensive. If you are not a patriot, and by wearing a ribbon you just want to emphasize your style, then you can simply not go to the event so as not to spoil anyone’s mood.
How to fold a St. George's ribbon

How to tie a St. George's ribbon with a bow

How to beautifully tie a St. George's ribbon

To make your badge look elegant, you can attach any decor to it. Now it is very fashionable to make petals using the kanzashi technique, or to make carnations from foamiran, and then the resulting products are simply glued onto St. George ribbons folded in a certain way and sewn to clothes. Here's what it might look like:

Let's remember that before everyone had to earn the right to wear the St. George ribbon on their chest - they had to show courage, fight, shed blood. Today there is no need to do all this. It’s enough just to show your imagination, decorate your clothes and bring it to the holiday. And this is important for raising the patriotic spirit, for feeling the power of unity, which saved our great people and gave us the strength to win the greatest victory in the entire history of mankind over a terrible, death-bringing enemy.
Video: “How to make a St. George’s ribbon?”
On the eve of the great holiday - Victory Day, it has recently become common among residents of Russia and other countries to wear a special symbol - the St. George's ribbon. If you wish, you can not remove the ribbon after the May 9 holiday and wear it all year round.
Many people, especially the younger generation, pay tribute to fashion and simply put on a ribbon without thinking about why it is needed. In fact, many do not know why this particular symbol of Victory has such a name, and what is the history of the St. George ribbon.
It is not easy to figure out in history exactly when this sign first appeared. Many historians adhere to the version that the St. George Ribbon was established in 1769 on November 26 by Catherine II, at the height of the Russian-Turkish War (1768-1774) to encourage the courageous actions of soldiers. The ribbon received this name from the valiant warrior St. George the Victorious. The motto of the symbol of courage is “For service and courage.”
The color of the badge was first yellow, then orange, that is, there were yellow or orange stripes on the black ribbon. This color design means “smoke and flame”, characteristic of wartime.
The St. George ribbons personify the feat of the Russian warrior on the battlefields, in the rear and on the front line.
Currently, most people associate the St. George ribbon with the symbol of victory in the Great Patriotic War, which our country won in 1945 on May 9. This day will forever remain in the memory of every Russian. And perhaps this is the only way our generation can express respect and deep gratitude to those who defended our Motherland.
For special achievements and participation in the Second World War, all participants in military operations received medals “For Victory”. The blocks of the new orders were covered with striped fabric - this is the St. George ribbon.
These are the medals:
On the eve of Victory Day, and not only that, many people are often lost and don’t know how to tie a ribbon so that it looks beautiful and doesn’t unravel.
Conventionally, all methods can be divided into three groups:
simple
a little more complicated
handmade masterpieces
The first group includes a loop, a tick, a knot, a simple bow, and an elegant bow.
For the second - in the form of a zigzag (zipper), the letter “m”, a bow in 2 or more layers, a tie.
Still others are roses, stars, leaves, compositions with stones and beads, brooches and in the form of a tree branch
Simple ways to tie a St. George ribbon
Loop
The simplest option for folding a yellow-orange ribbon is a loop:
the tape must be placed on a flat surface;
fold it in half;
one free end needs to be pulled up a little so that it is shorter than the second;
pull this end a little to the side;
you should get the letter “G”;
You will get this neat loop:
Check mark
We bend the tape in half, shorten one end and give it the shape of a checkmark.

Nodule
For this method, it is enough to tie a knot on the ribbon itself. It should be tied lightly for an attractive appearance..

Simple bow
How to tie a St. George ribbon with a bow:
First you need to lay the tape out on the table and roll it into a loop (on one side).
Now we perform similar actions with the free end of the tape to also make a loop.
As you can see, there is nothing complicated. This option for tying the St. George ribbon is considered the simplest and is more suitable for everyday wear. No special tying skills are required; even a schoolchild can quickly tie a ribbon in this way in just a couple of minutes before going out.

Elegant bow
If you want something unusual and elegant, then you will definitely like this option:
You need to form a regular bow from a piece of ribbon as described above.
You will need a black elastic band to hold the bow together. It will turn out beautiful and elegant, and also - in this way, a tied ribbon will be worn longer than the version with a pin.

Lightning
Ribbons laid out in this way look beautiful, especially on the lapel of a plain jacket. Making such a shape from tape is very simple:
take a piece of ribbon and small pins;
the tape needs to be laid out on the table and folded in three;
Now all that remains is to pull one end of the tape in one direction, and the other in the other (right and left);
you will get a zigzag or lightning;
you just need to fasten the ribbon very carefully with small pins to the clothing right on the table so as not to disturb the shape;
It is best to fasten with pins to the fabric where the ribbon is folded so that the pins do not stand out and keep the shape of the St. George ribbon.

Letter "M":
Another simple way is to form the letter “M” from a piece of tape (as the first letter of the word “Peace” or “May”):
place the tape on the table;
fold 4 times;
pull the edges;
you will get the letter “M”, which also needs to be secured to the clothes with pins.

Tie
The St. George ribbon in the form of a small tie looks very beautiful. If this is not your first time tying a man’s tie, you will easily cope with this task.
Wrap the ribbon around the base so that the right end is longer than the left.
Place the right end over the left and run crosswise under it.
Wrap the right end around the left end again and thread it through the loop from bottom to top.
After pulling the end out of the loop, thread it through the resulting eyelet and tighten the tie.

Bow in the shape of a man
you can fold from 4 pieces of St. George's ribbon
Cut ribbons to lengths of 24, 14, 10 and 7 cm
Make a loop from the longest ribbon
Roll the 10 and 14 cm ribbons into a ring, press and place on top of each other, securing with a pin
Wrap 7cm of tape around the place where the pin is attached.
Place the workpiece on the prepared loop
Fasten all the parts together using threads, a glue gun or pins
You can decorate the center with a flower or rhinestone

Handmade masterpieces


Rules for wearing the Victory symbol
You need to wear the St. George ribbon correctly:
It is tied and then secured on the left side of the body, closer to the heart.
You can wrap it around your sleeve and tie it in a double knot.
If the accessory is worn with a sleeveless top, it is tied at the wrist.
It is allowed to attach the ribbon to the side mirror or antenna of the car.
Some progressive girls hang it on their bag. If earlier this method was considered a sign of disrespect for veterans, today it is completely acceptable.


First of all, you need to remember that the Victory Day attribute is not a stylish detail of the image, but a tribute to the ancestors for their feat in wartime and a symbol of victory over fascism.
This is not how you should wear a ribbon:

Ribbons should not be tied to animals, although many people love to do this. It is also undesirable to weave it into your hair, attach it to a loop of trousers or skirts, or tie it to shoes.
Treat the symbol of victory with deep respect and learn not only to tie a ribbon beautifully, but also to wear it correctly and carefully.
"I remember, I'm proud"
This is the motto of the company, which started in April 2015 in the Russian and global space. The organizers called for the St. George ribbon to be treated as a tribute to those who fell in the Great Patriotic War, and not as a fashion trend.


