Origami wallet is one of the most popular paper origami. If you don't know how to make an origami wallet, then on this page you will find everything you need to assemble this simple paper figurine.
In the first photo you can see what you will get if you follow the assembly diagram below. The second photo of the origami wallet was taken by one of our site users. He created a kind of wallet that folds in half. If you have photos of origami you have collected, send them to: This email address is being protected from spambots. You must have JavaScript enabled to view it.

Assembly diagram
Below is a diagram of how to assemble an origami wallet from the famous Japanese origami master Fumiaki Shingu. If you strictly follow the instructions, then assembling the origami wallet will not take much time, and the result will be the same as in the picture. After doing what is described in the diagram several times, you will understand how to make an origami wallet quickly and without peeking at the diagram.

Video master class
Assembling an origami wallet may seem like a daunting task for beginners. Therefore, we advise you to enter the query “origami wallet video” on the largest video hosting site on the Internet, YouTube. There you will find a lot different videos about the origami wallet, which clearly shows the steps to assemble the wallet. We hope that after watching the video of the assembly master class, you will have no more questions about how to make an origami wallet.
If you want to make an original paper wallet, watch this video:
And this training video will teach you how to assemble a paper wallet:
Symbolism
A wallet has roughly the same symbolic meaning in many cultures. A wallet means prosperity and wealth. If you have a beautiful wallet with original decoration, then it can still be a symbol of good taste and careful attitude to money.

 Children love beautiful and functional things, so that everything is serious, like adults. Even to a toy store you need to go with money. And to store them you will need a special bag.
This is where knowing how to make a paper wallet with your own hands will come in handy. This activity is so exciting and creative that the child will undoubtedly like it and will perceive it as a new game.
 You can create whatever your heart desires from paper with your own hands. The main thing is to use a little imagination and make simple movements to evenly fold the corners. The first thing you need to create a money wallet with your own hands is to prepare materials.
The following items are needed:
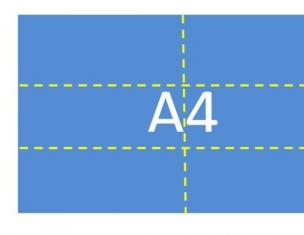
- A4 sheet of paper;
- pencil;
- scissors;
- stapler
When the diagram is ready, you need to fold paper sheet in half, then half again, and half again. The result is smooth folds along which you will need to make cuts, as indicated in the diagram.
Next, the resulting parts are folded and fastened together using a stapler. You need to fold side No. 2 with side No. 3, then the reverse side No. 8 should be attached to part No. 1, sides 4,5,6 should be connected to side No. 2 and No. 5 should be fastened to No. 1.
After performing such simple manipulations, you can already fold banknotes into the product, and a plastic card will fit into the side pockets.
The diagram is most clearly explained in the video:
How to decorate a money wallet?
Any child will quickly get tired of a regular white purse, so the product needs to be given individuality. To make a paper wallet bright and beautiful you may need:

The resulting product can be painted or an interesting pattern drawn on it.
With the help of sparkles, you can make your wallet glamorous and position it as a fashionable clutch.
A simplified version for creating a paper wallet
There is another simple way to make a paper wallet. The money keeper will be neat, with two pockets the size of the bills.
 To create it, you don’t need a stapler - just a sheet of cardboard, preferably colored, and strictly follow the diagram by folding it evenly:
- fold the sheet in half and straighten it out;
- bend the corners on all sides of the sheet;
- bend the “spouts” at the corners;
- fold the side edges again to form a rectangle;
- turn the product over and fold the edges again;
- fold it in half and you're done.
In such a handmade purse, especially if it is made of a thick base, you can put small metal items and various little things.
Origami or folded paper is an ancient Chinese art that tells us how to fold different paper figures. Initially, origami was available only to representatives of the upper classes and was used in religious rituals. It was believed that mastery of this technique is a sign good manners. Nowadays, not only adults, but also children are passionate about origami. Paper folding is very exciting activity, which often turns into a hobby. Today we will show.
To make such a craft, you need to take a sheet. It can be plain white, or it can be made from colored paper or a magazine.
If you take an A4 sheet, your wallet will be small; it is better to prepare an A2 sheet (like 2 pages of a magazine or album).

Bend two corners of one side at 45 degrees. We do the same on the other side.

Now we bend the resulting angle parallel to the middle of the sheet. And he does this action again towards the middle. We fold the second part in the same way.

Now let's turn the resulting product over and bend it towards the middle.

Our wallet is almost ready.

All that remains is to remove the corner from one compartment from one part, which will serve as a lid for the wallet.

So quickly, and without spending cash, you can fold a paper wallet!

Paper wallet!
The resulting paper wallet You can give it to someone for their birthday with money if you forgot to buy an envelope. And also the child will be happy to play with it and put paper money there.
How to make an origami wallet? There are many ways. We will look at one of them today. All you need is a piece of paper and some free time.
Paper selection
Origami is the art of paper folding. It is this simple material that we will need to make a wallet that will be large and strong enough. To make an origami wallet, you need to make sure the material is of good quality. For this art there is special durable paper, which is also easy to fold. It is available in a wide range of color options. Of course, origami paper costs a little more than regular paper. You can also use thin cardboard or a thick sheet of glossy magazine.
How to make an origami wallet?
- Step 1
Take a square piece of paper and fold it in half vertically. Make a good fold in the center and then unfold it back to its original state.

- Step 2
Fold the sides of the paper towards the center. After you have ironed the folds thoroughly, open the sheet back. You should now have three folds and the paper is evenly divided into four sections.

- Step 4
Fold the edges of the paper at each corner so that they match the folds made in the previous step. Make sure all four corners are folded. This time there is no need to unbend.

- Step 5
Fold the left and right sides of the paper to the center of the fold. They must be symmetrical. Now you have two doors with the corners folded inward. Once you have done this, turn the paper over with the flaps facing down.

- Step 6
Fold top part paper by approximately one third. The triangle, which should be completely visible, will help you make sure of this. At this stage, you can use a ruler or something else to help press down the paper to make the fold line more distinct and deep.

- Step 7
Do the same with the bottom. This fold should slightly overlap the other sash. Then, using a sliding motion, insert the bottom corners of the triangle into its top corners. It should look something like a diamond.

- Step 8
Fold the paper in half to complete your origami wallet. Now you will be able to store cards and coins there, depending on how large your wallet is.

Once you're done, you can also decorate your origami paper wallet with designs or stickers to make it more original or help remind you of what's in there.
Paper wallets
You can make anything out of paper - New Year's toys, airplanes, boats, frogs, cars and many other interesting things. Paper origami A wallet can become an indispensable assistant in children's games. You can also make a ton of paper coins with numbers from 1 to 10 on them, so the game of shop also turns into a hidden learning activity. You can store more than just money in these wallets. Girls can hide their personal secrets there in the form of candy wrappers or stickers. The simplest origami wallet can be made from a regular notebook page as a practice, and you can also use colored and durable paper, this will make your wallet even prettier.
Print Thank you, great lesson +0
A paper wallet can be useful in various games, and simple folding can briefly entertain your baby on the road or at home when he gets bored. Moreover, to create it you do not need to have scissors and glue, because it is folded using the origami technique. To make it beautiful, use colored paper(preferably decorative) and various materials for decorating finished crafts.
_svoimi_rukami_materialy.jpg)
- One sheet of A4 or A5.
Step-by-step photo lesson:
To create a paper wallet you will need one sheet of A4 or A5 paper of any color. Fold in half along the longest side.
_svoimi_rukami-1.jpg)
Open it up and get a horizontal fold line.
_svoimi_rukami-2.jpg)
Fold a sheet of paper in half left side.
_svoimi_rukami-3.jpg)
Let's open and start bending the corners from the left side to the horizontal fold line.
_svoimi_rukami-4.jpg)
Now the upper and lower corners on the right side should be folded towards the center line.
_svoimi_rukami-5.jpg)
We bend the side right corner to the left side, so that 1 cm remains to the edge of the fold.
_svoimi_rukami-6.jpg)
We'll do the same on the left side.
_svoimi_rukami-7.jpg)
Turn the workpiece over. Then bend it completely to the center fold line.
_svoimi_rukami-8.jpg)
Bend the top side down towards the horizontal fold.
_svoimi_rukami-9.jpg)
Turn it over.
_svoimi_rukami-10.jpg)
We bend the sides to the vertical fold line, which is located in the middle of the workpiece.
_svoimi_rukami-11.jpg)
We put together the craft.
_svoimi_rukami-12.jpg)
On one side you can see several pockets.
_svoimi_rukami-13.jpg)
We pull out a corner from one compartment.
_svoimi_rukami-14.jpg)
We bend the corner down and get a finished paper wallet using the origami technique. It has several compartments where you can place coins and toy bills.
_svoimi_rukami-15.jpg)
Video lesson