In order for your hands, especially nails, to look always well-groomed, you need to know how to do a manicure correctly. This procedure must be resorted to once every seven days. You can do everything you need neatly and quickly in a beauty salon. If you do not have the desire or the opportunity to visit it, then you can do the manicure yourself at home and is no worse than the one that is offered to you for money.
 Answering the question of how to do a manicure correctly, it should be noted that there are a huge number of them. However, the most common choice for a woman is edged, unedged or classic. The main thing is to choose and decide.
Classic manicure
The classic manicure procedure involves removing the cuticle using small metal tweezers or sharp nail scissors.
Trim manicure
 Preferred for those with thick and rough cuticles. Quite traumatic. Carelessness or inexperience can cause injury by cutting off too much skin. As a result, this injury is capable of provoking inflammation, due to which the cuticle will thicken even more and begin to grow more intensively.
Unedged manicure or European
 This type of manicure also provides for the removal of the cuticle, but with the use of a special tool developed on the basis of mild acids, namely fruit and lactic acid. Unedged or European manicure is preferable for women with delicate and thin skin of the hands. The process of removing the cuticle is reduced to its painless and delicate dissolution.
The European manicure procedure takes much less time than the classic one.
However, this method of cuticle removal is contraindicated for women with sensitive skin, since the components of the product can provoke an allergic reaction.
Twelve manicure tools
 The manicure is created with twelve essential tools. Therefore, if you are really interested in the right manicure, they should always be in your female arsenal. In particular, we are talking about:
- sharp nail scissors;
- nail file;
- metal tweezers;
- a metal spatula or orange tree stick to push back the cuticle;
- bath products: sea salt, olive and essential oils;
- nail polish remover;
- cotton pads or balls;
- cuticle softening oil;
- cuticle remover;
- hand cream;
- base coat and fixer;
- nail polish.
Four stages of a manicure
Only if all the steps are followed, while performing a manicure, your nails will gain the opportunity to look always healthy and beautiful, and you will receive an answer to the question of how to do a manicure correctly.
Stage one "Bath"
 Having decided on a home manicure, you need to make a bath for your nails in order to soften the cuticle and remove it further without any injury.
So, it is necessary to pour hot water into the bowl to such a level that all fingers of both hands can be completely immersed in it. You must also first add two or three tablespoons of olive oil, two tablespoons of colorless sea salt and a few drops of essential oil (for example, lemon) to the liquid.
The oil will not only soften your skin, but also nourish the marigolds with valuable vitamins, and the colorless sea salt will make them strong.
The fingers are immersed in this solution for about ten minutes. As soon as you notice that the cuticle has become soft, feel free to start removing it.
Stage two "Cuticle removal"
 Taking your fingers out of the bath one by one, use a stick or a spatula to push the cuticle to the base of the nail. It is necessary to act carefully, but with the application of sufficient effort. It is necessary to monitor all the time so as not to overdo it. After all, there is a risk of damage to the base of the nail.
Using the sharp side of a stick or scapula, scrub the remnants of the skin from under the cuticle. Remove the remaining burrs with tweezers. The skin should not be torn off, but bite off to avoid cuts. With an unedged manicure, the cuticle is removed by using a special tool from the cuticle remover series.
In this case, a gel is applied around the nail, not forgetting about the area under the nail. As a result, carefully, using a stick or spatula, the product is removed along with the dissolved cuticle.
It is better not to apply this remedy to all fingers at the same time, as the remover dries quickly enough. Professionals recommend treating two nails each.
Many manicurists recommend applying a cuticle remover to those nails that are still covered with old varnish. Since the agent used has a rather aggressive composition that destroys the nail plate.
Stage three "Correction of the nail shape"
 To do a manicure correctly, you must remember that if you want to shorten your nails as much as possible, you must use nail scissors, and all movements must be single and confident. If the nails are filed, then it is necessary to direct the file only in one direction so that the nails do not begin to exfoliate. It is also necessary to control that all marigolds have the same length.
Stage four "Application of varnish and care"
 In order to evenly lay the varnish on the nail plate, you must make sure that it does not go beyond the boundaries of the nail, as shown in this manual. Pay attention to the photo.
Now let's try to apply the varnish correctly on our own:
- Degrease the nail plates with a nail polish remover.
- Apply a base coat to keep your nails free from harmful effects of nail polish and further yellowing. The base also aligns the surface of the nail plate.
- Brush with varnish from the base of the nail to its edge.
- The second and third strokes should also come from the base of the nail, by removing a kind of arc with a brush, following to the edges.
- The final step will be the use of a fixing coating, which will give the manicure made not only shine, but also prolong its life.
Now you know how to properly do a manicure in a cozy home environment without the participation of an expensive beauty salon in this process. The main thing is to understand that every woman by nature is an inborn skill in all matters of beauty.
Each girl cares about the health and beauty of her hands. For to make the manicure look well-groomed and neat does not have to visit an expensive salon. You can put your nails in order on your own, and you do not need a lot of money. Well maintained manicure no matter what color it is painted with, and what drawing is depicted on it, it will look great.
Instrument preparation
Before making a high-quality manicure at home, it is worth preparing the following tools:
- high quality stainless steel nail scissors;
- nippers;
- clippers;
- cuticle scapula (it is advisable to use a wooden one for independent purposes);
- nail file;
- polishing buffs;
- a bath or bowl;
- means for softening and removing dead skin around the nail plate;
- cream, hand mask;
- means for degreasing nails (you can use pharmacy alcohol or face cream).
In order to master the art of creating a manicure on your own, you need to pay due attention to the preparation process. First, you need to get rid of the old coating, then the dead skin near the nail plate is removed, the process of filing and leveling the surface is completed. For owners of thin and brittle nails, it is better to use a crystal nail file; for extended nails, a glass file is suitable. Everyone's favorite metal nail file is suitable only for strong and healthy nails. The oval shape of the tool takes care of long nails, shortens them and processes the edges.
 Boomerang file rounds the nail plate, rectangular - suitable for any purpose. Polishing buffs are used at the final stage to level the surface and help get rid of small grooves. In addition to hand tools, you can use a special apparatus (milling cutter) to facilitate the preparation process.
Before use, the tools should be carefully treated with disinfectants; at home, you can use alcohol wipes. In the case of using an orange nail file to get rid of the cuticle. The instrument is disposable and does not require disinfection.
Creating a manicure at home, step by step instructions:

European manicure created without the use of tools. There is no need to soak your nails. The old varnish is removed, the nail plate is degreased, a special agent is applied to the cuticles. After 5 minutes, the cuticle becomes soft, you can remove it with a wooden spatula. All that remains to be done is to wipe the nail with a remover and apply a special base under the varnish, it will fill all cracks and irregularities.
Trim manicure with regular nail polish
Manicure is desirable for short nails., on them it will look more attractive. All preparatory procedures are carried out in the same sequence as described above. With a simple varnish, you can create such varieties of manicure as: artistic, gradient; ombre, patterns on the water.
Regular coverage at home it will not be difficult to do, and will save time. After the base is completely dry, varnish the nail plate. If the shade is not too saturated, apply a second layer, but after the first one has completely dried. On top of the dried varnish, the nail is covered with a fixative. It sheds the life of the varnish, strengthens the plate, and the fixer enriches the marigold with nutrients.


Creating a French manicure yourself
Do French at home quite easily without special skills and abilities. All you need to buy a varnish with a thin brush, you can also use ready-made stencils.
Step-by-step instruction:
- On fat-free the base under the varnish is applied to the nail plate. After complete drying, a layer of the base color is applied. To create this type of manicure, use pastel colors (pink, cream, beige, peach).
- Once dry base varnish, a "smile" is created. You can use ready-made stencils, but they have their drawbacks: they come off, let the varnish pass.
- At the edge of the nail plate a white stripe is drawn that resembles a “smile”. Depending on individual preferences, it can be of any shape (triangular, oval, square). The optimal strip thickness for a jacket is 2-4 millimeters.
- After the "smile" dry, cover the surface with fixer. Thanks to him, the manicure will not crack, it will give the nails a natural shine. Instead of the usual fixer, glitter varnish is sometimes used.

How to make a mirror manicure correctly?
There are several ways to create a beautiful mirror manicure. It is done using foil, reflective film or nail art varnish.
The easiest way at home is to use foil:
- cover the surface of the nail with varnish of any shade;
- without waiting until the varnish becomes dry, glue the foil on top, cut it along the contour of the nail plate;
- cover with fixer.

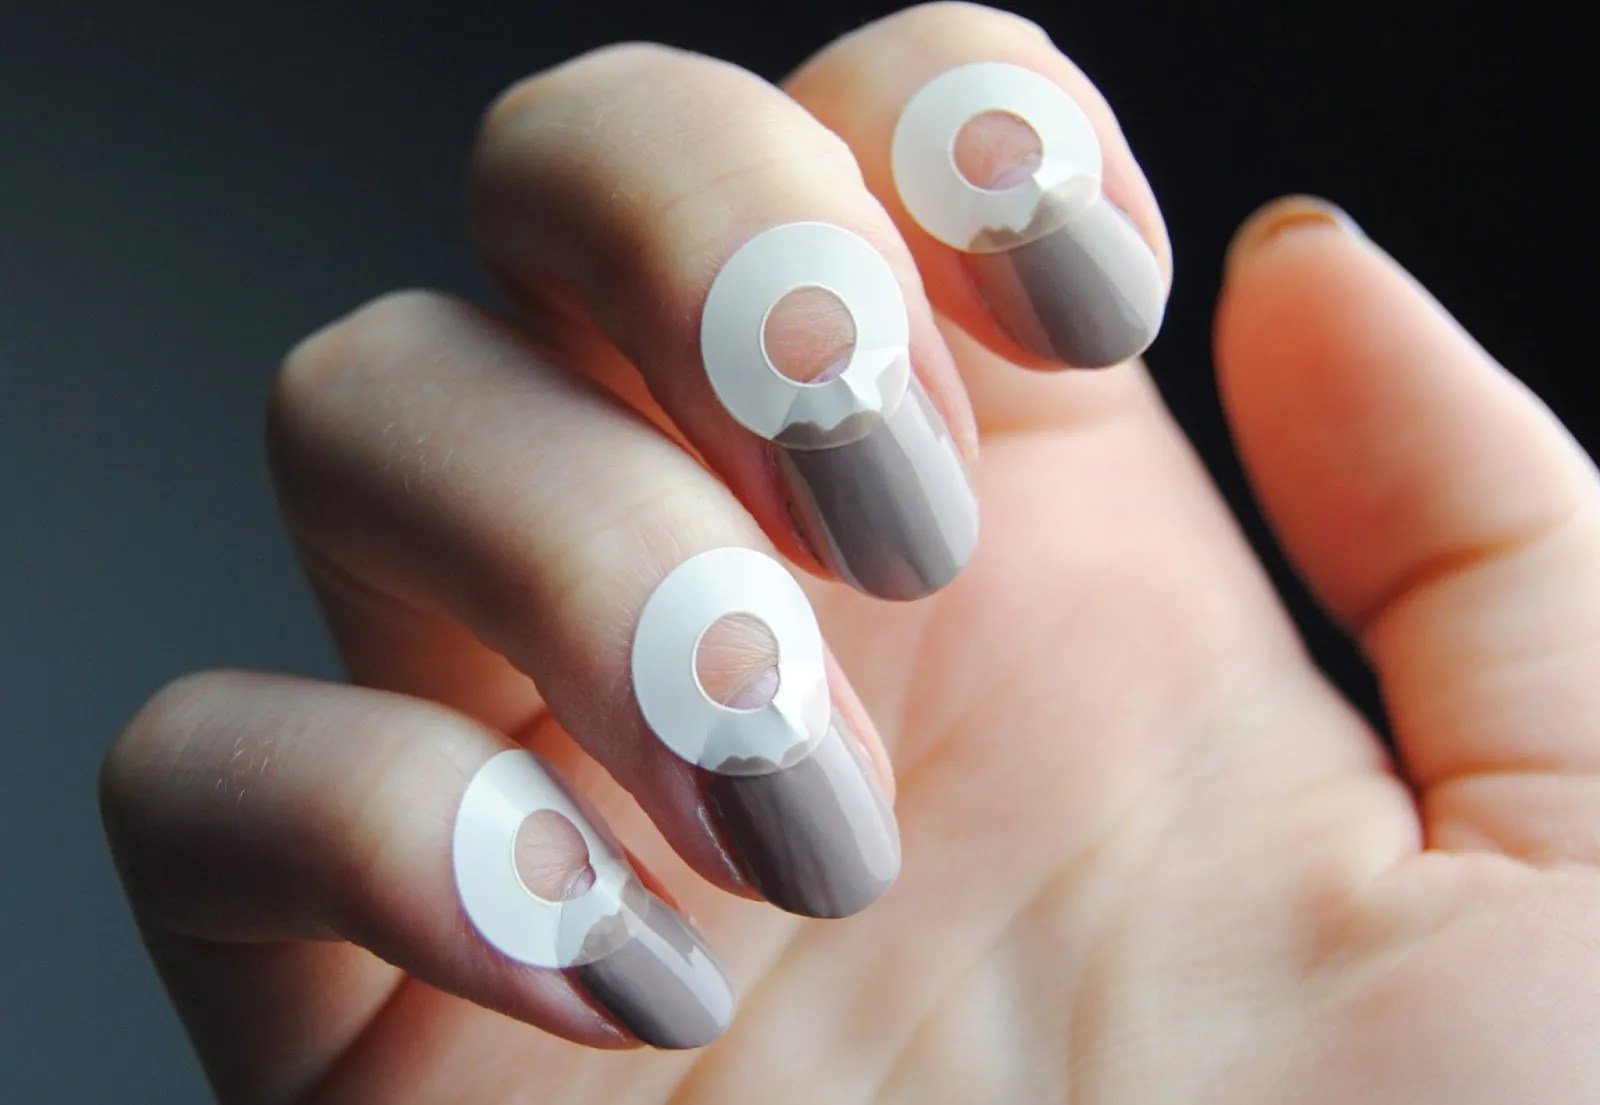
Elegant moon manicure
It is not difficult to create a moon manicure on your own. The technique of execution resembles a French manicure. Unlike a jacket, only the holes are covered with white varnish. You can paint the nails with both regular and gel polish.
Stages of creation moon manicure using gel polish:
- When working with gel polish, special means are used for degreasing, alcohol and ordinary tonic are not suitable. Professionals use preparations enriched with minerals and silicone.
- Next, the surface of the marigolds is painted over with gel varnish, and the holes are drawn. For an even image, it is advisable to use acrylic brushes. The holes can be decorated with rhinestones, for secure fixation, press gently with a stick. The nails are dried for two minutes under an ultraviolet lamp.
- Then the entire plate is painted with gel varnish, then placed under a lamp for two minutes and dried. For a rich color, apply a second coat.
- Completes the process of rubbing with a nail with a special tool to remove stickiness.
To create a moon manicure, can be used as contrasting shades
(green and yellow) and pastel ton (cream and white).
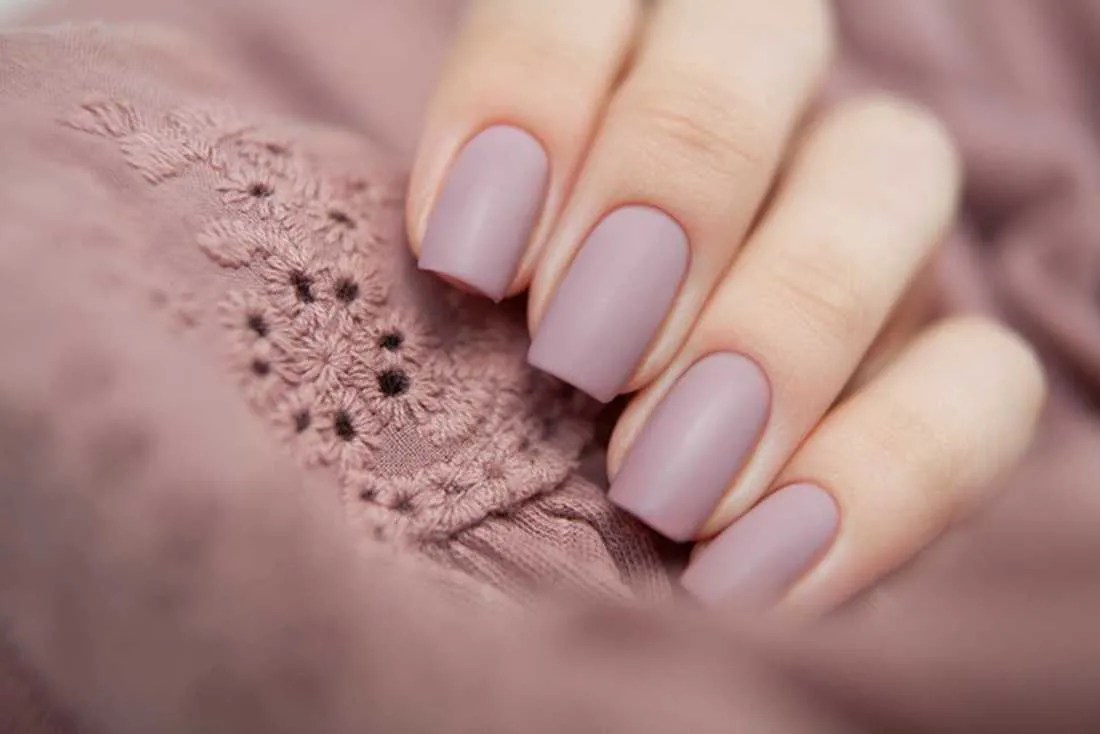
Velvet or matte manicure
In recent years, matte manicure has become especially popular. You can use both special velvet varnishes and ordinary ones.
Step-by-step instructions for creating a velvet manicure:
- When using regular varnish, apply it in several layers. Dry your nails over steam for a few seconds, keeping a distance of ten centimeters to burn yourself. After drying, the nails become dull.
- A quick and easy option is to apply a matt varnish.
- Using a special sand coating, after they dry, they turn into powder.
A matte manicure will look spectacular with a variety of textures. For example, you can cover your nails with a dark color, dot or draw lines. Velvet leopard manicure will look beautiful. Cover the nail plate with a light varnish, draw glossy dots on top, circle them with a matte varnish of a different shade. For example, you can put a dot in black and circle it in brown.
Water manicure
It is not so easy to make a water manicure. This method allows you to create unusual patterns, for this you need to purchase high-quality varnishes, show accuracy and skill.
Step-by-step instruction:
- The nails are painted with white varnish, this is necessary in order for the colors to look rich and bright.
- Varnish is dripped into a container with warm water, at intervals of a few seconds. You need to act quickly, otherwise the varnish will dry out, this will complicate the process.
- Draw the desired pattern with a toothpick.
- There are several schemes. The easiest is to draw circles starting from the center.
- Once the pattern is ready, dip your finger into the container perpendicular to the liquid for a few seconds.
- Using nail polish remover, remove excess nail polish.

Water manicure is interesting and original; it takes very little time to create it. For a quick effect, it is better to give preference to acrylic paints.
How to make an ombre manicure
Gradient manicure holds a special place in the hearts of many girls. Smooth transitions from one shade to another look fashionable and elegant. In the salon, an airbrush is used to create an ombre. Due to its ease of execution, a simple sponge will do at home. It should be flat and tight.
Steps for creating a gradient manicure:
- On the prepared nail plate, apply a base and white varnish.
- Cut out a small part of the kitchen sponge, apply stripes of varnish in different shades along the surface. You can combine cherry with white, sand or gold.
- Lightly blot the nail with a sponge. With strong pressure, a smooth transition will not work.
- Apply glitter and fixer to help hide the sponge marks.

Letter or newspaper manicure is a fashionable hit of recent seasons. Created with a newspaper, in just a couple of minutes. For the printed edition, ink is used that can be easily erased with alcohol. If the newspaper is turned over and rubbed over the back with rubbing alcohol, the letters will come down to the other surface.
Stages of creating a letter manicure:
- Prepare the nail plate in advance. Then apply a base and varnish in any shade except black.
- Place a small part of the printed matter back to the nail.
- Go over the newspaper a couple of times with a cotton ball dipped in alcohol.
- Once the letters are on the nail, apply the fixer.

To make a beautiful and unusual manicure on your own for everyone's strength, it is enough to make a little effort and accuracy.
In general, here we can say that the most important thing is to think over what exactly you want to get in the end, and only then do it. You need to think over all the points, since it often happens that when you start painting your nails, you realize that you are doing something wrong, or the wrong color of varnish has been chosen, etc., etc. Therefore, you need to determine the color of the varnish, stock up on manicure tools and start the procedure for home manicure.
A good manicure set costs a lot, since the material from which the tools are made and their high quality play an important role. It is better not to save money, and buy good manicure tools in the store, so that later you do not have to buy a new one. To make such a gift to yourself - there is nothing reprehensible in this, you can spend a little money. When there is no money at all, and you really want to have well-groomed pens, the world trading platform Aliexpress comes to the rescue. There you can buy millions of products at a relatively low price. For example take a look manicure sets.
Typically, a standard home manicure set consists of tweezers, two nail scissors (rounded and straight), a pusher and a cuticle stick.
A cosmetic pusher is a tool that is used for manicure and pedicure. Helps to push away and remove cuticles, give nails a neat and well-groomed look.

In addition, you also need to have a disinfectant nearby, a nail degreaser, cuticle oil and, perhaps, everything. Important recommendation: Before starting a manicure, be sure to disinfect all instruments. This is an important condition that will help protect yourself from possible problems.
After the tools for home manicure are prepared, it is time to start doing your manicure at home. And if there is an old varnish, then you need to remove it. This can be done using a special liquid.
Removing varnish
At first glance, it may seem that there is nothing difficult in removing varnish. However, this is not quite true. In addition to old polish, there may also be glitter on the nail, which is very difficult to remove. Before starting, you need to prepare a nail polish remover and a cotton pad. By the way, you need to choose a nail polish remover so that it does not contain acetone and its derivatives, since they are very harmful to nails. You may have to pay a little more, but as the saying goes, "for your beloved."
Cuticle removal
Before wiping off the nail polish, it is very important that the cuticles are not in the way. The cuticle can be removed in two ways: classical and European. 
The classic way involves preliminary softening of the cuticle. To do this, you need to make warm water, put your hands in a bath of water, hold them there for about 10-15 minutes, - the skin around the cuticle will become soft, which means you can remove it without any problems. Add a few drops of lemon juice or half a teaspoon of sea salt to a bath of water - this has an additional softening effect. After the cuticle is softened, it is necessary to trim the cuticle with tweezers. Instead of tweezers, you can use small nail scissors.
 European way consists in the fact that a special composition containing fruit acids is preliminarily applied to the cuticle. These products come in small bottles with a brush designed for easy application. After the product has been applied to the cuticle, you also need to wait 10 minutes, and then use a pusher to remove the remnants of the cuticle. This method is more gentle and suitable for those with sensitive skin.
After the cuticle has been removed, you need to apply a small amount of nail polish remover to a cotton pad and then wipe your nails, then lower your hands again for 3-5 minutes in warm water to give your fingers a rest.
Cutting nails correctly at home
Once the old nail polish has been removed, it's time to trim your nails. And here are some simple rules to help you do it right:
1. Never cut your nails directly under the root. Even if you want very short nails, it is better to leave a small part of the nail protruding above the nail plate, and then remove the excess with a file. Another reason why this should not be done is the likelihood of injury to the skin.
2. Cutting off nails, do not leave sharp corners. This is fraught with the fact that over time they can simply grow into the skin, which will cause very noticeable inconvenience.
3. In order to cut nails, you need to use only high-quality, high-tech materials, which must first be disinfected.
Filing nails
When filing, one rule must be observed - filing nails is recommended only in one direction, since this method is more gentle for the nail. The fact is that filing in different directions destroys the structure of the nail, and after that it can grow already exfoliating and brittle.
Before you start filing your nails, be sure to dry your nails. It is believed that if the nail is wet, then it is more susceptible to external factors.
Finger massage
If you go to a beauty salon to get a manicure, then for sure, the masters will offer to massage your hands before painting your nails. This is necessary for several reasons. Firstly, hand massage improves blood circulation, and secondly, it relaxes and tones the hands, relieves tension and fatigue.
Massage can be done in many ways, varying different techniques, however, there is some established sequence of actions.
First, you need to rub your hands in a circular motion for about a minute. After that, you must thoroughly massage each finger; should be repeated at least three times. Then it's time to move on to the palm, or rather, you need to start from the outside and gradually move towards the base.
The main effect of massage is to stimulate blood circulation, but it should also not be forgotten that the cream and / or other nutrients are absorbed much faster and better into the warmed skin of the hands.
Nail polish

Well, it's time to move on directly to the application of varnish. Whatever varnish is applied, it must be painted over in two layers, since this is the only way to get a truly deep and rich color. But it is important not to overdo it, otherwise there is a risk of getting a layer that is too thick, which, at the first opportunity, will immediately deteriorate. A home manicure requires some preparation, although it is considered fairly straightforward.
You need to paint your nails, starting from the little finger of your right hand, if you are right-handed, and moving towards the thumb. The first stroke should be done near the root and gradually, going up to the edge of the nail.
By the way, there is a significant difference between glossy varnish and matte finish. It is advised to apply matte varnishes in one layer, since only in this case, the color will be uniform and deep. For home manicure, matte varnishes should be used with great care.
In some cases, you can fix the effect with a transparent varnish containing special useful vitamins and minerals.
- How to get a matte manicure?
- Lunar manicure: creation scheme
- How to do a water manicure?
- How to make an ombre manicure?
- Ideas for a beautiful manicure
- The manicure that you do yourself has several unconditional advantages at once. Firstly, you do not need to sign up for the salon in advance and waste time on the road. Secondly, this skill can save you a lot of money. And thirdly, the procedure for creating a manicure can be really exciting. We have compiled a detailed beauty cheat sheet that will help to understand the issue even for those who have never held a nail file in their hands.
How to do a manicure for yourself?
Before you start using bright varnish or create complex nail art, you need to prepare the appropriate soil - in other words, do a basic manicure. Here's how to do it at home.
What do you need for a manicure?
© site
Of course, the list of what you need depends on many factors. For example, on what type of manicure you prefer:. But the standard set of tools you need looks something like this:
- nail polish remover,
- cotton pads or lint-free wipes,
- nail clippers or nail scissors,
- orange stick or cuticle pusher,
- cuticle remover (remover),
- file for shaping nails,
- file for polishing nails,
- hand cream,
- base coat for nails
Simple unedged manicure at home: step by step instructions
Have you prepared everything you need? Then make sure your work area is properly lit - and follow our instructions exactly.
Wipe your nails with nail polish remover
The first step is to remove the remnants of the old varnish with a cotton or lint-free cloth dampened with nail polish remover. It is better, by the way, to do it with a napkin whenever possible: cotton pads often leave small villi, due to which the varnish is then distributed unevenly. And even if there is no polish on the nails, still wipe the nail plate with nail polish remover to degrease it.

© site
Use scissors or nail clippers to trim your nails. If your nails are not too long, or you do not plan to shorten them significantly, you can skip this step and go straight to using the file.
Use a 180-200 grit file for natural nails. You can find out how to choose the right tool, and our detailed one will help you choose the right nail shape. Do not move the file in a right-to-left way, this can lead to delamination of the nails: move in one direction, in smooth movements. Round your nails very carefully and do not overdo it: if you file the nails too actively on the sides, this can lead to their ingrowth in the future.
In no case do not use the nail file immediately after taking a shower, the nail plate must be absolutely dry!

© site
Sand the edges
Use a buffing file to sand the edges of your nails to avoid delamination and lightly polish the surface. But, again, do not strive to achieve a mirror shine: it will be difficult for nail polish to "fix" on a perfectly smooth surface.

© site
Using an orange stick or a special pusher, gently push back the cuticle and pterygium - the lower layer of the cuticle, which is a thin film.

© site
Apply a special cuticle softener (remover), wait 20-30 seconds.

© site
Push back the cuticle again
Using an orange stick or a pusher, gently push back the cuticle again, being careful not to press hard on it. If you don't have a special remover on hand, you can use a greasy cream instead.

© site
If necessary, remove any burrs with nippers or scissors. Treat the skin of your hands with a cream.

© site
After removing the cuticle, use an alcohol-based liquid or nail polish remover. This will help remove remnants of the remover and degrease the surface of the nail. By the way, some beauty brands produce special degreasers for nails, they are also very effective and convenient to use.
Apply base coat
Be sure to use a base coat: it will prevent yellowing of the nail plate and provide better adhesion to the varnish. Spread the base in a thin layer, slightly stepping back from the cuticle. Do not skip this step, even if you plan to cover your nails with light varnish afterwards.

© site
Video tutorial on creating a manicure
Beauty blogger Lena Sevelenium has prepared a simple and understandable video tutorial on creating a basic manicure at home. We look!
Should you do a trim manicure?
Nowadays, the most popular is the procedure of unedged (European) manicure, the schemes for the creation of which we presented above. With such a manicure, the cuticle is not trimmed, but softened with the help of a special tool (remover), and then pushed back.
If you usually follow an unedged manicure scheme, it is best not to start trimming the cuticle: the more often you trim it, the rougher it becomes and the harder it is to remove it.
In addition, the cuticle acts as a barrier and protects the skin from infections. If you are still used to trimming (classic) manicure, but would like to switch to European, just stop trimming the cuticle, start using a remover - and be patient. Fortunately, the process is reversible, and if you refuse to cut the cuticle, with regular European manicure, the cuticle will become softer and thinner over time.
How to do a French manicure at home?

© iStock
French is one of the classic types of manicure. If the tip of the nail is highlighted with a contrasting strip, then it is a jacket in front of you. The canonical version assumes a combination of "pink translucent varnish plus a white strip", but today, more and more often in French manicure, different and also different textures are used - both shimmery, and glitter, and matte.
According to the latest trends, the colored line at the tip of the nail does not have to be straight. But if you want to create a classic version of the jacket, then this problem will be the main one that you have to solve.
The most common way is to use special stencils to create a jacket. You will only need to glue the stencil (it should start not right at the base of the nail, but step back a little from it) and mark the tip with varnish. When it dries, peel off the stencil: a perfectly even strip will remain on the nail.

© site
A French manicure brush, the edge of which is not straight or beveled, but with a semicircle "cut" in the center, will also help to quickly and conveniently draw an even strip. Such brushes are sold only in specialized stores, so you will have to spend some time looking for it, but it will save you a lot of time when creating a jacket.

© site
The third way (and perhaps the easiest one) is to buy special stickers for a jacket. You just need to glue the ready-made strip of the selected color to the edge of the nail.
French manicure: step by step photo instructions
For someone who is skillful enough to work with brushes for manicure, a jacket will be easy to do. You will need the actual brush itself (the thinnest of all possible), a transparent base, pale pink or varnish of another light shade, white or any colored varnish with which you will paint a strip on the tip of the nail, as well as a fixative varnish.
Apply a clear base coat.
Apply a light pink or beige varnish in two layers, wait a couple of minutes until it dries.

© site
With a thin artistic brush, carefully paint the tip of the nail with white or colored varnish, creating the very "smile" that distinguishes the jacket from other types of manicure.

© site
How to do a quartz manicure?
The nail plate with imitation of streaks and veins, as on the surface of quartz, is one of the main nail trends in recent years. How to repeat this image? First, stock up on a light pink varnish with a translucent texture, white varnish, a toothpick or a needle and, of course, base and topcoats.

© carbonfairy
Apply a base coat and paint your nails with a pale pink translucent varnish in several layers (for example, a varnish for a classic jacket is suitable). In this case, it is not so much the specific shade that is important as the texture: the varnish should not be dense, otherwise it will not work to create the effect of quartz.
Wait for the layers of pink varnish to dry properly, and start creating those very white "veins" that distinguish this type of manicure from the rest. Draw them with a toothpick, a needle or a special manicure brush with old or mother-of-pearl varnish typed on it. Draw the lines in a chaotic manner, and then, before the polish has time to dry, cover the nails with another layer of translucent pink polish so that the lines end up a little blurry.
Apply a clear top coat.
How to get a matte manicure?
To make a matte manicure, which has recently become a serious competitor to the usual glossy one, is easiest with the help of a special matte coating: many nail brands are producing these today. The coating can be colored or transparent - the latter can be supplemented with any other glossy varnish to turn it into a matte finish.
- You will need: nail polish remover or nail degreaser, cotton pad, color varnish of any shade, matte finish.

© site
Apply a special degreaser to your nails or wipe with a cotton pad dipped in nail polish remover.
Apply any varnish from your collection in two layers. It can be with a dense or translucent texture, with shimmer or glitter, metallic or pearlescent. But it is worth clarifying that an ordinary monochromatic varnish with a dense texture will look more impressive in combination with a matte top.

© site
Make sure that the coating is perfectly even, without the slightest flaws. A matte top will accentuate imperfections, so if you are not satisfied with something, it is better to repaint your nail. Also keep in mind that a matte finish can change the original shade of the varnish - for example, make it lighter. Apply a matte finish to your nail. The manicure is ready!

© site
You can learn about other ways how to create a matte manicure using available tools from.
How to do a marble manicure?

© greciiimua
Marble manicure resembles quartz in its appearance, since it is made according to the same principle. In this case, it is proposed to create a pattern on the nails that imitates the surface of a marble tile with multi-colored veins. How to create it quickly?
- You will need: a base clear coat, white varnish, black varnish, gray varnish, a manicure or fine art brush, a sponge, a clear top coat.
As usual, start by applying a layer of base coat to protect the nail plate.
© site
Apply white varnish in one or two coats, depending on how dense the texture is. Your task is to create a coverage without "bald spots". Wait for the varnish to dry properly.

© site
Using black varnish, using a special manicure brush or the thinnest art brush, paint thin stripes on the nails in a chaotic manner.
Place a few dots on the nails with gray varnish. Do this when the black lines are dry so as not to smudge the previous coat of varnish.
Gently apply a clean cosmetic sponge to the surface of the nail: this action will help create those "marble" stains.

© esnail_la
Secure the effect with a transparent cover.
DIY mirror manicure
The easiest way to create a mirror manicure is to use a special glitter powder (rub), which can be found in specialized stores. Also, you will have to use not a regular, but a gel polish. In addition, you will need special gel polish coatings (base and top), a UV lamp and a cosmetic sponge.
Apply a special transparent base for gel polish, hold your nails under a UV lamp for two minutes, so that the coating has time to harden.

To make any of the manicure presented, you do not need any special tools (stamping, stickers, etc.) - only varnish and improvised means. The techniques are elementary, you can handle it even if you don't have artistic talent. Everything is so easy that you can repaint your nails at least every day, trying new designs.
Flower fantasy
For this beautiful and delicate manicure, you need a dots (ball-tipped wand). Many girls have it, and if not, then a hairpin or invisible will perfectly cope with its functions.
You can do it exactly like in the video, or you can experiment with the shades and size of flowers.
Neon manicure
This striking design is perfect for spring and summer. Colors can be matched to clothes using the appropriate shades of varnish. If you do not have a small diameter dots, use a toothpick.
Bokeh effect
In photography, bokeh is a way of blurring the background. A similar effect can be achieved on nails. To do this, you will need a lot of pink and red varnishes (in fact, the color scheme can be any), as well as a coating of a metallic shade.
The original jacket
This design is suitable for everyday manicure as well as for special events (wedding or graduation). White varnish with a thin brush, small diameter dots - and an elegant pattern appears on the nails in a matter of minutes.
You can also use this technique by painting from the base of the nail and experimenting with colors. Then the manicure turns out to be bright in summer.
French vice versa
For a classic French manicure, frame the tip of the nail. But, if you highlight the base of the nail with white, it will turn out beautifully too. Wait for the base polish to dry and paint over the base of the nail with white varnish using a semicircular stencil (can be cut from adhesive paper).
Strict lines
It is easy to find adhesive tape for nail art in cosmetic stores that have sections with nail products. By sticking this on your nails, you will get a stylish manicure with strict lines. An excellent solution for the office.
Glitter
Glitter varnishes are indispensable in nail design. After all, glitters come in small and large glitters, of different colors and textures. With their help, you can make a stunning manicure, no worse than a salon, for example, using the same gradient effect.
You can also highlight the ring finger with glitter varnish. It's trendy.
Newspaper print
The letters on the nails look very stylish. Soak newsprint with rubbing alcohol to transfer the letters to your nails. As a base, you can use any light varnish, as well as a gradient. You already know how to do it.
Space
To create this spectacular manicure, you need black, white and colored varnishes, as well as a sponge. It can be used to create stars, the Milky Way, and the galactic glow. It all depends on your imagination.
Frosty pattern
The technique of painting on raw varnish opens up a lot of space for the flight of imagination. Armed with a toothpick, you can create real impressionist canvases on your nails.
In winter, such a design, similar to frosty patterns on the windows, will be relevant.
Geometry
Smooth lines and strict angles on the nails look impressive. True, if you are not a professional manicure master, it is difficult to portray them. But there is a technique with which you can draw a neat geometric pattern on your nails easily and quickly.
Denim manicure
This design is suitable for girls who prefer casual style or sportswear. If you don't have a nail art marker, use a black polish with a fine brush. There may be difficulties with the "pocket", but you will probably draw a denim stitch without much difficulty.
Sneakers
If it's easy for you to draw a straight line, you can easily complete this design. First, dot with dots, and then connect them with white varnish with a thin brush. See for yourself how simple it is.
Stylish hearts
Insulating tape is indispensable in the household, not only on. You can cut stencils out of it and make an elegant nail design with hearts. Those who do not like black varnish can choose a different shade.
Rainbow zebra
Make a bright gradient, and then paint the stripes with black varnish with a thin brush. The result will be a pattern similar to the color of a zebra, only rainbow colored. However, any background can be used in this design.
Bright rhombuses
Another summer design option. For its execution, you need a beveled brush like the one with which you draw eyebrows and arrows in front of the eyes. Instead of acrylic paints, you can use multi-colored glossy varnishes.
Embossed manicure
Apply a clear polish with glitter to the top coat (it can be of any color), let it grab a little and, armed with dental floss, give the nails a relief. When dry, secure with clear varnish.
British
Manicure in the colors of the British flag is quite popular. Want to keep up with fashion but can't draw at all? Cut out triangular stencils from gummed paper or duct tape and paint your nails as shown in the video.
Write in the comments which of the presented designs you like the most. Also share your original ideas for manicure, which are easy to implement at home.