DIY paper Santa Claus
Master class “Santa Claus. Origami"
Purpose: this master class is intended for creative people: children and parents. Can be a gift for grandparents New Year.
Target: making a Santa Claus figurine using the origami technique.
Tasks:
- learn new techniques for working with paper,
- talk about the sequence and techniques for making a Santa Claus figurine using the origami technique;
- develop imagination, creativity,
- develop fine motor skills,
- cultivate perseverance, accuracy, and respect for work.
The most fun and long-awaited holiday is New Year. Both adults and children look forward to it. At this time, all dreams come true, everyone receives a gift. And they are always presented by the kind and beloved Grandfather Frost.
Look, what a grandfather -
Dressed in a white fur coat,
Frost in long hair
And icicles on the mustache!
He has (wow!)
Ice beard,
And when he nods
A quiet ringing is heard!
And they rush to this ringing
Kids from all sides -
Both boys and girls
And hares and squirrels...
Their grandfather, by the way,
Sprinkles with white snow.
It’s immediately obvious that grandfather loves
And children, and white...
From embroidered mittens
Grandfather releases tits.
They scurry around next to him,
Sing winter songs!
Hitched to the road
Bag embroidered with gold,
He, under the snow-star flag,
He's coming towards us with great strides!
And leads by the hand
Little granddaughter!
Not a single New Year's holiday can do without this hero. Usually this is a respected old man in a fur coat, hat, beard and mustache. He has a wonderful staff and, of course, a bag of gifts. Let's make the figure of Santa Claus ourselves using the origami technique.
Description:
For work we will need: colored single-sided paper, scissors and felt-tip pens.
Step 1. Take a sheet of colored paper (the fur coat can be blue or red, or just white). Fold the corner of the rectangle over, bringing the short side down onto the long side.
Step 2. Cut a strip along the resulting triangle.

Step 3. Expand the shape. Arrange the square in a diamond shape. First bend one side towards the midline.

Step 4. Then fold the other side towards the middle. It will work out basic form"kite".

Step 5. Lift the bottom corner up, dividing the resulting shape in half.

Step 6: Turn the folded sheet over.

Step 7. Lower the top corner, about 2 centimeters from the corner, this will be the face of Santa Claus.

Step 8. Fold back another 1 centimeter to open the cap.

Step 9. Now fold the bottom corners back, on one side and then on the other.

Step 10. You will get this figurine of Santa Claus.

Step 11. Now you need to draw his eyes.

Now you can give it to your grandmother by putting a small chocolate or candy inside.

And we made these Santa Clauses at school last year.

And this is me and my classmates.
Always waiting magical holiday the whole family gets involved in making New Year's decorations for green beauty and home. And the main symbol is rightfully considered the most favorite craft New Year's holiday- Father Frost.
We suggest you make Santa Claus out of paper. With this simple material You can create real masterpieces with your own hands. You just need to devote a little time to this activity and show all your limitless imagination.


Study our master classes on making Santa Claus with your own hands and you will be able to please your loved ones with unique New Year's gifts made with soul and attention.
Modular origami Santa Claus - master class


We will need: sheets of A4 paper: blue- 14 pieces for 211 modules, white - 13 pieces for 207 modules, pink - 1 sheet for 17 modules.
We divide each sheet into 16 rectangles, from which we will make modules.

Step one. Fold the rectangular sheet in half lengthwise. Using another fold, we outline the middle line.

Step two. We bend the edges of the rectangle folded along the middle, as shown in the photo. Turn the piece over and fold the bottom edges up.

Step three. We fold the corners, bending them over the large triangle, and then bend these corners inward. We bend the resulting figure in half - so we have learned how to make a module. Now, in the same way, we make the required number of modules indicated above from the rest of the paper.

Step four. Let's start making crafts. We take 5 white modules and arrange them as in the photo (we place the top row module with the smaller side up). Next, we assemble a chain of 3 rows of white modules. Each row consists of 25 pieces.

Step five. We close the chain into a ring and turn it over. Next, we perform 3 rows with blue modules. From the seventh row we make a beard. To do this, insert 2 white modules with the smaller side facing out. We insert the remaining blue modules of row 7 as usual.

Step five. In the 8th row we fasten 3 white modules, as usual, with the long side, the remaining modules are blue. With each next row we add one white module on each side of the beard.

Step six. In the 11th row we insert one red module into the middle of the beard - this is the mouth. Row 12 consists of white modules. We put them on blue modules with the smaller side facing out, and on white modules (beard) with the long side, as usual. In the 13th row, opposite the red module, we put on the white one with the long side outward, and 2 pink modules each with the smaller side (see photo).

Step seven. In the 14th row we put on 6 pink modules with the smaller side, and we put on white modules as usual. Row 15 - we put on 17 white modules and 8 pink ones. In the 16th and 17th rows we put on all the white modules with the smaller side facing out - this is the hat.

Step eight. The last 18th row consists of blue modules with the smaller side facing out. We assemble hands from 3 white modules and 5 blue ones. Glue the finished eyes and insert the nose (part of a children's mosaic). Santa Claus made from paper using modular origami technique is ready. We hope that after studying the master class, the Snow Maiden, made in the same technique, will appear next to your Santa Claus.
Santa Claus made of paper using origami technique - master class

We will need colored paper and a little patience. We offer you several schemes according to which you can easily make Santa Claus with your own skillful hands. You can hang it on the Christmas tree and decorate it greeting card or give it to friends for New Year.


DIY Santa Claus from colored paper - master class

We will need: red paper, pink for the face, white paper for the beard, cotton wool, felt-tip pens, scissors and glue.

Operating procedure:
- Using a compass or a small plate, draw a semicircle on red paper. We cut it out, fold it into a cone and glue it together.
- We cut out an oval from pink paper, draw eyes and a nose on it with a felt-tip pen and glue the face of Santa Claus to the cone.
- Next, glue on the beard and hat from white paper. To do this, cut out white strips, cut fringe on them and twist it with scissors. We glue strips with twisted fringe to the cone at the bottom of the face in several rows, giving the beard fullness. We make a hat from the same strip. A beard, hat and fur coat for Santa Claus can be made from cotton wool, which is glued to the cone along its lower edge, on the face and top part cone An elegant Santa Claus made from paper, made by yourself, is ready. Using a cone, using your imagination, you can make a Snow Maiden.
Santa Claus from colored paper strips- master class

We will need: thick colored paper, white corrugated cardboard, scissors and glue.

Operating procedure:
- Cut out 6 strips measuring 1 cm by 15 cm and 6 strips measuring 1 cm by 10 cm from red paper. Glue them into rings. We assemble a ball from 6 large rings, fastening it with glue at the top and bottom. Using small rings, we assemble a smaller ball using the same pattern. The result is the torso and head of Santa Claus.
- Cut out a small circle for the face from pink or orange paper. Cut out a mustache, beard and hat of any size from corrugated cardboard and decorate the face with them. Cut out and glue the eyes and nose. Glue the face to a small ball, which we then glue to the body. Cut out mittens and felt boots from cardboard and glue them to the craft. The New Year's symbol made from paper, created with your own hands, is ready.
A few more ideas for creating Santa Claus with your own hands
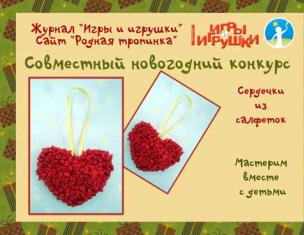
By using your imagination and using the patterns we have proposed, you can make Santa Claus even from a paper napkin.

A paper cone allows you to make many versions of Santa Claus with your own hands.


And this family of Santa Clauses is made from ordinary toilet paper rolls.

Father Frost and Snow Maiden using the popular modular origami technique.

We hope that our master classes helped you understand the technique of making Santa Claus from paper and encouraged you to be creative. Use a little imagination and create your own kind Grandfather or even several. They will decorate your holiday and create a magical mood!
Hello dear masters and craftswomen. I present to your attention a master class on making such an origami swan, and I called it “Swan in Pink”. How to make an origami swan? We will make a pink drawing, highlight the swan with pink modules around the perimeter and place it on a round stand, and also glue small eyes. Please watch this video on making an origami swan. IN […]
Hello dear masters and craftswomen! Today I bring to your attention a master class on making a tricolor Swan from triangular modules. It would seem that what else can you come up with, what other options are there for making Swans using the modular origami technique. But it turns out there are still options and this is not the last thing in my arsenal. The tricolor swan is so simple […]
Hello dear masters and craftswomen! I present to your attention new master class for making a Swan in black from 3D modules. In the last lesson we made a Swan in red, but now I decided to change the style a little and make a Swan in black. The scheme is not complicated and will suit anyone, even a beginner in modular origami. Specially […]
Hello dear masters and craftswomen! I bring to your attention a new master class on making a Swan in red shades. On the Internet you can find a huge number various schemes and master classes on making Swans using the modular origami technique. I'm sure you've never seen a swan like this before. This scheme is quite simple and even [...]
Swan in blue. Video tutorials and diagram. Part 3. In the third part of the master class, I offer you two video lessons and detailed diagram origami how to make a swan. The first video shows how to make a swan's neck and how to make a small stand. The second video talks about how to glue a swan better and faster. Lesson 6 (neck and […]
Swan in blue. Video tutorials and diagram. Part 2. In the second part of the “Swans in Blue” tutorial we finish making the body. I have prepared for you two video tutorials and a detailed diagram of an origami swan from modules. To assemble a swan you will need 1438 modules of 1/16 size, of which: 317 - purple modules 471 - blue modules 552 - blue […]
Swan in blue. Video tutorials and diagram. Part 1. I bring to your attention a new master class on making an origami swan from paper from 3D origami modules. The design is quite unusual and the appearance of the wing is not quite classic. In the photo you can see small through holes and a mesh pattern. I'll be honest - the scheme is quite complicated! Especially for this scheme I […]
“Rainbow Swan” diagram and video tutorials (part 3). The third part of the “Rainbow Swan” master class consists of three video tutorials on assembling the stand. And I also decided that a video tutorial on gluing the “Rainbow Swan” would be very useful for you. Lesson 5 (stand part 1) Lesson 6 (stand part 2) Lesson 7 (stand part 3) […]
Crafts for the New Year can be very funny and unusual. Their subject matter may remain quite traditional:
We offer you a master class on how to make modular origami Santa Claus and the Snow Maiden from paper. The craft is truly capable of arousing the admiration of guests, your friends and acquaintances. And if your child takes it to school, he will clearly receive recognition from classmates and teachers. So, here is a diagram for assembling Santa Claus from modules.
A master class on how to make such paper blanks in the form of triangles is also not difficult. We take a sheet of paper and along the edge we divide the short side of the sheet into six segments of three and a half centimeters each. In the same way, we divide the long side of a sheet of paper into six segments of five centimeters each. We draw lines to make rectangles and cut along the marked lines. The second way to make paper origami blanks for the figure of Santa Claus is as follows. Take a sheet and fold its long side in half and cut it. Without laying out the resulting parts, we bend the sheet in three layers in the form of a wave. Then we cut along the fold lines, and the resulting rectangles are cut into three parts again. The resulting rectangles must be folded in half on the short side, then in half again. We turn the second fold back and bend the corners along the second fold line so that we get an airplane. We bend the corners and sides to make a triangle. By folding the triangle in half again, we get one of the modules from which we will subsequently make a modular origami Santa Claus and Snow Maiden. Continuing our master class, we will assemble from required quantity prepared modules figure of Santa Claus.
Assembly diagram
Our modular origami Santa Claus is almost ready. Next, we create hands by taking one, two, three, and again two red modules and three white ones. One red module will connect the torso of Santa Claus and his arms. We do this with both hands. Then we cut out mittens from red paper: it is better to glue them to the hands. We attach the arms to the body. We cut out the eyes from white and black paper and glue them on as well. Modular origami Santa Claus is finished. As the master class shows, the assembly scheme is simple, but quite painstaking and time-consuming. However, such a Santa Claus will serve as a worthy decoration for any Christmas tree.
Video master class
Snow Maiden
- 274 white,
- and 78 yellow.
- We lay out forty pieces of white modules in a circle.
- repeat the previous one.
- Turn it inside out and lay out another similar row.
- Another similar row.
- thirty blue and three white.
- Thirty-one blue and two white.
- we lay out three white ones in a row, imitating fur on a fur coat, in four places we randomly place one white module at a time - this is an imitation of snowflakes, two modules yellow will play the role of braids, we evenly distribute twenty-four blue ones between them.
- For a fur coat, two are white, for snowflakes, two are white, one is yellow for a braid, and twenty-two are blue.
- for a fur coat we take three more white colors, for snowflakes - one white each, for a braid - two yellow, then twenty-four blue.
- For a fur coat, two colors are white, for a braid - one yellow, thirty blue.
- For a fur coat - three white, for a braid - two yellow, twenty-four blue.
- For a fur coat - two white, for a braid one white, twenty-six blue.
- for a fur coat - three white, for a braid - two white, twenty-four blue.
- for a fur coat - two white, for a braid - one yellow, twenty-two blue.
- for a fur coat - three white, for a braid - two yellow, twenty-nine blue.
- for a fur coat - two white, for a braid - one yellow, twenty-two blue.
- for a fur coat - three white, for a braid - two yellow, on each side eight blue.
- Eighteen are blue, two are white for the fur coat, and one is yellow for the braid.
- Ten are blue, three are white for the fur coat, two are yellow for the braid.
- Twelve are blue, for the fur coat - two white, for the braid - one yellow.
- Thirteen are white and two are yellow.
- Ten are white and one is yellow.
- Eight are blue, two are yellow and one is white.
- Eight are blue, one is yellow and two are white.
- Back side down, nine pieces are white and two are yellow.
- Six pieces are white, four are yellow.
- Five pieces each in white and yellow.
- Eight are white, six are yellow.
- Six are white, seven are yellow. You can insert 1 pink one (mouth) in the middle.
- Six are white and eight are yellow.
- Seven pieces each of white and yellow.
- Four are white, eight are yellow. Can be inserted at a distance of 2 green (eyes).
- Five are white, eight are yellow.
You can see it here step by step photo— how to make the Snow Maiden from modules.
DIY Santa Claus from modules
Master class. "Santa Claus" craft from paper modules
Purpose: This master class is intended for fans of modular origami. This toy can be a decoration Christmas tree either as a gift, or to take part in the New Year's exhibition.
Target: Learn to create a figure of Santa Claus from an ordinary one paper sheet. To cultivate imagination, perseverance and interest in three-dimensional modules when assembling figures.
Master class: “Santa Claus” craft from paper modules
Modular origami. Father Frost
When a whole figure is assembled from large quantity identical triangles, sometimes glue is used when gluing the bottom row for strength. The art of origami itself is a very common type of technique for working with paper. Creating a variety of figures from a regular sheet office paper- the activity is very exciting, but requires patience and perseverance. The figure is made up of many small details, the texture itself finished crafts similar to knitted fabric, which is knitted from thick threads. When assembled, origami modules are held together by friction and allow the figure to be given a variety of shapes.
This is the kind of Santa Claus we will make with you
Santa Claus - Red Nose
There is a hut in a dense forest,
It has carvings with patterns,
And a feather bed
Which one is hard to sleep on:
Instead of fluff in that feather bed
Only stars-snowflakes,
Ice blanket
Replaces a blanket.
And Moroz lives in the hut
And it's called Red Nose.
It's cold at times
Covers the ground with white snow.
Helps animals too -
Gives snow pillows,
Covers with white fluff,
Whispers songs in your ear.
The gray wolf howls -
She can't sleep from the cold.
And Frost from night to morning
Insulates her hole.
And in the den there is a clubfoot,
Instead of honey, he licks his paw.
Let the frost crackle on the roof,
The bear doesn't hear anything!
Perched on a pine tree,
An owl hoots in his sleep:
"Wow, and the cold is cold,
Never get warm!"
Santa Claus walks through the forest
And he puts things in order:
He pine nuts
Sprinkles it for the squirrels for fun.
I met a red fox -
Gave her mittens.
And he gave his sheepskin coat to the wolf,
Because the wolf was trembling.
This Santa Claus
What is called Red Nose,
Helps all animals
And it saves you from the cold.
Tasks:
Introduce in detail the technique of performing origami
Learn how to create a three-dimensional toy
Teach basic techniques
Step-by-step process for completing the work:
For work we will need: red, pink and white paper, eyes, nose, scissors
First we do triangular modules from a red sheet of office paper
We take a sheet of paper and prepare it for making triangles as shown in the photo