A man's tie in the history of its development went through several stages: a semblance of a ribbon around the neck, as a confirmation of the status of a man, neckerchief, which was tied in all sorts of ways and knots, frill, lush collars with ribbons and so on ...
Jesse Langsdorf(an American entrepreneur) patented a tie in the form in which it is still widely used today: sewn from three slanting parts. This significant event took place in 1924, since then the fashion for the width, the color of the tie has changed many times, but the main trends in the cut have remained.
Is one of the few accessories available in business style... Sew ties from various materials: silk, wool, mixed fabrics, polyester. Many women wear men's ties with pleasure and very skillfully, although manufacturers also sew them especially for women.
I have a weakness for men's ties made of natural silk - I have a whole collection of them. Sometimes my friends give me ties, friends, acquaintances give me those ties that have become irrelevant. I buy silk ties at sales for 2-3 dollars apiece - I can’t walk by ... And now I have accumulated a considerable collection of ties that are simply bored in the closet. Well, why don't they turn into material for needlework ...
On the Internet, I once discovered a photograph of a woman's jewelry that can be used to refresh a plain sweater or collarless blouse. The author of the idea was not listed, but, to be honest, I only reproduced this idea in the first version of the decoration.
We need:
- tie;
- a needle and thread to match the tie;
- button or brooch;
- tailor's pins;
- ruler, crayon (optional).


The second option, which was born quite by accident: I pulled the thread with which the tie was sewn, and ... we look further.
You will need:
- tie;
- a needle and thread to match the tie.

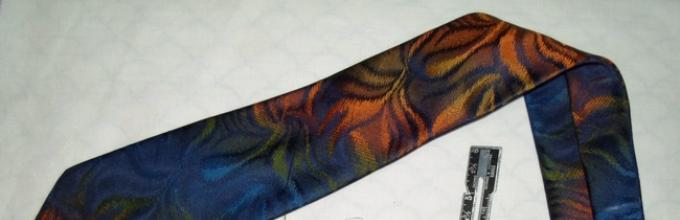
Good, high-quality ties on the back are sewn, as a rule, with sparse stitches and very strong thread. If you pull this thread, the tie is gathered in beautiful folds. Especially soft and delicate folds are obtained on wide ties made of natural silk. It is almost impossible to break the thread with your hands - it is very strong.
1.
We are looking for the first stitch on the wrong side of the tie from its wide side. We pull gently by the thread and form the folds to the length we need. You can also pull off the tie at the right distance from the narrow side, making counter folds.

And also where did this accessory come from and what it meant. Now we are touching on a completely different topic - what to do if the tie is worn out, or just doesn't like it? What to do with the heaps of ties presented to her husband, which absolutely do not suit him? It's a pity to throw it away, there is no one to give it to anyone, even tie them up with tomatoes in the spring! Dear ladies, there is a way out! And not alone. Ten ways to use wisely the old "cravate", as the French call them.
1.Bags and clutches
If a tie fell into the hands of a passionate fan of patchwork, there can be no question of throwing it away! For real needlewomen, throwing away some seedy shred is a whole problem. They are ready to store it for years before it finds its use, and here is a whole tie! After all, you can cut it into bright shreds and sew whole masterpieces, be it a bag, patchwork quilt or a colorful plaid. Inspiration bag options:

2.Creative wardrobe: dresses, skirts, vests and belts from old ties
A dozen out-of-fashion ties, a bit of sewing and tailoring, one free evening and voila! The original, unlike anything new thing is ready! Moreover, you do not need to be a professional seamstress to understand that such things are easy to sew! It is enough to open the old ties and carefully sew them together, taking into account the peculiarities of your figure.

Nice detail - jeans with a tie hem at the bottom of the legs:
3.Bijouterie
You have many options here. You can cut out a stylish strap or cover a finished wooden blank for bracelets with a piece of an old tie, you can sew an original brooch or weave a hair band ... It's up to you. Small for inspiration:
Another master class on how to sew an unusual necklace from a tie:
A cute element of clothing decor - a heart made of two ties:
Beads "in a case":
4. Hats
Such hats look very stylish and original. Moreover, retro is back in fashion!
5 pillows
Another option for those who are fond of patchwork. You can cut ties into rags and sew a pillow cover out of them, or you can cut them into even ribbons and weave them beautifully.
Step 1

But! Work ties - only dry-cleaned, they cannot be washed, you can see for yourself what they turn into.
Step 2

First, we strip off all the tags and fasteners.

All ties are hand-sewn with a strong thread, so you just need to pull this thread and the tie will open.

We take out the inner gasket, but do not throw it away, it will be useful to us too!
And we rip off the triangular pads at the ends of the tie.
Step 3
Italians have a tradition of throwing out old furniture before the New Year, my husband gets rid of old ties. Therefore, I have a lot of them. This is good - they will be enough for me for the whole year.do it yourself


We iron both the gasket and the tie from the inside out.
Step 4

We begin to mark the tie from the narrow end. Divide the tie in half lengthwise and set aside 4 cm in both directions from the middle. Cut off the excess.

We continue the lines to the wide part. It fits 4 strips of 4 cm. We cut the tie into strips. Since the tie is made of jacquard, more often silk, dense and cut along the bias, we will get wonderful ones!
Step 5

At the ends of the segments, we cut the inlay at 45 degrees.

We fold the ends of the beys at right angles and grind them. It turned out three seams.

Iron the allowances and cut the protruding ends.

Voila! We got 4 meters from one tie.

It remains to wind the bias tape into a roll and pin it off with a pin.
But that is not all!
Step 6
From the tie strip, which is also cut obliquely, you get excellent sliders for jackets and coats!
We cut out two window frames 20x5 cm. They can be used in jackets and coats.

Out of 5 ties, I made five pairs of skateboards and a 20 m thick silk bias tape with a small pattern, which is great for:
Edging of allowances and waistband of trousers and skirts;

Edging of the bottom, stand and slits of the sleeves at the shirt;


Decorations on the inside of jackets and coats.
do it yourself

I have a whole chest with such slanting inlays and tie-rollers, which I constantly look into when sewing coats and jackets. They help me out a lot! Now they will help you out too. In addition, this greatly saves the sewing budget, because for the edging of one coat, you will have to buy at least 0.5 m of silk jacquard, and the prices for it bite!

Svetlana Khatskevich
Svetlana graduated from a university with a degree in sewing production engineer. He has been teaching sewing technology for over 20 years. She is a senior lecturer at Burda Academy. We know Svetlana from her work on the site since its inception. She generously shares her knowledge and infects her with her love of sewing.
Sveta leads her pages to
It takes quite a bit of effort to put a smile on your daddy's face. A tie-shaped souvenir would be a great option for this purpose. Also, this self-made masterpiece will become good gift and for a brother, godson, friend, neighbor, grandfather, boss, father-in-law, nephew, godfather ...
What can be used to make an original tie?
A creative gift is very easy to make from paper and cardboard, for example, using the simple origami technique. The purpose of this technique is to facilitate the process of inexperienced or disabled people, also most suitable for children. When creating figures in simple origami, a minimum of folds is sought, which reflect the main features of the figure that folds.

This designer tie can be decorated in a wide variety of ways. And help in this will already be finished photos tie crafts, of which there are more than enough in the international network.


Paper tie idea
The process of creating a unique masterpiece:
- for a start, according to a ready-made template, 2 pieces are cut from the cardboard. identical ties;
- after that, you should prepare jewelry for the tie, various paper figures will be an excellent option;
- then, it is advisable to carefully glue the two parts of the tie;
- now, you need to glue the already cut paper figures on front side manufacturing;
- now you need to use a hole punch to make two holes on the tie, which is needed for decoration with braid;
- at the end - the braid is threaded through the holes and you're done!


Gift-tie
For this purpose, you will need the following consumables:
- cardboard of absolutely any color;
- hole puncher;
- shiny gel glue;
- scissors;
- serving napkins in two colors;
- PVA glue;
- simple pencil.


Tie gift making process
First, you need to draw a tie and stars on cardboard (you will need it for decoration). Then, with the help of scissors, you need to cut it all out. Now you need to lay out the stars on the tie itself and circle them with a simple pencil. With the help of a hole punch, two holes are made for the ribbon at the top of the tie. It is advisable to prepare napkin balls that can be made in the following ways:
- napkins cut into small squares, roll into balls;
- torn napkins roll into small balls.

Now PVA glue is applied to the traced stars. After that, the napkin balls are stacked quite tightly against each other. It is important here that all the stars are tightly pasted over with one-color balls. Then, along the edge of the tie, an edging from napkin balls of a different color is glued. It is also important that the space that remains is pasted over with self-made decorations in a third color.

After that, a shiny gel glue is applied to the stars. At the very end, a ribbon is inserted into the holes, which is glued with tape on the back.

Unique tie
Materials:
- multi-colored cardboard - burgundy, black, blue, yellow;
- cut out pictures - cars, airplanes, ships, military equipment, etc .;
- corrugated paper - burgundy, black, blue, yellow;
- scissors;
- glue;
- napkin;
- oilcloth.

The process of creating a designer craft:
- From the very beginning, you need to cut a tie from a ready-made template. After that, using scissors with corrugated paper a rectangle of about 5 * 20 cm is cut out.
- Now you need to roll it up with a tube and glue it to the tie - this is how you get the braid. At the end, it is advisable to glue the cut pictures to the front side.
- Designer ties that have no analogues - ready!

Tie templates and folding patterns
For example, such tie templates can be useful for further self-made crafts - a designer tie. It is recommended to save and print them later.

Some examples of tie templates are provided for ribbon decoration. Their upper part is folded and fastened with glue to thread such an element of decoration.


Postcard "shirt with tie"
A very good substitute for a gift-tie will be original postcard in the form of a shirt with a tie, which is also very easy to make.

The process of creating a unique postcard:
At the very beginning, a base is made for the postcard, a sheet of cardboard must be folded exactly in half. Then a shirt should be drawn on cardboard of a different color. After that, it is advisable to cut out the drawn shape. Now it's time to glue it to the base of the postcard. Now you need to draw and cut out the main element - the tie.

At this stage of the work, you need to glue the tie. Then you should open the postcard and write congratulations and wishes with the help of felt-tip pens.

At the very end, you need to decorate the creative postcard, relying on your taste. That's all done!


Conclusion
As many experiments show, the manufacture of non-standard and bright crafts do it yourself - a very interesting and exciting process. He is to the liking of both children of all ages and adults.


An important factor is also the fact that such an activity contributes to the motor skills of thinking, the manifestation of imagination and the improvement of creative abilities.

Photo of crafts of a tie


Surely your dad has a whole bunch of old ties. And although their condition may still be quite excellent, the shape and style have long been outdated. Yes, and today no one wears such colors. We suggest remaking old ties into a stylish pillowcase for a sofa cushion.
As a rule, ties were always sewn from very high quality silk, unusually durable fabric. These traditions in sewing real men's accessories have remained relevant to this day. And it plays into our hands!
The author of the master class suggested alternating ties of only two colors. It is unlikely that you will be able to find several ties of the same color and pattern. It doesn't matter - the alternation of completely different ties can create an even more interesting composition.
Let's finish the conversation - get down to business!
Step one. Decide on the location of the ties. Especially responsibly approach this issue in the case of different ties, with different patterns and motives and different colors. The success of getting a stylish pillowcase made of handmade ties actually depends on this planning stage.

Step two. Sew together the previously laid out ties to create a one-piece fabric. If possible, use the machine zigzag stitch, if there is no sewing machine, sew ties by hand.


Step three. Cut one side of the pillowcase out of the canvas. In order to save ties, the reverse side can be cut out of ordinary lining fabric.


Step four. Sew on the four sides of the pillowcase. Leave a small opening on one side for turning and filling.