We continue the series of demonstrations of a master class on socks. You are provided original craft DIY butterfly. First, we will create all the necessary patterns, and then we will sew the toy. You will be simply captivated by this fantastic activity.
The result is the smiles of children and the delight of loved ones from looking at the finished Butterfly.
How to cut and sew a Butterfly toy with your own hands
You will need:
- pair of socks
- reinforced threads
- floss threads
- piece of felt
- 2 beads
- satin ribbons and lace
- holofiber or synthetic fluff
Operating procedure:
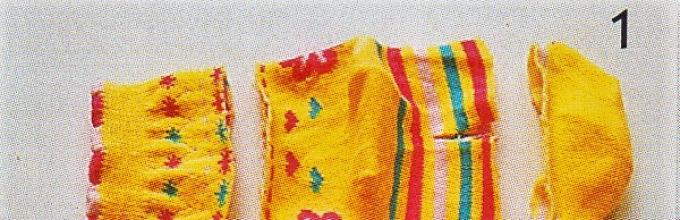
- Place your toes with your heels facing up. Cut off the front part and make a cut along the center line: on one sock - about 2 cm short of the heel, on the second - all the way to the heel. Cut off top part first sock. A larger piece will be needed for the Butterfly’s body, a smaller one for the head.

2. Turn the parts inside out wrong side and use a “back needle” seam to connect the sections, as shown in the photo. Turn out and stuff the pieces. Bend the elastic band down on your torso.

3. Pull up the head hole. Connect the body and head with a hidden seam. Fold the elastic upward.

4. Tighten the sides of the body in the same way as doing the arms.

5. Bandage the protruding parts on the head satin ribbons. The butterfly already has ears.

6. From a piece of felt, cut out wings suitable in size and shape for the Butterfly. You can choose any color of the material at your discretion.

7. Finish the edges of the wings with a contrasting thread using an over-the-edge stitch. Attach the wings to the body. Our toy already has wings.

8. Cut an oval from the remaining fabric. Its length should be approximately equal to the height of the middle part of the wings.

9. Sew the part to the wings with hidden stitches, having previously tied it with thread and stuffed it with holofiber or synthetic down, as was described for the voluminous eyes and nose.

10. Cut out two circles for the eyes from felt. Attach them with an overcast stitch, having previously secured them with pins.

11. Add pupils from beads, embroider the mouth, tie a ribbon around the neck. Decorate the detail on the wings with horizontal stitches, as in the photo.

12. Soft toy The handmade butterfly is ready.

You can make many of these Butterflies and give them for their intended purpose. They will take everything and say thank you.
Review of examples of toys made from socks (video)
It is good to sew such soft toys with the presence of children. Let it be a girl or even a boy. Boys love to cut things out with scissors and reason at the same time.

Girls need to be able to work with both scissors and a needle; this will be useful to them in their future studies and family life.

And only attentive parents and grandmothers will teach them this.
Today we will sew something like this cute butterfly. This will help us master class.
For making soft toy "Butterfly" we need small pieces felt:
- for the body - dark blue 8cmx6cm;
- blue - for wings 11cmX20cm;
- light green for spots 8cmx14cm;
- light yellow for spots 4cmx6cm;
You can take another fabric (preferably one that does not fray); In addition, you will need threads, a needle, scissors, 2 beads for the eyes, and filler - cotton wool or padding polyester.
Details patterns are shown in actual size. To see them in the right size, click on Fig.2.
Re-take the pattern pieces and cut out the following details from felt or other fabric of different colors (Fig. 3):
- wings 2 children
- body 2 children
Wing spots:
- large oval 4 children.
- oval small 4 children.
- bottom spot 4 children.
We begin to sew a butterfly by basting the spots on the wings: we baste the upper ovals to the lower ovals (Fig. 4) and baste them to the upper wings. Then we baste the lower spots to the lower wings (Fig. 5).
We sew the spots to the wings using a blanket stitch, as shown in Fig. 6.
Then we baste the body of the butterfly in the center of the wings (Fig. 7) and sew it to the wings with a blanket stitch (Fig. 8).
Now we take both parts of the wings (Fig. 9), fold them with the wrong sides facing each other and baste them so that they do not move (Fig. 10).
We sew them together with an overlock stitch, leaving an unsewn area in the upper part, through which we put the filler into the butterfly (Fig. 11). We used padding polyester.
We sew the open area with a blanket stitch (Fig. 12).
We make antennae from threads, sew on beady eyes (Fig. 13) and our butterfly is ready (Fig. 14)
If you have a desire to sew different butterflies, see how we made butterflies with one pattern different moods(Fig. 15). You can change the size, shape and number of spots. Hint: You can use coins as templates for the spots. different sizes(Fig. 16).
We hope that our master class “Do-it-yourself soft toy butterfly made of felt. Pattern" helped you make a wonderful toy for your child!
Show your imagination, use your skills and talents! And we will help you put them into practice!
Well, let's hurry up the summer?!
I suggest you make a couple of funny moths/butterflies with me.
You'll see, it's not at all difficult, but it lifts the mood for both you and those on whose palm they then land. This is what we need to create small miracle:
- scissors,
- pencil,
- paper (for pattern),
- a couple of scraps of fabric - cheerful, tacky colors for the wings and a plain or calmer color for the faces and body,
- thread with needle,
- synthetic fluff (or other filler),
- a little wire - for antenna horns,
- brush and acrylic paints on fabric (for drawing faces),
- rhinestones, beads, etc. - for decoration (however, you can do without them),
- good mood(it’s better to grab a smile right away, the rest will form itself in the process
So, let's do it once - construct a pattern: 
We make two - cut out circles-wings from fabric according to the pattern. We make three - we fold the wing pieces and stitch them along the edge from the wrong side. 
Next, we take scissors in our hands and make cuts along the entire perimeter of the wings at a distance of about 5 mm (this is so that after turning the edges do not bunch up or fold). In addition, you will have to poke a small hole in the middle (through it we will turn the wing blanks inside out).

After the wings are turned out, sew up the middle hole and tighten the middle a little to form their rounded shape:

Now let's start making the head and body. To do this, take 1 of the cut out circles, sew along the edge in not very small steps ("bait"), put padding in the middle (sintepon, cotton wool or other filler available at hand) and tighten the thread. Thus, you get 4 small balls

Well, all the necessary “spare parts” are ready.

Assembling them is a very trivial matter; I think you can skip the details with drawing the eyes and twirling the antennae. And now a charming pink winged creature is already looking at us =)

To make it not boring, I also made a brother and sister. The result is such a funny bunch:


Today I offer you, my dear readers and young creators, a master class! Let's do it with your own hands beautiful butterfly.
To make a butterfly we will need:
2 squares of fabric, ranging in size from 6 to 15 cm for the wings (colorful, colorful scraps, cotton fabric is good for this craft)
A strip of fabric for the body 2-3 cm wide and 12 – 15 cm long
Threads
Wire for antennae (or threads). IN master class Stamens are used for artificial flowers.
Mustache beads
We start by preparing the body of the butterfly.
For the body you need a narrow strip of fabric. Fold it in four or roll it into a tube. To prevent the fabric from unraveling, you can fasten it with pins.


Fold the strip in half and tie it with thread.

Or we twist it with wire with beads at the ends.

The antennae are in place.
Now we need to form the head of the butterfly. It is better to secure the head with two knots. Don't cut the threads!

We make the wings from squares.

We take one square and fold it with a scarf, diagonally. We assemble the fabric with an accordion.


We insert the finished part between the front and back halves of the body.

Try to place the wings as close to the neck as possible.

We fasten the wings with threads, wrap them around them on all sides, as if drawing a figure eight. As a result, you get a cross on the front and back sides. Be sure to tie two knots.

Using the same principle, we attach the lower wings.

Having secured the lower wings, cut off the threads. But take your time, you can leave the threads. The kids play with the butterfly with great pleasure, waving and swinging it in different directions.

Spread the wings. The butterfly comes to life and fun game begins!

You can use the finished beauty as a decoration. Sew it to the hair elastic.
Also butterfly can be used as a brooch. Or decorate a gift box. And if you insert a skewer into the butterfly, you will get an excellent decoration for a flower pot.
Or maybe you have more ideas? Then make your own butterflies and tell us!


