Now more than ever it is important to knit all kinds of lambs and lambs, because the symbol of the next New Year is a lamb. We bring to your attention a master class on pillows in the shape of a lamb.
This wonderful pillow was knitted by craftswoman Anya under the nickname naffanya in the Country of Mothers
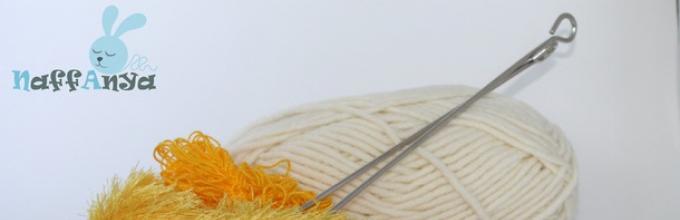
To get started we will need:
Materials: 1 skein of grass (140-150 m/100 g), a skein of acrylic or wool blend yarn for the muzzle, ears and legs (choose 120-150 m/100 g, I have wool blend 100 m/100 g - not enough for one skein enough this description I make it exactly for a thick thread, pay attention to this!), thin thread for stitching suitable color, two black acrylic beads for the eyes (as a friend who makes jewelry explained to me, now acrylic is the best quality, of course you can use glass, but this is a different price category), two large sew-on buttons, filler (holofiber, synthetic fluff or synthetic polyester) and all sorts of small things for decoration (this is up to your taste).
Tools: hooks 2 and 3 mm, knitting needles 3-4 mm (mine are unnamed, presumably 3 mm), sewing needle and scissors.
Here is my minimum set (I forgot to add one more hook):

Legend:
Vp - air loop
sc - single crochet
pr - increase, knit twice in one loop
dec - decrease, knit two loops together
ss - connecting post
dc - double crochet
pssn - half double crochet
Head. 1 piece
Yarn milky, hook 3 mm.
2nd row: 6 inc (=12)
6th row: (4 sc, inc) - 6 times (=36)
Rows 7-9: 36 sc (36)
Row 10: (4 sc, dec) - 6 times (=30)
11th row: 30 sc (30)
Row 12: (3 sc, dec) - 6 times (=24)
Rows 13-15: 24 sc (24)
Row 16: (3 sc, inc) - 6 times (=30)

We switch to grass, a 2 mm hook. We knit from the inside out, then all the fibers will be out.
Row 17: (1 sc, inc) - 15 times (=45)
Rows 18-20: 45 sc (=45)
21 row: (5 sc, dec, 6 sc, dec) - 3 times (39)
Row 22: (11 sc, dec) - 3 times (36)
23rd row: (4 sc, dec) - 6 times (=30)
24 row: (3 sc, dec) - 6 times (=24)
Fill with filling not very tightly.
Row 25: (2 sc, dec) - 6 times (=18)
Row 26: (1 sc, dec) - 6 times (=12)
Row 27: 6 dec (=6)
We close the remaining loops, fasten the thread and hide it inside.

I use a suede brush to lightly brush the grass. This technique was suggested to me by one wonderful needlewoman.

Ears. 2 pcs.
Milk yarn, hook 3 mm.


Legs. 4 pcs.
Milk yarn, hook 3 mm.
1st row: 6 sc in amigurumi ring (=6)
2nd row: 6 inc (=12)
3rd row: (1 sc, inc) - 6 times (=18)
4th row: (2 sc, inc) - 6 times (=24)
Row 5: (3 sc, inc) - 6 times (=30)
6-7 rows: 30 sbn (=30)
Row 8: (3 sc, dec) - 6 times (=24)
Row 9: 24 sc (24)
Row 10: (2 sc, dec) - 6 times (=18)
Rows 11-13: 18 sc (=18)

Ponytail. 1 piece
Grass, hook 2 mm.
1st row: 6 sc in amigurumi ring (=6)
2nd row: 6 inc (=12)
3rd row: (1 sc, inc) - 6 times (=18)
4-6 rows: 18 sc
We also comb the tail.

Body. 1 piece
Grass, knitting needles 3-4 mm.
Cast on 45-50 loops and knit stockinette stitch(front rows - all front loops + edge loops, purl rows - all purl loops + edge loops) rectangle for how much yarn is enough (once I knit it, I’ll be sure to write down the dimensions). You can try crocheting with double crochets, but then one skein will not be enough and you will need to sew a pillowcase for stuffing.
For the body I cast on 48 stitches (with edge stitches), the width is 32 cm.

I got the canvas measuring 32*38 cm

All the parts are ready, now let's start assembling.

We fill the legs loosely with filler to make it easier to tighten later. We fold the canvas front side inside. I start stitching from the corner and immediately sew in the legs. First I sew the sides with the legs, and then I sew the back, don’t forget about the tail. We leave the part unstitched and fill it with synthetic fluff or some other stuffing. The girls in the comments suggested inserting a pillow, I think this is a great idea, you just have to adjust the size of the canvas to the size of the pillow. Sew up the remaining hole. It turns out like this rectangle with legs and a tail:

We design the head.
We sew on the ears, fold them in half and sew on the grass somewhere in the area of the third row. Try it on and see how it looks more organic there and sew it on. We sew on the eyes, I have two beads, and we embroider the nose and mouth. I didn’t tighten the triangle of the nose, but pulled the strip under the mouth a little - then the lamb’s cheeks appear.
I wanted to knit and create something interesting and at the same time useful. And they came up with such a toy pillow with long legs, a “lamb” head, a charming smile and kind eyes.
I previously purchased blue “grass” yarn white(two skeins) for knitting a fluffy body in the form of a pillow and yarn for the muzzle and legs - light brown, cotton (one skein).
I crocheted the body of the sheep with crochet number 5, but I added cotton iris yarn to the “grass” yarn, otherwise the loops were not visible at all, and the knitting progressed unbearably slowly.
But even taking into account the knitting in two threads, knitting the pillow itself turned out to be painstaking and monotonous work. It took me about a week to knit a fabric 27 cm wide and 56 cm long.
I folded the canvas in half inside out and tied it around the perimeter in single crochets with white cotton iris thread, leaving 10 cm unsewn. Then I turned the canvas inside out, stuffed it with toy stuffing (by the way, it took a lot), and sewed the pillow up with a hidden seam using a needle. The thread was secured and hidden.
I also knitted the sheep’s face for quite a long time. I used hook number 2.
Sometimes I had to unravel and knit it all over again when I realized that the shape didn’t suit me.
For the “hairstyle” of the buffalo, I used the same “grass” yarn, but without adding cotton thread, I used a hook number 3.5. Knitted in a semicircle suitable size, and then turned it out with the fluffiest side and sewed it to the muzzle.
Then I started decorating the face, embroidered a charming smile with black thread,
I sewed on pre-knitted blue eyes and “drew” breathtaking eyelashes :-)
The legs for the sheep were simply put together in one go, because I couldn’t wait to see this little animal, so to speak, “entirely” :-) The length of the legs is 20 cm each.
This is how funny the sheep looks with the composition = head + legs (without body)
And then they determined where exactly to sew the head... for example, like this, on top
Then the legs were finally sewn on at the edges, and we experimented some more...
Well, as a result, they finally sewed the head “in place” :-)
Assembly of parts and design:
To start, I sewed the legs along the edges of the pillow.
We sew the ears to the muzzle.
Well, and most importantly, we sew the muzzle to the pillow, choosing the position of the head relative to the body that you like best. I sewed the muzzle in such a way that if the pillow is placed vertically, the head is tilted and the sheep is looking at us!
The length of the toy pillow was 38 cm (excluding the length of the legs).
Make yourself and your loved ones happy!
Lamb pillow. MK
Work completed by Olya-886
Online hosted by naffanya
To get started we will need:
Materials: 1 skein of grass (140-150 m/100 g), a skein of acrylic or wool blend yarn for the muzzle, ears and legs (choose 120-150 m/100 g, I have wool blend 100 m/100 g - not one skein for all enough, I am writing this description specifically for a thick thread, pay attention to this!), a thin thread for stitching in a suitable color, two black acrylic beads for the eyes (as a friend who makes jewelry explained to me, now acrylic is the most optimal in quality, of course you can glass, but this is a different price category), two large sew-on buttons, filling (holofiber, synthetic fluff or synthetic polyester) and all sorts of small things for decoration (this is up to your taste).
Tools: hooks 2 and 3 mm, knitting needles 3-4 mm (mine are unnamed, presumably 3 mm), sewing needle and scissors.
Here is my minimum set (I forgot to add one more hook):
Legend:
VP - air loop
sc - single crochet
pr - increase, knit twice in one loop
dec - decrease, knit two loops together
ss - connecting post
dc - double crochet
pssn - half double crochet
Head. 1 piece
Milky yarn, 3 mm hook.
2nd row: 6 inc (=12)
6th row: (4 sc, inc) - 6 times (=36)
Rows 7-9: 36 sc (36)
Row 10: (4 sc, dec) - 6 times (=30)
11th row: 30 sc (30)
Row 12: (3 sc, dec) - 6 times (=24)
Rows 13-15: 24 sc (24)
Row 16: (3 sc, inc) - 6 times (=30)
We switch to grass, a 2 mm hook.
Row 17: (1 sc, inc) - 15 times (=45)
Rows 18-20: 45 sc (=45)
21 row: (5 sc, dec, 6 sc, dec) - 3 times (39)
Row 22: (11 sc, dec) - 3 times (36)
23rd row: (4 sc, dec) - 6 times (=30)
24 row: (3 sc, dec) - 6 times (=24)
Fill with filling not too tightly.
Row 25: (2 sc, dec) - 6 times (=18)
Row 26: (1 sc, dec) - 6 times (=12)
Row 27: 6 dec (=6)
We close the remaining loops, fasten the thread and hide it inside.
I use a suede brush to lightly brush the grass. One wonderful needlewoman suggested this technique to me.
Ears. 2 pcs.
Milk yarn, hook 3 mm.
Legs. 4 pcs.
Milk yarn, hook 3 mm.
1st row: 6 sc in amigurumi ring (=6)
2nd row: 6 inc (=12)
3rd row: (1 sc, inc) - 6 times (=18)
4th row: (2 sc, inc) - 6 times (=24)
Row 5: (3 sc, inc) - 6 times (=30)
6-7 rows: 30 sc (=30)
8 row: (3 sc, dec) - 6 times (=24)
Row 9: 24 sc (24)
Row 10: (2 sc, dec) - 6 times (=18)
Rows 11-13: 18 sc (=18)
Ponytail. 1 piece
Grass, hook 2 mm.
1st row: 6 sc in amigurumi ring (=6)
2nd row: 6 inc (=12)
3rd row: (1 sc, inc) - 6 times (=18)
4-6 rows: 18 sc
We also comb the tail.
Body. 1 piece
Grass, knitting needles 3-4 mm.
We cast on 45-50 loops and knit in stockinette stitch (knit rows - all knit stitches + edge stitches, purl rows - all purl loops + edge stitches) into a rectangle for as long as there is enough yarn (as soon as I knit it, I’ll be sure to write down the dimensions). You can try crocheting with double crochets, but then one skein will not be enough and you will need to sew a pillowcase for stuffing.
For the body I cast on 48 stitches (with edge stitches), the width is 32 cm.
I got the canvas measuring 32*38 cm
All the parts are ready, now let's start assembling.
We fill the legs loosely with filler to make it easier to tighten later. Fold the fabric right side inward. I start stitching from the corner and immediately sew in the legs. First I sew the sides with the legs, and then I sew the back, don’t forget about the tail. We leave the part unstitched and fill it with synthetic fluff or some other stuffing. The girls in the comments suggested inserting a pillow, I think this is a great idea, you just have to adjust the size of the canvas to the size of the pillow. Sew up the remaining hole. It turns out like this rectangle with legs and a tail.
New Year is a great reason to create such a wonderful thing as a crochet sheep pillow with your own hands, the master class will help you do this, even if you haven’t been doing needlework for very long. The craft combines two functions – a toy and a pillow for a child. In addition, the baby will certainly be very interested in trying out for himself how a sheep turns into a pillow, so even for the little ones such a product will be a wonderful educational toy.
Analogs with this idea are sold in almost all children's stores, but the toy that mom made will undoubtedly be more valuable. Therefore, stock up on a few hours of free time and knit with us.
First, go through the list necessary elements and think about what you need to buy and what to find at home.
Crocheted sheep pillow - the symbol of 2015 is made from such materials
- beige grass yarn – 50 grams;
- pink acrylic yarn – 20 grams;
- ready-made eyes for needlework;
- a piece of fabric 25 by 25 centimeters;
- a little black yarn for the face;
- thick thread for sewing parts;
- hot glue gun;
- filler for the toy (sintepon, paralon or other).
That's sorted out. Start production crochet We will make our own sheep pillows using small parts.
Crocheted sheep head pillow
We collect 6 sc in the amigurumi loop and close the ring. In the second row we knit two single crochets into each loop, thus doubling the number of loops, now there are 12 of them. We knit the next row, alternating 1 sc in a loop and 2 sc in a loop, we get 18 loops. By analogy, we knit the following rows, in each row we make an increase through the number of loops, 1 order of magnitude greater than in the previous one. We knit this way until there are 30 loops in the row, that is, 2 more rows.
By the way, here is another option for New Year's crafts 2015 - a wonderful toy for a child and home decoration.
We knit the next 5 rows simply with regular single crochets, without decreasing or adding loops. But then we begin to decrease the loops in the rows in the same way as we added until there are 18 loops in the row.
Now is the time to stuff the product. This must be done tightly so that the head of the sheep pillow - the symbol of 2015 - is free of failures.

Now we knit 3 more rows of sc and change the thread to grass. It is better to knit grass with a different crochet, thicker than with acrylic. We knit 4 rows with single crochets and fill this part of the product.

Then we decrease the loops until the hole is completely closed.
Crocheted sheep feet pillow
All four legs will be knitted the same way, but for interest, you can add a different shade of pink yarn to two legs.
1st row: 6 sc in amigurumi loop
Row 2: increase in each stitch
3rd row: increase in every second loop
Row 4: increase every third stitch.
We get 24 loops.
Rows 5-10: knit in single crochets.
Row 11: Decrease every third stitch. 18 loops remain.
We knit 2 more rows of sc.

Lamb body pillow for the New Year 2015
Actually, the body itself consists of 3 things: knitted fabric, filler and fabric.
We knit the fabric like this: we cast on 30 air loops and then knit with double crochets, turning the knitting over after each row, as many rows as we consider necessary. In our case, the width of the lamb is 23 centimeters, which is 18 rows.

It is advisable to take the filler in one piece so that it does not wrinkle inside the toy later. It can be ordinary thin foam rubber or padding polyester, as in our case. Take a very thick piece only if it bends well, and if not, a thin one is better.

A piece of fabric can be cut from any diaper, as we did. Or you can make it from felt or anything else you can find at home. But do not use satin, as the stitches from the needle will be clearly visible on it - this is of no use to us.
First, do not forget to make ties in the area of the paws from ordinary air loops.

Next is the most crucial moment - we sew together all the details of the sheep pillow, crocheted with a needle and thick thread, it is good to use iris.

For the head we need to tie the ears. We knit them like this: we cast on 15 loops and tie them on both sides in a circle with double crochets and a second row of single crochets, unrolling the knitting.

We sew on the ears, make a muzzle, and glue on the eyes.

Next, carefully sew the head to the pillow in its rightful place.

So I'm ready knitted sheep pillow DIY crochet, master class prepared by Julianna Welner.
We also invite you to make another interesting accessory with your own hands -
So let's get started.
To get started we will need:
Materials: 1 skein of grass (140-150 m/100 g), a skein of acrylic or wool blend yarn for the muzzle, ears and legs (choose 120-150 m/100 g, I have wool blend 100 m/100 g - not one skein for all enough, I am writing this description specifically for a thick thread, pay attention to this!), a thin thread for stitching in a suitable color, two black acrylic beads for the eyes (as a friend who makes jewelry explained to me, now acrylic is the most optimal in quality, of course you can glass, but this is a different price category), two large sew-on buttons, filling (holofiber, synthetic fluff or synthetic polyester) and all sorts of small things for decoration (this is up to your taste).
Tools: hooks 2 and 3 mm, knitting needles 3-4 mm (mine are unnamed, presumably 3 mm), sewing needle and scissors.
Here is my minimum set (I forgot to add one more hook):
Legend:
VP - air loop
sc - single crochet
pr - increase, knit twice in one loop
dec - decrease, knit two loops together
ss - connecting post
dc - double crochet
pssn - half double crochet
Head. 1 piece
Milky yarn, 3 mm hook.
2nd row: 6 inc (=12)
Row 6: (4 sc, inc) – 6 times (=36)
Rows 7-9: 36 sc (36)
Row 10: (4 sc, dec) - 6 times (=30)
11th row: 30 sc (30)
Row 12: (3 sc, dec) - 6 times (=24)
Rows 13-15: 24 sc (24)
Row 16: (3 sc, inc) – 6 times (=30)
We switch to grass, a 2 mm hook. We knit from the inside out, then all the fibers will be out.
Row 17: (1 sc, inc) - 15 times (=45)
Rows 18-20: 45 sc (=45)
21 row: (5 sc, dec, 6 sc, dec) - 3 times (39)
Row 22: (11 sc, dec) - 3 times (36)
23rd row: (4 sc, dec) - 6 times (=30)
24 row: (3 sc, dec) - 6 times (=24)
Fill with filling not too tightly.
Row 25: (2 sc, dec) - 6 times (=18)
Row 26: (1 sc, dec) - 6 times (=12)
Row 27: 6 dec (=6)
We close the remaining loops, fasten the thread and hide it inside.
I use a suede brush to lightly brush the grass. This technique was suggested to me by one wonderful needlewoman.
Milk yarn, hook 3 mm.
Legs. 4 pcs.
Milk yarn, hook 3 mm.
1st row: 6 sc in amigurumi ring (=6)
2nd row: 6 inc (=12)
3rd row: (1 sc, inc) – 6 times (=18)
4th row: (2 sc, inc) – 6 times (=24)
Row 5: (3 sc, inc) – 6 times (=30)
6-7 rows: 30 sc (=30)
8 row: (3 sc, dec) - 6 times (=24)
Row 9: 24 sc (24)
Row 10: (2 sc, dec) - 6 times (=18)
Rows 11-13: 18 sc (=18)
Ponytail. 1 piece
Grass, hook 2 mm.
1st row: 6 sc in amigurumi ring (=6)
2nd row: 6 inc (=12)
3rd row: (1 sc, inc) – 6 times (=18)
4-6 rows: 18 sc
We also comb the tail.
Body. 1 piece
Grass, knitting needles 3-4 mm.
We cast on 45-50 loops and knit in stockinette stitch (knit rows - all knit stitches + edge stitches, purl rows - all purl loops + edge stitches) into a rectangle for as long as there is enough yarn (as soon as I knit it, I’ll be sure to write down the dimensions). You can try crocheting with double crochets, but then one skein will not be enough and you will need to sew a pillowcase for stuffing.
For the body I cast on 48 stitches (with edge stitches), the width is 32 cm.
I got the canvas measuring 32*38 cm

All the parts are ready, now let's start assembling.

We fill the legs loosely with filler to make it easier to tighten later. Fold the fabric right side inward. I start stitching from the corner and immediately sew in the legs. First I sew the sides with the legs, and then I sew the back, don’t forget about the tail. We leave the part unstitched and fill it with synthetic fluff or some other stuffing. The girls in the comments suggested inserting a pillow, I think this is a great idea, you just have to adjust the size of the canvas to the size of the pillow. Sew up the remaining hole. It turns out like this rectangle with legs and a tail:
25.
We design the head.
We sew on the ears, fold them in half and sew on the grass somewhere in the area of the third row. Try it on and see how it looks more organic there and sew it on. We sew on the eyes, I have two beads, and we embroider the nose and mouth. I didn’t tighten the triangle of the nose, but pulled the strip under the mouth a little - then the lamb’s cheeks appear.


Now we tighten the legs. We insert the needle into the first row and bring it out at the level of 9-10 rows, repeat the procedure, tighten the thread, tie a knot and hide the tails. 

We sew buttons on the lamb's belly in the corners. We retreat somewhere 2.5-3 cm from the edges.

The lamb is ready!
At the family council it was decided that the result was a boy lamb, and why do boys need jewelry?


Interest group VKontakte


