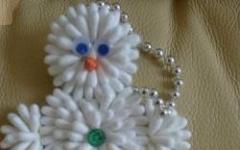
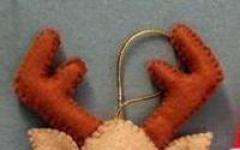
We create beautiful and nice gift for New Year or Christmas with Vitebsk Courier!
TO winter holidays stores are filled with all kinds of postcards, sometimes the choice is so wide that even your eyes run wild. With such variety, we sometimes forget that an original card can also be a good addition to a gift. And what will our warm feelings better than a handmade card? On the eve of the holidays, we offer you our photo instructions for creating a hand-made postcard.
Hand-made postcard “Christmas wreath”
Last time we did one designed to decorate our interior; you will see similar motifs in this guide. So for those who haven’t found the strength or means to make a wreath, we’ll make one from a postcard.

For work, we will need colored cardboard or pastel paper (we use Murano paper) light, dark green and brown, a piece of ribbon in a rich New Year's color, two bells and a red outline or red half-beads, or even ordinary beads or small beads, We'll leave that to your choice.

We start by cutting out the base for our future postcard from a dark green sheet and bending it in half to make such a book. Our blank has proportions of 20x11 cm.

We cut out the backing from brown cardboard, it should be slightly smaller front side postcards, and glue it to the blank.

Using any handy object that allows us to draw an even circle, we make two marks: on light and dark green cardboard. The circle on a light sheet should be smaller than on a dark one. It is convenient to use a glass for this, since it has a wider and narrower side.

We cut out our blanks so that the edge turns out wavy. To do this, it is convenient to use curly scissors, but you can do without them. The “donut” made from dark green cardboard will be larger and wider; make sure that it fits evenly on the backing.

Check the resulting blanks so that the hole in the light one allows it to overlap the dark one so as to fit in the middle of its thickness.

Glue both pieces together and place them on the backing. Next we need a small bow. For convenience, we suggest tying it on a fork. This will allow you to get an even and neat bow.

We cut the ends of the bow and fasten them to a candle or lighter.

Glue the bow to the card.

We take the bells and sew them directly under the bow.

Using an outline or half beads, we form red holly berries on the wreath, three in a group. If you don't have half beads or an outline, use red beads or small beads and secure them with glue.

Without a congratulatory inscription, the card looks empty. We make an inscription using an outline.

Our cute and easy-to-make card is ready. Now you can complement it with decorations to your liking. And don’t forget to write inside your sincere and most warm regards!
Sometimes, in a handicraft impulse, you want to make something beautiful with your own hands, but as luck would have it, nothing comes to mind, and so as not to suffer again, I decided to put together a selection of examples of how to make a postcard with your own hands. Here different examples postcards and small descriptions of how to make this or that postcard.
I tried to select as many different images as possible, both in style and theme, so that there was plenty to choose from. Of course, each postcard is just an example of how you can make postcards with your own hands.
To mom
How to make a card for mom? It’s clear that it should be the most beautiful and touching, but I want some specifics, right? The first thing you need to do is focus on the reason, it could be:- an unplanned card for no reason;
- Mother's Day or March 8;
- New Year and Christmas;
- birthday or name day;
- professional holidays.
Of course, no one can stop you from making and giving your mom a postcard dedicated to the first snow or even the release of your favorite TV series, but in general, the main reasons are indicated quite clearly.


A New Year's card for mom can be ordinary (from the point of view New Year's greetings, naturally), it is not necessary to somehow emphasize the special relationship. But a birthday or Mother's Day are special holidays on which it is worth presenting a personal card with the signature “To my beloved mother.”
How to make a birthday card for mom? Sketch out a sketch with a simple pencil, add a little color to get an idea of the color scheme and understand what shades you will need during the work process. So, you need to buy or find in the bins:
- a blank for your needlework (thick and thin cardboard is suitable);
- background image - this can be scrap paper, colored paper, any sheet that you like with an ornament, or you can simply artistically spray paint on a sheet of white thick paper or even use the monotype and marbling technique;
- chipboard for inscription - it is better to purchase a ready-made one or use a special stapler to decorate the edge;
- a couple of decorative elements - flowers, butterflies, beads and leaves;
- one or two large decorative elements - flowers or bows;
- decorative tape;
- good glue;
- scalloped ribbon or lace.
First you need to glue the background image to the blank, then arrange large flowers, and only then complement the resulting composition with small decor and lace. Dry the finished work well, decorate it with small decorations and sparkles, and then sign it - mom will be happy with such a sign of attention.
Now you know how to make a card for Mother's Day, and you can easily figure out what a card for an anniversary or angel's day should be like.
Another original version: the essence is that you need to cut out circles from colored paper, and then cut each circle in a spiral and twist it into a bud, you will get cute flowers with which you can decorate a card.


To dad
A DIY birthday card for dad is always very touching and sweet. Choosing a particular "papal" theme is not too easy, but there is a wonderful straw to grab onto - style. If you make a stylish card, then the father will undoubtedly be happy to receive it, even if it does not contain the usual symbols of “masculinity,” which in our country often include cars, weapons and fishing.
Naturally, if the father is celebrating the anniversary of his driving experience, then a car on a postcard is quite appropriate, but on dad’s birthday it is better to present a neutral and beautiful greeting card.

What kind of cards do men like:
- not too colorful;
- in a calm, slightly muted palette;
- with clean lines;
- in which a lot of effort has been visually invested.
Men admire the process, so before you make a nice card using the scrapbooking technique, think about how you can put your work into the card? This can be working with threads or embroidery, spirography and paper cutting, pyrography and much more.
Incorporate a few elements of hard work and love into your work and your dad's birthday card will be stunning.

So, we make paper cards with our own hands for our beloved daddy. Start by choosing a subject - this could be some element of a male portrait - a stylish beard and glasses in the spirit of hipsters, or the silhouette of dad's favorite pipe, you can also make some kind of heraldic flag or symbol.
Choose colors - they should be calm and beautiful, and also look good in harmony with each other.
Make a pattern for the future postcard and get to work - if this is a regular applique, then cut out all the elements and carefully lay out the future composition. And in the case of artistic cutting, it is better to spend time on the pattern and drawing. By the way, for this work you will need a good breadboard knife.
After all the main elements have been cut out, assemble the card - if you planned it using the scrapbooking technique, then you can simply glue the composition, and if you are trying to create a thin openwork product made of cardboard and paper, then select shading colors for each layer - to make the work look really openwork, you will need to choose shades that will highlight all the cuts.
Make a central element on your card, and then put it under a press - this will help prevent the paper from deforming from the moisture contained in the glue.
In honor of the wedding
Do beautiful cards doing it yourself for a wedding is not an easy task, and here it is better to watch master classes.

A wedding is one of the most important events in the life of a young family, and therefore it is not enough just to draw a card, you need to carefully design and package it, and perhaps supplement it with some other elements.


How to make a beautiful card for congratulations on your wedding day:
- come up with an idea;
- find out from the bride and groom the main color of the wedding, or the main theme of the celebration;
- look at various options for postcards - using scrapbooking techniques, with embroidery, ribbons, and so on;
- choose several interesting lessons;
- make a rough postcard from paper and cardboard (and if you are not sure of your result, then it is better to do this step several times);
- make original cards with your own hands;
- choose packaging and make it a little more unique;
- label the envelope and postcard.
Other occasions and recipients
Rest assured, handmade birthday cards will delight the recipients - after all, this is not just a DIY postcard made in a master class, it is a real man-made miracle that keeps a piece of the soul.


You can make cards for mom and dad with your own hands, or you can delight your friends before every holiday with a custom greeting - all you need is free time, good master classes and a little patience.
3D postcards look especially impressive. How to make a three-dimensional postcard? Come up with (or look at experienced authors) an idea on how you can shape it so that you get voluminous postcards. You may want to use more decorative elements, or you may decide to make a simple DIY birthday card with 3D elements.

By the way, if you are wondering how to make a postcard for your mother or friend with voluminous paper elements, take a closer look at children's books. Surely you still have several copies, when opened, carriages and castles, trees and horses appeared between the pages.
Take a close look at how these elements are made and glued together - you may be able to reproduce this in your sketch.

Or try to do something in the shabby chic style and scrapbooking with your own hands - it’s not as difficult as it seems, the entire main volume effect is created by layering elements. By the way, flat cards are also good. :)
I think now you have enough ideas for creating greeting cards, postcards and tags - craft for your pleasure and bring joy to your loved ones!

Moving card - “Waterfall of Hearts”:
Some more ideas for inspiration:


* The calculations use average data for Russia
A postcard made by yourself is more valuable than its counterpart printed on a printing press. Moreover, the imagination of folk craftsmen knows no bounds. They decorate cards with coconut fiber and bamboo and balsa wood and gold and even candies and bagels.
hand-made cards: The essence of business
As a rule, postcards can be divided into two categories: postcards with small volume self made and postcards of a complex category. If the former can be stamped several hundred per day, then the production of the latter is more labor-intensive: one master can make from 30 to 70 such postcards daily.
Considering that one company employs from six to 25 craftsmen, a client order for the production of, say, a thousand handmade cards can be completed in three to 10 days. In addition to craftsmen who primarily have an artistic education, designers work on postcards - as a rule, no more than four.
The main problem of this business is to find a good specialist for a small salary. On the one hand, the worker must have the ability to create, and on the other, perseverance and the ability to perform, in a sense, monotonous operations are required. Such qualities rarely coexist in one person. And few people agree to work for pennies. Today, on the European market, a handmade postcard costs about EUR5, but in Ukrainian retail it costs about 15 UAH. This difference in price is explained mainly by the level of wages.
Trending product 2019
Thousands of ideas for making quick money. The whole world experience is in your pocket..
A variety of materials are used for making postcards: fabrics, plastic, paper, beads, buttons, oilcloth, paints... All this is purchased mainly in hardware stores or directly from suppliers who bring materials from abroad.
To the credit of Ukrainian manufacturers of hand-made cards, domestic products are not inferior in quality to foreign ones, and sometimes even surpass them. Ukrainian manufacturers constantly accept orders from the USA, Canada, Israel and Russia.
hand-made cards: Sales channels
The problem of sales in this business is considered one of the main ones. The fact is that, basically, manufacturers sell their products through bookstores and gift stores, such as “DC”, “Multi”, “Bukva”. But there are very few such networks in Ukraine, and, according to manufacturers, it is quite difficult to get there with postcards.
The most promising sales channel for Ukrainian manufacturers handmade postcards remain the production of products to order. In the structure of seasonal sales, the share corporate orders is at least 50%. It is worth noting that custom postcard manufacturers have no shortage of corporate clients.
First of all, they are banks and other financial institutions, automobile corporations, large international companies - in a word, those organizations that care about their own image and can afford to spend money and time ordering original cards to pamper their employees, clients or partners with a non-standard, memorable congratulation.
hand-made cards: Profitability
Participants estimate the minimum threshold for entering the business at $8-10 thousand. This amount is quite enough to hire craftsmen and designers, purchase paper and materials and start working. According to the entrepreneurs of this business, it is not difficult to enter it, but only for those who are passionate about their business, who want to create beauty in addition to money, everything should amaze: paper, text, drawing, framing, arrangement, font combinations... If this no, then here you can lose more than you earn.
For the same reason, postcard manufacturers do not spend money on advertising. After all, a beautiful and original postcard is an advertisement in itself. The only way to promote for such companies is to participate in specialized exhibitions, both domestic and foreign.
Not only postcards are promising, but the gift and souvenir market as a whole, its profitability ranges from 20% and above. And if you don’t pay taxes and produce cards in small batches at home, then the profitability, of course, increases several times and even reaches 100%.
According to experts, the structure of postcard sales will change over time. In Europe, for example, everyday cards account for at least 60% of total sales, but in our country - no more than 40%. There they give or send cards not only for Christmas, birthdays and weddings, but also, for example, for Easter, Thanksgiving, Mother's Day, for housewarming, the birth of a child, and also for loving, parting, apologizing, visiting the sick or simply, to lift a person's spirits. For us, all this is still only in the future, but according to the observations of market participants themselves, this prospect is not so far away.
Ready ideas for your business
Another distribution channel is large supermarkets. But there are also some nuances here: traditionally, large retail formats have been “occupied” by foreign manufacturers with their products, in particular, the Russian “monster” of the postcard business, the Open Letter company. Therefore, the share of sales through supermarkets in the sales structure is very small.
Market volume: 11-13 million UAH.
Development rate: 20-30% per year
Number of players: 4 large companies, a dozen groups of artisans
Profitability: from 20%
Prices: 12-30 UAH.
Based on an article by Olga Buryan in the magazine Power of Money
628 people are studying this business today.
In 30 days, this business was viewed 26,773 times.
Calculator for calculating the profitability of this business

According to the owners of birch bark production, this is a profitable business. A company with eight employees with established sales can...

The profitability of wooden tableware production is approximately 200 percent. The amount of earnings depends on the productive capabilities of the master and the availability of sales channels for the products.

Inlay is the decoration of products using thin plates of metal, mother-of-pearl, ivory and other materials cut into its surface. Decorative inserts are on the same level...

Everything you need to start a home-based craft business polymer clay, - these are certain work skills, perseverance, attentiveness and, most importantly, limitless...

A sachet is a small fragrant pillow or bag. The name comes from the French word sachet, which means pouch. The sachet can be filled with various plants and resins, having...

The big plus for a startup in the sleep mask business is the low investment. The main thing is to have imagination and the ability to use a sewing machine. Well, actually, without a sewing machine...
Handmade is a type of needlework , with the help of which things are made from threads, fabric, wool and other materials. Every person is creative by nature. Some people's talent is clearly manifested in singing, dancing or other forms of creativity, while others are creatively realized in making crafts.
This article is about homemade cards designed to congratulate someone close to you on their birthday. Of course, it all depends on the complexity of the work, but for the most part, all inventions are quite easy for the average person to implement.
DIY postcards for beginner handmakers
If before the holidays you asked yourself the question: “What gift will make my girlfriends, relatives, friends or family happy?”, then this article is intended just for you. 
Usually our thoughts stop at some banal souvenir or cheap thing, which is definitely more useful in everyday life than a souvenir.
Most likely, they didn’t even think about the question “how hard is it to make a gift with your own hands.” In fact, it is not much more difficult than finding a suitable gift in a store.
The disadvantages of this gift include the fact that, most likely, you will spend a little more time than you originally planned. But you will delight the birthday boy with a gift and an original card of your own making.
The need to purchase materials such as beads, glitter, fabric, stickers and various bows depends on the sample you choose.
You can choose from a wide range of products necessary materials. When you learn how to make simple, but no less beautiful handmade cards, you can test your strength by trying to make decorations using some interesting technique. 
Again, look at handmade techniques from the all-knowing Internet. Of course, creating a postcard using techniques will be much more difficult, but the resulting gift will be much more presentable.
Don't think that making cards is difficult.
After looking at photographs of the crafts of various professional handcrafters, you may decide the opposite. But still, there is one truth here: handmade is an easy way to create a small masterpiece in the form of a postcard (or anything at all).
After an attempt is made to build something magical, you will see that creating is not so difficult.
And we can say for sure that you will probably enjoy the creation process. You should start working on a gift only after watching a couple of video tutorials that talk about the nuances and details of the process.
Handmade craft ideas
Hurry up to start your experiments on paper. Here are some hand main ideas that are easy to implement:

Options for making a handmade postcard for a friend

The necessary drawings and inscriptions are drawn on a rough sheet of paper, then these drawings and inscriptions are transferred through glass using a wax pencil. thick paper; paints, preferably watercolors, make the background of the postcard. 
Drawings made with a wax pencil will appear through the bright background of the postcard.
Using the handmade technique, you can make not only a gift for a friend original postcard, but also a hairband, a creative vase, home decorations, a jewelry box, decorate glasses and girlfriend's clothes.
To do this you need to show a little imagination, spend a little time and effort.
The most important thing is that a postcard and a gift for a friend using handmade technique will preserve a piece of your good attitude and love.
Views: 606
Tweet
Cool
Before the New Year's bustle takes up all your thoughts, why not prepare cards for your loved ones in advance. A handmade postcard will be a pleasant addition to a gift, and production will take a maximum of 30 minutes. On cold winter evenings you can pass the time with one of these postcards. “Pooring” over crafts will create festive mood, will calm and calm you at the end of a busy day. As you can see, the benefits are not only for those to whom you give the gift, but also for you.
Let's choose and get started!
1. Postcard with ribbon
Very cute, and can be done in literally 10 minutes. Materials: ribbon, buttons, cardboard, scissors, glue.


2. Postcard with felt Christmas tree

You will need:
Scrap paper (or any colored paper with a suitable pattern)
Green craft felt (or fleece, or velvet paper)
Lace
Halves of beads (beads, buttons)
A piece of beautiful thread
Ruler
Scissors
Breadboard knife
Glue stick
PVA glue

We cut out the base with a size of 20x15 cm. The postcard itself will be 10x15 cm.

We measure the middle and use scissors along a ruler to draw a fold of the card.


Cut out the background, size 9x14 cm.

Draw the silhouette of a Christmas tree on felt and cut it out.


We embroider a “garland” with thread and fasten it on the back side.


We cut out another Christmas tree from cardboard, only a little smaller, and glue it onto felt. This will make the spruce more voluminous.

Take a rectangle of white paper and write the inscription. To this extent it was applied with a stamp, but it can also be written by hand.

We measure out the lace.

On sewing machine we sew a line around the perimeter of the card.


Using double-sided tape, glue the tree.

Glue the inscription.

We glue this background onto the base.

Apply a drop of glue to the place where the bead will be.


3. Multilayer card
Materials:
Card base made of thick cardboard, format 11x16 cm, folded
Two sheets of scrap paper measuring 10x15 and 8x13cm
Paper cuttings in the form of an openwork oval frame and two snowflakes
A piece of striped tape 14 cm long
Transparent dial
Two golden fabric leaves
Three decorative berries with stems
Chip with the image of Santa Claus
Half a bead.

We sew sheets of scrap paper around the perimeter (but not necessary).

We cut the end of the tape in the form of a flag.

Glue the sheets on top of each other. We hide the end of one tape under one of the layers.

Glue the frame and clock.

We collect bouquets of leaves and berries. Roll them together and cover with a leaf.


4. Volumetric postcard made of scrap paper with different ornaments
For work:
Paper of different colors of ornaments for scrapbooking
White postcard without drawings
Decorative carnations or pins
Stationery glue
Double sided tape
Simple pencil
Scissors
Ruler.
Cut out 12 rectangles. The length of each is 12 cm, the width of the first is 9 cm, the width of each next is 6 cm less.

Roll each rectangle into a tube. For convenience, you can use a pencil.

Glue the tubes to each other. Thus, you will get a Christmas tree.

Take a white card (or a rectangular piece of white cardboard that needs to be folded in half) and glue the Christmas tree.
We decorate it with carnations, the “legs” of which we insert between the tubes. You can also use beads or rhinestones. This example also uses a bow that decorates the top.


5. Minimalist card
We need:
3 sheets of white laminated cardboard (12x20cm)
Wide satin ribbons
Narrow golden ribbon
Green or gold rhinestone
Scissors
Pencil
Ruler
Sewing machine

We put the ribbons on the cardboard and connect them together by stitching them.

On another sheet of cardboard, mark the width of the ribbons with a pencil and draw Christmas trees. Watch the proportions.


Cut out the workpiece.

We place the resulting stencil on a layer of tapes and place a third sheet of cardboard under them.

We put the tape around the perimeter and stitch it. On one side, through all three layers.

We form a bow on one side and glue a rhinestone into its middle.


