Decorating your home for the holidays is not an easy task, but nothing is easier if you figure out how to make a snowflake out of paper - such decor looks attractive and has been relevant for many years. Moreover, you can make not just ordinary flat decorations, but also voluminous ones. By the way, they can be used in interior design, a festive table, or even decorate a Christmas tree with them.
Traditional garlands made of paper leaves have been cut out for several generations, this is the most popular type of decor. It is best to get the whole family together and do this activity - so you can have a good time and make snowflakes with your own hands - with different designs.
Traditional decorations are obtained by folding the sheet six times - you can see the patterns of snowflakes. However, if you want to get a more sophisticated decor, you should not dwell on the classic options, it is quite possible to fold the leaf any number of times - so the snowflakes for the new year will turn out to be diverse.
What you need in order to make paper snowflakes yourself:
- paper - plain office white paper is suitable, as well as an album for children's creativity. Particularly dense varieties like watercolor should not be taken - such a blank will not be very easy to bend and cut.
- craft knife and stationery scissors - directly for cutting. If you plan to make paper snowflakes with your kids, make sure they have scissors with rounded ends.
- pencil and eraser - for marking and patterning on the workpiece.


Several ways to create
How to make a beautiful paper snowflake if you have never done it before? You can go through trial and error if you have enough time and enthusiasm. Fold the sheet in any way convenient for you, and then pick up scissors or a clerical knife.
This video shows 3 ways to fold paper to cut out snowflakes:
draw a pattern and cut it out correctly:
If you do not mind bending, then you can use nail scissors. First of all, you need to make a beautiful edge for your future snowflake - you can simply cut it with a smooth line, cut out ice crystals or even a few cloves. It all depends on your imagination.
Then you need to cut through the main decorative elements - they can be abstract or quite logical - for example, the herringbone pattern looks beautiful. After you cut out the main elements, add small ones - it is more convenient to make them with a clerical knife (you can put the blank for this on a special paper cutting mat or on a pile of old newspapers or magazines - this will help save the table).
Then the workpiece needs to be smoothed out. A few attempts will help you navigate and decide on the design.
If you don’t understand how to fold paper, then you can use the simplest way - fold the paper sheet in half, then one more time - a diamond will come out. Fold it again to make a triangle - the corner where the most folds will be the central part, and the free sides - the edge. You can look at addition schemes to get elements with any number of rays.

A colored paper snowflake looks impressive - especially if it is double-sided colored paper with glitter effect. By the way, the finished snowflake can be decorated with decorative glitter glue.
Try to fold paper for a snowflake according to one of the patterns and cut something of your choice, and if you don’t like the result, you can always print a beautiful pattern and make snowflakes with your own hands from paper or a blank.

How to cut big beautiful snowflakes?
Download large paper cut snowflake patterns or check out beautiful snowflake stencils.
More volume
If you want to understand how to make a three-dimensional paper snowflake, then you first need to define the terms. Volumetric can be either an ordinary shape, which was folded after cutting and fixed in such a way that it turns out to be corrugated, and a design that is made of several elements.

The most spectacular look are beautiful huge snowflakes (larger than an A4 sheet), which are assembled from several fragments. Making a big snowflake without an assembly diagram is very difficult, you need to have good spatial thinking. To understand how to make each element and figure out how a three-dimensional structure is obtained from it, it is better to watch a short and understandable master class.
The best do-it-yourself voluminous foil and paper snowflakes are obtained when you follow inspiration and at the same time look at the working scheme of the assembly.
Do you want to figure out how to cut paper snowflakes with an unusual design in the form of Einstein's head or with symbols from the Game of Thrones? You will need snowflake templates to cut out - follow the instructions and you will get exactly the same result as in the image.


If you are confident in your own abilities, then you can try to draw your own stencils for cutting - first we fold the sheet as many times as necessary, then on one of the sides we draw a drawing of what should be the result and cut it out.
Such decorative elements can decorate an apartment or a Christmas tree, and they can also be used at a party - of course, if it is in the spirit of a popular fandom. However, you can go the other way and not print the finished design, but study the step-by-step master class and figure out how a folded triangle of paper turns into familiar symbols and faces.
Try cutting paper snowflakes using the cutout templates.
Unusual voluminous paper snowflakes can be made in another way - for example, using the quilling technique. You will need strips from which you will twist the spirals and glue them together.
Use a ready-made idea with a photo or video, or come up with something of your own. To make voluminous beautiful snowflakes from colored paper with your own hands - watch step-by-step lessons and you will learn how to make unusual snowflakes from paper and colored foil looking at the cutting patterns.
However, if you like to cut, you have a good knife for paper cutting, then you can do fan snowflakes with your own hands. This is a complex structure with an interesting design, which is assembled from several layers - like a children's pyramid. Each layer consists of sheets of paper folded like a fan, on which fancy patterns are cut.
Here's what a large voluminous snowflake can be made from two sheets of paper folded like a fan:
A paper fan made in this way is glued with three or four of the same fans - this will be the largest circle. By the way, you can make it quite dense, without a large number of openwork elements, or take sheets of blue or blue color for manufacturing - subsequent layers will shine through and the product will really glow with blue light.
The next paper circle is also made from fans, but already smaller, you can change the depth of the fold and pick up an interesting pattern. This is how several layers are made in stages - do not do too much, 3-6 layers will be enough.
To assemble a snow globe, you will need a drawing - you can print it out or come up with it yourself based on the master class. All that is required for this product is to figure out how many elements you will assemble your ball from, and how you will fasten the elements together (the easiest way is to glue them), and then prepare a template for one such element.
Now you know how to cut New Year's snowflakes and can even bring a little winter decoration and comfort to your home even in the hottest summer.
Do you know that preparing for the New Year brings no less (if not more) joy than the holiday itself? And why? Because the expectation of the New Year is the expectation of a miracle. And with age, we do not stop hoping for a miracle. That is why we prepare so carefully for this magical holiday, look for new recipes for the festive table, select new outfits, buy gifts for relatives and friends and, of course, decorate our home. And we decorate the Christmas tree, and hang the garlands, and be sure to cut out the snowflakes. Well, even if we don’t cut it now, then in childhood everyone was fond of this New Year’s activity.
DIY Christmas snowflakes - what was easier? Nothing, except that cotton balls on threads under the ceiling. And beautiful, openwork man-made snowflakes were molded on windows and mirrors, hung on walls and doors, and they decorated the Christmas tree with them. And even today, despite the abundance of bright and shiny New Year's decorations in stores, hands are itching to make something like New Year's. And thus touch the miracle. So, according to the old memory, we reach for paper and scissors, and again, as in childhood, we cut out snowflakes, cut out, cut out - until we get bored.
And, by the way, making New Year's snowflakes is not limited to paper cutting alone. Do you know, for example, that do-it-yourself New Year's snowflakes can be made from pasta, from foil, from salt dough? Yes, they can be simply crocheted or sewn. Let's see what comes out of all this.
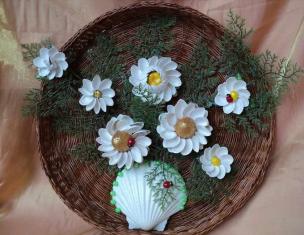
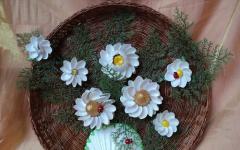
Dry pasta snowflakes
Small pasta (shells, flowers, wheels, feathers) is suitable for these snowflakes. The most interesting thing is to come up with a shape for snowflakes. Gather beautiful, different in shape and composition snowflakes first on the table, and only then glue them together. In order for the snowflakes to dry well and not stick to the work surface, place them on wax paper and turn them over from time to time.
After that, paint the snowflakes with a brush or spray paint. They can be made white, blue, gold or silver. Be careful not to apply a lot of paint at once - pasta swells from moisture! After painting, snowflakes can be decorated with sparkles, beads or beads. Hang the finished snowflakes on ribbons and decorate the Christmas tree and the room with them.

Foil snowflakes
For foil snowflakes, food roll foil or chocolate foil is suitable. Cut out square wrappers from it with sides from 5 to 10 cm (it all depends on the size of the future snowflake). The number of wrappers will also depend on the volume of the snowflake itself. Roll each wrapper into a ball (not very tight, but even). Actually, these balls will be the rays of the snowflake.
Now, in one of the balls (it will become the center), use an awl or a thick needle to make the required number of through holes (three or four). And insert pieces of wire (10-12 cm) into them and then put the remaining balls on the wires. Seal the ends of the wire inside the last lumps of foil. Attach a ribbon. Everything - the snowflake is ready!
Knitted snowflakes
Those who know how to crochet can use their skills to make elegant knitted snowflakes. Little openwork beauties will decorate not only the Christmas tree and the house. They can also be used to decorate knitted items (for example, a baby hat). Snowflakes are knitted from white, blue, blue (as you like) threads for knitting or iris, or floss, or severe bobbin threads for sewing.
Particularly creative craftswomen can come up with a pattern for their snowflakes on their own. And with a decline in creativity or lack of time, you can find many interesting ready-made schemes. By the way, with no less success for knitting snowflakes, you can use the motifs of openwork napkins. The finished snowflake is slightly starched and ironed. However, for those who do not yet know how to crochet, making knitted New Year's snowflakes is a great occasion to master this simple and very useful technique.
Snowflakes from twigs
For such snowflakes, you will need branches of any tree (pencil-thick), a knife or sharp scissors, glue (glue gun) and something for decorating - buttons, beads, berries, ribbons, coniferous branches, etc.
We cut the branches according to the number of rays of the future snowflake. Remember that there should be an even number of them - six or eight? Glue all the rays on the base (the middle of the snowflake) from cardboard in a circle. In order to give the branches a resemblance to snow crystals, we add transverse or V-shaped short crossbars to each ray. And you can do both. We decorate the middle as we like: a bow, a green twig, bright buttons, in a word, whatever your heart desires. The snowflake is ready. We want, we hang it on a Christmas tree, we want - on the wall and admire!

Snowflakes from felt
This is a great option for making creative snowflakes for those who are friends with a needle and thread. But even if you don’t know how to sew well, then felt snowflakes are a great reason to start learning this. For such snowflakes, you will need red and white felt (discs with a diameter of 10 centimeters and a strip of 0.5 by 10 cm), a fabric pencil, a sewing machine, red and white threads, and scissors.
Draw a horizontal line through the center of the white disk with a pencil and divide the disk into six equal sectors. Two centimeters from the center of the circle, mark points on the drawn stripes and connect them alternately with each other with straight lines. In the center of the snowflake should be a pentagon. And then on each long strip (snowflake ray), draw two perpendicular short stripes. However, this is only one of the options for drawing. You can depict on felt any other snowflake of the correct geometric shape.
After that, fold the red and white circle with each other, and between them, under one of the rays, put a thin strip of felt (this is a loop for hanging a snowflake). Thread the sewing machine so that the top thread is red and the bottom thread is white. Sew the snowflake along the drawn lines - first the rays, and then the small stripes. Trim off any excess thread. And then cut out all the unsewn parts of the circle with scissors, departing from the seams by two millimeters on both sides. Erase the pencil and you can admire the extraordinary red and white felt snowflake. Yes, not only admire, decorate a Christmas tree or a room with such snowflakes - the effect will exceed all expectations.
Salt dough snowflakes
Beautiful salt dough snowflakes can be made in two ways. In any case, you will need a dough of one part salt, one part flour and two parts water. For plasticity, you can add a spoonful of vegetable oil to the dough.
In the first case, we sculpt snowflakes from thin sausages. We roll out the sausage and turn the monogram out of it. We wrap the ends of the sausage in a spiral on both sides (two or three turns), and then we pull these spirals towards each other so that a loop forms under them. This is the first element of the snowflake. The second element is a simple loop. We roll the rolled sausage dough into a loop and cut off the excess tips.
For one snowflake, you will need four monograms and twelve loops of dough. Place a small circle (also made of dough) in the center of the future snowflake, and place the monograms around it with spirals inside the snowflake. Place four loops (cone down) between the spirals of the monograms, and the remaining eight (cone up) between the loops of the monograms.
In the second case, the snowflake is made from a single piece of salt dough, rolled into a thin layer. Cut out a snowflake using a stencil - it can be openwork, it can be solid, without gaps. Make a hole for the tape. Cover the dried snowflake with white paint and decorate with dashes, circles and curls. For coloring, use a red or blue felt-tip pen. If desired, varnish the finished snowflake.
As it turns out, a do-it-yourself New Year's snowflake is not only scissors and paper. All your handicraft skills can be fully manifested in the manufacture of such a simple and wonderful symbol of winter and the New Year - snowflakes. So, in preparation for the New Year, we sew, knit, sculpt and glue these magical lace decorations, and how could it be otherwise - the New Year is on the threshold!
Talk 9
Similar content


Snowflake is one of the most important attributes of the New Year. They decorate houses and various institutions. Everywhere on the windows these little particles of the holiday flaunt. Previously, snowflakes were made mainly of paper, now there are a lot of opportunities for a flight of fancy. In this master class, the most popular ideas for creating a snowflake will be considered.
DIY snowflake from threads
These snowflakes are fun and cute. They can be used as a souvenir for the New Year.
To create these wonderful snowflakes you will need:
- Thick yarn;
- Cardboard;
- Scissors;
- Glue;
- Beady eyes.
First, you need to cut a circle out of cardboard. The larger the circle, the larger the snowflake will be. Next, a smaller circle is cut out exactly in the center. The cardboard blank is wrapped with yarn. When the whole circle is wrapped, take scissors and cut the yarn along the outer diameter of the circle. The cardboard is carefully removed and the threads are tied in the middle. Then the yarn is straightened as it was on the cardboard.
The next step is to form rays. There can be as many rays as you like, it all depends on the size of the snowflake. An important point: the rays must be the same size. They are fixed with threads and the eyes and nose are glued, the mouth is made of red thread.

paper snowflakes
Very often snowflakes are cut out of napkins. They are incredibly soft and airy. Even a child can cope with such a task if he knows how to handle scissors.
First of all, you need to fold a sheet of paper so that you get a triangle. Then everything depends only on the imagination. In the triangle, they begin to cut out different shapes with small scissors.
You can add volume to snowflakes from a napkin. This will require three openwork oval napkins. They are folded horizontally. Next, each accordion is folded in half and glued in the middle. Finished parts are connected to each other by the sides. The snowflake is ready. Such a snowflake can be hung on a Christmas tree, decorate a window or wall.

Volumetric paper snowflakes also look very original. To make such a snowflake, you need to take six identical sheets of square-shaped paper. Each square is folded diagonally. Parallel lines are drawn on the resulting triangles. The distance between them must be equal.
Then, cuts are made along these lines, not reaching the middle of a few millimeters. Next, the triangle is unfolded and the strips are fastened together in pairs. They start from the middle, then turn the sheet over and fasten the next pair and turn the sheet over again. Fold the rest of the sheets in the same way. When all the details are ready, they are fastened together at the points of contact.
Foil snowflakes look very festive. They do not need to be additionally decorated, as the glitter of the foil gives the snowflakes a New Year's fabulous glow. The technology for cutting a snowflake is the same as that of a snowflake from a napkin.

Crocheted snowflake with your own hands
A crocheted snowflake can become part of the decor of a room, it can be used to decorate a Christmas tree or a New Year's card. And also snowflakes can be sewn on a child's dress for a New Year's party.
So, you need to make a ring with your finger and knit one air loop with a lift. In the first row, eight single crochets are made. When the row is ready, the ring is tightened and the closing column is knitted.
The second row starts with five air loops. In the next loop, make a double crochet and two more air loops. The process is then repeated until the row is completed. Complete the row by making the closing column in the third lifting loop.
Arches are knitted in the third row. To do this, make a closing column, two lifting loops and three columns with a crochet. Then knit five air loops. To get the next arch, knit four double crochets and again five air loops. Then continue in the same pattern to the end of the row. The row ends with a closing column.
In the fourth row, make one lifting loop and one single crochet. Next, three air loops are knitted, forming a picot. Then knit one single crochet in the same loop. The next picot is knitted from five loops and one single crochet. Then a pico of three loops and a single crochet. The element is ready. To connect, make three air loops and repeat the element to the end of the row. At the end of the row, a closing column is made and the thread is hidden. The original decoration is ready.
 Preparing for the New Year always takes place in the hustle and bustle. I want to do everything and not forget to decorate my house. Openwork snowflakes made in different techniques will be an excellent decoration for the holiday. The time spent making them will give you a good mood and a sense of a fairy tale. And snowflakes hung everywhere will create a winter atmosphere, even if it is raining and slushy outside.
Video on the topic of the article
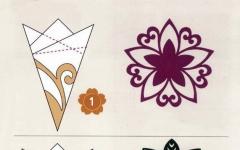
To make a beautiful paper snowflake, you should stock up on ready-made templates for creating a pattern in advance. Of course, you can cut paper without using special patterns, but this method is only suitable for those who already have a certain experience and artistic taste. The process of making openwork snowflakes is quite simple, for this you need to fold a sheet of paper in half so that you get a triangle. We fold the resulting triangle two more times, after which we cut out the pattern using a pre-prepared template. This is applicable to create traditional hexagonal snowflakes.
To make a snowflake with eight corners, first fold a sheet of paper in half twice in a triangle, and then diagonally once more. The octagonal snowflakes look more delicate, but are more difficult to cut due to the more layers of paper. 
Patterns for cutting paper snowflakes


Instead of plain white paper, you can use paper napkins, tissue paper, foil, or old magazines. Beautiful openwork snowflakes on the walls and windows of the room will perfectly complement the festive decor. From light paper snowflakes, you can make a great garland or streamer with threads hanging down. You can also decorate a New Year's card or gift wrapping with a homemade snowflake. Snowflakes made of a denser material will be the perfect decoration for a children's New Year's costume.

Volumetric paper snowflake

Necessary materials:
- thick paper of any color;
- pencil;
- ruler;
- scissors;
- stapler (glue or tape).
Manufacturing:

Beautiful pasta snowflake

Necessary materials:
- pasta of various shapes;
- brushes of different sizes;
- glue Moment;
- acrylic paints;
- decorative elements (beads, rhinestones, sparkles, artificial snow, stickers, etc.).
Manufacturing:

Openwork snowflake in quilling technique
Quilling (paper rolling) is a direction in art associated with the manufacture of flat or three-dimensional figures from strips of paper twisted into spirals. Using the quilling technique, you can create incredibly beautiful openwork snowflakes.

Necessary materials:
- paper;
- ruler;
- pencil;
- scissors;
- tassel;
- glue;
- awl.
In winter, when it is not always possible to walk long evenings due to bad weather, you have to find something for yourself during this period. The main winter holidays are, of course, New Year and Christmas, so this article can be a help in answering the question "how to decorate a house for the holidays." Snowflakes can also be used to decorate a Christmas tree and a festive dress. In childhood, we all cut out similar figures at home and at school, I suggest a little recollection of those times. We want to talk about how to make a snowflake from improvised materials with your own hands. So let's do it together!
How to make a snowflake with your own hands in different ways
We will need:- Cardboard;
- Napkins;
- Foil;
How to make very funny snowflakes out of cardboard
Very cool snowflakes are obtained. They can be made with the child and decorated as desired.
The only drawback of such snowflakes is that they take a very long time to make. First you need to print the template, cut it out, transfer it to cardboard and cut it out again, then glue and paint. But I think the result is worth it.
As options for decorating such simple crafts, I recommend paying attention to:
- Confetti;
- Finely chopped rain-tinsel;
- Broken glass from Christmas decorations;
- Colored markers or felt-tip pens;
- Colored glue with glitter;
- Nail polish;
In other words, any bright and shiny material is suitable for decoration and decoration. And if you make additional figures and stick them on top of the main snowflake through foam rubber spacers, you get a beautiful and voluminous figure.
Little white snowflakes fascinate us. Perhaps that is why they have become a symbol of the New Year and winter holidays. I think everyone remembers how in childhood they cut out snowflakes from everything that was at hand, came across. And the most interesting thing was to cut out snowflakes from paper napkins. They were light and airy. Of course, over time, you forget how to do it, but you need to help your child make a snowflake.
Even a child can make a snowflake out of a napkin. They will definitely enjoy this activity. Moreover, long garlands can be assembled from individual snowflakes.

From napkins, you can make snowflakes of various shapes: from square and round to voluminous. For ordinary snowflakes, it is necessary to prepare blanks of a certain shape. You also need to properly fold the napkin. Folding can be done in several ways. The easiest and easiest way is to fold it into a right triangle. To do this, we take a square napkin and fold it in half diagonally and get a triangle, then fold this triangle in half again in the middle. And once again we add our triangle, we get a narrow triangular blank. We draw or transfer the drawing of a snowflake and cut it out. Do not forget that one of the sides cannot be cut so that the snowflake does not crumble.
Be patient, as napkins are very fragile material and can break, so don't be discouraged if the snowflake doesn't work the first time.
You can also make voluminous snowflakes from napkins. But modular origami is a difficult type of product for a child, so parents will have to help.
Let's try to make different sizes of foil snowflakes
We have discussed with you how to make snowflakes from cardboard and napkins, now let's learn how to make foil snowflakes.
It turns out the snowflakes are very beautiful, even more beautiful than from paper, because they will shine with their highlights in different directions, as soon as a ray of light falls on one of the snowflakes, they will look very beautiful near the hung shimmering garlands.

- Chocolate foil, preferably with a paper backing;
- Pencil;
- Scissors with thin edges.
Let's get started:
Cut out squares from foil.
We add them according to the scheme:

We draw patterns and carefully cut them out, you may need a clerical knife or a scalpel to work in hard-to-reach places.
We can diversify our decorations by combining several snowflakes from different materials into a single figure, showing imagination and gaining inspiration, you can develop this topic indefinitely, because what could be easier than cutting out a snowflake familiar to everyone from childhood?
It is not so difficult to make a pretty and quite interesting decoration from the simplest and most affordable materials. Snowflakes will delight you throughout the holidays, and if you show a little imagination, you can easily make even more beautiful and interesting figures. You can also add crochet snowflakes to your decorations. It will be especially interesting to teach this to children of preschool and school age, this will develop in them both fine motor skills and a sense of composition and rhythm, shape and color. I wish you inspiration and joy in these wonderful days. Watch this video for inspiration.
Video selection on the topic of the article