
New Year holidays is just around the corner, so today I want to share the “recipe” holiday decoration, which can be sewn very quickly, is a simple New Year's boot.
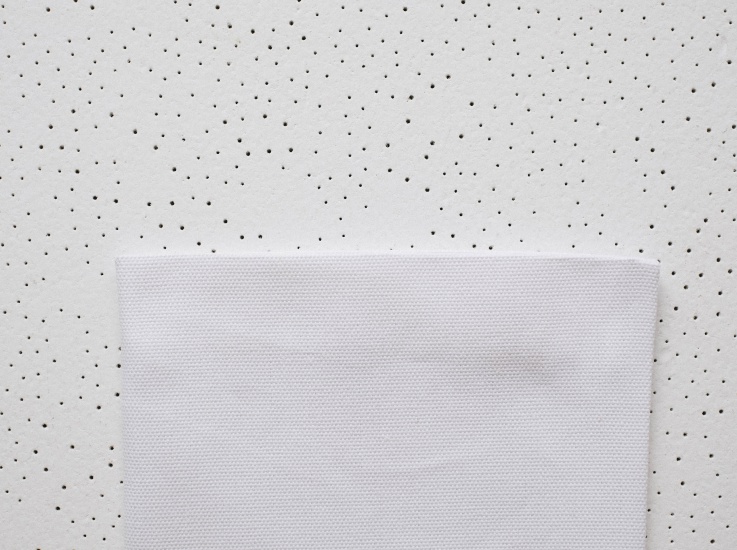
New Year's boots come in all sorts of shapes, sizes and types, and the ideas for decorating them are truly inexhaustible, but I decided to start with the “basic model”)) And I was inspired by this panel (or in other words, a coupon) that I found in the World of Sewing - my favorite sewing store.

They make adorable mini boots, I can see them on the Christmas tree - they’re beautiful and you can hide small gifts for children.
It seems to me that with this fabric you can sew boots together with your children - it’s not difficult, the child will cut along the lines, and the mother will sew. Holiday mood guaranteed!

There are 24 boots in total on a piece of fabric - only the front parts, the back part and the lining will need to be cut from a different fabric. And at the bottom of the coupon there is Christmas balls and gingerbread men. You can decorate the entire Christmas tree with toys self made. I plan to give away the boots, the Christmas tree in our house is small and 24 boots is clearly too much.
But even without such a panel, the process is still very simple and, most importantly, fast! I have prepared 2 free boot patterns for you different sizes, you can download them below. Let's get started!
Simple DIY New Year's boot
Materials and tools:
1. Fabric - I use cotton fabrics for patchwork with Christmas prints. You will need fabric for the front and back of the boot, fabric for the lining (mine is Stof fabric) and eyelets.
2. Filler - it is not necessary to use it, but with it the boot holds its shape better. I use regular cotton quilt filling Aurora Simply Cotton, the boot turns out soft and fluffy. Instead of quilt filler, you can use adhesive interlining.

3. Pattern— you can download two versions of the pattern:
4. Tools:
- Scissors or cutter and cutting mat
- Ruler
- Disappearing fabric marker or tailor's chalk
- Pins
- Threads to match

5. Sewing machine

How to sew a simple New Year's boot
1. Let's cut out the details
The first thing we need to do is cut out 2 parts for the front and back of the boot. Make sure they are facing in different directions.
For the loop you need a rectangle of fabric 4 x 15 cm

And 2 parts for the lining - also in a mirror image.

One piece of filler - we will only lay filler front side boot. 
All the details are ready, let's sew!
2. Sew a loop
Fold the rectangle in half lengthwise, iron it, then fold the edges toward the center and iron again. Fold the strip of fabric so that all cut edges are hidden. Sew along the edge of the loop.

3. Quilt the boot
Take the front part of the boot and place it on the filling. Pin and quilt. You can skip this step if you decide not to use filler. You can also skip quilting the boot if you use adhesive interlining instead of quilt filler.

4. Let's sew a boot
Take 1 piece of the lining, place it facing you, the toe of the boot should point in the same direction as the front part. Sew the loop to the lining at a distance of 3 cm from the right edge.

Fold the front part and lining WITHOUT eyelet Face to face, sew along the top edge with a seam allowance of about 1 cm.


Do the same with the back and lining. with loop.

Trim seam allowances so that they do not create excess volume.

Lay the 2 pieces face to face - lining to lining, front to back, line up the seams and pin together.

Sew around the entire perimeter, leaving a hole in the lining. It is necessary in order to turn the boot inside out. Don't forget to backtack at the beginning and end of the stitching. seam increase is about 1 cm. 
Trim the seam allowances and make notches on the rounded parts of the boot, so they will turn out better. I trim the seam allowances with zigzag scissors; with them there is no need to make notches.

Turn the boot inside out and sew up the hole in the lining.


Tuck the lining inside the boot and loosen it. Ready!

If you have a little time and basic sewing machine skills, a Christmas stocking is the easiest and quick decoration which can be sewn for the New Year. It will not only decorate the room, but will also be an ideal gift wrapping.
The Story of the Christmas Gift Stocking
According to one legend, many years ago, in a small English town there lived a widower with three daughters. He was very worried that due to poverty he could not provide his daughters with a dowry, and no one would marry them. When the man was telling his friend about this sadness, Santa Claus heard him and wanted to help. Santa understood that the widower’s pride would not allow him to take the money, so he decided to give the man’s daughters gold coins.
On Christmas night, Santa Claus came down the chimney into the family's house. But instead of New Year's decorations and a decorated Christmas tree, in the girls' room there were only washed socks and stockings hung on the fireplace. Santa had no choice but to put the gold coins in them. In the morning the girls woke up and found gifts. They told their friends and neighbors about them, and gradually all the residents of the town learned about this Christmas story. Since then, on a festive night, people began to hang hosiery on their fireplaces, in the hope that Santa Claus would make them happy too.
Even if you don't have a fireplace, you can easily find a place to hang a cute Christmas stocking or two to get in the Christmas spirit.
DIY Christmas stocking - materials and tools
Time spent on 1 Christmas stocking - 20 minutes. We will need:
- dense fabric - about 50 sq. cm for 1 sock
- sewing machine
- threads
- scissors
- twine
- thick needle with a large eye
- stencil with letter
- a simple pencil or tailor's chalk
- fabric paint and brush.
How to make your own Christmas stocking
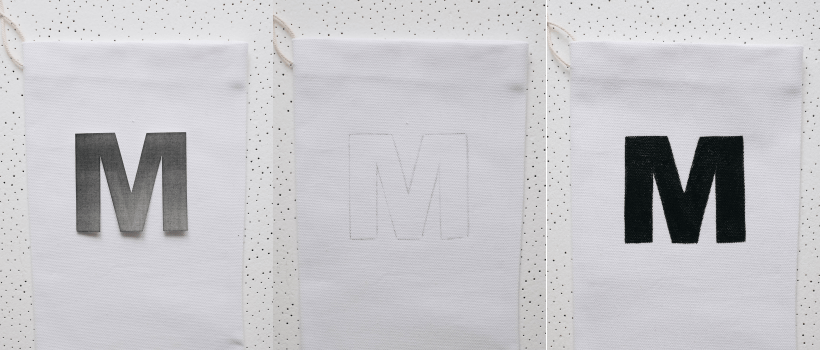
I decided to make the Christmas socks monochrome, so I chose white fabric and painted the first letters of my husband’s and my names with black paint on the fabric. You can build on your interior and make them in any color.
1. Fold the fabric in half with right sides facing inward. Take the Christmas stocking stencil and trace it onto the fabric using a simple pencil. You can easily find a stencil on the Internet or draw it by hand, as I did. Remember to leave a seam allowance of about 5mm along the outline and about 3cm for the hem at the top.

2. Cut out the workpiece, sew on sewing machine, turn it inside out and iron it. It is better to cut off the excess fabric closer to the seam so that after turning it inside out, the sock will look neater.
3. Fold 3 cm of the top fabric inward. The edge can be stitched or secured with hot glue.
4. To save time, I did not sew the loop from fabric, but made it from cotton twine.
We take a very thick needle with a large eye and thread the string through it. We step back about 2 cm from the upper left edge of the Christmas stocking and pierce the fabric with a needle to thread the rope. We tie it in a knot. The resulting loop can be used both for hanging and for additional decorations.


5. Now cut out the letter. Usually, this is the first letter of the name of the person to whom the gift is intended. It can be printed on a printer.
We attach the letter to the fabric, trace it with a simple pencil and paint it with acrylic for textiles.
The Christmas stocking for gifts is ready!


As the cold weather approaches, many people begin to feel the holidays are approaching. And not without reason, because Christmas is getting closer and closer. Even bad autumn weather with rain and winds cannot spoil these festive feelings. All housewives dream of how to quickly decorate their home and bring bright colors into it with the help of decor. If you want to fill your home with an unusual zest, then the tilde in New Year's style would be a great option. You can sew such an unusual decorative element with your own hands. It’s worth thinking about creating such a doll in advance, because you may get carried away with the process and want to make a couple more New Year's toys tilde to give to friends.


New Year's toys in the tilde style will look great in traditional colors Christmas - red, green, blue, white. Fabrics with themed patterns in the form of deer, snowflakes, and Christmas trees will look especially harmonious.


New Year's toys in the tilde style are becoming quite popular, but sewing them is a pleasure. The patterns are quite simple, and if you choose bright fabric, the Christmas tilde will turn out to be original.
When producing a New Year's tilde, you can find many ideas and show your imagination. Not only tildes in red shades will look great as home decoration. You can make it in the image of a snow-white fairy, or sew an outfit in silver tones.
Consider the options for patterns for New Year's tildes. Perhaps you will like some of them.


Tips for sewing tilde from the New Year's collection:
- transfer the patterns to cardboard. This will make it more convenient to store it and transfer elements to the fabric;
- when cutting patterns from fabric, be extremely attentive to the shapes, especially the edges;
- do not forget to leave allowances on the fabric;
— think in advance about the image of the New Year’s tilde doll, taking into account clothes, decorations and attributes.
If you liked the idea of painting a room with tildes, then consider sewing small New Year's tilde dolls from which you can make a garland. Alternatively, tildos can be of different sizes, but similar to each other, or the same size, but play with different fabric textures.

DIY New Year's tilde angel

Required material:
- thick cotton/linen. Color: cream, beige, chocolate.
- fabric for dresses, pants, wings
- lace for decoration


Any yarn can be used as hair. For example, mohair, or felting fiber. In the second case, you will also need a felting needle.
Filler.
Use synthetic fluff or holofiber as filler.
Wire.
A piece 25 cm long, diameter 0.8.
You will also need a black fabric outline or black acrylic paint to make the face of our New Year's tilde doll.
Print two sheets of patterns in full size.


Transfer patterns to fabric


Make identical rectangular blanks.
Sew the fabric piece of the body and the top of the dress, and lace between them.

Flip to wrong side. Translate the pattern. Make sure the lace stays in place.
Align the parts at the seams and stitch.


Cut, leave seam allowance at the bottom and turn right side out.
Legs too. Sew the same parts together. Top – pants, bottom – body. We sew lace between the threads.
Don't forget to iron.

Draw the line of the bottom of the pants together, fold the pieces in half, and transfer the pattern. Pin the seam line and stitch.


Cut, leaving an allowance at the top, turn inside out using a wooden stick or pencil.

We make New Year's tilde bending knees. You need to fill your legs up to the knees.
It is necessary to stuff evenly.

Let's stitch.

Stuffing top part DIY Christmas tilde legs


Everything is easier with your hands. Let's translate the pattern and sew the fabric folded in half.

Cut with allowance

Turn it inside out and stuff it slowly

Let's do the wings. Let's transfer the pattern to white fabric.

Sew with a small hole to turn inside out and stuff later.


We sew in the legs of the angel tilde. You need to bend the edge of the body at the bottom and sew the legs with a basting stitch. They need to be drawn up along the pattern line so that the legs are not of different lengths.


Let's sew on the handles. Fold the seam allowance inside the arm. Make sure that the seams of the arm and body match. Sew with hidden stitches.


We got such a cute New Year's tilde doll.
All that remains is to make her an outfit.

Sew together the details of the upper and lower skirts. It needs to be ironed, but not along the seam, and the part of the upper skirt should be shorter so that the lower one can peek out.


Gather and distribute along the waist


Sew the skirt with a hidden stitch

As a decoration, make a rose out of fabric.


Sew the flower to the body 
Make the tilde eyes with a contour along the fabric.

Making our Christmas tilde's hairstyle

We use threads for felting. We take the fiber, measure the required length and mark the parting location. Take a felting needle and roll the hair along the parting.


It’s like inserting fibers inside the fabric.


A Christmas stocking will perfectly decorate your interior during the New Year. It’s not at all difficult to sew, try it and you’ll definitely succeed, and our detailed recommendations will help you.

You will need:
Sock fabric and loops
Lining
How to do:
Sew several scraps of fabric together to create a piece onto which you can transfer the 65cm long sock template (see image A). Please note that 30 cm of the sock must be completed by yourself.
Sock pattern:


Place the piece on the batting, pin and stitch by hand or on a sewing machine. Place the quilted blank and lining together with right sides facing each other, sew along the collar edge and press the seam (see Fig. B). Fold the blank along the front side inward and transfer the sock template (see Fig. C)

Sew the piece together, leaving a hole in the lining for turning inside out, and cut it out. Turn the sock right side out and sew up the turning hole. Insert the lining into the sock. Sew a loop to it.
Hand quilting.
I must say that I am by no means an expert in quilting - neither by hand nor on a sewing machine. Perhaps this is why I prefer hand stitching, which always looks very cute. This technique reminds me of the old rugs in our cottage, inherited from my grandmother, which had shrunk and faded from numerous washes.
Ideally you would sew the main fabric, batting and lining, but I tend to sew only the main fabric and batting. Try tightening the thread a little tighter than usual - this will make the seams more decorative.
Please note that when using this technique the model shrinks, so the seam allowances must be left larger.
To pre-fix the layers of fabric, I use a special gun, which is sold in quilling stores. It shoots out little plastic buttons that hold the materials together while you stitch.


In our families during the winter holidays, the traditions of Western Christmas and Russian New Year are increasingly intertwined. And there is nothing wrong with this if we take everything that is most beautiful, bright and interesting. A New Year's sock, also known as a boot, or a Christmas stocking, is already a familiar accessory for gifts from Santa Claus to many children. Today NameWoman will tell the legend about the origin of this holiday symbol and will offer readers a master class on how to make a Christmas stocking. But first things first...
The history of the New Year's stocking
New Year's this attribute of the main winter holidays became only in our country, initially it was one of the symbols of Christmas, firmly connected by a magical legend with Santa Claus, or rather with Saint Nicholas (Nicholas).

One day Saint Nicholas heard about an honest and very kind, but poor family of women. According to one version, only three sisters lived under one roof; according to another, their elderly mother also lived with the girls. Their situation was very difficult and, in order to somehow improve it, the poor women would have to sacrifice their virtue. Then the saint decided to help them by making generous gifts worthy of the golden souls of the girls. So that they could not refuse the miracle that had occurred and knew for sure that these gifts were intended specifically for them, St. Nicholas threw gold bars (according to another version, bags of coins) into the house through the stove pipe so that they fell straight inside the drying stockings. So stockings or socks became a symbol of Christmas gifts.
How to make a Christmas (New Year) stocking for gifts
 Materials
To make a Christmas or New Year's stocking for gifts, we will need following materials:
A piece of fleece 40 by 40 cm;
A piece of any fabric for a cuff 15 by 20 cm;
A piece of ribbon suitable color, for a loop;
Adhesive interlining.
For decorative elements we will prepare:
Black beads for the snowman's eyes;
Sequins and bugles for a broom;
Acrylic paint: red and white for the snowman;
10cm gold ribbon for the bow.
Red, white and green are the colors of Western Christmas, and Santa Claus is most likely to put his gift in this sock. Well, even though Santa Claus is not used to New Year's socks, he cannot resist blue, blue and white. It’s always a pleasure to make your own New Year’s decorations and gift wrapping yourself and together with your children, because this work already sets the tone for the festive mood.
Pattern
To make a pattern, take any sock. We apply it to the fabric and trace it with a piece of chalk at a distance of 1.5-2 cm from the sock. A greatly enlarged product will also look great, although it will more closely resemble a Christmas boot. But it can act as original packaging for a gift to a friend or girlfriend. On the eve or immediately after the chiming clock, you can distribute such socks with sweet souvenirs to everyone present. In such a case, NameWoman make the loop of the New Year's sock longer and wider and write on it with a pen or acrylic paint guest's name. As a last resort, make a hole in the corner of a small card with a hole punch and insert a ribbon into it, thus attaching the card to the gift.
 |
 |
Manufacturing technique
Cut out the part of the Christmas stocking. We apply it to the remaining piece of fabric face to face and cut out the second part of the boot. We sew the folded parts together. Additional processing of the cuts is not required, since the fleece fabric is comfortable and does not fray. Turn the product right side out.
We cut out a snowman from non-woven fabric. (For the template, it is convenient to use not only a compass, but also any round objects (jars or glasses). In this case, the basis for the craftswoman’s work was a wooden spool of thread. We cut out 3 circles of different sizes for the body and head and 2 circles for the handles.
We lay out the circles on the boot, forming a snowman. Be sure to make sure that all the mugs are with the glue side down. Place a piece of newspaper or thin paper on top of the non-woven fabric and iron it with a hot iron, pressing lightly. All the circles will stick.
Let's add one more detail for a fashionable snowman on a New Year's sock: I cut out a piece of non-woven fabric in the form of a trapezoid and glued it to the head. This will be a bucket. White acrylic paint is for the snowman's fur coat, red is for his headdress. Let the work dry.
We mark the location of the broom. Where the holder will be, sew sequins onto the toe. Bugle beads will play the role of twigs. In place of the eye we sew two large beads, and paint the mouth with red acrylic paint. If desired, you can add a carrot nose. A voluminous nose is easy to make from a small piece red shower sponge, but foam rubber, unfortunately, tends to dry out over time.
 |
 |
After the snowman is completely ready, we proceed to the cuff. Cut out a rectangle. Its length is equal to the circumference of the boot at the top, plus 2 cm for the seam. And the width is arbitrary, but not less than 7cm. Fold the rectangle in half, stitch the seam, and iron it.
 We put the resulting ring on the boot and sew it on. We turn the resulting cuff up, bend it and sew its second edge inside the boot. We decorate with a gold ribbon, sewing a bow from it, and do not forget to sew on a loop for hanging the New Year's stocking. You don’t often see a fireplace in a modern apartment, use a set with kitchen hooks and temporarily mount it on the wall near the tree. A few Christmas socks can also decorate the kitchen interior during the holidays, keeping company with the pans, ladle and cutting boards suspended above the countertops.


