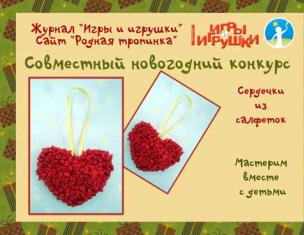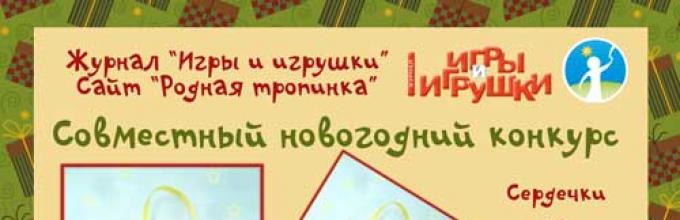
Napkin hearts with your own hands with your children: how to make a holiday souvenir - hearts.

The master class is conducted by Svetlana Nikolaevna Myasnikova, a kindergarten teacher from the city of Verkhoturye, Sverdlovsk Region (Municipal Autonomous Preschool Educational Institution “Kindergarten No. 19.”).
The hearts that you will make today in our master class can be Valentine’s cards, Christmas tree decorations, and gifts for birthdays or March 8th. They can also be made in different sizes and used to decorate the house for the holidays or to decorate the holiday table.
The technique used in making hearts very well develops the dexterity and skill of children's fingers and prepares the child's hand for writing.
You will find all the master classes of our competition for making crafts with children in the list in
Napkin hearts
I give the floor to Svetlana Nikolaevna and her students to conduct the master class:
Hello! I am Svetlana Nikolaevna Myasnikova, I work as a teacher in a kindergarten. My pre-school children and I decided to take part in your competition.
A very cheap and convenient material for work is paper napkins.
Our idea: make a New Year's toy using napkin balls.
To make hearts from napkins we will need:
- PVA glue,
- napkins,
two shaped pieces made of cardboard (we have a heart and a circle),
- a cord for a loop (on which we will hang our toy).
Step 1. Cut the napkins into 6 x 6 squares and roll them into balls.

Step 2. Dip each ball in glue and glue it onto our cardboard piece. It is better to start gluing along the edge, moving towards the center.


Step 3. We fill our entire part with such balls.
Step 4. We have two identical hearts.
Step 5. When they dry a little, glue a loop on the other side of our work and glue two identical parts together.
This is the heart we got.

And if you want to do hearts made from napkins for decorating the holiday table, then this video will help you:
Napkin hearts for table decoration
A heart can also be made from paper using the origami technique.
Paper heart using origami technique
http://youtu.be/BPA7H4cpj7w
You will find more interesting ideas for creativity in the website section:
— a three-dimensional postcard, an original flower vase, corrugated cardboard flowers, a floral panel made of two postcards.
Alena Larina
Master class"heart" (from paper napkins) .
How many different valentines
Spinning in snowy February.
One of them is mine for you.
Dear colleagues! I would like to congratulate you on the upcoming Valentine's Day! And offer yours master class.
As the main material, I decided to use ordinary paper napkins. After all, working with this material is a pleasure. It is very pleasant to the touch, the color range is not limited, it can be found in any store and its cost is not high. Wrapped out napkins many balls, Can make very beautiful, bright and original things.
And so let's begin.
For making " Heart"we will need the following materials:
1. Colored cardboard (I used red and pink shades);
2. Paper napkins, single-layer (white and red);
3. Scissors;
4. PVA glue;
5. Pencil;
6. Brush for applying glue;
7. Hole puncher;
8. Satin ribbon, braid or ribbon for flowers.

Bend a sheet of cardboard in half and draw heart or trace according to the template, then cut it out.

Napkin cut into small squares, the size of a matchbox.

Use a hole punch to make a hole for the tape (optional).

On the back side of the product, in the center, we draw smaller heart.

From roll napkins into balls(lumps, but not too tight (the ball should not open, but at the same time be slightly “disheveled”).
Along the inner contour apply glue to hearts.

We begin to lay out white lumps along the contour.

Laying out the outline heart– fill everything with lumps heart. We try to place the lumps close to each other.

We start gluing the red lumps from the edge heart, gradually moving towards the center. We glue the lumps as close to each other as possible so that there are no gaps left.

And so is ours the heart is ready.

If desired, you can thread a ribbon through the hole and use heart like a pendant.
Our heart – the work is not difficult, but extremely painstaking, it requires perseverance and accuracy. It will not only be a wonderful gift, but also a source of pride for children, and will also serve as a source of inspiration, motivating them to create new masterpieces.
Publications on the topic:
I offer an option for making flowers from paper napkins to decorate children's crafts. Our children are 2ml. gr. They decorated hats for the holiday.
Flower crafts can be useful for any occasion. I would like to present to your attention a master class on making paper flowers.
Master class "Forest. Winter landscape". Application from paper napkins in the senior group. Starting from the younger group, I have been making things with my children.
Master class “Beauty Christmas tree” made from paper napkins For work you will need: - green paper napkins (this is the main color, red,...
Master class New Year tree made from napkins. We take ordinary green napkins; for a tree 30 cm high you will need 2 packs of napkins. bend.
Dear colleagues! Today I present a master class on making a Christmas tree from green paper napkins. There's nothing like it on the Internet.
I present to your attention an unusual snowman, and he is unusual because he is red, and not only that. Here are the steps: 1. Draw and cut out.
How beautiful a room looks, decorated in large letters or numbers for the holiday. This could be a romantic “LOVE” at a wedding or the first letters of the names of lovers on February 14, the holiday date of the new year or the age of the birthday person on. Such decor will always be an excellent material for any photo shoot. Letters and numbers can be purchased ready-made or created with your own hands using cardboard and paper. There are several ways to make them.
What to make the base from?
http://www.thesweetestoccasion.com
A regular medium or large cardboard box made of cardboard is suitable as a base. On it you need to draw the outline of the future number or letter and cut it out with a stationery knife.
Next, you need to decide what number or letter you want to make - flat or three-dimensional. It all depends on the time you are willing to spend. The volumetric one looks more interesting, you can play with it and easily rearrange it anywhere in the room, but you will have to spend more time and effort on it. If you plan to just hang it on the wall, then you don’t need to cut anything else out of cardboard, and you can immediately start decorating.
For the volumetric version, you need to additionally cut out another similar shape with your own hands, and from the remaining part, long strips of cardboard of the same width for the sides. After this you need to assemble the frame. This is quite easy to do with a heat gun or masking tape.
How to decorate?

There are several different ways to decorate such products with your own hands. Choose yours based on the overall design style and the necessary materials.
Here are the most common options:
1. using twine,
2. colored yarn,
3. fabric - organza, chiffon, satin and even velvet,
4. floral films for packaging,
5. using regular colored paper,
6. from corrugated paper, stationery or floral,
7. flowers from ordinary napkins.
You can simply wrap the frame with these materials, or you can create volume by turning fabric or paper into fluffy flowers or “funts” sticking out in different directions. Let's talk about some of the methods in a little more detail.
In eco style

To decorate a letter or number in a fashionable eco-style, you only need twine and glue. This decor will easily fit into any interior and will not require large expenditures of both time and materials. The main task is to carefully wrap the outline with twine with your own hands, first coating the area of the box with glue.
The twine can be left unpainted or painted in any desired color with acrylic paints directly on the product.
Floral pattern
A very beautiful figure is obtained using. The whole alphabet, of course, won’t work, since it will take too much time, but if you need to make with your own hands only one number indicating age, for example, for a child’s birthday, then such decor will look simply gorgeous!
The roses are made from strips of corrugated paper; the photo shows the process of their production.

It is most convenient to fix them during the twisting process, and then glue them onto cardboard using a hot-melt gun. To save time, you need to make roses of at least medium size; gluing them with small flowers will definitely take several days.
Counters
Fountains can be rolled using fabric, paper or using flower packaging film. To do this, the material must be cut into equal squares. Each of the squares must be folded in half, but unevenly, and then in half again and again unevenly. So that all the edges stick out in different directions. After this, the pound is fastened at its base with a stapler and glued to the product.
 This simple and uncomplicated method is suitable for any occasion - a wedding, New Year or birthday. After all, the pounds lie on the base and make the number or letter from cardboard truly bright, elegant and voluminous.
Napkins
Another interesting decor idea is decorating with flowers from napkins. Using the most ordinary napkins, you can make the fluffiest number in the world with your own hands! 
First you need to make a lot of napkin flowers, and then glue them with PVA. Here's how to make a napkin flower.
1. A single-layer napkin is cut into 4 equal parts, which are folded on top of each other. We fix them in the center with a stapler.
2. Trim the edges of the square, turning it into a circle.
3. Cut the circle from the edges to the center so that the flower has thin petals.
4. We lift all the layers of napkin petals up and get a beautiful fluffy flower, as in the photo. With these flowers you can decorate not only a letter or number, but also make a whole one! 
This is how the bright yellow six turned out, a little like the sun. It will fit perfectly into the warm interior of a nursery for an upcoming birthday. All that remains is to make a few fluffy pom-poms for it with your own hands, as in the next video.
There is more besides fabric, corrugated paper and napkins. For example, scrap paper or delicate lace, coins or halves of wine corks. With such a surprise you are guaranteed to surprise everyone around and provide many bright photos at the holiday.
Using ordinary napkins for crafts is a fairly simple and at the same time original solution. A similar craft can be made even with a child, who will develop qualities such as patience, perseverance and accuracy, and also contribute well to the development of fine motor skills. In addition, napkins for children will help them become familiar with the different properties of paper.
As an example of such crafts, this master class invites a child to make an interesting gift for his mother in the shape of a heart.
Work together with your child, which will provide the basis for communication between you, and this, in turn, is another building block in the foundation of mutual understanding.
So, first of all, you should prepare the necessary materials. For the base you will need red cardboard, white and pink napkins, a pencil, scissors, glue, and a hand cut out of paper in advance.

To cut out a heart from red cardboard, you can use a template, or draw it yourself, which is quite easy. Cut out the resulting heart.

On the back of the heart, on one side you should circle a paper palm.

Next we will work with napkins. Several pieces of napkins should be cut into four strips at once, and each of these strips into three parts. The result is small squares with a side of three centimeters.

Now you should make lumps from these white and pink squares. Please note that you should not use water to make the task easier. The lumps themselves should not be very dense, but they should not fall apart either.

When the required number of lumps has been made, you can begin to form the composition. A palm will be made from white lumps, the inner area of which should be filled with them, gluing with glue.

In order for the composition to be hung on the wall, you need to take care of the loop. At this stage it should be glued to the center of the upper part of the heart. You can use satin or paper ribbon.

Now we will need pink lumps, with which we begin to fill the entire remaining area. It is better to start work from the perimeter of the heart, gradually moving towards the center. Make sure that all the lumps fit tightly to each other, otherwise the “bald spot” will not look beautiful.

In principle, the product is already ready; if desired, it can be further decorated. For example, here they added a small flower from their paper.

On the reverse side you can stick a wish to your mother or write it yourself.
27 January 2016
After the New Year holidays, we begin to prepare for Valentine's Day. It is considered a must-have gift to loved ones. valentine as a sign of attention and appreciation of feelings. Couples in love arrange a romantic evening by candlelight (using decoupage technique). An original surprise for Valentine's Day will be making a napkin holder in the shape of heart for this master class.
To work you will need a square sheet of paper and PVA glue.

Fold the sheet in half.
Unfold and fold it in half again in the other direction.
Having unfolded the square, we fold its edges towards the central horizontal line.
We repeat the same folds after unfolding the sheet in a different direction.

Having unfolded the square, we pay attention to its corners - due to the existing folds, small squares have formed in these places. You need to bend the corners of the squares, focusing on the boundaries of these small squares.
We repeat this on all corners of the large square.
Fold the sides of the workpiece towards the central vertical fold.
We turn our workpiece over to the other side.

We bend the upper part of the workpiece towards the central horizontal line.
We do the same with the lower part, bending it upward.
Triangular folds formed at the corners of the resulting square. They need to be opened a little, and then folded to form a diagonal fold.

We repeat this operation on the remaining three corners.
Now let's start forming the upper edge of our future heart. To do this, we make small bends.
After this, we straighten them, and tuck the resulting folds inward.
We repeat the same on the other side.

Bend the workpiece in half.
To form the bottom of the napkin holder, make a small fold at the bottom.
Then we straighten this fold and form the bottom.
We give the resulting heart its final look. To do this, you need to use glue and fix parts of the heart in several places.

Our napkin holder is ready.

It will become an original decoration for the festive table on Valentine's Day.

A paper napkin heart folded in the shape of a symbol of love will definitely lift your spirits on a romantic evening. Paper heart Not only is it a table decoration, but it is also used at the end of the meal.
The master class was prepared by Mar-K for the Handicraft Lessons website.