Happy parents of a two-year-old child know firsthand that a baby at this age is unusually active and inquisitive. If you turn away from him for a few minutes, the fidget will immediately find something to do, by the way, not always liked by adults. The child, like a magnet, is drawn to do some kind of "Skoda", exposing himself to all sorts of troubles and dangers.
"What to do with a little naughty to direct his energy in the right direction?" many parents ask. We will try to help in this difficult, but painful issue.
To begin with, I want to draw your attention to the fact that at the age of 2 years, children actively absorb any information coming from you or the people around them. Therefore, I strongly recommend not only playing games with your child, but also involving him in needlework and creativity. This is a great way to strengthen friendships with the baby, develop his creativity, as well as develop fine motor skills of the fingers.
In this article, I offer you a lot of ideas: what to do with a two-year-old toddler in your free time. I must say right away that at first the baby will be distracted, as well as not quite attentive and assiduous. Therefore, you will face a difficult task - to teach your child to keep their attention in one lesson throughout the entire process of making crafts, drawing images, etc.
What crafts can be done with a child of 2 years old ?!
finger painting
One of the most favorite activities of little personalities is drawing with fingers and palms. The main task of parents is to choose the right paint so that it is of high quality, environmentally friendly, approved by dermatologists and does not cause allergies on the child's skin. You can buy ready-made finger paints or make your own.
How to make your own finger paint.
You will need the following materials: starch, salt, sugar, food coloring and some glycerin.
Manufacturing process: mix all the ingredients except glycerin and boil a little to a glue-like state. Add a little glycerin to the cooled mass so that the paint shines noticeably.
Be sure to prepare the workplace for the drawing lesson. To do this, cover the work surface with oilcloth or waste paper, place objects for drawing (paints and paper), put a container of water so that the young artist can periodically rinse his hands, put a towel next to him. By the way, so that the child does not get dirty - put an apron on him. The choice of the theme of the drawings lies with you and, of course, with the baby.
We draw on cereals, sand, salt ...
Drawings from various fillings or salt. To create such patterns, pour the cereal onto a tray and smooth it with your hand so that it covers its entire surface. Show your child how to draw: run your finger over the rump, drawing a circle, a stick, a flower, etc. Then level the surface and ask the little one to do the same! Perhaps the child wants to draw some kind of hooks, incomprehensible "carly", broken lines, etc., then do not stop him, do not interrupt the flight of fantasy and the inspiration that has flooded over him.
Modeling from plasticine and salt dough.
Crafts from egg boxes.
Crafts using an egg tray. A vivid example of such a creative solution can be a whole flower meadow. To do this, cut out the shape of an egg and make cuts along the edges. These will be the petals. Give the child the opportunity to straighten the flower petals, and then paint them with multi-colored paints. Plasticine attach a stalk to the flower - a toothpick or a twig.
Houses and huts! Tell me, who didn't love them as a child?!
Some more experiments!
Bouquet from natural material. In the autumn season, during a walk, collect golden, red and green leaves, beautiful flowers with your baby and dry them between the pages of an old magazine or an unnecessary book. From such a natural material, you can build a beautiful composition on a piece of paper or make a bouquet and put it in a vase.
Pictures or fridge magnets made of gypsum. You won’t believe it, but together with a two-year-old child, you can make plaster figures. You will need to dilute the gypsum with water to the consistency of thick sour cream, and then pour it into the molds. So that the product can be hung, immediately apply a wire, string or magnet to it. When the plaster hardens, ask your child to paint the crafts with paints.
How to promote the development of creative talent in a child!? Recommendations.
- I strongly recommend that all the crafts that the child has made should not be hidden in the closet, but put on the shelves, hung on the walls of the children's room so that the child sees the fruits of his creativity and, upon the arrival of guests, can proudly show off his own masterpieces.
- And further! If your favorite two-year-old craftsman does not work well or he does the craft differently than you want, then in no case do not shout at him, do not insult him, but just calmly tell him how to do it right.
- Art activities should take place in a relaxed, friendly environment.
- Do not forget to praise the child so that he feels your support in a difficult matter for him.
Read more:
Making decorations for Valentine's Day with the kids
What toys to choose for a child of 2 years old ?!
Application classes for children 2 - 3 years old
Oct 21
You can make amazing applications with children at an early age. Invite the baby to tear off pieces of paper and stick them on a sheet - an elegant tablecloth for Masha's doll is ready! What else can you offer a 2-3 year old baby to make, does mom think?
We offer you a small applique lesson plan for kids, starting from the simplest tasks and gradually complicating them. Let the application for the child be not just “gluing circles”, but an interesting game. For each task, come up with a fairy tale story. We glue not just flowers, but a magical clearing, along which the crumbs' fingers will then run, stepping from flower to flower. Prepare all the details for work in advance.
balls
Cut out several circles: large and small. Tell the child that these are koloboks that roll along the road. Invite the kid to glue all the big ones, next to all the small kolobs. You can stick them on different sheets: mothers-koloboks live on one sheet-house, and all the children live on the other. Circles can be not only koloboks. Dream up - these are apples (and of different colors) that the hedgehog toy will come to collect, these are the balls that the Bear will play with. Already closer to three years, the game can be complicated: the koloboks want to play leapfrog - they jump over each other. We glue big-small-big-small circles. We draw two plates - for a small doll and a large one. We glue small apples in one plate for a small doll, and large ones in another. Playing in this way, call the baby colors, size, shape.
Cubes
As in the previous game, we play with cubes. Cut out large and small squares. Take 2 cars of different sizes. Load the "loads" into the cars (small - in a small one, large - in a large one). We take them to the construction site and glue them on sheets of paper. Now we make paths from tiles, bumps for the frog.

Path for dolls
When the child has mastered the circle and square well, they can be alternated. Doll Masha wanted to visit Mishka? Let's make a path for her. Take a sheet of paper. Lipstick a doll on one end, a Bear on the other. To get to visit, we make a fun path, alternating a square and a circle.
Apples and berries on a plate
Doll Masha came to visit Mishka. What will Mishka treat her to? He gathered a lot of apples and berries in the forest. Let's help Mishka put them on a plate to treat your guest. We glue circles on a plate (cut out circle from paper) - small berries and large apples. What are apples? Sweet, juicy, tasty, fragrant. What do they grow on? Who loves to eat them?

colorful balls
Introduce the baby to another geometric figure - an oval. Cut out ovals and circles - these will be your balls. Let one of your toys go to the birthday party and give the birthday boy balloons. Glue colorful balls. Older children can be invited to draw strings for balls of the same color.
Mushrooms
When talking with your baby about autumn, do not forget to mention mushrooms: where they grow, what they are, who likes to eat them, who stores mushrooms for the winter. Read poems about mushrooms. Invite the child to help the squirrel and make her some mushrooms.

Bookmark for a book
Make a bookmark from ready-made forms. Cut out a long rectangular strip. The baby will glue your blanks on it: flowers and leaves. Alternating them, you get a wonderful bookmark that you can give to your grandmother or dad.
Cheerful snowman
To make it, you will need circles of different sizes. We glue three circles on top of each other, the smallest are the handles. Mom can draw eyes, a carrot nose, a mouth, buttons, a bucket. Name the dimensions for the baby: “This is the largest circle, we will place it down so that our snowman is stable and does not fall. Where do we have a smaller circle? Where is even less? What are the smallest? How many? That's right, two." It is advisable to do winter crafts in winter so that the baby understands how to sculpt it and from what.

Christmas tree decorated with toys
On the eve of the New Year, decorate the Christmas tree with your child. Invite the baby to stick multi-colored toy circles on the Christmas tree template. Oh what a beautiful Christmas tree! Sing a song about the Christmas tree, let the hedgehog and the squirrel dance around it. Make riddles for your child about the Christmas tree, winter, snow, Santa Claus or read poems.
Napkin
Does your child love cooking and feeding dolls? Excellent. Suggest that he make napkins for them to wipe their mouths after dinner. We decorate the napkin with various geometric shapes. For example, circles and squares.

Airplane
What kid doesn't love flying airplanes? Make one of them with a crumb. For this frame, you will need three strips of different lengths. We are talking about where the longest, medium and shortest stripes are. Having built an airplane, put a pilot bunny on it. Fly around the room. Let the child, on behalf of the pilot, tell what he sees around: "I'm flying near the table, over the sofa, I'm flying to the bedroom, etc." Tell the rhyme together with the baby “We will build the plane ourselves ...” A. Barto.
Drawing on a circle
Have you bought your child a toy tableware yet? It's not a problem. Invite the crumbs to make plates for guests. Cut out circles from cardboard - these will be plates. They can be decorated. Let the child dream up himself: these can be randomly glued circles, or placed along the edges of the plate. Show that you can alternate large circles with small ones. Are the plates ready? You can have lunch too!

Checkbox
The flag is glued from two elements. You can make the pen and the flag itself in different colors. To learn colors, have your child pick up a pen of the same color for each flag. Tell a poem about the flag.
flower
It is easy to raise the spring mood by making such a flower. Let the baby's finger turn into a bee. Raise it higher - the bee flies and buzzes, lower your finger on the flower - the bee sits down to eat nectar.

trailer
Kids build trailers from various materials: from cubes, chairs, pillows, constructor. And they go in these trailers to the sea, to their grandmother. On the way, you can sing a song: "We are going, we are going, we are going to distant lands ...". Continuing the journey, invite the child to glue trailers. When they are ready, you can put the animals on top and take them to the zoo.
birdhouse
When do people hang birdhouses and why? Who lives in them? Talk to your child about birds. Invite the baby to make houses for starlings. They can be glued in different sizes. Separately cut out large and small birds from an unnecessary magazine. Seating the tenants according to size in your houses.

Chickens in the meadow
Salute

Pyramid
The pyramid is one of the favorite toys for kids. In a similar way, come up with various games with her, connect your toys.
Beautiful handkerchief

Plate
small house

The baby's mind is at his fingertips - all teachers and mothers know this. Work on kids is extremely important, but also interesting, because it always takes place in the form of an exciting game. Even the busiest parents usually find time for such activities. Applications with a child of 2 years old are one of the best ways to take a son or daughter to good use. Experts believe that such classes should be held at least twice a week so that new neural connections are formed in the brain of the crumbs, imagination develops, as well as such an important quality as perseverance.
Fun apps for kids
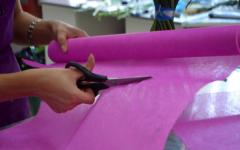
For such activities, as a rule, colored paper is used, from which, with a certain amount of imagination, you can make any fun story. It can be a scene from a fairy tale, cartoon, or even from the life of a baby. All mom or dad needs are scissors, glue (the so-called “dry” glue is best) and a base for colored paper figures. It is very good to use textured material (corrugated paper, embossed cardboard).
Many toddlers love playing with plasticine. Plasticine can also be applied to the base, creating various volumetric plots. Details should be made as small as possible. Plasticine can be distributed on paper and then textured using special or improvised tools.
 Paper can also be used to create volumetric plots. To do this, it can be crushed, bent, twisted, cut or torn into small pieces. It is very useful to use ordinary paper napkins, which the baby can crumple into a ball, and then stick to the paper. It is even better if the napkins are colored or with patterns, drawings.
Two-year-olds can already work with small details, such as buckwheat, rice, acacia seeds, melons, watermelons. Such material can be attached not only to a paper base with glue, but also to a layer of plasticine previously applied to the base. Pictures made of beads or even pasta of various shapes look very original.
Here are some options for ideas on what you can make with a 2-year-old baby along with mom:
 |
 |
 |
 |
 |
 |
Dealing with the smallest, parents, of course, will have to do most of the work themselves, because for the application, children at 2-3 years old still cannot cut out figures with scissors, handle liquid glue. But this is not necessary. The main thing is that it is useful to spend time with your son or daughter, to allow them, to the best of their abilities and abilities, to do this or that work, encouraging any undertaking. As a rule, everything connected with attaching individual parts to the base is willingly done by the kids themselves.
As a rule, at the age of about a year, children have their first interest in creativity. They begin to scribble with a pencil with pleasure, it becomes interesting for them to pinch off pieces of plasticine, and if you introduce the baby to glue, then he will generally be completely delighted. Any undertakings and talents in a child need to be developed, so now is the time to offer the baby the first classes in, and applications.
The basic rule for creative activities with a child at this age is give only those tasks that are feasible for the baby . Your task is to instill interest in creativity, and not to discourage it. If you offer your baby too difficult crafts that are not appropriate for his age, this will most likely lead to the fact that the child will not succeed, and he will just watch how you do everything for him. Classes should be held in such a way that the main part of the work is done by the child, and not by the mother.
It is important to remember that creative activities with a child of this age should not be more than 5-10 minutes. Always be guided by the mood of the child. If a child loses interest in work, then this most likely means that it is too simple or, conversely, too difficult for him. Or you delayed the lesson, and the baby is already just tired.
I divided all applications and crafts with children 1-2 years old into several groups in order of increasing difficulty:
Stage 1. Chaotic gluing pieces of paper on a piece of paper, gluing geometric shapes
Before making any crafts and compositions, first you just need to introduce the baby to the glue. The child must catch the very essence of the application and remember the basic scheme of actions: first we smear a piece of paper with glue, then turn it over, apply it to another piece of paper and smooth everything well with the palm of our hand to hold it tighter.
At first, you can simply glue pieces of colored paper onto the base sheet. Most likely, your kid will really like this activity. At this age, children are more attracted to the process itself than the result. We will work on art pictures later.
Now all your attention should be focused on teaching the child correct application technique . And it is very important to do it right now so that you do not have to retrain later. What is the correct technique?
Firstly, show your baby how to hold the glue stick. As a rule, children tilt the glue stick, which only complicates the spreading process for themselves. Teach your baby to place the glue strictly perpendicular to the leaf!
Secondly, explain to the child that when he smears a piece of paper with glue, it must be held with the palm of his left hand (if the child is right-handed). Most likely, at first, the paper will jump out from under the baby’s finger, so lightly fix his palm with your hand. Just do not do everything completely for the child, he must participate!
My daughter Taisiya met glue at about 1 year 3 months. In the beginning, we were just busy sticking small pieces of paper randomly into the album. Daughter absolutely loved this activity. A little later, the idea dawned on me that it is possible to combine business with pleasure and glue geometric shapes, voicing their names during gluing. At that time, Taya already knew all the flat geometric shapes, even such as a trapezoid and a parallelogram (we studied them with the help), therefore, while doing the application, we simply fixed them in memory.
Stage 2. Simple crafts with a chaotic arrangement of elements
After the baby gets a little comfortable with the application technique itself, you can begin to create the first crafts. I want to bring to your attention a few simple ideas for crafts, applications. All of them imply a free arrangement of parts on a sheet. Those. the child will not need to get to any specific place, but simply glue it wherever your heart desires.
Important! Give the child the opportunity to decide for himself where exactly on your Christmas tree the ball will hang or where the fish will swim in the aquarium. I noticed by myself that all the time I want to correct my daughter's creativity, to make everything beautiful and smooth. And if you think about it, why do it? Our work is not to be exhibited. It’s better to let the child be sure that he glued it as he wanted, and no one interfered. Sometimes you can just give a hint and explain why the way you propose will turn out more beautiful.
I think, based on the ideas presented, you can easily come up with many of your own options. Also in the article there is an opportunity to download the simplest b / w templates for the presented crafts. You can pre-color them if you wish.
All the necessary elements for the application, the mother will need to prepare in advance.
- Christmas tree with balls . First, together with the baby, we glue the Christmas tree itself onto the base sheet, then balls, stars and other decorations you have prepared. Or you can glue the decorations on the finished Christmas tree template - DOWNLOAD TEMPLATE.

- tree with apples — DOWNLOAD TEMPLATE

- Hedgehog with apples and mushrooms — DOWNLOAD TEMPLATE

Vitamins in a jar for a girl — DOWNLOAD TEMPLATE

Berries in a basket — DOWNLOAD TEMPLATE


- Fish in the aquarium. The idea of the application from the manual "". The child sticks only fish.

Stage 3. Crafts with gluing elements to specific places
Now the baby will have a more difficult task, he needs not only to glue the application element, but also to get to a specific place. In my experience, such crafts should be switched to no earlier than 1.5 years. But, of course, everything is individual.
At first, on the base sheet, draw the outlines of the objects that you will glue. So it will be easier for the child to understand what should happen. Then you can gradually move on to gluing without contours.
So, here are some slightly more complex crafts with children 1-2 years old:
- Caterpillar . We glue the caterpillar from the circles. When all the details are glued, mom finishes the face of the caterpillar. To make the task easier, you can stick circles on the template - DOWNLOAD TEMPLATE.

- Cotton pad snowman. We cut out a bucket hat in advance from colored paper. When all the details are glued, mom finishes the face.

Cotton pad dandelions — DOWNLOAD TEMPLATE.

- Air balloons . The kid sticks only balloons to the finished drawing. DOWNLOAD TEMPLATE.

block house

Christmas tree made of triangles . Glue the triangles one on top of the other.

- House with windows. We glue square windows to the house. You can also make a door. DOWNLOAD TEMPLATE

- Car . We glue windows, wheels, and, if desired, headlights to the silhouette of the car.

Cut pictures from magazines . You can cut out pictures from magazines, cut them into large, baby-friendly pieces, and then glue them together with your child. For example, you can cut out a car, a face or a human figure completely.

- We put the toys on the shelf. Application idea from the manual " It could be your baby. Stick a picture»

- Snow tree from napkins . Application idea from the manual " My first masterpieces»

- Traffic light. Application idea from the manual " My first masterpieces» — DOWNLOAD TEMPLATE
 By the way, ideas for crafts for New Year and winter themes can be found.
In your creative pursuits, you can also use various tools. They have a lot of ready-made ideas, before class you will only need to cut out all the necessary details or use ready-made stickers. For example, we used the following publications:
- (Ozone, My shop, KoroBoom)

- (Ozone, My shop, KoroBoom)

- Application. Mishutka and his friends (Ozone, labyrinth, My shop)

- Educational stickers for kids. The form (Ozone, My shop, KoroBoom)

And in conclusion, I would like to say one more very important point. One of the main principles of the world-famous is to provide the child with as much freedom and independence as possible. And this does not mean at all that you need to leave the child to himself "Go, play as you want!". This means that the baby needs to be taught to play so that he can subsequently do it on his own. So that he could prepare himself for the game, he himself knew how to handle the materials, he himself was able to clean up after himself. That's why, when you are doing creative work with your baby, be sure to immediately accustom him to certain rules .
For example, we have this order: first we go together to lay a special tablecloth on the table (it can be a modeling board), then we take out all the necessary accessories from our “creative” locker (glue, album, colored paper). After work in the reverse order, we put everything in its place. We apply such rules from 1 year 3 months. Now, a year later, I can say that my daughter knows all the rules well (although she already learned them a month later) and performs without any resistance. There are times when she cleans up after herself without a reminder, but mostly with a reminder, of course.
I wish you and your baby creative success! I hope you enjoy our craft ideas. I will be glad to make friends with you in social networks, come

Hello dear readers! Many mothers begin modeling with children after 1-1.5 years. At this age, the little ones still know almost nothing ... Here I will tell you how to make such activities not only useful, but also exciting. I will introduce the principles of the very first crafts. I'll tell you what it is better to sculpt from, how to interest the baby in a new kind of creativity ... And I'll show you a photo of our first works.
When to start sculpting with kids?
Acquaintance with homemade salt dough can begin at least from 6 months. It is harmless, it is quite possible to “taste” it, any toddler will show interest in such material. However, I personally don't see much point in it. And I think that modeling lessons should be started no earlier than 1 year. Until this age, it is enough to use ordinary toys. But it all depends on you and your baby's needs. The main thing is that the classes evoke positive emotions in everyone!
Modeling with children 1-2 years old has its own characteristics. We are engaged solely for the sake of the process itself. There is no need to think about any result yet. We are introduced to new material. We get acquainted with the possibilities of our fingers. Not all one-year-old children will give you the opportunity to complete the craft, not everyone will be ready to accept your rules of the game. Therefore, in the first lessons it is very important to give the child just a good study of the dough. And do not try to do crafts before the little one is ready.
What is the best way to sculpt?

We are all used to plasticine. In our childhood, there was only he ... But today in children's stores there are many different masses for modeling! How to choose the best?
Increasingly, children are buying kinetic sand. This photo is just him.

Kinetic sand is a good alternative to the usual children's sandbox. Especially in winter. It does not stick to the hands, does not get dirty, while any "kustki" can be easily made from it. It's nice to mess around in it. I would not call such games modeling, but if you want to diversify your baby's everyday life - why not? But remember: after such games, you will have to arrange a little cleaning. Vacuum and mop floors. Well, if you have a shallow basin that is suitable for the role of a home sandbox ... But it will not save your floor from cleaning. However, it is convenient to pour the sand from the basin back into the storage jar.
My daughter enthusiastically fiddled with such sand for 30-40 minutes. And at 1.5 years, and at 2.5. Kinetic sand is not cheap, but it lasts a very long time. It does not dry out, does not deteriorate ... They dug into it - and removed it back. Of course, every time it becomes less and less ... But that's okay.
Plasticine. In my opinion, this is the most unfortunate material for classes with kids. Even for children 2-3 years old. And for a one-year-old ... Plasticine stains hands and everything around, remains under the nails, it is not easy to wash it off the floor, it is quite hard ... And one more thing: it is better not to take plasticine in your mouth. Therefore, I brush aside this material, thinking over games with children. Plasticine is useful for a school-age child, but in the development of young children it is better to use dough.
Salty dough. It is much easier to sculpt from it than from plasticine. It doesn't get stuck under nails. Easy to wash off. Harmless. It is almost perfect... Of course, you cannot make crafts with an abundance of small details from salt dough. It's not as flexible. But it doesn't matter to us yet, does it?
You can make this dough yourself. Or you can buy it in the store. It can be "Play Doh" or some similar modeling mass. Along with the test, you can buy interesting kits. There are devices that help cut circles, squares, triangles from dough layers. My daughter really liked the "scissors" for the test. For a child 1-2 years old, such sets are not relevant yet. We evaluated them after only two years.

The advantage of purchased dough: it is more elastic, bright, it is very pleasant to hold it in your hands. Cons: it dries up rather quickly, forcing mom to go to the children's store again. It is better to buy it in large sets - 10 jars, for example. If the dough is a little dry, do not rush to throw it away. Add some water to it. So you save a lot of money. Of course, after water, the material slowly loses its elasticity, but one jar is enough for us for 1-4 weeks (depending on how often the daughter forgets to put it in the jar).
The recipe for homemade dough is very simple: 150g of flour for 150g of salt and 100ml of water. This is a one-time dough, which can then be well painted. There is also a recipe for reusable homemade salt dough: 1 tbsp flour, 0.5 tbsp salt, 0.5 tsp. dry citric acid, 200 ml of water, 1 tsp. vegetable oil. When preparing such masses for modeling, gouache can be added to them. So the dough will be colored.
How to introduce a child to modeling?

I am of the opinion that it is impossible to teach reading at 2 years old and applications at 1.5 years old. If you have a different position, the Creativity from the Diaper program will suit you. I try to teach children more relaxed, to give more freedom. Therefore, the main principles of the first lessons are as follows:
- let the child knead and study the dough as much as he needs. Perhaps it will take 1 day, or perhaps a month. If the kid is ready for hours with enthusiasm to fiddle with the material without your intervention, then this is enough for him for now. This is especially true for children under 1.5 years old;
Show your child the possibilities of sculpting by example. Sculpt animals, little men yourself, play out fairy tales. It is important that your little one learns to see a dog, a cat, etc. in a plain piece of dough;
- Show how you can leave impressions on the test. Apply forks, keys, coins to the layer, make spectacular dents on it;
- try to smear the "store" mass for modeling on cardboard or thick paper, coloring pictures;
- if the child does not get "balls" and "sausages" in any way - relax and do not torment the baby. In six months or a year, he will master this skill without problems. There is no point in “running ahead of the engine”, even if at 2 years old all the children in the yard cope with such tasks “perfectly well”.
First crafts

Closer to 2 years, you can try to do interesting crafts. At this age, it is difficult for children to do something voluminous. And I would recommend focusing on "flat modeling", which results in convex paintings. But the very first classes are not even crafts, but simply pinching off pieces from a layer of dough. Here are some game ideas:
1. Pieces of dough will be cookies (or pies). Sculpt small “cookies” with your baby, put them in the “oven”, and then on a toy plate. Of course, there will be dinner for all your animals next. With slightly older children, you can work a little on the quality of the cookies, making them even and semi-circular.
2. Pieces of dough will be coins. And you play shop. There is a lot of room for imagination here.
3. Pieces of dough will be mushrooms / berries. First you plant them, and then the bunny collects them in a basket.
Often, mothers begin their acquaintance with modeling with such tasks:
The next stage of modeling is more complex elements, paintings. Gradually we learn to roll "balls" and "sausages". We sculpt a tree: you create a trunk and branches (if "sausages" are not given yet), and the little one sticks leaves. It turns out like this:

When you can make friends with the "balls" a little, it's time to sculpt flowers. First, draw a green meadow with the little one, and then take the mass for modeling ... It's very good when you can combine different types of creativity!

Another interesting craft idea is the water world. It would be nice to first study with the baby some book or photograph with marine life. Then paint the sea using a variety of colors (better - paints). When the paint is dry, it's time to sculpt the fish. Fish can be of a wide variety of shapes, depending on your capabilities. You can just stick pieces of dough. You can - attach a small ponytail to a round head. And you can even draw fins with a plastic knife.

We even made an octopus. Making it is very easy: connect one ball and many sausages.

When the baby understands the principle of balls and sausages, you can mold anything with him. A butterfly, a little man, a dog, a car... Choose the most understandable stories that the baby knows well. And of course, be sure to make this cake:

For this craft, you need to be good at rolling and flattening balls. It's not as easy as it seems. But how many games can you come up with such a cake!
That's all. I think you understand the main principle of modeling with children under 2 years old. Don't be alarmed if our craft ideas seem very complicated to you. Still, many children at this age are able to sculpt only “cookies” with “coins”. This article is not a test of your baby's abilities, but a small collection of ideas. And there is nothing wrong with the fact that the child is ready for such modeling only at 2-2.5 years.
What do your kids like to sculpt at this age?