Products with natural fur are expensive. And it’s very disappointing when fur breaks on your favorite item. It doesn’t matter how it all happened - the threads with which it was sewn were worn out or you accidentally tore it. If you go to a workshop to repair the product, then this pleasure will probably cost you a tidy sum. Today I will tell you how you can repair fur on your own and at home.
Only at first glance it may seem that this is a very difficult and overwhelming job. But I advise you to try to do the repairs yourself.
I will start repairing a man's fur coat.
The fur tear begins right along the seam of the welt pocket and goes down in an uneven line about 15 cm.
First of all, you need to get to the place of the tear from the wrong side. We examine the bottom of the product. Sometimes the lining at the bottom is not sewn (at the flyaway) and then access to the underside of the fur is free. What to do if the lining is connected to the upper part of the product? And I have just such a case. I turn the sleeves inside out and look for the seam sewn at the top. I rip it open. This is the turning hole through which the fur coat was turned inside out after assembling the lining and top. But it will be inconvenient for me to repair the tear through the sleeve. Therefore, I rip the seam between the top of the fur coat and the lining at the hem by 20-25 cm. Now access to the torn area is quite free.
I have thin fur and therefore I take the thinnest hand needle and thin threads (60-70). I begin to sew the fur along the seam along the pocket on the wrong side of the fur coat with small stitches. I pierce two layers of fur at once, the needle as close to the edge of the fur as possible, the thread goes over the edge. I make subsequent stitches as close as possible. Using a needle, I tuck the ends of the fur onto the front side. In this way I sew up the entire fur gap.

I would like to advise you to use a thicker needle and thread for coarse and thick mesh and make the stitches further apart. For thin and soft flesh, the needle and thread are thin and the stitches are frequent.
And so, I sewed up the tear in natural fur by hand. From the front side, use a needle to straighten the fur well in the seam you have made. The repair of natural fur is not finished yet and I don’t recommend leaving it like that; you still need to glue the tear area.

To glue natural fur, as well as natural leather, I use shoe glue “Moment Marathon” (see photo). It glues well and the gluing area remains soft and flexible. To glue the fur I will need fabric as a spacer. I use stiff calico. If this is not the case, then you can take another cotton fabric. I cut flats of fabric along the length of the tear and a little wider, about 1.5 cm. My tear is uneven and therefore I need 2 fabric strips. I smear the seam of the gap 1-1.5 cm wide with glue on the wrong side and put the prepared strips of calico on top. I glue the part protruding from the pocket on the wrong side. This will secure the pocket where the tear is.
According to the instructions for the glue, I press down the glued area with a heavy object and leave it for 24 hours.
There are usually only two options when you may need to repair a mink fur coat. The first is that the fur coat is damaged, and you need to repair this damage. The second option is that you are tired of your model (it has gone out of fashion, lost its relevance, or simply stopped liking it), and you want to remake it into something else. In both cases, some types of repairs can be done with your own hands at home. But is this always possible, and is it necessary? Let’s figure it out.
Mink fur coat repair
Simple repairs that are quite accessible to every woman include the most common types of restoration, such as hooks and patches. This is the repair that does not change the main cut of the fur coat. This also includes updating fur that has lost its appearance.

More complex restorations include any change in style - or overall length of the product, or narrowing of the model.
But those types of repairs that it is better not to undertake with your own hands include global alteration of the model - sewing on the hood, narrowing or widening the armhole, widening the model to the bottom.

We will try to answer the most popular questions about repairs in a question-and-answer format.
How to update fur?
First you need to find out why the fur looks bad. If it has lost its appearance locally, i.e. one specific place, then it can be moistened with a solution of warm water and a couple of drops of glycerin. This procedure is performed on the inside and outside of the skin - this will soften the inner layer. If mink fur has generally lost its attractive appearance and has ceased to shine, then it can be renewed with the help of special solutions, most of which are also glycerin-based.
What to do if the fur is worn out?
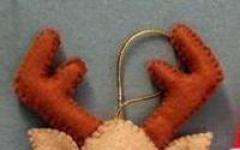
Most likely, you will have to put a patch in this place. To do this, you will have to purchase a skin of the same color as your fur coat (individual skins or even pieces of them can often be purchased from furriers). You can also use fur from a selection if the area of wear is small. When installing a patch, remember that the seam should always go from top to bottom, in the direction of the pile (photo).

The product is torn near the sleeves or chest - what should I do?
The fur coat may tear on the chest due to the fact that the model is too narrow for you. In this case, you will also need to expand it with additional fur. If sleeves and armholes are torn, then several options are possible. First, peel back the lining and assess the damage. If the seam comes apart evenly, this can be easily corrected using a thick tailoring needle. In case of uneven tears, you will have to install a patch. If the fur “floated”, i.e. The edges of the tear are torn and uneven, and the reason for this is that the narrow model is not suitable for you, then such a product will have to be altered. As an option, cut off the top of the fur coat and alter the product using the bottom. But keep in mind that in this case it will become much shorter. By the way, it is not recommended to perform such work on a typewriter - it is better to do it manually.

How to replace the lining?
It is better not to change the lining yourself - doing the job incorrectly will tighten the fur. For a new lining, it is best to choose a breathable fabric such as viscose.
How to shorten a mink coat?
Put on the fur coat, button it up and mark the new desired length with bobby pins, measure the resulting piece. Next, you should tear off the lining and measure the seam allowance line. Under no circumstances should you cut fur with scissors or a regular knife - it will crumble and the edges of the cut will be uneven. It is best to use a construction knife for pruning. Then, using a special needle for fur and leather and strong nylon threads, begin sewing the edge taking into account the allowance, moving from the right side to the left. When about 15 centimeters remain until the end of the work, put on and button up the fur coat again - this way you can even out the edges (video).

The basic rule that you should follow when repairing fur products at home is maintaining the appearance. If the model is heavily modified with a large amount of fur cut off, the overall balance of the product may be disrupted. An incorrectly shortened or narrowed model may “float” on the shoulders, the sides may move apart, and the back line may shift. Therefore, before you start work, objectively assess whether you can avoid ruining the fur. And if you see that repairing on your own can damage the product, then it is best to turn to professionals.
What can be made from an old mink coat?
It is quite possible to give your product a second life. So from long models it may well turn out to be more than one thing. For example, if your item is knee-length, you can shorten it to a short fur coat or jacket, and sew a vest from the remaining pieces. The most interesting option may be new products made from knitted mink, which you will get from scraps. To do this, the mink is cut into strips and knitted in the usual way. This is how practical fashionistas manage to get an excellent matching knitted mink hat, gloves and even bags.

Many people use cut products to create new ones. So, if you have scraps left, you can order a leather jacket decorated with fur, or sew a fur vest with leather sleeves.
As you can see, there are a lot of options for remodeling. Therefore, do not rush to part with a boring or outdated model, which, most likely, will not be possible to sell profitably anyway. Consider the options and become the owner of new, interesting and relevant products!
I have a rather expensive mink coat. Divided 5 cm under the arms. Just sewing it up I suspect is not an option? Is it necessary to insert pieces, maybe take them from the belt?
Are there any other options that you would recommend? Hello girls, I have been on the forum for a long time as an amateur absorbing information. Tell me, maybe someone has encountered something similar. And with finished products too, those with fur. I plan to knit and won’t mess with the linings, because I don’t know how, so I’ll clean them like this. Agree that this option is very economical and fast. In general, before restoring the nakho, clean and soften these areas.
It will be necessary to put some kind of armpits there. I often wear it with sleeveless dresses. Charmant, Ah, I see)) Wearing dresses without sleeves also has an effect on these places))) After cleaning and restoration, put in the armpits, and that’s it, the fur coat will be worn for a long time without surprises. It's funny here! contact a normal technician. I have this mode for 15 minutes. From time to time I repeated it twice. On the Internet they recommended going to the city laundry, because... It’s better to have especially huge drying ones in size.
How to repair a mink coat under the arms
But I still divide the fur coat into parts before doing this, and therefore, putting it in parts, there are no problems. After you take it out, you need to shake it well and/or go through it with a vacuum cleaner. I suspect that I have gained a little weight from size 42 to 44 and therefore there is tension in this place, so I am thinking about whether to insert a piece or not. But first I’ll try, your option. Charmant, For these purposes, special fabric edges are applied.
This will strengthen the seam. And so that the adhesive plaster does not fall off, it is necessary to baste it to the skin with wide stitches from the inner side. And let him look at the CUT of the product. 80% of the problems are specifically in the cut. The technician will find out the reason and repair it without damaging it with any sizing. Yeah, by the way, I also meant restoration by masters, and not independent))) I think that everyone should mind their own business))) Since it’s not at all difficult to ruin everything out of ignorance - especially fur - such a piquant and expensive material. Please tell me.
On an old mink coat, interlining is glued to the core (of course, in factory conditions) and therefore the coat looks like wood. You can somehow remove it so that the fur coat becomes softer and more mobile. Charmant, I advise everyone the same thing. I have already returned several fur coats this way.
Thanks a lot. I’ll try!)) Girls! Help, I wanted to stick a rag on the hole to glue the fox skin and ironed it on the other side with an ordinary iron and the place took and tightened, tell me what to do? This is my fox vest and the skins have come loose on my back in the area of the shoulder blade . Nice day. Sharing my experience of cleaning fur. I read this method on the German Internet (unfortunately, I lost the page). Just the fur (that is, without thermal insulators, lining, etc.) is sprinkled on the fur side with dry carpet cleaner (I bought it for Vorwerk, but they there are other companies) put it in a bag (I used a zippered pillow) and dry it on a cool setting, along with a few balls, cat. Recommended for use in drying.
If this has already been discussed, point your nose at me, please, I can’t find it, I’m reading and reading. My head is already spinning. Alena, you can revive him. It’s difficult to have such a huge area, but it’s possible. With the ordinary means that were described on the forum, you will be tortured. Try purchasing a regular fatliquor. On the Internet, type in a search engine - “Emulsion fatliquoring.” choose preparations for fur. buy and get to work. She is only 4 years old. In the summer it is stored in a cool room. And it was bought at a salon for a very high price. By the way, the fabric edges are there.
The fur has come away from the edge. I think I figured out why. I called the salon and they explained everything to me. The lips “pick up” dirt from the carpet fibers and then remove it with a vacuum cleaner.” Girls-craftsmen, help with advice! I washed the raccoon coat in the machine, dried it naturally on a hanger (and maybe dried it later on a radiator - I don’t remember, it was a year and a half ago. Yes, I know. I am a fool.) The fur coat stood up like a stake, became stiff and shrunk raccoon). Is there at least some method to revive fur without a studio? Since the studio promised to help, but the cost is immediately called 5 times more expensive than it currently costs.
The fur coat smells like a dog. what to do. I took it to the dry cleaner. did not help(((Mink coat, Sheared. Surely, among the more affordable ones, Vanish will do. P.S. “Dry carpet cleaning is often also called powder cleaning because of the appearance of the cleaner. The detergent composition really looks like powder, but in fact it consists of millions micro sponge.
Small sponges are impregnated with a special composition that dissolves any kind of dirt: both water and oily or greasy. Maybe something will have to be changed. Tamara. The fur coat is not ancient.
The sections are stitched together with them. And it is imperative to check this point: if it has spread, it is unlikely that this was influenced by an increase in size. Most likely the flesh is creeping, which happens for various reasons.
Therefore, repairing this hole may lead to a rupture in another place. the fur coat may not be bad, but it is aged, or the pieces under the armhole are not the most reliable. It is necessary to carefully trim along the seam those places where the fur is torn. Then, on the flesh, where there are holes and tears, sew up without tightening the skin with wide stitches. Later stick wide! place the adhesive plaster on the inside so that its edges and the edges of the fur coincide, because you will sew them back together. As a result, the musty smell is completely lost. Smells very, very clean.
I'm happy with the result. Apply more vinegar and vinegar to the fur and that’s it. Now I will always do this. There's really no point in paying. Shuba is practically 12 years old. Although the fur was not bad, she had been small for a long time. In other words, the choice is simple: a rug at the dacha (well, not the best, hard)) or a second life, if you can soften the fur.
Holds to death! Give it a try. LARIXA, thank you very much, I’ve already thought about the topic: dead, no one enters.
It is possible to dress a woman beautifully and emphasize her status by dressing her in a mink coat. The product is not cheap, so I would like it to be worn for at least several years. A suddenly torn fur coat will cause trouble for the owner, and repairs in workshops are very expensive. You will learn how to sew a fur coat by hand and update the product in this article.
It is quite possible to repair your favorite fur product with your own hands at home. Small defects may result in a hole in the product, and large defects may result in a seam tear on the back or under the arm. After assessing the extent of the defects, you can decide how to sew up the fur coat - alone or take it to specialists.
How to remove defects on a mink coat
Situations in which mink coat repair is needed:
- tear along the seam on the back of the product;
- small holes under the arm;
- tear of the product on the sleeve;
- gap at the collar.

The product tears most often on the back and sleeves, and in these places it is most difficult to fake it. If you need to sew up a fur coat on the back, you first need to tear off the lining and insulation from the inside. If you get to the break point, you should cut it out and apply a patch. It is not recommended to cut the fur itself for patching with scissors, as the pile will deteriorate. The patch is sewn to the tear site without pulling the skin and fur. Sew with a regular marking stitch. If you tap the area where the patch is applied with a wooden hammer, the fur will become more even. To properly sew a fur coat on your back, you need to remember that mink fur is heavy and durable. For hand sewing, use a thick leather needle and always sew in the direction of the pile.

Sewing a sleeve on a fur coat is not very easy; to do this you will have to rip open the side seam and tear off the lining. The armhole will need to be trimmed enough so that the size of the tear is clearly visible. If the fur inside is torn and the tears are even, you can sew it up with your own hands by applying a patch.
Sewing the sleeve under the arm will be more difficult: for this you will need to insert and sew on a piece of fur. It can be purchased at a studio, or, alternatively, cut from your own clothes if you plan to recut them in the future. For small tears, the mesh can be glued independently with soft glue. A rubber-based adhesive, such as rubber, is ideal. The edges of the torn product are pulled together with a thread and a needle, then a layer of fabric or gauze coated with a layer of rubber soft glue should be applied to this place. This way, the seam will be secured and the mesh will not deteriorate. The advantage of this method is that the skin will not tighten and the appearance will be restored. After the glue has dried according to the manufacturer's instructions, provided that the edges are glued end to end, no defects will be visible.
A mink coat along the sleeve length rarely needs to be repaired, since the product usually tears under the armpit.

Minor seam repairs
Valuable mink fur must be properly stored and carefully inspected before purchase. A common problem for the owner of the product is tearing at the seam. The seam should be sewn up with thick threads, and the fur pile should be turned outward, so that the seam itself will not be visible later. If you sew the product yourself, you need to use a needle to repeat all the stitches that have come apart. To avoid the seam from spreading, you should step over the edges of the tear. If you are repairing a product by machine, then the goat or overlock stitch is best suited for stitching. A mink coat can be glued along the seams with contact tape, then sewn with a goat-type overlock stitch. Sewing the seam will thus be the neatest and fastest option. Having connected the parts end to end, they are stitched, and then simply comb the fur with a comb. The quality of the fur and seams indicates how long the product will last in the future.
A fur coat is an expensive and luxurious outerwear. Most often, its cost starts from $1,000. Therefore, every owner takes care of it and tries to do everything possible to make it last as long as possible.
But it is not always possible to preserve the appearance of a fur product. Improper care, poor workmanship and manufacturing errors can all lead to holes or seams coming apart. In such a situation, the housewife is faced with the question: should she seek help from a studio or do it all herself?
How to sew a fur coat under the arms?
The armpits of a fur coat are one of the weakest and most vulnerable places. This is where a product made of natural fur breaks most often. You can correct such a defect yourself. To do this you will need the following tools:
— glue “Moment”;
- medical bandage;
- a couple of needles of various sizes;
- threads matching the color of the fur.
The simplest and most easily repairable damage is when the fur coat is torn under the arm along the seam. In this case, you only need to stitch the attachment point twice. It is also necessary to securely fix the threads of the previous seam to prevent it from unraveling again.
Need to know! If the mink coat is torn under the arms and it is the skin that is damaged, then you need to use a bandage and glue. It is very important to carry out the restoration carefully and accurately so that the defect is invisible.
Action plan:
- First of all, you need to dry the fur product, for which you need to lay it out on a flat surface.
- Next, you need to connect the torn edges and sew them to each other.
- After this, you should cut off a small piece of the bandage, pour a little glue on it and apply it to the seam.
- Now let the fur coat dry.
- Do not hang it on a hanger or touch it for one or two days.
What to do if the flesh is torn?
 The list of reasons why the hide is torn should include poor dressing of the skins or old age of the fur. Also, poor care often leads to damage to the reverse side of the product.
To get rid of the defect, you can simply sew up the fur at home. Best suited for this furrier's hand stitch. It is done like this:
- Gently fold the flesh with the hair inward.
- Next, you need to sew from right to left. The stitch should be similar to a standard overlock stitch. The main difference is that the needle is stuck into the same place twice. As a result, the joint on the reverse side will become almost flat.
- It is very important, after finishing the darning, to unfold the fur product and iron the seam with a thimble, after moistening it.
Such simple steps make it possible to make the bonding area completely invisible either to the touch or in appearance.
How and with what to seal the membrane?
If it was not possible to sew the mesh and it still tears, then it must be strengthened by gluing a thin strip of fabric or leather. But you should not use super glue for this, as it will simply crack at the break point.
A good solution would be to use a casein solution. You can buy it at almost any hardware store. Moreover, the cost of this kind of solution is more than affordable and does not exceed $2-3.
How else can you glue a fur coat made from mink, nutria, muton and rabbit? A good choice would be Moment glue. But it is very important to apply a piece of soft, thin fabric to the torn part. This will make the seam much more secure.
If the seam is cracked
If any part of a fur product is torn along the seam, you can repair everything yourself. To do this you need:
- Place the damaged parts together.
- Place a layer of gauze or similar fabric on top.
- Secure the parts together with pins.
- Glue everything together using Moment glue or another solution designed for gluing suede or leather.
If everything was done correctly, the seam will be restored and will last for many more years. In this case, the appearance of the fur coat will not be spoiled.
How to sew up a hole?
Most often, fur products tear on the sleeve or back. To properly sew up a hole in the back of a fur coat, you must first tear off the lining and insulation. Next, cut it out and apply a patch to the damaged area. 
The patch is sewn to the tear site using threads to match the fur and a needle. It is stitched using a standard marking stitch. After completing the restoration, you should tap the damaged area with a wooden hammer. Because of this, the fur will become much smoother.
In the case of a sleeve, it is necessary to open the side seam and rip apart the lining. If the breaks are even, then you can do the repairs yourself. Otherwise, the best and correct decision would be to seek help from a specialist.
If a hole appears on the sleeve under the arm, then to correct such a flaw you need to insert and securely sew on a piece of fur. You can purchase it either in a studio, or cut it from another fur product if it will be recut in the future. If the hole is small, then you can get by with only soft glue. In this case, rubber mortar is the ideal solution.
Astrakhan fur coats are best suited for repair. Thanks to the wavy structure of the fur, the seam will be completely invisible. Therefore, you can restore such products as often as you want.
Video instructions on how to sew fur: