Many girls have long ceased to care enough about their hands, because they need to be flawless from start to finish. In view of this, a procedure such as a pedicure with shellac coating is now gaining increasing popularity, since ordinary nail polish on the legs chips off quite quickly, especially in the summer.
What is a pedicure with shellac coating and how is it different from gel polish?
Every girl will like a pedicure with shellac coating, since maintaining beautiful and neat toenails is not an easy task. This type of coating has become popular due to its durability, color retention for several weeks and safety. Everywhere you can find representatives of the fair sex with various variations of shellac manicure designs. But now this procedure has moved even lower: salons have begun to willingly provide pedicure services with shellac coating. But at the same time, price lists offer the same procedure, only with gel polish. What's the difference? Actually they are the same thing. The fact is that the CND brand released the first gel polish, which was called shellac. This word was quickly put into circulation and in a short period of time it became a common noun so that people began to confuse them and draw boundaries between them. But since many other manufacturers picked up the idea and began to produce their own products, minor differences appeared between shellac and gel polish, which are as follows:
- Price. This is perhaps the most significant criterion. CND brand shellac costs on average about 1 thousand rubles, while manufacturers of budget gel polishes Kodi and Bluesky ask for only 100–150 rubles for the same jar. But it is worth noting that the quality of cheap brands is not very good.
- Differences in composition. Each company uses its own special recipe for preparing varnishes, on which durability and color retention depend.
- Method of application. Usually, to cover nails with gel polish, the nail plate is degreased and sanded to form a rough layer for adhesion of the product. Shellac does not require this; it can be applied to a smooth nail, which makes the procedure much easier and the top layer is not damaged.
- Removal method. Gel polish requires more time-consuming removal from the surface. In order to remove it, you will need to either cut off the decorative layer or soften it with acetone for some time. Shellac can be removed using a special product that is designed to dissolve the hard layer of varnish. At the same time, the nails remain healthier, since there is no mechanical impact on it.
The palette of CND shellacs is varied
Shellac has many advantages that make it so popular:
- The most important of all the advantages is the ability to wear the coating for about a month, or even more, it all depends on the brand of the product and the professionalism of the technician. With shellac, you don’t have to be afraid to walk in open sandals or flip-flops; the pedicure will last without cracking or chipping.
- This type of coating is suitable for owners of thin and fragile nails, because it thickens the plate and makes it less brittle. Shellac is a protection against external negative factors and prevents nails from peeling.
- An aesthetic appearance that lasts throughout the entire wear time of the coating. The glossy shine does not wear off or fade.
- Huge variety of colors. Today, manufacturers offer many shades of any color. It is possible to perform a matte pedicure, it looks very fashionable and stylish. Also, recently they began to produce thermovarnishes that change their color depending on the temperature.
- Shellac is not harmful to nails, and the absence of dangerous substances such as formaldehyde allows it to be used by pregnant women and girls.
- This coating can be easily removed at home: you only need special remedy, which will help soften the hard layer.
But, despite all the advantages, there are also disadvantages that should be taken into account if you want to get such a pedicure:
- First of all, among the disadvantages it is worth noting the price. Going to a salon is quite expensive, since a pedicure in an average beauty salon costs about 2 thousand rubles. If you carry out this procedure at home on your own, it will be much more profitable, but first you will have to spend money not only on varnish, but also on an ultraviolet lamp, base and top coat. But one bottle of varnish, even if it costs about 1 thousand rubles, can be used many times.
- Exposure to UV rays on the skin during drying of gel polish. To protect yourself from this harmful effect, before a pedicure you need to anoint your feet with a special sunscreen with SPF (protection level) of at least 30. You can buy this at any pharmacy or cosmetic store.
- On the one hand, the durability of gel polish is a huge plus, but at the same time it also becomes a minus. After a week, the nail begins to grow, thereby increasing the space between the coating and the cuticle. It doesn’t look very nice, so the only solution is to update your pedicure more frequently or choose a “lunar” design.
- Danger of damage nail plate when removing shellac. Many coatings cannot simply be dissolved with a special liquid, so you have to resort to the help of nail files. If you are not careful, you can accidentally cut off part of the nail along with the varnish, which will become thinner. Remover liquid also has a negative side: it dries out the plate, so after using it you must definitely use moisturizing creams or oils.
Based on the above, we can conclude that shellac is a relatively safe and durable coating.
Pedicure with shellac coating at home
Let's look at the process of performing a shellac pedicure step by step. To begin with, it’s worth saying what is required to complete this procedure:
- ultraviolet lamp, which is necessary for polymerization of the coating;
- a nail file or buff, the abrasiveness of which should be in the range from 220 to 240;
- degreaser, instead of which you can use regular nail polish remover or alcohol;
- set of gel polishes: base, top and color coating;
- a set of orange sticks that will be needed to remove the cuticle;
- cuticle oil, which is applied at the very end.
The technology for performing a pedicure is simple if you understand all its aspects. The main thing is to do everything as stated in the instructions, then the result will not disappoint you.
Pedicure at home is great solution for girls on a tight budget
- First you need to prepare your nails for applying the coating. To do this, you need to make a bath to soften the cuticles and side ridges. To prepare it you will need 2 liters of warm water and 2 tbsp. l. sea salt. Soak your feet for 20 minutes, then dry with a towel. Using an orange stick, we carefully begin to push back and remove the softened cuticles and remnants of dead skin.
- After this, the skin of your feet should be wiped dry and lubricated with moisturizer. You can do a relaxing foot massage to make the procedure even more enjoyable.
- Next, we model the shape of the nail using a nail file. It all depends on your taste: it can be oval, square or semi-square. We sand the surface of the nail plate with a buff to ensure the coating adheres to the surface. We remind you that if you use shellac, it is not necessary to file off the top layer.
- Immediately before application, it is necessary to degrease the nail plate using a special liquid. We wet a cotton pad with the product and gently rub it over each nail.
- The next step is applying the gel polish itself. It’s also worth preparing the lamp: check in advance that your foot fits into it, otherwise you simply won’t succeed. First, the nails are covered with a base coat. It is necessary to ensure that the pedicure lasts as long as possible. You should try to make the base layer as thin as possible.
- Next, paint your nails with colored shellac. The brush is placed at a distance of approximately 1 mm from the cuticle and drawn to the edge, then the sides are painted. The end of the nail must be sealed every time - this way you protect the pedicure from chipping. Each layer must be dried in a UV lamp for 1–2 minutes. The exact time depends on the wattage and manufacturer of your lamp; this information is usually contained in the instructions. The second layer is applied in the same way as the first. Experts advise applying at least two layers, but no more than four, otherwise the nail that grows at the cuticle will be very different in thickness from the painted one, which will make the pedicure unaesthetic.
- Finally, a top coat is applied. It consolidates the result, gives the pedicure gloss and protects it from the negative effects of the environment. The layer of top gel polish should be thick enough compared to the base one. Because of this, sometimes it takes 20-30 seconds longer to dry than the previous ones.
- Once you are sure that the coating has dried, you can begin to remove the sticky layer. This can be done using a lint-free cloth and a special product.
Tip: shake the bottle of gel polish several times before use. This simple procedure ensures that the color pigment is evenly distributed during application.
Removing shellac at home
Of course, sooner or later the coating will have to be removed, since the nail will grow, and the coating itself may acquire defects over time. For CND you don’t have to cut it down top part, it will be enough to soak the hard layer with a special removing liquid, and then remove the softened gel polish with an orange stick.
So, for removal you will need:
- foil or special reusable wrappers;
- shellac remover;
- sanding file;
- orange sticks;
- cotton pads.
In order to get a good result, you must follow the points below:
- Feet should be washed well with soap and warm water. This is done in order to remove fatty substances and dirt.
- Take a file and start cutting off the top glossy layer. This must be done carefully so as not to damage the nail plate under the varnish.
- Cut the cotton pads in half to make semicircles. This will make it easier to work with them. The foil should be cut into square pieces measuring 4 cm by 4 cm.
- Soak the cut cotton pads well with remover. Next, we apply them one by one to the nail surface of each finger, immediately wrapping them in foil. After all the nails have been treated in this way, wait 15–20 minutes. During this time, the coating will soften and can be easily removed with an orange stick. While the liquid is working, you can massage your fingers.
- After the specified time has passed, the foil and half of the cotton pad are removed from each finger in turn. Until you remove the softened layer from one nail plate, you should not unroll the next one. If hard pieces of shellac remain, you need to soften them again in the same way.
- After the removal procedure, it is necessary to lubricate the cuticles and nails nourishing oil or liquid vitamin complex.
This is how easy it is to remove the old shellac coating from your nails. If for some reason you were unable to complete this procedure, it is better to contact a specialist, otherwise you risk severe damage to the nail plates.
Hardware pedicure from a specialist
Hardware pedicure It is practically no different from the classic one, it’s just that instead of traditional means like a nail file and an orange stick, a special device is used with many attachments that have different functions.
If you want the result to be exactly the way you imagine it, but you are not yet confident in your abilities, you can visit a beauty salon to get a pedicure. The procedure is not cheap, but you will receive highly qualified care and high-quality results. One of the advantages is the use of expensive products. Still, few girls buy really good products for pedicures at home.
In the salon, you are seated in a special chair, and your feet are lowered into a hydromassage bath with various essential oils and aromatic salts. This stage takes 10–15 minutes. Then the master treats the feet one by one: removes cuticles, dead cells, polishes the heels. After this, a scrub is applied to the feet, which is designed to remove even smaller dead particles. This ensures perfect smoothness. Next, the feet are wiped dry, a mask is applied for 5–10 minutes, accompanied by a light foot massage. The next stage is the treatment of the nails themselves: a specialist polishes them and gives them the desired shape. Then all three types of coatings are applied: base, color and top coat. Nails are decorated according to your wishes. At the end of the pedicure, nourishing oil is rubbed into the skin.
The pleasant atmosphere of the beauty salon will also allow you to enjoy the procedure.
Photo gallery: design ideas
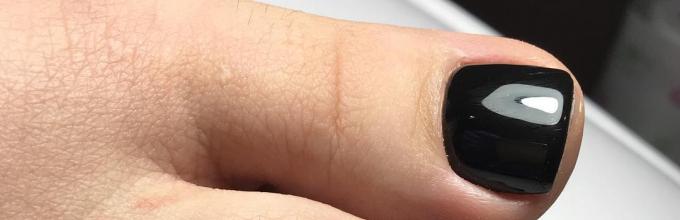
 A shocking black pedicure can be done for some event.
  Gray-beige pedicure decorated with rhinestones
  Pedicure performed in french style
  Floral drawing on thumbs will decorate an ordinary beige pedicure
  Pedicure with shellac purple mixed with glitter
  Classic pedicure done in milky pink color
  A beautiful pedicure in blue and silver colors is perfect for sandals on a festive evening. A pedicure made in an interesting shade of pink. A soft pink pedicure with rhinestones on the big toes.
  Bright pedicure red
  Cute pedicure with geometric pattern in different colors
  Pedicure made in soft blue color, decorated with black and transparent stripes on the thumbs Delicate beige pedicure, decorated with rhinestones
Gel polish is a favorite of a huge number of women and girls all over the planet, and all thanks to its durability, safety and beautiful appearance of nails. A pedicure with shellac coating will give your feet a neat appearance, and you can safely walk in your favorite sandals or sandals.
The fact is that technology in nail care does not stand still; recently, after another invention by cosmetologist chemists, we have at our disposal such a product as gel polish, the most famous brands This line includes Shellac and Luxio.
Gel nail polish Luxio– Canadian luxury nail polish.
It was gel polish that supplanted the hitherto popular gel and varnish coatings.
Why? The answer is simple, because Shellac, Luxio and other gel polishes combine gel and varnish in their composition, and a bonus to this union is the high strength of the coating and long term his service. Yes, yes, gel polish can be worn on nails for up to a month and it will barely fade without losing its rich color and perfect shine. You can walk on the sand or tend to your favorite flowers in the garden bed, this coating does not matter.
Do you want your nails to look like the photos from glossy magazines, then pedicure with Luxio coating this is what is needed for this.
Information
Technologists It is not recommended to wear gel polish for longer than 2-3 weeks. Shellac and other gel polishes, like any artificial coating, shrink, dry out the nail, and cause the nail to curl. In addition, toenails need to be constantly shortened.
Advantages of Shellac and Luxio coating:
- People with problems thin and brittle nails it will strengthen them and put them in order. The nail begins to develop correctly under the coating and continues to grow correctly in the future.
- Very durable coating with extended wear life.
- Your nails get a magazine-quality shine that won't fade over time.
- Infinitely large selection of colors. Manufacturers are constantly replenishing the palette with the most incredible color shades.
- The coating does not contain formaldehydes that are hazardous to health, which is why only pedicures with Luxio and Shellac coating not contraindicated during pregnancy.
Pedicure with Luxio and Shellac coating, stages of implementation:
- Performing a hardware pedicure to process nails and give them a given shape. Cuticle treatment.
- Performing grinding to impart the required degree of surface roughness, which will ensure high-quality adhesion of the coating to the nail plate.
- Treatment with antibacterial agents. This procedure is performed for two purposes. Firstly, ensure the sterility of the nail plate, and secondly, degrease the surface for better adhesion.
- This is followed by the application of the gel polish coating itself (Shellac, Luxio, etc.), first the base layer is applied, after it dries in an ultraviolet lamp, a layer of colored elastic varnish is applied and then, after drying the next layer, the final surface layer is applied. Under the influence of the rays of a UV lamp, all layers are firmly bonded to each other and to the nail plate.
The application procedure requires full compliance with the technology; this is what determines how long the coating will last after a pedicure with Shellac or Luxio coating is performed.
Beware of fakes so that under the guise of an original coating you will not be given a Chinese analogue. From which you should not expect the same properties as the original gel polish from well-known manufacturers.
An appointment for a hardware pedicure in Moscow can be made through instant messengers, a feedback form from the website, Instagram or a phone call.
Open summer shoes exposes the foot, demonstrates the beauty of miniature toes. In order for your foot to look aesthetically pleasing, you need to take care of a neat pedicure. Since in the summer, the coating on the nails is exposed to external factors, so regular polish has to be applied several times a week. In this case, it is much more convenient to do a shellac pedicure.
What kind of technology is this
This innovation in the field of beauty has already proven itself in the service market, and the fair sex has managed to appreciate all the advantages of this coating. The product is universal, as it has the properties of both a gel and a regular varnish. Application does not require any special skills, all you need is light.
Advantages
Shellac has a number of advantages. It perfectly strengthens natural nails, protecting them from brittleness and damage. In the summer, as well as during the holidays, it is simply irreplaceable. The coating does not lose its shine and attractiveness appearance for two weeks. The absence of damage, as when using regular varnish, makes it simply an ideal option for manicure and pedicure.
The nails will not lose no matter what you do to them. Pedicure with shellac coating has the main advantage over other types of coatings - it is absolutely hypoallergenic. It does not contain toxic substances harmful to health, such as formaldehyde, toluene and others.
Preparation and pedicure shellac: photo and description
The procedure is painless and does not cause any discomfort. Before applying the coating, the nail plate is carefully processed. First, you should soften and remove the cuticle, sand or trim rough areas of the skin. Then proceed directly to the nails. Having leveled them, the surface is gently sanded.

What you need for a pedicure
In order to do a shellac pedicure at home, you will need: an ultraviolet lamp, a wooden cuticle stick, a degreasing liquid for nails, lint-free synthetic wipes, for coating - a base, base tone, top or fixer, as well as a gel to remove the sticky layer . When everything you need is at hand, you can get to work.
Getting a pedicure

To begin with, the nail plate is treated with a napkin soaked in degreasing liquid. After this, you can apply the base coat. The thinner the base layer, the better. After application, nails should be dried in a UV lamp. If the device has a built-in timer, then after the sound signal the leg can be removed. If this function is missing, you will have to time it yourself. The average exposure period is 60 seconds. The specific time depends on the power of the lamp and is usually indicated in the instructions.
Next, the main coating is applied, preferably also in a thin layer. And again the nails are dried using a lamp. The base layer will come out translucent at first - that's okay. After all, such repetitions need to be done 1 or 2. Several layers give the coating durability. After each application, do not forget to dry your nails in a lamp. The final coat is the final layer. The top will add shine to your nails and ensure durability for at least 2 weeks. There is one helpful tip to keep in mind when applying the base coat and subsequent coats.

If the end or cut of the nail is thinly treated with a coating, then moisture will not be able to penetrate the plate, and, therefore, the pedicure will last a very long time. Finally, using a special gel, you need to remove the sticky layer of the top coat. This consistency is formed as a result of polymerization of the components of shellac; it should be washed in any case. At this stage, the shellac pedicure is ready.
How to shoot
Many people are interested in the procedure for removing the coating, because this cannot be done with ordinary liquid. For these purposes, a special shellac coating remover has been created. However, experienced manicurists and pedicurists claim that with careful treatment of the nail with a copious amount of liquid containing acetone, as well as exposure to heat, the layer can be removed quite easily. For the procedure you will need cotton pads, foil, a file for polishing, oil or cuticle cream.
Pedicure shellac is removed as follows. soaked in removing liquid and pressed tightly to the nail plate. Next, the finger is wrapped in foil. After completing the procedure with all nails, you should wait 20 minutes and then remove. In this case, the cotton pad must be pressed as much as possible against the nail plate, since the coating will come off in one layer almost immediately. Remains of shellac can be removed using a wooden manicure stick. Next, you should polish your nails using a special nail file with several coatings. At the end of the procedure, the cuticle must be treated with care oil and the nails with cream.
Ideas
Shellac is truly varied. For summer, of course the best option there will be a bright coating with interesting design. For example, geometric or floral patterns are suitable. You can combine several options in one pedicure. A monochromatic, rich coating is applied on four nails, and a contrasting pattern is applied on the fifth.

The color scheme can be matched to accessories or jewelry, since the wardrobe in the summer is very fickle. A bright and extravagant nail design is more suitable for a vacation, while for a work environment the best option there will be a stylish jacket. It can be done in different options, deviating from the classics towards the modern.
Lunar
A very common and stylish lunar pedicure makes it look like a celestial body. For coating, it is better to choose two contrasting shades, one of which should be silver or gold plated. Although there are a lot of color variations on this theme. A French jacket looks very original and neat on legs, complemented by various decorative elements. For example, a lace pattern lays beautifully on its base.
Other ideas
Jewelry in the form of a pebble also looks stylish. small size, fixed at the nail growth line. Another option for placing rhinestones is under the white stripe. Nails look even more elegant when such decor is not present on all of them at once, but on several plates. A lifesaver for pedicurists and those who want to diversify their design is a special print. This device helps to transfer the design to the nail plate. To do this, you also need to stock up on stencils. Among them you can find the same patterns and images that you would like to see on your own nails.

Shellac pedicure can be performed in pastel colors. In this color scheme nails, especially on the feet, always look neat and attractive. Today, trendy colors are smoky gray, pink, vanilla, milk, coffee, egg, creamy green, wine and others. It should be noted that shades can be mixed with each other to obtain new options. For example, adding white to rich chocolate, you can end up with light coffee or even milk. This comes in handy when you want to create a multi-color design, but buying several shellac options at once is costly. The set should have up to 5 shades, 2 of them will be basic, with the rest you can create new tones.

Shellac pedicure looks great when it looks like a pattern is painted on the nails. Silver and golden shades are well applied to a base in pastel colors using a print and stencil. It is best to perform the pattern on big nail. For the rest, you will have to find a smaller stencil. The decor is as follows. Using a brush, shellac is applied to the area of the stencil that is intended to be transferred to the nails. An impression is then placed on the same area, which picks up the ink. After this, it should be very quickly applied to the nail and carefully removed so as not to smudge the image. It should be remembered that applying a pattern is considered equivalent to a layer and requires drying in a lamp. And the decor on top should definitely be secured with a top.

Conclusion
Now you know what shellac pedicure is. Photos of a similar design of marigolds are presented in the article for clarity. If you follow all the recommendations for performing a pedicure using shellac coating, your nails will please your owner for at least 2 weeks, or even more. It all depends on the growth rate of the plate.
21.04.2017
If you decide to get beautiful toenails, then a pedicure with shellac coating will be the best option so that the result will not only please you in the first days, but throughout the whole month. This relatively new product has become popular not only in beauty salons, but also at home. Many girls have long ago bought themselves an ultraviolet lamp and are pleased with the long-lasting coating that lasts from 2-4 weeks, while maintaining the original result. Shellac is a combination of the well-known gel that was used for nail extensions and regular varnish, but there is no need to file off the plate to keep it firmly on your nails.
Agree, you can’t imagine beautiful, well-groomed legs without a pedicure, and today, a pedicure can’t be imagined without gel polish. After all, not every girl has the opportunity to repaint her nails every 4-5 days due to the fact that they no longer look attractive, are peeling, or cracked from external influences. But just a pedicure with shellac coating perfectly solved this problem. The main thing is to learn how to do this simple procedure at home, as a result of which you can delight yourself with such a pleasant pleasure every month.

Benefits of shellac coating
Having heard the word “shellac”, many girls immediately associate it with such an advantage as long service life, but not everyone knows about its other advantages, which we will tell you about:
- Stunning color. If you decide to do a pedicure with shellac, then it will delight you with its color range, in addition, the shades are all very rich and beautiful, they apply smoothly, without streaks, and also shine until the last day;
Fortitude! The main advantage of shellac, thanks to which it immediately became popular. Allows you to stay on your nails for up to one month, maintaining the original appearance and shine of the coating.
- Simplicity. Even a beginner can master the technique of applying shellac. Its texture is no different from varnish, and due to the fact that it dries quickly in a lamp, after completing a pedicure with shellac coating, you can immediately begin your daily duties;
- Easy to remove. Today, the shops are crowded by different means not only for applying shellac, but also for removing it. Therefore, in a matter of minutes, you can get rid of the old coating, without damaging your nails;
- Useful properties. If you decide to do a pedicure with shellac, then in return you not only get beautiful effect painted nails, but also strengthens the nail plate. In addition, thanks to various innovations, you can purchase a base that adheres to the nail, which saturates it with vitamins or other useful microelements;
In addition to the huge number of listed advantages, it should be added that gel polish does not cause an allergic reaction. And this is important. Indeed, today some people, after removing extended nails, complain about disease of the plate, its delamination, yellowing. But with shellac this is impossible. He doesn't even have unpleasant odor. That is, using such a practical product to cover nails is absolutely safe, which should be of primary interest to girls.

Technique for proper application of shellac
Let's start with what we do standard procedure foot care, that is, trim pedicure. Let's steam the feet in the bath, sand the feet well with a file or pumice stone. Let's move on to the fingers. Let's give them beautiful shape, length, remove the cuticle, periungual ridges, polish the nail plate, and then apply nourishing cream to the legs. This completes the classic foot treatment procedure. Now let's move on to the design of a pedicure with shellac or a simple coating.
You must degrease each finger with regular acetone to remove any remaining cream for good adhesion of the varnish to the plate. Now, take the base, apply it to all nails and dry it for a couple of minutes in an ultraviolet lamp. Afterwards, select the color of the gel polish and apply it again on top of the base in a thin layer. Don't forget to dry it. For a beautiful rich shade, coat with colored shellac again. If you want to do a pedicure with shellac with a design, then this should be done after the last layer of color coating, for example, by gluing rhinestones or laying out a French edging with sand. The final stage will be fixing with a top coat, final drying, and then removing the sticky layer using a cotton pad and regular acetone. Now you can enjoy the result and not worry about its durability for almost a whole month.
- Nastya June 15, 2017 at 02:25 pm
- Julia June 19, 2017 at 11:37 am
I have been covering my toenails with shellac for a long time; with it, the manicure lasts quite a long time and my nails break less often. There are no problems with application, everything is very simple, everything is the same as with a manicure on your hands.
- Anna June 21, 2017 at 07:17
I always did a regular pedicure, and after a few days the nail polish peeled off and cracked. This would continue until my beloved gave me an ultraviolet lamp with a recipe for a new varnish - this is a mixture of the well-known gel and regular varnish, this is “shellac”. Everything is done as with a regular pedicure, but after applying shellac, we dry the nails for two minutes in ultraviolet light.
- Irina June 22, 2017 at 05:42
I agree, a pedicure with gel polish looks much more impressive than regular polish, and lasts longer. In the summer, I definitely make a design for myself (for example, now my base coat is marshmallow pink, and on a large nail the broken glass design looks gorgeous on tanned skin!).
Every girl knows how important beautiful and well-groomed legs are. Lovers of open shoes, as well as simply fashionistas, prefer high-quality and neat pedicures. Shellac is now increasingly used for it. This coating is quite durable and can last on nails from two weeks to two months. The duration of wear depends on the rate of nail growth.
Shellac and gel polish: similarities and differences
Many people believe that gel polish and shellac are exactly the same coatings, but this opinion is wrong.
It's called shellac cosmetic product for nails, combining the properties of gel and varnish. The creator is the cosmetics company CND.
Gel polish is plastic and easily soluble. It is quite easy to apply to nails and lasts for a long time thanks to drying with an ultraviolet lamp.
Similarities between shellac and gel polish
Shellac and gel polish have a number of similarities:
- both coatings provide nails with neatness and shine;
- the nail plate becomes less brittle;
- lasts long enough;
- An ultraviolet lamp is used during the drying process.
Table: difference between shellac and gel polish
Video: what is the difference between shellac and gel polish
Shellac coating: advantages and disadvantages
Shellac coating has a number of undeniable advantages:
- strengthening nails;
- compared to regular varnish lasts much longer;
- the material on the nails does not crack or chip;
- under an ultraviolet lamp dries quickly and acquires the necessary strength;
- an abundance of bright and deep colors;
- many decoration options using rhinestones, sparkles and other materials;
- smooth and uniform coating.

Disadvantages of shellac:
- possible overdrying and splitting of the nail;
- Frequent and prolonged exposure to ultraviolet lamps on the skin can negatively affect health.
Shellac coating at home
Shellac is gaining more and more fans, but it should be noted that the cost of a pedicure with such a coating is quite high. However, there is good news - the procedure can be performed at home. To do this you need to purchase the required minimum materials:
- ultraviolet lamp for drying, preferably 36 W;
- buff or file for polishing the nail plate at the preparatory stage;
- degreaser, which is used to treat the nail immediately after polishing;
- base;
- shellac directly;

The process of performing a pedicure with shellac coating
Manicure and pedicure using shellac are performed using the same technology.
- Remove cuticle.
- Degrease the surface of the nails to prevent dust or lint from getting under the coating, as this can lead to chips and cracks.
- Apply base to nails and dry using an ultraviolet lamp. It is very important to ensure that the base does not get on the skin; if this does happen, you need to remove it with a wooden stick.
- Cover your nails with colored shellac in several layers. Dry each with an ultraviolet lamp.
- Apply topcoat and dry with an ultraviolet lamp.
- If you purchased a top with a sticky layer, you need to degrease the coating again.
Do-it-yourself pedicure with shellac coating will not deliver special troubles, if you follow the order of application. You can experiment with colors and designs.
Video: DIY shellac coating
Removing shellac coating at home
To remove the shellac coating, you need to prepare the following tools and materials:
- kitchen foil;
- nail polish remover;
- cotton pads;
- orange sticks;
- manicure spatulas.
Divide the cotton pad into several pieces. They should be slightly larger than the nail plate. Soak each of them in nail polish remover and apply to your nails. Wrap your fingers in foil. After 10-15 minutes, remove the foil and remove the remaining shellac on your nails with a spatula.
Hardware pedicure from a specialist
A hardware pedicure service in a beauty salon is suitable for girls who are not ready to perform the procedure themselves. It is not cheap, but the result justifies the price.
A salon pedicure using shellac lasts about an hour.
- You are seated in a special chair.
- The feet are immersed in a hydromassage bath with various oils for 10–15 minutes.
- The cuticle is removed and the heels are polished.
- A scrub is applied to the feet to remove dead cells.
- A special mask is applied for 5–10 minutes.
- Polishing nails.
- Three coatings are applied sequentially: base, color and top.
- The skin around the nails is treated with nourishing oil.
 Hardware pedicure is expensive, but the result will please you
 Fashionable design for shellac nails
An important advantage of a pedicure with shellac coating at home is the ability to choose your own design. You can experiment with colors and shades, rhinestones, sparkles, stickers. Of course, such work requires maximum concentration and patience, but it is worth it. Here are examples of several new items for the upcoming fashion season:
- polka dots are one of the trends for the coming season; usually dots are drawn using an orange stick only on the big toe, the rest are covered with one or different shades;
- rhinestones and sparkles have long captivated many fashionistas; you can glue them on each finger or highlight just one with shiny decor;
- matte and glossy - a new trend in modern pedicure; cover the nail with color, and then go over the surface with a buff, this creates a matte effect, then apply the design with colored shellac of the same shade, dry it and cover with top coat only the glossy pattern.


