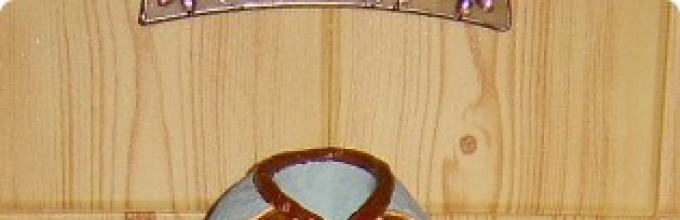
I finally finished my vase with a giraffe made from salt dough. The girl was 38 cm tall and weighed 5.3 kg. The vase is not only for dried flowers, you can also hold fresh flowers in it. The only detail that serves as a partial frame is a narrow, tall glass glass inside the giraffe. Water flows in and out safely. Painted with ink and watercolor, partially varnished.
Thanks for watching!!!
![]()
![]()
![]()
Dough recipe for those who are interested
I’m used to pouring everything by eye, so all quantities are approximate.
For 4 tablespoons of flour (huge heaped spoons) about 4 tablespoons of fine salt, but modest and without heaps. Add 2 level tablespoons of potato starch. And some water. I pour it straight from the kettle into the eye - pour a little, stir, if necessary, add more water, or add flour and salt.
The lump of dough will be modest, but I make them in such portions - for one time of use.
It took me 10 days to sculpt the giraffe. It’s most likely not the dough. The fact is that I first made a flat “foundation”, 3-3.5 cm high, and dried it in the oven. It was not completely dry, of course, but it hardened well. I placed a glass in the middle, pressed it about 0.5 cm. Then I pasted a thin layer of dough over the glass. I dried it. I also increased the width and dried it again. Then, step by step, she built on the top, the body of the giraffe. I dried each layer, row, etc., otherwise everything would slide or spread out. The vase was not always held vertically. Much of what I glued was glued in a horizontal position, placing the vase on the pillow, because... on the table it either began to press down or roll around. I improvised a lot, I can’t tell you everything step by step.
sqart for website
For a long time I have been looking at handmade floor vases. But my 45 square meters and my son, who had just learned to walk, simply did not leave me such an opportunity. And then such an opportunity arose - to try a new type of creativity in adventurous exchange, which was organized by our forum “All by myself.” And the work began to boil, it really boiled for a long time - a month, but this is what happened.
Description of making a vase made of salt dough:
I bought 1 m of the thickest sewer pipe, sawed off 80 cm with a hacksaw. The excess lies in the pantry - waiting in the wings. I cut out the bottom from a plastic container lid and glued it on. At first, I simply painted the vase with a regular construction primer and acrylic paint - the result was not impressive - the paint strokes were too obvious. Then I glued a piece of regular wallpaper for painting - I painted it - I liked it.

I kneaded the most ordinary salty dough and kept it wrapped in cling film in the refrigerator. I tore it off piece by piece - otherwise the dough will quickly become airy and dry. I rolled out the dough into a layer, using a regular leaf from a houseplant as a template, and cut out the amount I needed. I also pressed through the veins of the leaves with a knife. I glued the glue onto the “Master” in a rather chaotic order.

Next came the turn of the lilac clusters themselves. A small ball is made, a droplet is made from it, which we cut into 2 or 4 parts with nail scissors. Open them a little - the lilac flower or bud is ready. A bunch of these small flowers is collected. I glued it directly to the base. I dried it near the radiator, turning it one way or the other. I decided to somehow decorate the top - I cut out circles from the dough and glued them on.

The main sculpting work was completed. I painted the grapes and leaves with watercolors and shaded them with glitter nail polish. Something was missing - my flowers looked like orphans on a white background - I went over the convex parts of the wallpaper with blue paint. Painting the vase as a “birch tree” improved the appearance. At intervals of a day, allowing it to dry thoroughly each time, I coated it 3 times with acrylic varnish.

We assemble the vase in three stages:
- at the first stage we paste the dough over the workpiece,
- on the second - we grow the inner layer of grass,
- and on the third, we grow the outer layer of grass.
Before each new stage, all products and workpieces must be thoroughly dried.
The third final stage is the most important and should be given special attention - how you complete it will determine how your vase will look and how beautiful it will turn out.
To make a vase, we will need:
1.Salt dough (1 tbsp. Extra salt + 2 tbsp. flour + 130-150 ml. water)
2. Base form for a vase (I took a half-liter plastic bottle)
3.Toothpicks
4.Working board covered with foil
6. A glass of water
1.Take a plastic bottle and cut it to the desired height.
Remember that the grass will rise above the base by about 2.5 - 3.5 cm and the vase will be much larger than the base. For example, the base of my vase was about 6 cm in diameter and 11.5 cm high, and the final vase was 9 cm wide and 14 cm high.
You can make your vase larger or smaller, wider or narrower - just take into account the increase in volume and calculate which base is best for you to take.

2. Roll out strips of dough approximately 2 mm thick, 2-3 cm wide and 10-12 cm long. Prepare 5-6 strips at once.
3. We begin to wrap the prepared strips around the base, adding from bottom to top, until we have covered the entire bottle. Do not forget to lightly moisten the joints with water.

4. Cover the upper end of the base of the vase with dough as well.
5. Now let your workpiece dry.
I set aside 3 days for drying, although the layer of dough is thin, it dries only on one side, so it’s better not to rush.
It is important that the dough is well dried, because We will subsequently attach our grass to it!
After the base has dried, we can begin to “grow” grass on it. I “grew” two layers.
6. Make the inner layer (closest to the base) of the grass short: roll out a flagellum from the dough and put a toothpick inside for strength.


To prevent the still wet weed from deforming, the top trimmed, foil-wrapped part of the bottle was inserted into the base, against which the weed rested.

8. Once the top part was filled, I placed the base on the inserted part of the bottle and attached the remaining blades of grass upside down. However, this could have been done from the very beginning.
So I attached 14 blades of grass. And again I sent the future vase to dry.
The distance between the blades of grass turned out to be about 0.7-1 cm. I deliberately made the blades of grass not the same - the difference in height is 1 - 1.5 cm (in some places even 2 cm) to make the vase look livelier and more attractive.
At the same time, I made a small flower and also left it to dry.
While the vase with the first layer of grass is drying, we begin to make preparations for the outer layer:

We roll out the flagella from 12 to 14 cm in length. We slightly sharpen the upper part and bend it a little, and cut off the lower part with a knife to make it even.
In total, we will need 28-30 blades of grass for the outside of the vase (it’s better to make 2-3 more pieces in reserve). The diameter of each is about 5-6 mm and the length is 12-14 cm. And we send this grass to dry for 3-4 days.
So we have:
-preparing a vase with an already pasted inner layer of grass,
-and harvesting blades of grass for the outer layer.
The blades of grass of the outer layer are quite delicate and can easily break due to strong pressure when gluing, since the base is not a perfectly flat surface.
To prevent this from happening and to ensure that the blades of grass fit nicely tightly to each other and hold tightly to the vase, we need to make an internal technical layer of dough to which we will attach the blades of grass.
To do this:
10. Roll out a piece of dough about 4 x 9 cm, 3-4 mm thick. We wet it with water and glue it to the workpiece (approximately as in the photo on the left)
11. On the fresh dough, attach blades of grass close to each other, gently pressing them into the dough layer.

Try to ensure that adjacent blades of grass are not the same length, let them be different. This way we fill the entire surface of the vase.
All! The main work is done.
Let your beauty dry well.
Take your time. Give her a week, or better yet 10-12 days.
After drying, the vase looks like this:

12. When the vase has dried well, we begin to revive it.
We take our favorite paints, I use regular gouache. Mix yellow, green, blue, dip your brush into the paint, use your imagination and...
This is what the vase looks like after painting.

Don't forget to make a soft pink flower.

13. After the paint has dried, cover the vase with two layers of varnish, tie it with a beautiful ribbon and be sure toput a bouquet of flowers in it!
You can make a huge number of crafts from salt dough, for example: flowers, animals, various figures, inscriptions, numbers, toys, paintings and whatever you want! Modeling from salt dough is called bioceramics. The advantage of salt dough is that it is convenient to work with, this material is absolutely harmless and crafts made from it will delight you for several years. In this article we will look at how to make crafts from salt dough with your own hands.
You will need: a glass of wheat flour, a glass of extra salt, half a glass of cold water, a bowl.
Recipe
The finished salted dough should not stick to your hands or crumble. It should be cool and easy to sculpt. I recommend watching the video master class!
There are two most common ways to dry salt dough. The first method: the finished craft will dry on its own. The main thing is that it should not be exposed to direct sunlight, otherwise it will crack. The craft can be placed on a flat surface and wait a few days. Second method: dry the finished craft in the oven for 3 to 6 hours (depending on the size of the craft). Drying occurs in batches with breaks. One approach is 1-2 hours. For quick drying in one go, set the oven to 75-100 degrees, and then the craft will dry in an hour. At a temperature of 120 degrees, the craft will dry in 30 minutes, but it is better to dry it naturally.
There are two most common ways to color salt dough. The first method: after drying, paint the finished craft with acrylic paints or gouache using a brush. Second method: food coloring is diluted in water, then added while preparing the dough. When the craft is completely painted and dried, it must be coated with transparent manicure or furniture varnish in 2-3 layers. Each layer must dry before applying the next. This way the craft will last for a long time.
You will need: colored salt dough, stack, clear manicure polish, toothpick.
Master class

The salt dough star is ready!
Salt dough caterpillar
You will need: colored dough, knife, pva glue, toothpick, pendant, clear manicure polish.
Master class
- Roll out the sausage.
- Cut it into 6 equal parts.
- Roll into balls.
- Glue 5 balls together.
- Glue the head.
- Make a nose and eyes, then glue them on.
- Poke a toothpick into the hanging area.
- Dry the craft.
- Attach the pendant.
The salt dough caterpillar is ready!
Salt dough apple
You will need:
Master class
- Make half an apple, make the inside flat, pressing it onto a flat surface.
- Make a thin flat center and glue it to the main part.
- Roll 6 seeds and a stick, then glue to the apple.
- Blind the leaves, then glue them.
- Dry the craft.
- Apply varnish and wait until completely dry.
The salted dough apple is ready!
Salt dough elephant
You will need: colored salt dough, pva glue, clear manicure polish.
Master class
- Make the elephant's body by rolling an elongated ball.
- Make 4 legs in the shape of plump sausages.
- Make a proboscis.
- Make the elephant's ears in this way: roll out 2 flat cakes, glue flat cakes of the same shape of a smaller size and a different color to them.
- Make a small ponytail.
- Blind your eyes.
- Assemble the elephant in the following sequence: glue the legs to the body, then glue the proboscis, then the ears, eyes and tail.
- Dry the craft.
- Apply varnish and wait until completely dry.
The salt dough elephant is ready!
You will need: salt dough, foil, a candy bowl or similar plastic container, gouache, a brush, clear manicure polish, a modeling board, a knife or a stack.
Master class

You will need: salt dough, nail scissors, PVA glue, acrylic paints or gouache, manicure brush.
Master class

Salt dough hedgehog is ready!
Owl (eagle owl) made from salt dough
You will need: salt dough, pva glue, nail file, manicure scissors, acrylic paints or gouache, brush, wooden board with a pendant, clear manicure varnish.
Master class

The salt dough owl is ready!
You will need: salted dough, the base on which the craft will be attached, for example, a board or plate, a glass or a knife, a sheet of paper, a simple pencil, a garlic press, a rolling pin, pva glue, acrylic paints or gouache, a brush, clear manicure polish, cloves.
Master class

Salted dough fruit basket is ready! I recommend watching the video master class!
You will need: salt dough, knife, rolling pin, simple pencil, sheet of paper, sandpaper, acrylic paints or gouache, brush, transparent manicure varnish, glue gun or pva, base for crafts, for example: a board with a frame, transparent manicure varnish.
Master class
- Draw a cat or print a template.

- Roll out the dough into a thin layer.
- Attach the template and cut out the cat.

- Dry the craft.
- Sand the craft with sandpaper, removing any unevenness.
- Using a simple pencil, transfer the desired design onto the cat’s body.
- Paint with paints and wait until completely dry.

- Glue the cat onto the base with the frame.
Salt dough pencil
You will need: water, flour, extra salt, cardboard jar for the frame, PVA glue, scissors, a piece of decorative rope or corrugated paper, gouache, brush, button, stacks, acrylic varnish for crafts, toothbrush.
Master class
- Knead the salted dough in this way: add a glass of flour, a glass of salt, add water, then knead until the desired consistency of the dough. Separate part of the dough, add beige gouache, then knead.
- Roll out the cake to a thickness of 10-15 mm.

- Apply PVA glue to the outer rim of the jar and wrap it with dough. Cut off the excess with a stack and smooth the joints with a damp brush.
- Create a small dotted texture with a toothbrush on the surface of the dough.
- Knead the brown dough, roll it into a flat cake 10-15mm thick.

- Cut a 5cm wide strip of brown pastry and glue it to the bottom of the jar.
- Make 2 large owl eye bases from white dough, then glue them on.
- Make a beak out of brown dough and glue it on.
- Make eyes from turquoise dough and glue them on.
- Roll out 8 strips of pink dough, twist them into 4 flagella and make a bow, then leave it to dry for 2 hours.
- Make droplet-shaped owl wings using brown dough, then glue them on.

- Weave ropes of beige dough and glue them onto the neck of the jar.
- Roll out a sausage from white dough, draw the texture of the lace with a stack and glue it as a collar under the beak.
- Place the craft in a warm place for a day.
- Paint the bottom and wings with brown gouache and decorate with white dots.

- Draw the pupils and eyelashes with black gouache, wait until the paint dries, then paint white highlights on the eyes.
- Glue a pink bow above the wing.
- Glue a button with a bow from a corrugated strip onto the lace.
- Cover the craft with varnish and wait until it dries completely.
The salt dough pencil is ready!
Salt dough dachshund
You will need: salt dough, simple pencil, scissors, cardboard, paints, brush, rope, toothpick, foam sponge, clear varnish, PVA glue.
Master class
- Draw a dachshund on the cardboard as shown in the image.
- Cut out the template.

- Roll out the dough to a thickness of 5 mm and cut out the dachshund according to the template.
- Roll out the oblong eyes, then glue them on.
- Blind the eyelids and glue them onto the eyes.
- Use a toothpick to outline the paws, nose, mouth, ear and body contours.

- Roll out an oval, then glue it onto the ear and smooth the seam with a wet finger. Use the same method to add volume to the dachshund's back and tail.
- Mark stripes in different directions around the entire perimeter of the dachshund, so that the stripes resemble wool.
- Dry the figurine.

- Glue a piece of rope to the back of the craft for further hanging.
The salt dough dachshund is ready!
Boletus mushroom made from salt dough
You will need: salt dough, light bulb, paints, brush, foil, cardboard, masking tape, superglue, PVA glue, paper napkins, clear varnish, stack.
Master class
- Cover the light bulb with tape, then cover it with dough and dry the workpiece.
- Cut a ring out of cardboard and place it on the light bulb as a base for the hat.
- Form a hat from crumpled napkins, then secure with tape.

- Wrap the hat with foil.
- Roll out the dough to a thickness of 5 mm and stick around the cap.
- Remove the cap from the stem, cover the bottom with dough and make stripes in a stack.
- Glue the hat onto the leg.

- Mold the mushroom's arms, legs and nose, then glue them on PVA.
- Make a caterpillar and glue it to the hat.
- Dry the figurine.

- Paint the figurine, then leave to dry.
- Cover the craft with varnish and wait until it dries.
Boletus mushroom made from salt dough is ready! I recommend watching this video!
Funny salt dough pigs
You will need: salt dough, paints, brush, foam sponge, stack, thin rope, toothpick, black gel pen, PVA glue.
Master class
- Roll 2 balls for the snout and use a toothpick to make the nostrils.
- Make a muzzle, glue a snout and eyes above it.
- Make triangular ears, glue them, then mark stripes with a stack at the junction of the ears and head.

- Make a heart and glue it to the bottom side.
- Make indentations along the edge of the entire circle.
- Using a toothpick, make 2 holes on the top for attaching the rope and 2 holes on the bottom for the legs.

- Roll up the arms and glue them in such a way that they hold the heart.
- Make the hooves and make holes in them for the rope.
- Dry the workpieces.
- Paint the blanks with black paint and let them dry.
- Wash off the paint from the convex parts of the workpiece under running water with a sponge and wait until it dries.

- Prime the figures with a sponge and white paint.
- Color the piglets.
- Draw small details with a black gel pen.
- Cover the craft with varnish and wait until it dries.

- Glue wool threads as hair.
- Make a pendant out of rope.
Funny salt dough pigs are ready! I recommend watching this video!
Crafts made from salt dough and a homemade vase will become wonderful home decorations and gifts for loved ones and friends. Today we will talk about how to make a wonderful vase from this environmentally friendly material.

You will need:
- green salt dough
- orange salt dough
- bottle of contact lens cleaner
- silicone glue gun
- scissors
- toothpicks
- acrylic paints
- leaf
- a piece of tulle or braid
How to do
Preparing raw materials
To make a salt dough vase we will need green salt dough, orange salt dough, a bottle of contact lens cleaner, a silicone glue gun, scissors, toothpicks, acrylic paints, a leaf, a piece of tulle or braid, and varnish.

Making salt dough
So, first we make colored salt dough. For this we need 3 parts flour, 2 parts fine salt and 1 part water. Mix water with food coloring of the desired color and pour it into the salted flour, poured in a slide. Knead the dough well. If it crumbles, add a little water; if it seems runny, add flour. It is important to achieve a uniform color of the dough mass. We make salted dough in other colors we need.

Making the base of the vase
We cut off the top of the bottle of contact lens cleaner and we get the base of the vase. Take the green salt dough and spread it evenly over the surface of the plastic. To level the vase, roll it with your hands on a flat surface.

Making relief
To make the vase more interesting, take a piece of paper and begin to carefully apply it to the vase so that you get imprints.

We make bees and dry them
Now we make bees from orange salt dough. To do this, we make an oval part from a piece of mass, then use a stack to separate the head from the abdomen. Break off a piece of a toothpick with a point and insert it into the middle of the head, forming a bee sting. Leave the craft to dry at room temperature for 1-2 days.

Forming bees
Now we coat the vase with varnish. We paint the bees with acrylic paints, making a black head and black stripes. We cut a rectangle from the mesh fabric, round the edges, tie it in the middle with a thread and glue it to the bee. We got the lids. All that remains is to glue the bees to the vase.


