DIY paper sun: master classes for children. Videos and step-by-step photos.

DIY paper sun
The sun is one of the ancient symbols, because without the sun life on our planet would be impossible. Since ancient times, people have welcomed the Sun in the spring, rejoiced at it, celebrated Maslenitsa, and baked round pancakes on Maslenitsa - symbols of the spring sun. They also made larks and grouse.
And the children and I will make a spring sun out of paper with our own hands. Let it bring smiles and spring mood to our homes!
In this article you will find five options - five ideas for making a paper sun with your own hands with your children:
- Option 1. Sun made from paper palms.
- Option 2. Sun made of paper folded like an accordion.
- Option 3. Sun using origami technique (one-color and two-color).
- Option 4. Sunshine - a paper postcard for the holiday.
Master class 1. Sun made from paper palms using applique technique
Tools and materials for making a do-it-yourself sun
To work you need:
- colored paper,
- PVA glue or pencil,
- felt-tip pens
- scissors.
How to make a sun out of palms with children
Step 1.
Trace your palm 4 times onto colored paper. Cut out the palms.

Step 2. Cut two circles with a diameter of 10 cm from yellow paper.
Step 3. Fold a piece of paper in half and make a lip template for the sun's mouth. Expand the template and see if this form suits us. You can attach the mouth detail to one of the circles of the sun and check whether you like this detail in shape and size.

Step 4. Glue the part of the sun's mouth onto the circle.

Step 5. Prepare the details of the sun's eyes:
- cut out two circles or two almond-shaped pieces from white paper,
- cut out two circles from blue paper and stick them on the white eye blanks,
- cut out smaller black circles and glue the pupils onto the eye blanks or draw the pupils with a black felt-tip pen.
Glue the eye blanks onto the circle of the sun.

Step 6. To design the face of the sun:
- draw eyebrows, eyelashes, nose in black or brown,
- Draw cheeks with a red or pink felt-tip pen. You can cut out circles and glue them in place of the cheeks.
- draw bangs.
Step 7 Place the cut out palms under the sun and try them on in a circle like rays. Trace a circle around your palms and cut off the excess. (You can do it another way: glue your palms to the circle immediately, without trying on).
Step 8 Glue your palms onto the bottom circle.

Turn the workpiece over and glue the top circle on top, on which we decorated the face of the sun. The sun is ready. Good luck in your creativity! Have a nice Maslenitsa week!

Master class 2. Sun made of paper folded like an accordion
Master class 3. Sunshine - paper postcard for Maslenitsa
Master class 4. One-color sun using origami technique
This sun is quite difficult to make. School-age children can do it.
Master class 5. Two-color sun: paper construction
The sun is easy to make, and both children of senior preschool age and schoolchildren can make such a craft on their own.
You can make a paper sun and give it as a gift not only for Maslenitsa, but also for any spring holiday; these figures can also be used to decorate a room or kindergarten group.
We wish you pleasant moments of creativity with your children.
Get a NEW FREE AUDIO COURSE WITH GAME APPLICATION
"Speech development from 0 to 7 years: what is important to know and what to do. Cheat sheet for parents"
Click on or on the course cover below to free subscription
It is difficult to produce a complete list of materials for making this craft. It can be made from various materials and waste household items. Cardboard, paper, thread, wool, cotton wool, old music records, computer disks are materials for simple crafts. Complex structures are made using chipboard, plywood, metal, car tires, etc.
This is not the entire list of materials. It all depends on imagination, time, available materials, and the ability to use one or another tool.

Let's consider easy and complex options for making crafts.

Sun made of cardboard and disposable plate
An easy craft that can be made by preschool children. Helps develop your child's creativity and motor skills. Helps create a good mood for family members.

Required materials and tools:
- disposable plate;
- cardboard (preferably yellow);
- watercolor paints;
- scissors, glue;
- pencils, felt-tip pens;
- compass;
- colored yellow paper.

If colored cardboard or paper is missing, there is no need to despair. The main thing is to have colored pencils or paint. In this case, the process may be delayed while painting paper or cardboard.

Stages of creation
Using a compass or plate of the selected diameter, a solar circle is drawn. The solar disk is drawn on cardboard and then cut out. If you have a medium-sized disposable plate, it is painted and used as the basis for the craft.

The palms of the household members are circled on yellow paper. The palms are cut out, leaving small pockets on the base for gluing. Glued to the inside of cardboard and plates. The sunny face is glued to both sides of the craft. Eyes and a smiling mouth are applied with paints, felt-tip pens, and pencils. These elements can also be cut out of paper and glued on. After drying, the craft is ready for display.

Sun made of colorful paper
This is not a difficult manufacturing option. Available for preschool children. It's quite simple to do. Will help the child learn to use the simplest measuring instruments, office supplies, and devices.

The required materials and accessories do not differ from the previously defined list.

Manufacturing procedure
To make a sun, draw two circles of equal diameter on the inside of a yellow sheet of paper. Carefully cut along the outlined line. All elements are made from different paper. Black is used to make four eyes. Brown serves as the basis for creating a forelock. Red is used to make a smiling mouth. Yellow and orange are used to make sun rays. They are made in different lengths to make the sun look attractive. They are made in the form of strips up to 1 centimeter wide. The lengths of the rays of yellow and orange paper are measured in a ratio of 1:2. To hang the product, prepare a thread up to 30 centimeters long.

When the elements of the craft are cut out, gluing is done. Initially, the elements of the face of the front part of the sun are applied. Next, the product is given the opportunity to dry.

At the second stage, the rays folded in half are glued to the inner side of one solar circle. Orange ones are glued between each yellow ray. The end of a thread folded in half is glued into the middle of the structure. The drying time is determined.

In the final part, a similar second one is glued to the inside of the first solar circle.

Making a sun from computer disks
This manufacturing option is suitable for children of preschool age and primary school. Materials and office supplies correspond to the previous list. The special feature is the glue. Stationery will not work; you need glue capable of gluing the paper to the surface of the disk.

Manufacturing
First, fans are made from four sheets of colored paper. For this, it is better to use light-colored paper. Each sheet is folded like an accordion. The width of the strip should not exceed one centimeter. Then the accordion is folded in half, the inner parts are glued together. The ends are rounded to form a fan. Fans are also made from the remaining three sheets of paper. It turns out four lush fans of different colors.

Circles are cut out of yellow paper along the diameter of the inner circle of the disk. On the circles, with paint and felt-tip pens, we draw the smiling face of the sun. To create a face, its elements can be cut out of paper and glued. Solar faces are glued to the centers of the disks on the outer sides.

Fans in the shape of sun rays are glued to the inner sides of the discs. After drying, the product is put on public display.

A fan made of woolen threads is complex. Making such a fan is accessible to elementary school students with developed motor skills. In this version, the disc is carefully “sheathed” with wool or silk thread. The threads are applied tightly to each other, attached with loops to the disk.

Rays are knitted from individual threads. It is permissible to make them in the shape of braids; they are crocheted to the threads of the disc. Wool fabric is used to make the base of the sun face. Eyes and a mouth are embroidered on it with threads. The fabric is carefully sewn into the center of the disc. Faces can be made in the form of pillows. Then the sun will become more voluminous. Suspended from pieces of furniture by the beams.

On the Internet you can find many simple examples of making this item. The main thing is the joint creativity of family members. More complex elements of crafts are made from durable materials.

The sun as a decorative element of a summer cottage
At all times, the sun was perceived as an attribute of good. The presence of such an item will decorate the summer cottage, add joy and light. It can be made as an independent decorative element, or be built into the design of objects. The production of such crafts is available to the head of the family and school-age children.

When setting up you will need:
- welding machine;
- drill with a set of drills, jigsaw;
- hacksaw for wood, metal;
- chalk, pencil, measuring tool;
- 6-8mm wire or 14-16mm metal rod;
- car tires;
- plastic bottles;
- bolts with a diameter of 6-8 mm, washers, nuts;
- paints for exterior work on metal and wood;
- solvent, paint brushes;
- shovels;
- cement, concrete.

Sunshine on the playground
- Metal sun. The simplest version of the sun is made using metal wire with a diameter of 6-8 mm. The solar disk is arched in a circle of the required diameter. The ends of the wire are welded together. To prepare the sun's rays, pieces of wire are cut to the required length. Some rays are made wavy. Everything is welded to the solar disk. The eyes and mouth are made from the same wire, which are welded to special stands and installed in their places. Two nuts are welded to the outer rim. These are the attachment points for the craft. The product is painted with bright colored paints and attached to the walls of buildings or playground structures.
- Volumetric solar circles. They are made using the welding method, but using wire with a diameter of 14-16 mm. The solar disk element with rays is welded into 2 circles of larger diameter. The circles are connected to each other by crossbars, symmetrically welded from the beam of one circle to the beams of the other. The result is a three-dimensional rotating ladder. Can act as a slide ladder . Several circles of different diameters form a cascade of play ladders. The stairs are painted in rainbow colors. The bases are concreted.
- The sun in a car tire.

A car tire or several tires are dug into the ground. The digging depth should ensure the stability of the structure. At the ends of the tire, located above ground level, and on the caps of plastic bottles, holes are drilled according to the diameter of the existing bolts. Bottle caps, inside out, are screwed to the tires. Plastic bottles are screwed onto them. The design is painted in rainbow colors.

A solar disk made of chipboard is inserted into the tire. On a painted surface, the elements of the face are applied with paints. Attached inside the tire.

The work is finished. There is joy and fun on the playground. There is a place to play and relax.

In folk signs, the sun has always symbolized insight, prosperity, truth, and abundance. A self-made solar amulet will bring the family the joy of mutual communication, well-being, and comfort. Take care of yourself and your loved ones. Give your family the joy of communication, mutual care, and understanding.
The sun brings an atmosphere of warmth and joy to the house.
Especially something made by yourself.
This is the best guest for a children's room. What if you make it with a double function: decoration and toy?!
Such a sunshine will be ready to delight your baby every minute. It can even be used as a small pillow.
The textile sun is easy to use and also easy to wash in the washing machine.
It is recommended to sew the sun with your own hands together with your child. This is a very useful activity. It learns to be methodical in the actions performed, disciplines and teaches concentration. The creative process of sewing develops fine motor skills and perseverance. During this activity, under the supervision of an adult, the child learns to use scissors and, if age allows, a needle.
All this brings the family closer together and unites them.. In addition, old unnecessary things disappear from the house and are born in a new interesting form.
To make a sun with your own hands you will need the following materials: round container (for example, an ordinary dinner plate), simple office paper for creating a pattern, fabric for the sun (you can use fleece or velor), fabric for lining (you can use calico), white and yellow felt, Moment glue, synthetic filler for the sun , yellow and orange yarn for making sun rays, ribbon for decoration, toy eyes, decorative buttons (bugs, vegetables, fruits), scissors, pencil, needle, matching threads, sewing machine.
The creative process of sewing the sun begins:
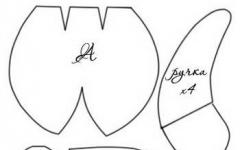
1. Take a suitable plate and place it on the paper. If desired, select dishes of the largest diameter. A circle appears. You need to draw one hand to the resulting circle yourself. It is located above the imaginary middle of the sun (Fig. 2);
2. The resulting pattern is folded in half and the future pattern is cut out (Fig. 3);
3. In Fig. Figure 4 shows a finished pattern with two handles. That's why there was no need to draw the second hand on paper yourself. The figure also shows in what positions the fingers can be inside the future finished toy;
4. Take paper in your hands and cut out another pattern - the back of the sun. It is equal in diameter to the first. An ellipse-shaped hole is made in it (Fig. 5). Subsequently, fabric will be sewn to this part along the entire edge - a sleeve;
5. To make a sleeve, a rectangular section is cut from a suitable fabric, the length of the side is equal to the length of the elliptical hole (Fig. 6). The depth of the fabric on the hand is measured at will (from 20 cm or more);
6. Figure 7 shows all the details that should ultimately be obtained;
7. Patterns can be transferred to fabric (Fig. 8). It is recommended to cut the sun according to the same pattern as for making a paper pattern: outline half, bend and cut out one whole. It is recommended to stitch the fabric along the outline before cutting, since the fabric tends to stretch greatly;
9. The lines of the handles are drawn together. There is no need to make allowances. There is also a hole for turning it right side out (Fig. 10);
10. Now you can cut out the part (Fig. 11). In parallel with this, the sleeve is sewn together;
11. Take the pattern of the back of the sun in your hands and apply it from the side of the lining. A hole is made for stuffing the toy with synthetic filler (Fig. 12);
12. The filler is filled into the internal space (Fig. 13). It is recommended to use tweezers. Finally, the hole is sewn up manually with a blind seam;
13. A sleeve is sewn on the back side of the product. The round neckline needs to be tightened with any thick thread (Fig. 14). Then the sleeve is sewn on the wrong side. It is advisable to stitch the line manually;
14. In Fig. 15 shows the resulting product: a sun with handles, a sleeve on the arm. The main stage is over;
15. The decorating process begins. Make your own rays for the sun. The yarn is taken and wound onto any suitable object with a length of 16 cm. On the right side (or on the left), the wound yarn is cut (Fig. 16);
16. The yarn is laid out on paper (length from one handle along an arc to the other) and a machine stitch simply runs along it (Fig. 17). The paper is separated, torn off;
17. The resulting rays are glued to Moment glue. Later, after the glue has dried, they are sewn on manually with thread for reliability (Fig. 18). Similar actions should be carried out with the rays of the lower half of the sun;
18. Now the rays are braided into braids (Fig. 19). The braid at the bottom is tied with a string to prevent unraveling;
19. The face is decorated. To make the sun's nose, a round piece of fabric is cut out of fleece. It is hand stitched along the edges and the thread is tightened to create the shape of a bag. A synthetic filler is stuffed inside the nose (Fig. 20). The resulting nose is sewn to the sun;
20. Toy eyes are glued on. The shape of the mouth and eyebrows is embroidered by hand (Fig. 21). A decoration (for example, a fungus) is sewn onto the sunny palm. It should be connected with threads to the front fabric, not to the back. The toy can be decorated with a button in the shape of a ladybug. A felt daisy is constructed on one of the upper rays. This fabric is very dense in properties, holds its shape well and will not wrinkle spontaneously. Chamomile petals can be joined together with a seam by hand, or glued with glue. The yellow circle is glued last on top;
21. The ribbon for decoration is divided according to the number of braids. The edges are burned with a candle flame. All ribbons are tied to the braids of the sun;
22. Using regular blush or a red pencil, draw rosy cheeks on the sun.
That's it, the wonderful magic sun with your own hands is ready!
For children. One of the varieties of origami is modular. It involves manufacturing using separate modules folded from paper. This is exactly what the sun is, the stages of its creation are shown in our master class.
To make it you will need square sheets of paper. You can use one color or several. We took red, yellow and orange. 
Fold one of the sheets along two diagonals. 
Then we bend each of its corners towards the center. 
We make folds on both sides towards the center line so that the workpiece takes on the shape of a diamond. 
Let's turn it over to the other side and bend the top corner. 
Now all that remains is to fold the blank of the future ray in half lengthwise. 
You need to make several of the same modules from paper of a different color. 
Next, we begin to collect our sun. To do this, insert the lower edge of one of the blanks into the lower part of the other blank from the opposite side. You can assemble the modules in any color order you like.


We are gradually continuing to work on connecting the modules. Our sun is beginning to take on the appearance of a circle. 
We close all the rays into a circle when we see that we have an even inner circle. As a result, our sun is ready. 
How to make a turtle from a DVD or CD, cardboard and paper: 1. Find a DVD or CD in your house with information that is outdated and no one needs; 2. Prepare plastic eyes, pencil, felt-tip pen, glue and scissors, cardboard and paper of a suitable color; 3....
This master class invites you to make a butterfly with your own hands at your leisure, for your own fun and together with your child, which will be bright, cheerful, and will delight the baby with its appearance. Our finished butterfly, made of paper and cardboard with antennae made from a piece of chenille - fluffy wire, can become an element of decoration for a child's room, and when glued to a paper base it can become...
For your own fun and for your child, our master class suggests making a bunny out of paper and cardboard according to illustrated descriptions. You don’t have to spend a lot of time, since our bunny is made quickly by making a face from a sheet of paper folded like an accordion, paws, ears and nose of the animal, and gluing the prepared elements. A ready-made paper craft will amuse your child with its...
It is still difficult for kids to master many types of creativity. But simple paper crafts are accessible to them, especially if adults help with this. We suggest making a simple fish, for your own and your child’s amusement, from paper of any color, folded like an accordion, using scissors and glue. Our master class shows how to make a blue fish from paper pre-folded like an accordion...
This master class will show you how to make a winter craft - a landscape, using paper and cardboard, cotton wool and natural material - tree branches, as well as glue and scissors. A winter landscape, formed on cardboard and a background of a blue sheet of paper in the form of trees covered with cotton wool reminiscent of snow and snowdrifts made of white paper, can look great on the wall of your room or a shelf in a sideboard and become...
What do children usually like to do at home? Play role-playing games with toys, draw, sculpt from plasticine, make crafts and much more. All this together can be called a manifestation of creative abilities. One of the popular techniques for developing spatial thinking is origami. If you want your child to become a creative person, do not be lazy to spend your own or...
This master class invites you to make a keychain or pendant as a decorative element for some item from a hand-woven sun from cords. Using the description and photographs, it will not be difficult for you to make this craft step by step and equip it with accessories...
How to pass long winter evenings? You can start making crafts with your child, including from scrap materials, and make a fish from cotton pads, as a toy for your Christmas tree on New Year’s Eve, or as decor to decorate a room. And so, let's prepare cotton pads, which are usually always at hand in the family abode, as well as additional materials and tools that...
It is impossible to completely replicate the beauty of autumn nature with the help of crafts. But you can try to recreate some of its elements. In particular, we propose to make an autumn leaf from paper that looks like a maple leaf. Step-by-step production of it is given in our master class...


